
Radio Control: SPORT AEROBATICS
Ron Van Putte
It's difficult to get back to the regular column after the Nats. The Nats is easy to cover because there are so many things going on to write about; the Nats article almost writes itself. Of course, getting all the pictures processed and the "top 40" matrix put together is no picnic, but the Nats article is still easier than a regular column. After the Nats article is turned in, most of the Pattern contests are over for the year, and the source of a lot of ideas and pictures is gone until the spring contests. Thank goodness for the letters people send me and for the periodic stacks of club newsletters I receive from the AMA! Otherwise, I'd be sitting at my desk with a blank piece of paper, a pen, and a head absolutely empty of ideas.
Pushrods
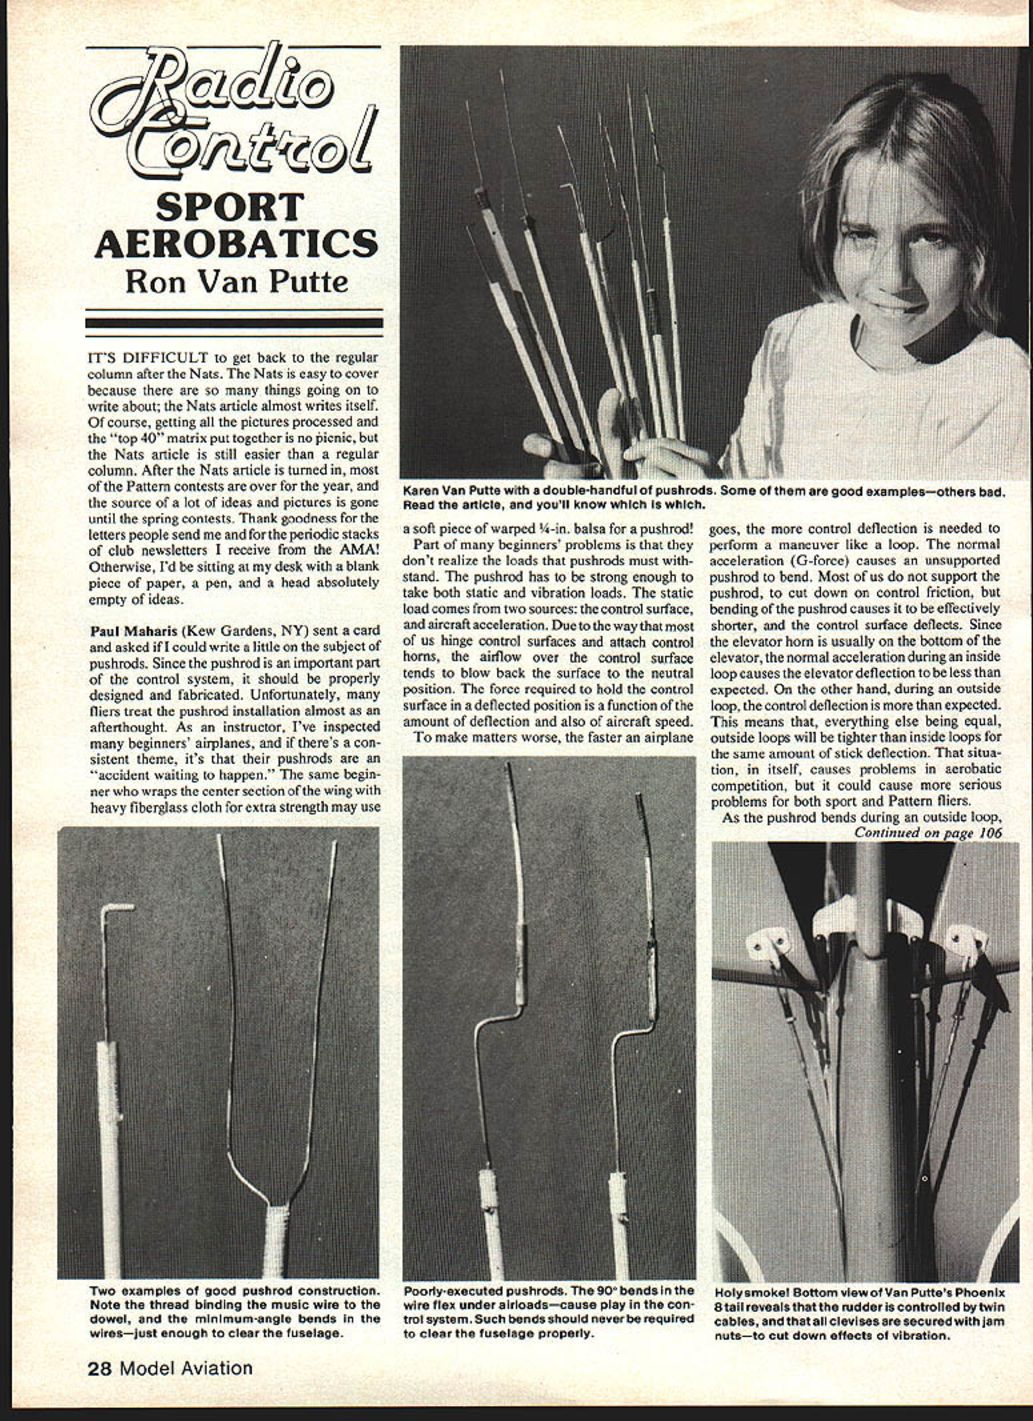
Paul Maharis (Kew Gardens, NY) sent a card and asked if I could write a little on the subject of pushrods. Since the pushrod is an important part of the control system, it should be properly designed and fabricated. Unfortunately, many fliers treat the pushrod installation almost as an afterthought. As an instructor, I've inspected many beginners' airplanes, and if there's a consistent theme, it's that their pushrods are an "accident waiting to happen." The same beginner who wraps the center section of the wing with heavy fiberglass cloth for extra strength may use a soft piece of warped 1/4-in. balsa for a pushrod!
Part of many beginners' problems is that they don't realize the loads that pushrods must withstand. The pushrod has to be strong enough to take both static and vibration loads. The static load comes from two sources: the control surface, and aircraft acceleration. Due to the way that most of us hinge control surfaces and attach control horns, the airflow over the control surface tends to blow back the surface to the neutral position. The force required to hold the control surface in a deflected position is a function of the amount of deflection and also of aircraft speed. To make matters worse, the faster an airplane goes, the more control deflection is needed to perform a maneuver like a loop.
Normal acceleration (G-force) causes an unsupported pushrod to bend. Most of us do not support the pushrod to cut down on control friction, but bending of the pushrod causes it to be effectively shorter, and the control surface deflects. Since the elevator horn is usually on the bottom of the elevator, the normal acceleration during an inside loop causes the elevator deflection to be less than expected. On the other hand, during an outside loop, the control deflection is more than expected. This means that, everything else being equal, outside loops will be tighter than inside loops for the same amount of stick deflection. That situation, in itself, causes problems in aerobatic competition, but it could cause more serious problems for both sport and Pattern fliers.
As the pushrod bends during an outside loop, the increased deflection of the elevator causes higher normal acceleration (a tighter loop), and this causes the pushrod to bend further, which causes the elevator to deflect more ... and so on. There is a combination of conditions where this vicious cycle can end in either wing or pushrod failure. Of course, the situation is reversed if the elevator horn is on the top of the elevator. In that case, inside loops will be tighter than outside loops.
Turbulence causes oscillatory loads on control surfaces, and due to a dynamic magnification factor, such loads are higher than the static loads. By the way, this is why the elevator and rudder horn and clevis wear out. The rudder is especially prone to turbulence problems because its control horn is so short, causing higher pushrod forces in both the neutral and deflected positions. The situation sounds pretty grim, doesn't it? However, a few good design procedures will alleviate most of the problems.
I prefer to use 5/16-in. wood dowels for pushrods rather than 1/4-in. fiberglass arrow shafts. The 5/16-in. dowel is strong enough to resist bending due to normal loads, and is light enough not to be a big weight penalty. For long pushrods, I drill a 1/16-in. hole from side to side about 1 in. from the end. Then I cut a 1/16-in. groove from the hole to the end, along one side. A piece of 1/16-in. music wire is bent 90°, with just enough wire in the bend to go through the dowel. The wire is inserted into the hole, the groove allowing the wire to seat, and the hole is filled with epoxy to lock the wire in place. This gives a positive attachment that will not pull out under repeated stress.
Construction and attachment steps:
- Drill a 1/16-in. hole side to side about 1 in. from the end of the 5/16-in. wood dowel.
- Cut a 1/16-in. groove from the hole to the end of the dowel along one side to allow the wire to seat.
- Bend a piece of 1/16-in. music wire 90° with just enough wire in the bend to pass through the dowel.
- Insert the wire into the hole so it seats in the groove; fill the hole with epoxy to lock the wire in place.
- Position the wire in the groove and bind it with carpet thread along the length from the transverse hole to the end of the dowel.
- Work five-minute epoxy into the thread to lock it onto the dowel.
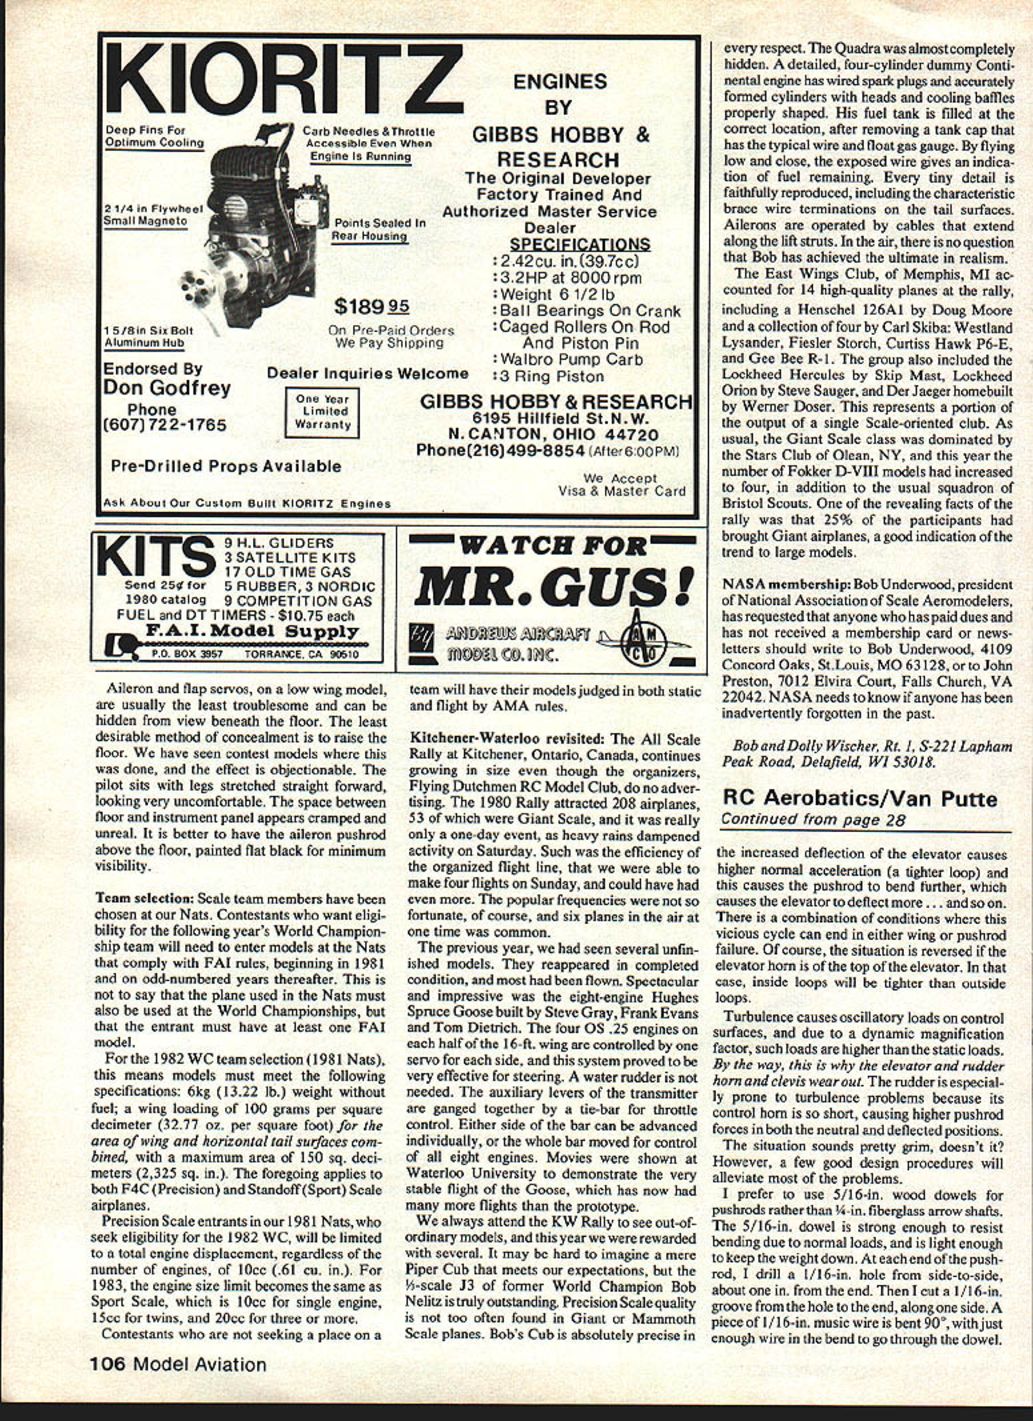
Use minimum-angle bends with wire pushrods—just enough to clear the fuselage. Poorly executed pushrods are an accident waiting to happen. In my view, piano wire flexing under airloads will cause play and eventual control problems. All control attachments should be secured to eliminate looseness caused by vibration.
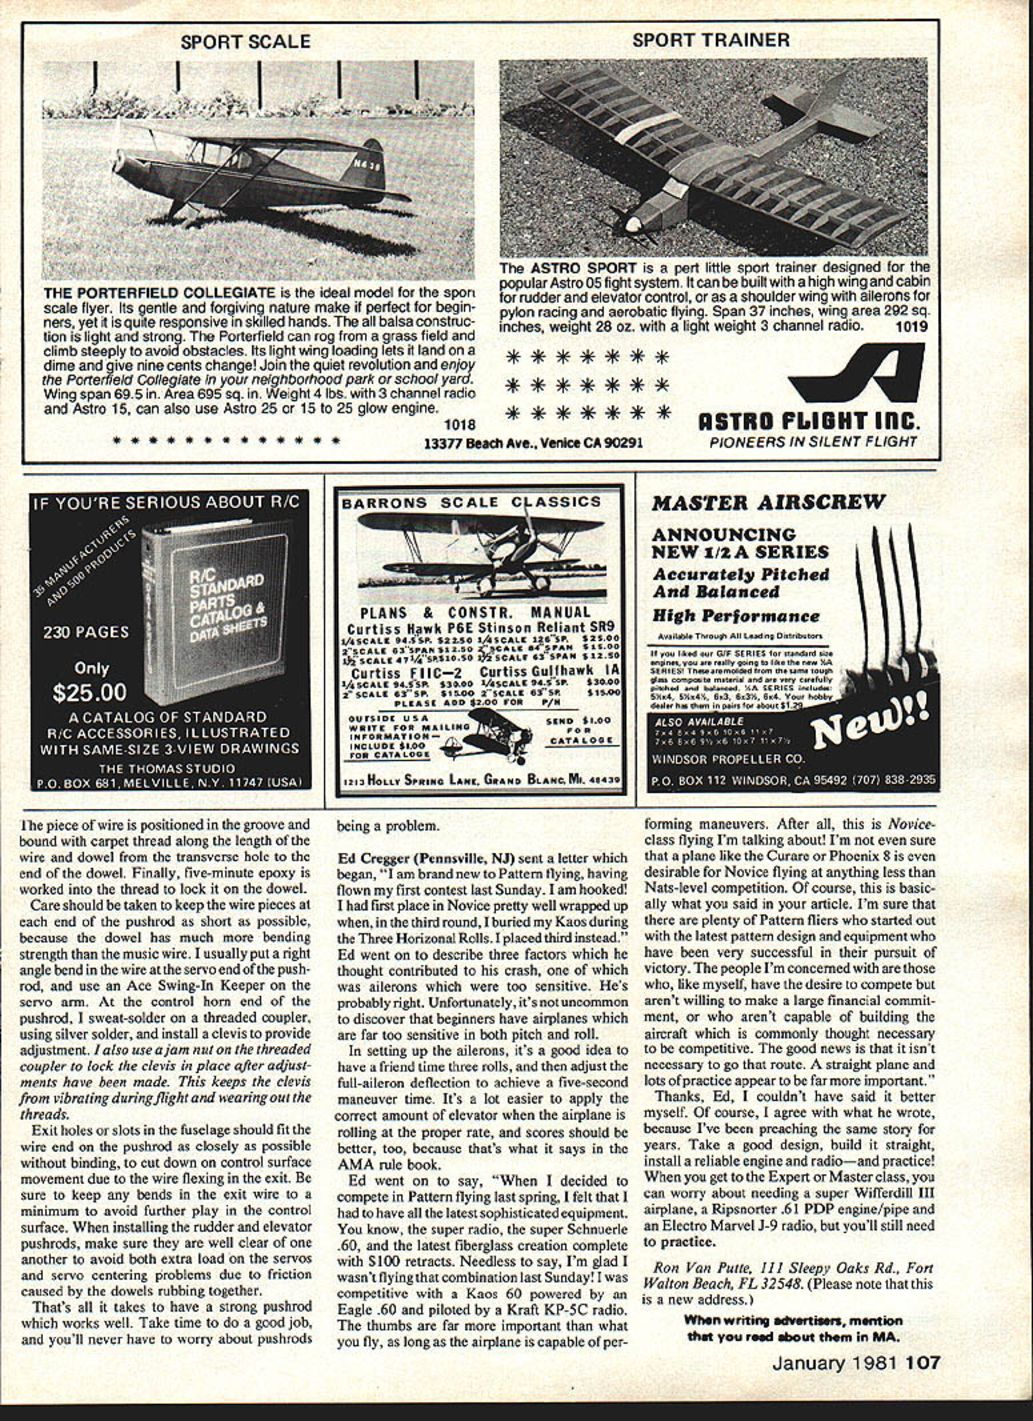
Care should be taken to keep the wire pieces at each end of the pushrod as short as possible, because the dowel has much more bending strength than the music wire. I usually put a right-angle bend in the wire at the servo end of the pushrod, and use an Ace Swing-In Keeper on the servo arm. At the control horn end of the pushrod, I sweat-solder on a threaded coupler, using silver solder, and install a clevis to provide adjustment. I also use a jam nut on the threaded coupler to lock the clevis in place after adjustments have been made. This keeps the clevis from vibrating during flight and wearing out the threads.
Exit holes or slots in the fuselage should fit the wire end on the pushrod as closely as possible without binding, to cut down on control surface movement due to the wire flexing in the exit. Be sure to keep any bends in the exit wire to a minimum to avoid further play in the control surface. When installing the rudder and elevator pushrods, make sure they are well clear of one another to avoid both extra load on the servos and servo-centering problems due to friction caused by the dowels rubbing together.
That's all it takes to have a strong pushrod that works well. Take time to do a good job, and you'll never have to worry about pushrods being a problem.
Aileron setup and a letter from Ed Cregger
Ed Cregger (Pennsville, NJ) sent a letter which began, "I am brand new to Pattern flying, having flown my first contest last Sunday. I am hooked!" I had first place in Novice pretty well wrapped up when, in the third round, I buried my Kaos during the Three Horizontal Rolls. I placed third instead.
Ed went on to describe three factors which he thought contributed to his crash, one of which was ailerons which were too sensitive. He's probably right. Unfortunately, it's not uncommon to discover that beginners have airplanes which are far too sensitive in both pitch and roll.
In setting up the ailerons, it's a good idea to have a friend time three rolls, and then adjust the full-aileron deflection to achieve a five-second maneuver time. It's a lot easier to apply the correct amount of elevator when the airplane is rolling at the proper rate, and scores should be better, too, because that's what it says in the AMA rule book.
Ed went on to say, "When I decided to compete in Pattern flying last spring, I felt that I had to have all the latest sophisticated equipment. You know, the super radio, the super Schuncler .60, and the latest fiberglass creation complete with $300 retracts. Needless to say, I'm glad I wasn't flying that combination last Sunday! I was competitive with a Kaos 60 powered by an Eagle .60 and piloted by a Kraft KP-5C radio. The thumbs are far more important than what you fly, as long as the airplane is capable of performing maneuvers. After all, this is Novice-class flying I'm talking about! I'm not even sure that a plane like the Curare or Phoenix 8 is even desirable for Novice flying at anything less than Nats-level competition. Of course, this is basically what you said in your article. I'm sure that there are plenty of Pattern fliers who started out with the latest pattern designs and equipment who have been very successful in their pursuit of victory. The people I'm concerned with are those who, like myself, have the desire to compete but aren't willing to make a large financial commitment, or who aren't capable of building the aircraft which is commonly thought necessary to be competitive. The good news is that it isn't necessary to go that route. A straight plane and lots of practice appear to be far more important."
Thanks, Ed. I couldn't have said it better myself. Of course, I agree with what he wrote, because I've been preaching the same story for years. Take a good design, build it straight, install a reliable engine and radio—and practice! When you get to the Expert or Master class, you can worry about needing a super Wifferdill III airplane, a Ripsnorter .61 engine/pipe and an Electro Marvel J-9 radio, but you'll still need to practice.
Ron Van Putte 111 Sleepy Oaks Rd., Fort Walton Beach, FL 32548 (Please note that this is a new address.)
When writing advertisers, mention that you read about them in MA.
Transcribed from original scans by AI. Minor OCR errors may remain.

