

Radio Technique
George M. Myers
OBSERVE THE great writer. He has replaced the engine on his Cutlass, and now the rudder servo won't work. Why is that, George?
Hmmm... Each time that we turn on the receiver, the servo runs all of the way to the left and stops. Could it be that the control knob has come loose? My transmitter is of the single stick type, which means that the rudder control is a twist-knob on the top of the stick. A set screw in the knob grips the shaft of a potentiometer. If the screw loosens, the center position of the rudder servo will change. Check that. It's tight! Try something else.
Maybe the servo is at fault. Let's exchange rudder and elevator servo plugs. The trouble must be in the receiver, because now the elevator jams full down.
Jumping at conclusions is the only mental exercise that some people get, I keep reminding myself. The only thing that we know for sure is that the rudder servo works OK in the elevator channel. We also know that the servos plugged in to the aileron and elevator channels work normally, although they are a little jittery. The trouble is in either the transmitter or the receiver. How do we decide which one is defective?
The easiest way would be to try to run the receiver with another transmitter, if we had another transmitter. I can get out the oscilloscope and start looking at wave forms, but that's already another project. Let's turn everything off and think a little. Is the rudder servo by any chance plugged into the landing gear receptacle? Let's turn on again and see. Now wait a minute! Those servos are moving, and I haven't turned on the transmitter yet!
"Tim, what are you doing?"
"Nothing much, Dad, just fitting your Cox/Sanwa 2-channel into my Hobie Hawk."
"That's on the same frequency as my Proline. I've been going nuts in here...."
"Gee, Dad, I'm sorry. I didn't think I would need the frequency pin in my own bedroom."
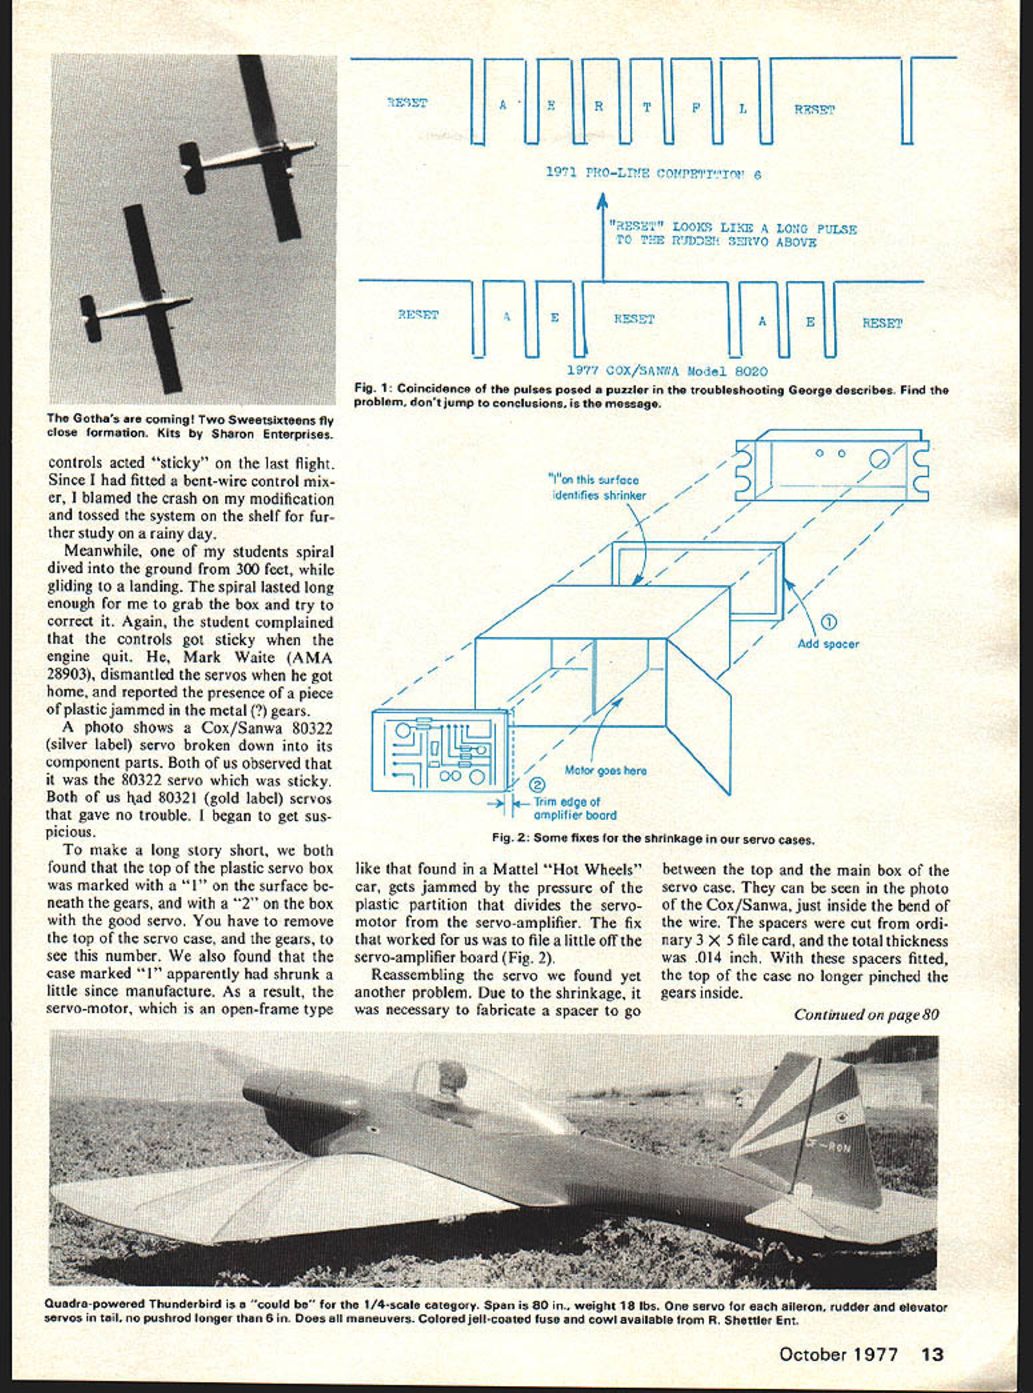
Now that we know what happened, let's try to figure out why it happened. Referring to Fig. 1, which is taken from last month's column, we see that the first two pulses in both the transmitter pulse streams are aileron and elevator. The significant difference is the third pulse. Note that on Proline the third pulse is rudder, while on the Cox/Sanwa it is reset. Reset is a very long pulse, and the Proline servo responds to long pulses by moving left, down, low motor and (flaps and landing gear) in. Since the pulse is long enough, it also resets the decoder to position 1. Then, since the nominal pulse width at neutral for both systems is about 1.5 milliseconds, the servos stay at neutral and jitter a little as they respond to first one, then the other transmitter.
I have mentioned the Cox/Sanwa Model 8020 (2-channel) radio several times in this column. It is cheap, powerful and generally a good performer. Due to the price, and the extensive merchandising effort, many beginners are buying this set. Several of my students have them, so I bought one to become familiar with its characteristics. First use was in the Hobby Lobby Shoestring (see June 1977 issue, page 10). The plane lasted for six flights, and I lost it when the controls acted "sticky" on the last flight. Since I had fitted a bent-wire control mixer, I blamed the crash on my modification and tossed the system on the shelf for further study on a rainy day.
Meanwhile, one of my students spiral dived into the ground from 300 feet, while gliding to a landing. The spiral lasted long enough for me to grab the box and try to correct it. Again, the student complained that the controls got sticky when the engine quit. He, Mark Waite (AMA 28903), dismantled the servos when he got home, and reported the presence of a piece of plastic jammed in the metal (?) gears.
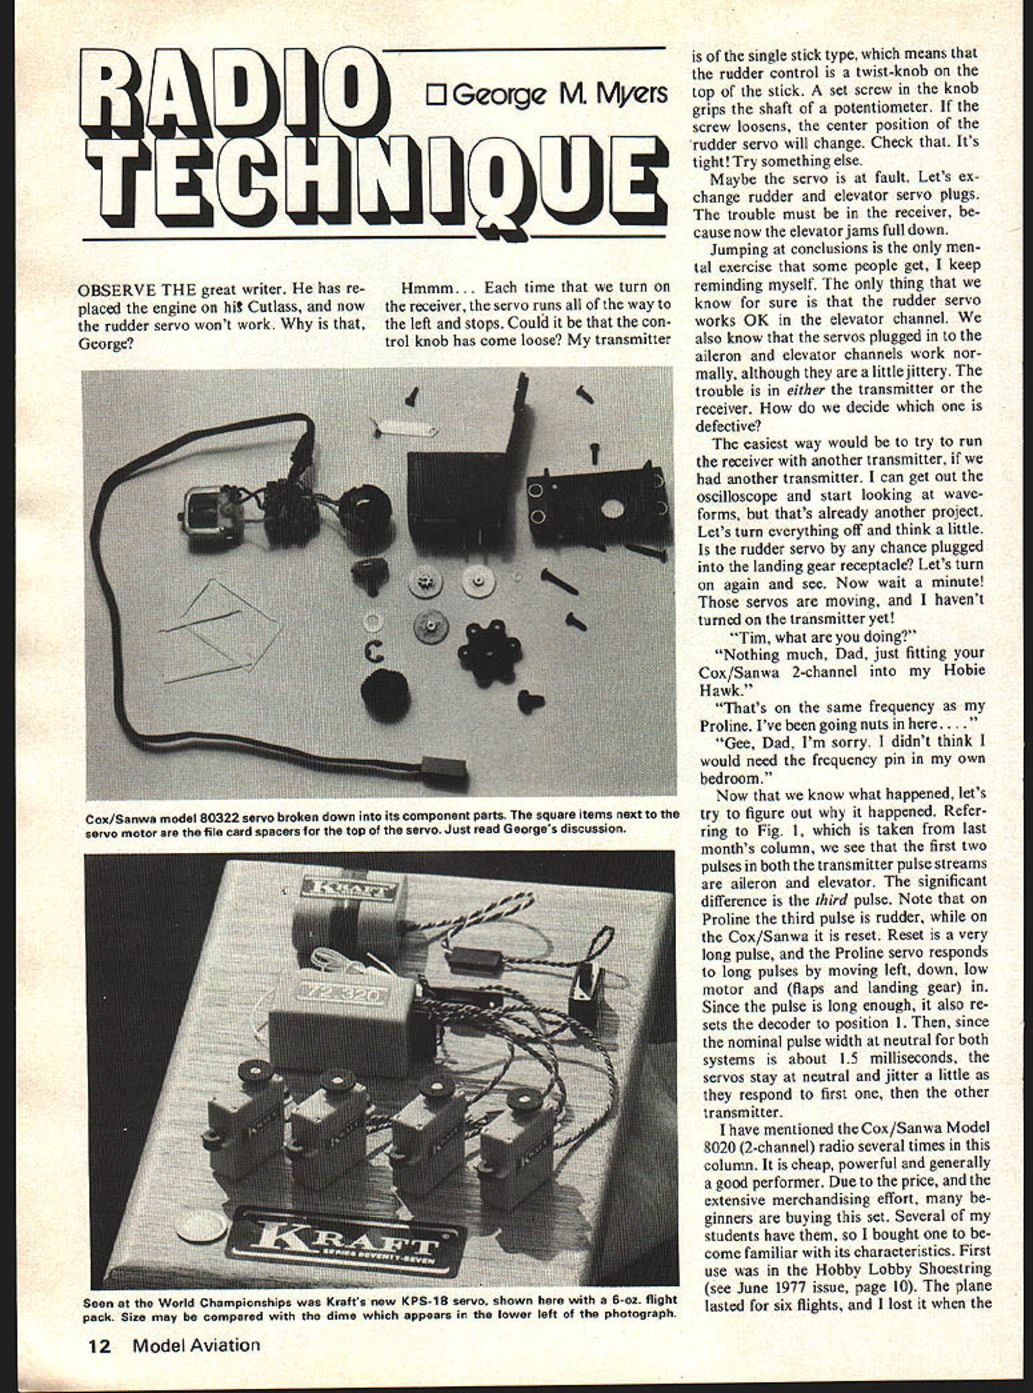
A photo shows a Cox/Sanwa 80322 (silver label) servo broken down into its component parts. Both of us observed that it was the 80322 servo which was sticky. Both of us had 80321 (gold label) servos that gave no trouble. I began to get suspicious.
To make a long story short, we both found that the top of the plastic servo box was marked with a "1" on the surface beneath the gears, and with a "2" on the box with the good servo. You have to remove the top of the servo case, and the gears, to see this number. We also found that the case marked "1" apparently had shrunk a little since manufacture. As a result, the servo-motor, which is an open-frame type like that found in a Mattel "Hot Wheels" car, gets jammed by the pressure of the plastic partition that divides the servo-motor from the servo-amplifier. The fix that worked for us was to file a little off the servo-amplifier board (Fig. 2).
Reassembling the servo we found yet another problem. Due to the shrinkage, it was necessary to fabricate a spacer to go between the top and the main box of the servo case. They can be seen in the photo of the Cox/Sanwa, just inside the bend of the wire. The spacers were cut from ordinary 3 x 5 file card, and the total thickness was .014 inch. With these spacers fitted, the top of the case no longer pinched the gears inside.
RC Technique/Myers
If you have one of these sets, it might be a good idea to check for these problems and make the necessary fixes before the need becomes critical. Check for binding in the servo by moving the control sticks very slowly from end-to-end of the travel. If the servo hesitates anywhere, find out why and save your plane. The shrinkage of the plastic may continue forever, so check regularly.
Plastics are peculiar. Very slight changes in the formulation, and the temperatures used in molding, give rise to these long-term shrinkage problems, and it can happen to any manufacturer. Temperature cycling (as when you move from a cool cellar to the very hot trunk of a car in summer) accelerates the rate of shrinkage.
George Myers, 70 Froehlich Farm Rd., Hicksville, NY 11801.
Transcribed from original scans by AI. Minor OCR errors may remain.

