
Radio Technique
George M. Myers
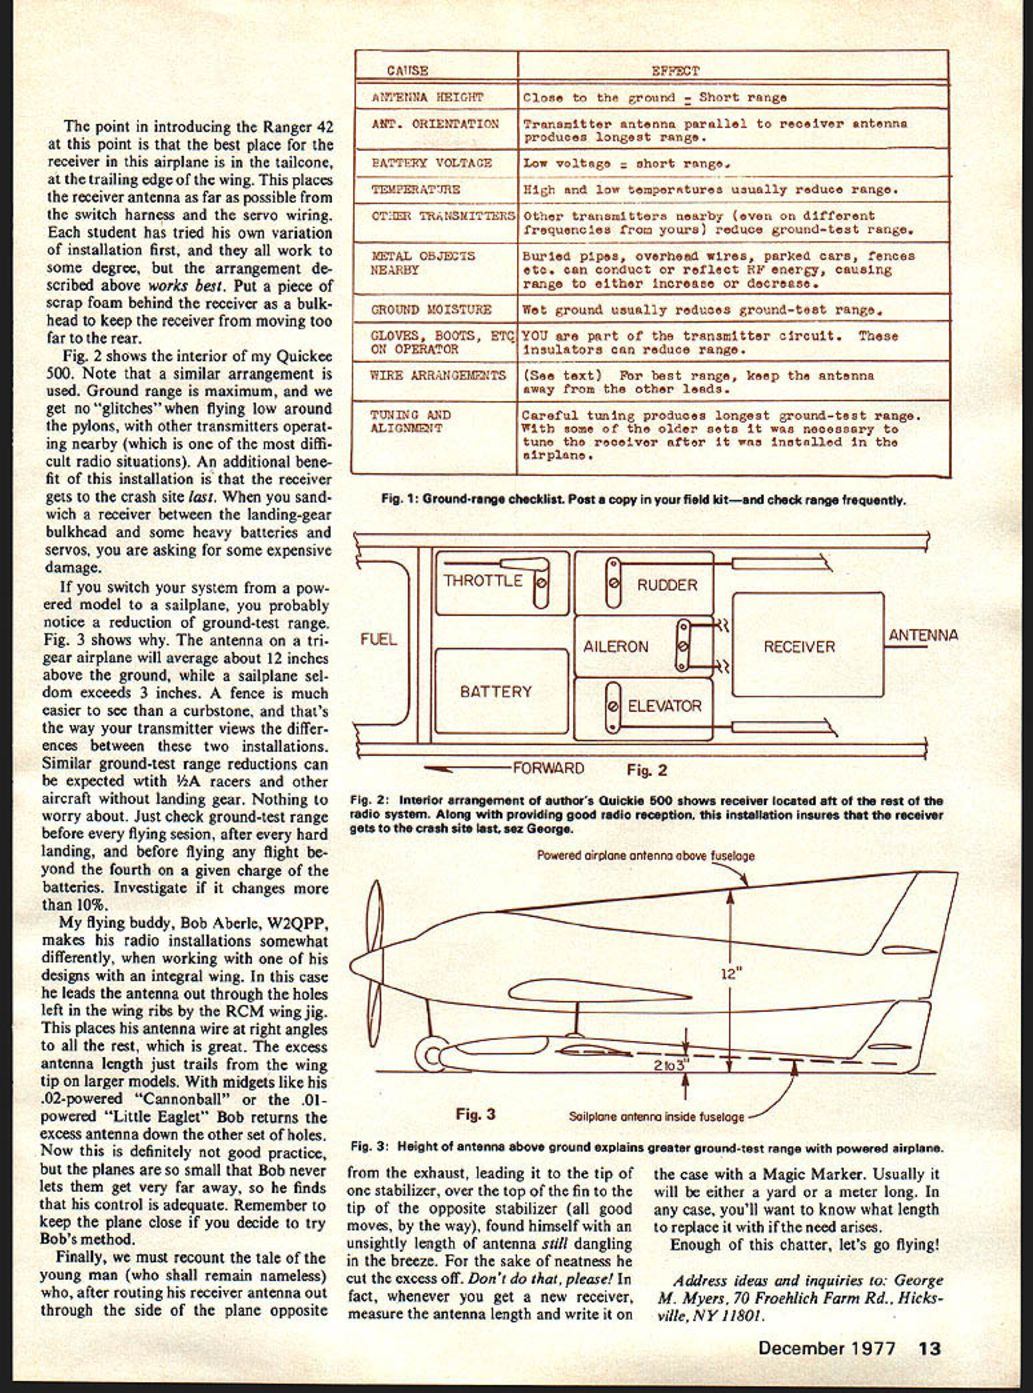
THE MANUFACTURER says that you should get a ground range of at least 75 feet, and here you are 25 feet away with no response. Sound familiar? Lots of things affect ground-test range, and Fig. 1 is a checklist for some of them. You might want to make a copy and tack it to your field kit. The list can be made longer, but I think that you get the point. Don't panic if you have an unusual ground-test range condition; try to find out why.
Let me give you some examples. Once, while flying off an abandoned Air Force runway we set out to check ground-test range in the usual way. I handed the transmitter to my son Tim, and told him to "take a walk," while I busied myself with fueling the airplane and laying out the field kit. Every so often I would raise my arm and wave to him to "keep walking." Finally, I looked up... no Tim! I heard a faint cry of "Is this far enough?" from a tiny figure about 1/4 mile away. What had happened was that the RF signal had jumped down into the reinforcing rods for the concrete runway, and then traveled along them to the airplane. Sorry about that, Tim.
Another example. One of my students had an airplane which had worked well for some time. One day he found that his ground-test range had dropped to practically nothing. Reason? He had changed his antenna routing. Where it had formerly exited at the trailing edge of the wing, he had now led it forward through the windshield area, then back over the wing to the top of the fin. In so doing he had doubled part of the antenna back over itself, with the noted results.
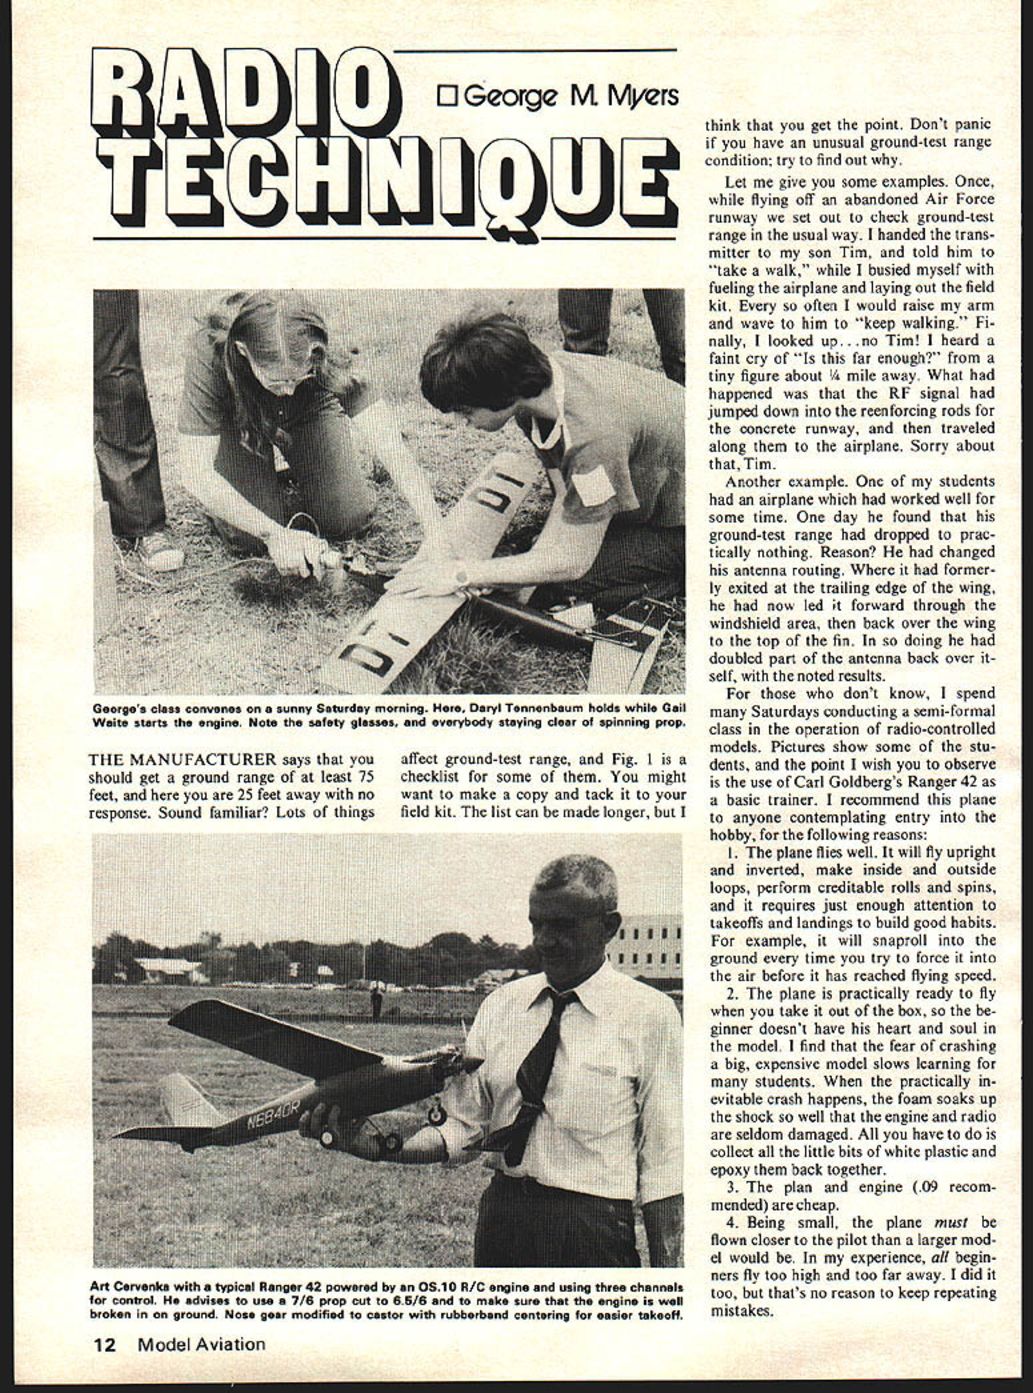
For those who don't know, I spend many Saturdays conducting a semi-formal class in the operation of radio-controlled models. Pictures show some of the students, and the point I wish you to observe is the use of Carl Goldberg's Ranger 42 as a basic trainer. I recommend this plane to anyone contemplating entry into the hobby, for the following reasons:
- The plane flies well. It will fly upright and inverted, make inside and outside loops, perform creditable rolls and spins, and it requires just enough attention to takeoffs and landings to build good habits. For example, it will snap-roll into the ground every time you try to force it into the air before it has reached flying speed.
- The plane is practically ready to fly when you take it out of the box, so the beginner doesn't have his heart and soul in the model. I find that the fear of crashing a big, expensive model slows learning for many students. When the practically inevitable crash happens, the foam soaks up the shock so well that the engine and radio are seldom damaged. All you have to do is collect all the little bits of white plastic and epoxy them back together.
- The plane and engine (.09 recommended) are cheap.
- Being small, the plane must be flown closer to the pilot than a larger model would be. In my experience, all beginners fly too high and too far away. I did it too, but that's no reason to keep repeating mistakes.
Pointing out the best place for the receiver in the airplane: the tailcone. Trailing-edge wing installations place the receiver antenna as far as possible from the switch harness and servo wiring. Some students have tried their own variations of installation; at first they worked to some degree, but the arrangement described above works best. Put a piece of scrap foam behind the receiver bulkhead to keep the receiver from moving too far rearward. Fig. 2 shows the interior of a Quickee 500. Note similar arrangement used.
With this installation you will get maximum ground-test range and have no glitches flying low around pylons or with other transmitters operating nearby, which can create difficult radio situations. An additional benefit of the installation is that the receiver gets to the crash site last. Sandwich the receiver between the landing-gear bulkhead and some heavy batteries and servos to help avoid expensive damage to the receiver and switch system.
Pilots of powered model sailplanes will probably notice a reduction in ground-test range when the antenna is routed near the landing gear. Fig. 3 shows that a tri-gear airplane will average about 12 inches above the ground, while a sailplane seldom exceeds 3 inches. A fence is much easier to see than a curbstone; that's one reason transmitter views differ between the two installations. Similar ground-test range reductions can be expected with .049 racers and other aircraft with low landing gear.
Nothing to worry about — just check ground-test range before a flying session, after a hard landing, before flying beyond the first or second flight after a charge change, and investigate any change greater than 10%.
My flying buddy Bob Aberle, W2QPP, makes radio installations somewhat differently. His working designs for integral-wing cases lead the antenna out through holes left by wing ribs. The RCM wing jig places the antenna wire at right angles to the rest; any excess antenna length just trails the wing tip. Larger models and midgets like .02-powered aircraft have their own installation considerations, but the same basic precautions apply. The point in introducing the Ranger 42 at this point is that the best place for the receiver in this airplane is in the tailcone, at the trailing edge of the wing. This places the receiver antenna as far as possible from the switch harness and the servo wiring. Each student has tried his own variation of installation first, and they all work to some degree, but the arrangement described above works best. Put a piece of scrap foam behind the receiver as a bulkhead to keep the receiver from moving too far to the rear.
Fig. 2 shows the interior of my Quickee 500. Note that a similar arrangement is used. Ground range is maximum, and we get no "glitches" when flying low around the pylons, with other transmitters operating nearby (which is one of the most difficult radio situations). An additional benefit of this installation is that the receiver gets to the crash site last. When you sandwich a receiver between the landing-gear bulkhead and some heavy batteries and servos, you are asking for some expensive damage.
If you switch your system from a powered model to a sailplane, you probably notice a reduction of ground-test range. Fig. 3 shows why. The antenna on a tri-gear airplane will average about 12 inches above the ground, while a sailplane seldom exceeds 3 inches. A fence is much easier to see than a curbstone, and that's the way your transmitter views the differences between these two installations. Similar ground-test range reductions can be expected with 1/2A racers and other aircraft without landing gear. Nothing to worry about. Just check ground-test range before every flying session, after every hard landing, and before flying any flight beyond the fourth on a given charge of the batteries. Investigate if it changes more than 10%.
My flying buddy, Bob Aberle, W2QPP, makes his radio installations somewhat differently, when working with one of his designs with an integral wing. In this case he leads the antenna out through the holes left in the wing ribs by the RCM wing jig. This places his antenna wire at right angles to all the rest, which is great. The excess antenna length just trails from the wing tip on larger models. With midgets like his .02-powered "Cannonball" or the .01-powered "Little Eagle" Bob returns the excess antenna down the other set of holes. Now this is definitely not good practice, but the planes are so small that Bob never lets them get very far away, so he finds that his control is adequate. Remember to keep the plane close if you decide to try Bob's method.
Finally, we must recount the tale of the young man (who shall remain nameless) who, after routing his receiver antenna out through the side of the plane opposite from the exhaust, leading it to the tip of one stabilizer, over the top of the fin to the tip of the opposite stabilizer (all good moves, by the way), found himself with an unsightly length of antenna still dangling in the breeze. For the sake of neatness he cut the excess off. Don't do that, please! In fact, whenever you get a new receiver, measure the antenna length and write it on the case with a Magic Marker. Usually it will be either a yard or a meter long. In any case, you'll want to know what length to replace it with if the need arises.
Enough of this chatter, let's go flying!
Address ideas and inquiries to: George M. Myers, 70 Froehlich Farm Rd., Hicksville, NY 11801.
Transcribed from original scans by AI. Minor OCR errors may remain.

