
Radio Technique
George Myers
At the crash scene — what not to do, and what to do first
"Heads up! I ain't got it!" Crunch. Now you turn off the transmitter, collapse the antenna, and walk slowly to the crash site . . . right? Wrong.
- Leave the transmitter on and the antenna extended while you approach. If the airborne unit is still powered, the transmitter's signal will keep servos centered. Turning off the transmitter risks some other signal driving the servos hard against the stops and destroying what might otherwise be a crash survivor.
- Do NOT move the sticks to "see if the receiver is still working." Leave testing for later.
- First, disconnect the airborne battery pack, taking care not to get a bad burn from exposed wires if a short-circuit exists.
- Then turn off your transmitter.
- Carefully pick up everything. Modern fast adhesives allow you to restore practically any airframe damage, but small radio parts (servo mounting hardware, output wheels, etc.) are often the hardest to find. Time saved at the cleanup translates into lower repair expense later.
Inspect systematically — never assume the cause
With parts laid out for inspection back at the pits, discover the cause of the crash. Never assume — prove it. It may be pilot error, but it may also be a radio fault you would miss by assuming. Transmitters rarely fail, but when they do the flight is over. For example, an experienced flier once assumed a departure-stall/snap-roll was pilot error until someone noticed the transmitter output meter read zero — the transmitter wasn't radiating.
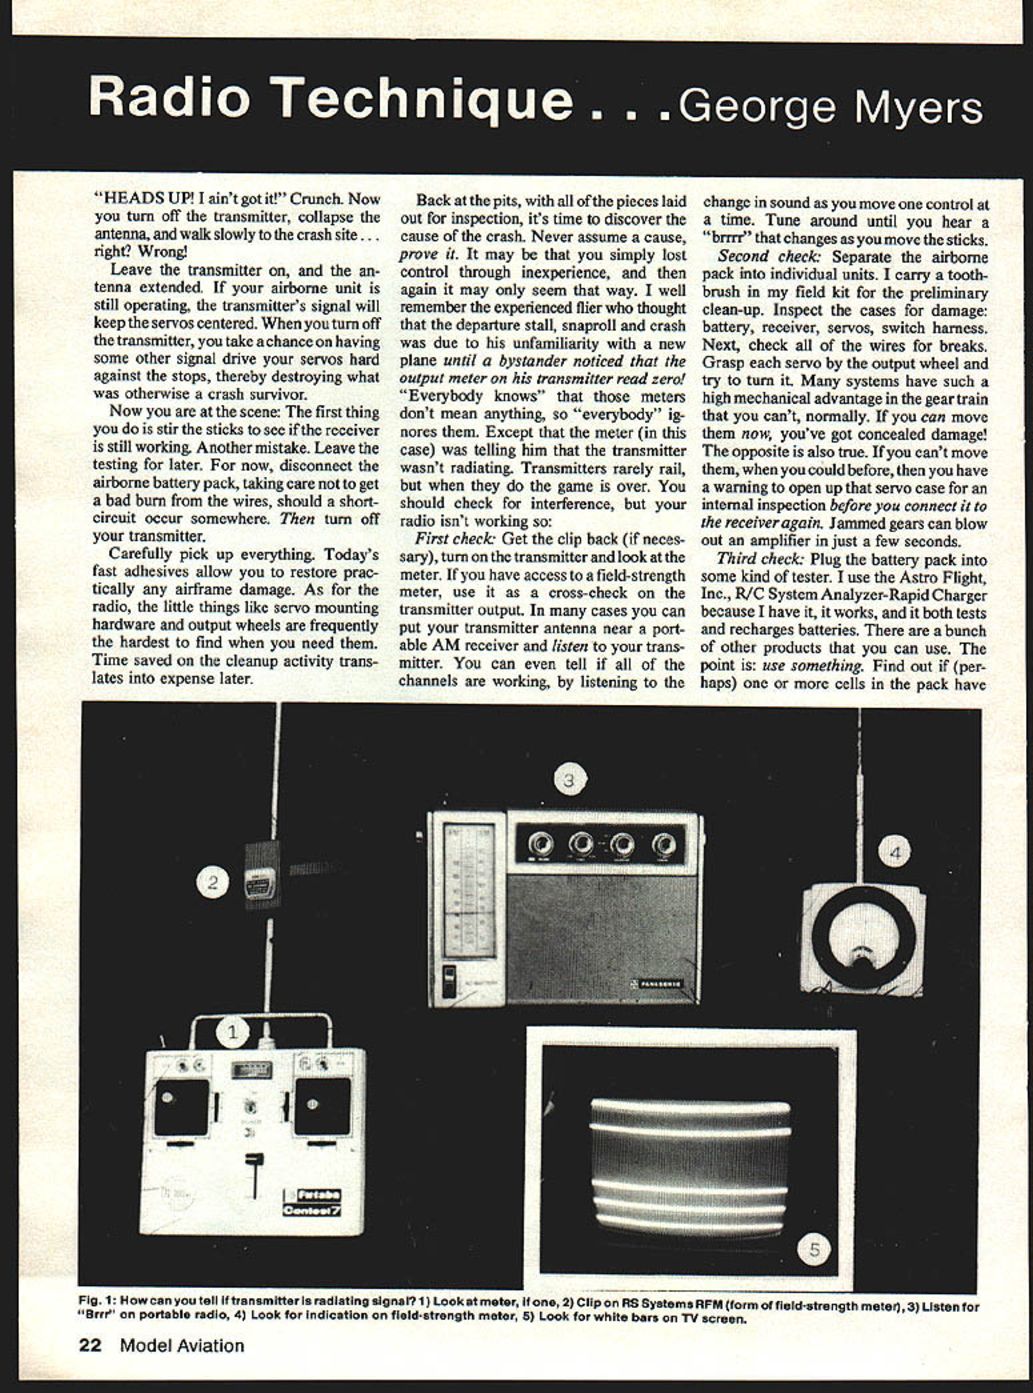
Troubleshooting checklist
- First check
- Retrieve the transmitter (if necessary), turn it on and look at the output meter.
- If available, use a field-strength meter to cross-check transmitter output.
- A quick crude check: put the transmitter antenna near a portable AM receiver and listen. You can often hear the transmitter "brrrr" and tell whether channels change when you move the controls. Tune around until you hear the tone change with stick movement.
- Second check
- Separate the airborne pack into individual components. A toothbrush in your field kit is handy for preliminary cleanup.
- Inspect cases for damage: battery, receiver, servos, switch harness.
- Check all wires for breaks.
- Grasp each servo by the output wheel and try to turn it. Many servos have high gear-train mechanical advantage so you normally cannot move the output by hand. If you can move it now, you likely have concealed damage. Conversely, if an output that moved before is now jammed, open the servo for internal inspection before reconnecting it to avoid blowing the amplifier — jammed gears can cause amplifier failure in seconds.
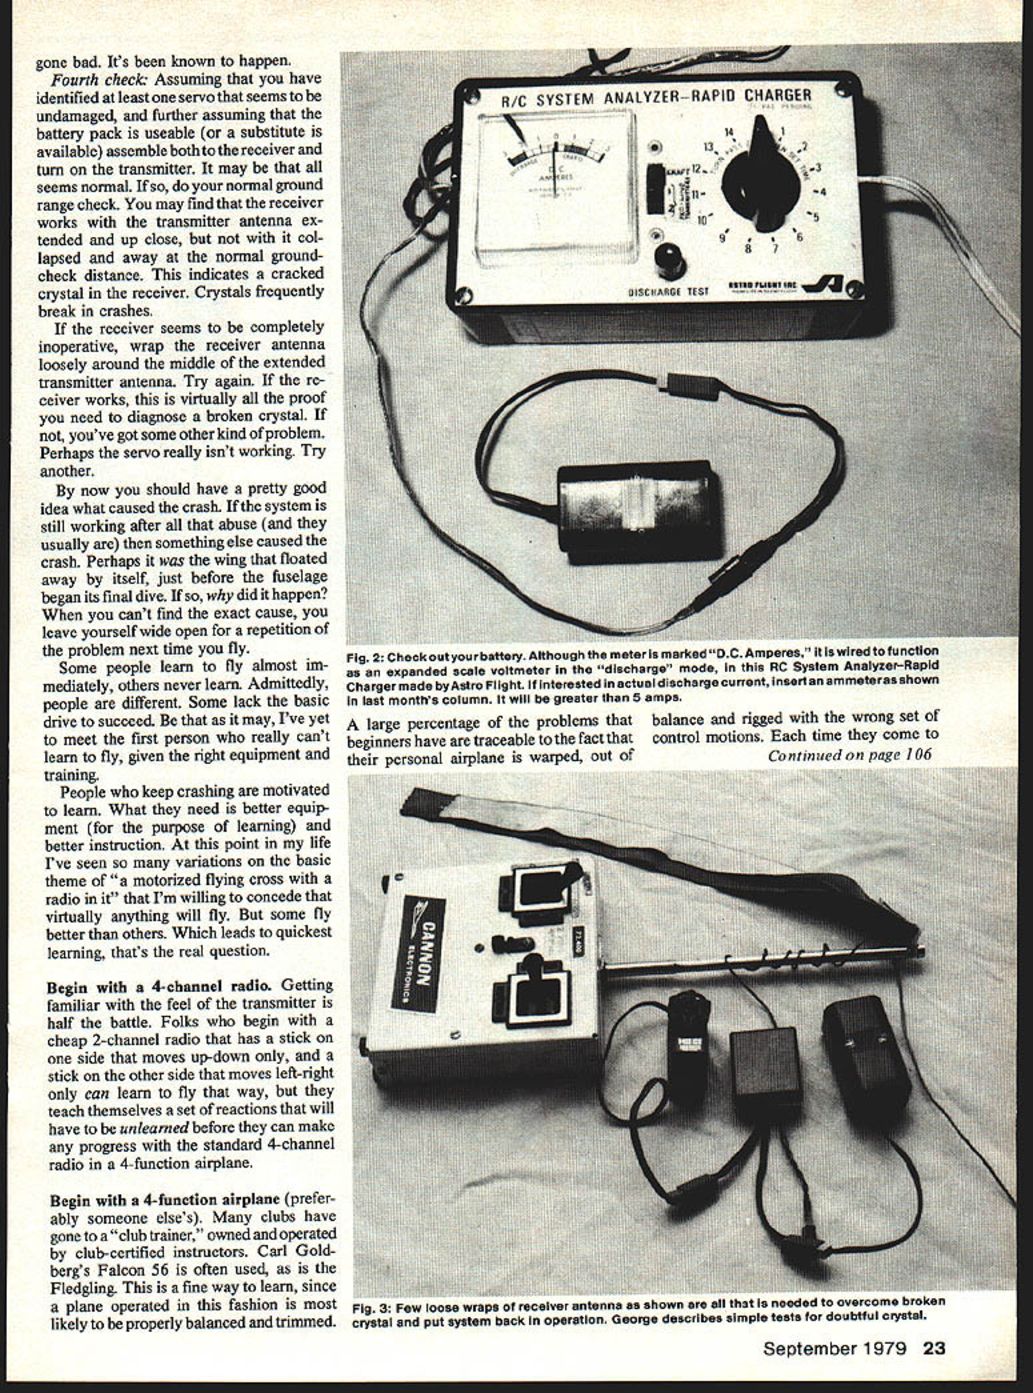
- Third check
- Plug the battery pack into a tester. Use whatever tester/charger you have (for example, an R/C system analyzer/rapid charger). The point is: test the pack. Cells sometimes go bad in a crash.
- Verify the pack supplies proper voltage/current to the receiver.
- Fourth check
- If at least one servo seems undamaged and you have a usable battery pack (or substitute), assemble the receiver and servos and turn on the transmitter.
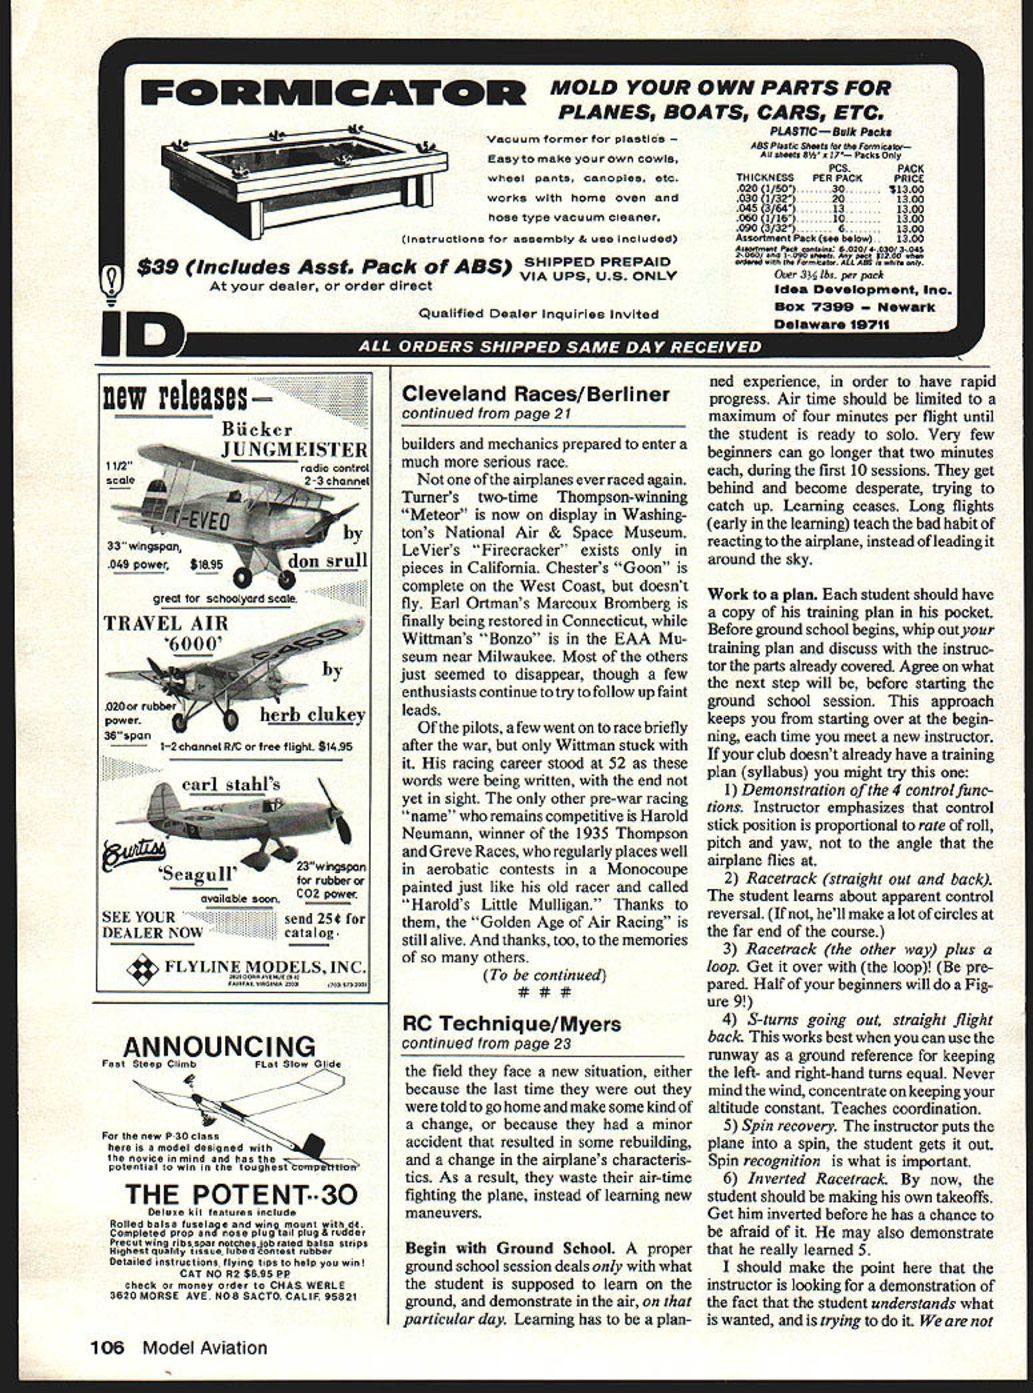
- If the ground-range check seems normal up close but the receiver collapses at normal range, suspect a cracked crystal in the receiver. Crystals frequently break in crashes and make the receiver appear inoperative.
- A useful test: wrap the receiver antenna loosely around the middle section of the extended transmitter antenna and try again. If the receiver works, it is strong evidence of a broken crystal.
- If a particular servo still seems dead, try another servo to isolate the fault.
If the system still operates normally after abuse, the crash may have been caused by something else (for example, a wing separation just before the final dive). If you can't find the exact cause and fix it, you leave yourself open to repeating the problem next flight.
Quick tips and reminders
- Use a toothbrush for cleanup; small tools and containers make parts recovery easier.
- Preserve small hardware and output wheels; they are often the most costly to replace or hardest to find.
- Prove the cause of a crash; don't rely on assumptions or convenience.
Begin with a 4-channel radio
Getting familiar with the feel of the transmitter is half the battle. Beginners who start on a cheap 2-channel radio with limited stick motion often teach themselves control reactions that must be unlearned before making progress with a standard 4-channel transmitter and a 4-function airplane. Begin with a 4-channel radio.
Begin with a 4-function airplane (preferably someone else's)
Many clubs use a "club trainer" owned and operated by club-certified instructors (Carl Goldberg's Falcon 56, the Fledgling, etc.). This is an excellent way to learn because such planes are likely to be properly balanced and trimmed.
A large percentage of beginners' problems stem from flying a personal airplane that is warped, out of balance, or rigged with the wrong control motions. Each outing can present a new variable: changes mandated by instructors, minor accidents and repairs, differing rigging — all of which waste air-time because the student fights the plane instead of learning maneuvers.
Ground school and structured learning
Begin with ground school. A proper ground-school session deals only with what the student is supposed to learn on the ground and demonstrate in the air that day. Learning must be planned for rapid progress.
- Limit air time to a maximum of four minutes per flight until the student is ready to solo. Very few beginners can go longer than two minutes during the first ten sessions; long early flights encourage reactive habits rather than deliberate learning.
- Work to a plan. Each student should carry a copy of his training plan (syllabus). Before ground school, review what has been covered and agree with the instructor on the next step. This prevents starting over with each new instructor.
- The instructor should use the training plan as a checklist and be objective: if the student cannot perform the required item, give more practice until he can. Do not lump students together; each progresses at his own pace.
Suggested training plan (syllabus)
- Demonstration of the four control functions. Emphasize that stick position is proportional to rate of roll, pitch and yaw, not to the absolute angle the airplane flies at.
- Racetrack (straight out and back). Teach apparent control reversal or the student will circle at the far end of the course.
- Racetrack the other way plus a loop. Get the loop done early — be prepared, many beginners will do a Figure 9!
- S-turns going out, straight flight back. Use the runway as a ground reference to keep left- and right-hand turns equal. Ignore wind and concentrate on keeping altitude constant; this teaches coordination.
- Spin recognition and recovery. The instructor may put the plane into a spin and have the student recover. Recognition is the key skill.
- Inverted racetrack. By now the student should be making his own takeoffs. Get him inverted before he becomes afraid of it; this also reinforces that he has learned item 5.
Final thoughts on learning and equipment
Some people learn to fly almost immediately; others take longer. People are different, but given the right equipment and instruction almost anyone can learn. Many keep crashing but remain motivated; what they need is better, purpose-built learning equipment and structured instruction. With those, rapid progress is likely. I'm willing to concede virtually anything will fly.
Transcribed from original scans by AI. Minor OCR errors may remain.

