
RC Dart
By Bernard Shulman
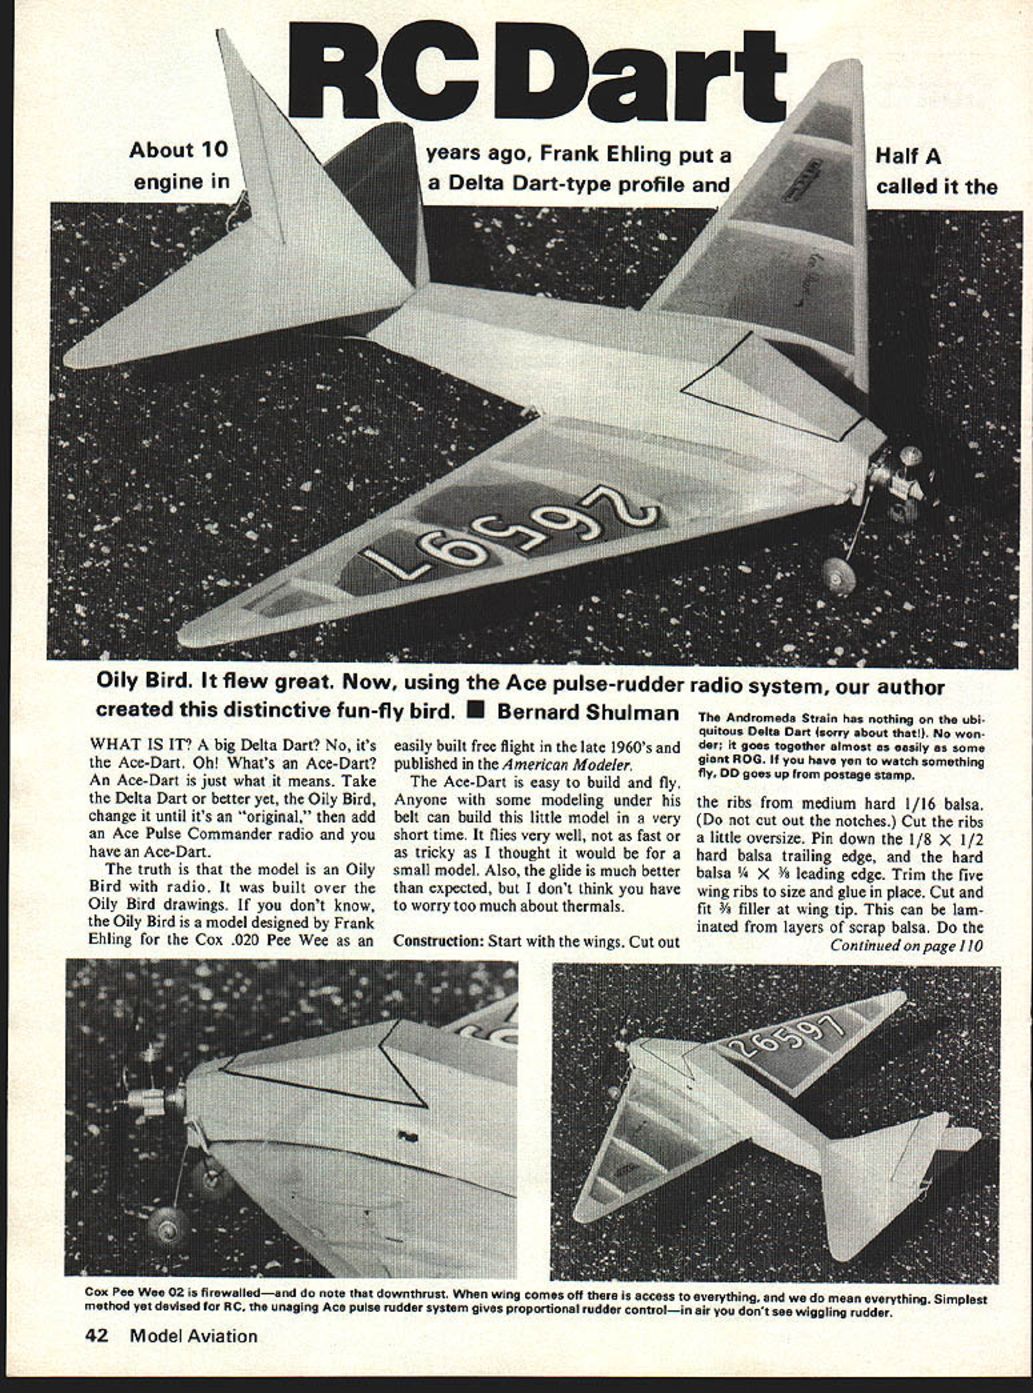
Oily Bird. It flew great. Now, using the Ace pulse-rudder radio system, our author created this distinctive fun-fly bird.
What is it?
A big Delta Dart? No — it's the Ace-Dart. What's an Ace-Dart? An Ace-Dart is just what it means: take the Delta Dart or, better yet, the Oily Bird, change it until it's an "original," then add an Ace Pulse Commander radio and you have an Ace-Dart.
The truth is that the model is an Oily Bird with radio. It was built from the Oily Bird drawings. If you don't know, the Oily Bird is a model designed by Frank Ehling for the Cox .020 Pee Wee as an easily built free flight in the late 1960s and published in American Modeler.
The Ace-Dart is easy to build and fly. Anyone with some modeling experience can build this little model in a very short time. It flies very well — not as fast or as tricky as I thought it would be for a small model. The glide is much better than expected, but you probably don't have to worry too much about thermals.
Construction
Wings
- Cut wing ribs from medium-hard 1/16" balsa. Do not cut out the notches yet; cut ribs a little oversize.
- Pin down the 1/8" x 1/2" hard balsa trailing edge and the 1/4" x 3/8" hard balsa leading edge.
- Trim the five wing ribs to size and glue in place.
- Cut and fit 3/8" filler at the wing tip. This can be laminated from layers of scrap balsa.
- Build up the thick center ribs until they are about 3/16" thick. Allow wings to dry.
- Dry-sand the root ribs to get the proper dihedral (about 2° under the tip). Glue dihedral joints well and let dry.
- Dry-notch the top ribs for 1/8" square spruce spars. Notch the bottom for 5/32" spars; use two layers of 1/8" square if needed.
- Dry-fit the front wing as shown on the plan; add gussets. Sand the wing smooth — it's then ready to cover.
Stabilizer, fin and rudder
- Cut stabilizer, fin and rudder from medium 3/32" x 3/8" balsa.
- Glue fin and stabilizer together and allow to set.
Fuselage
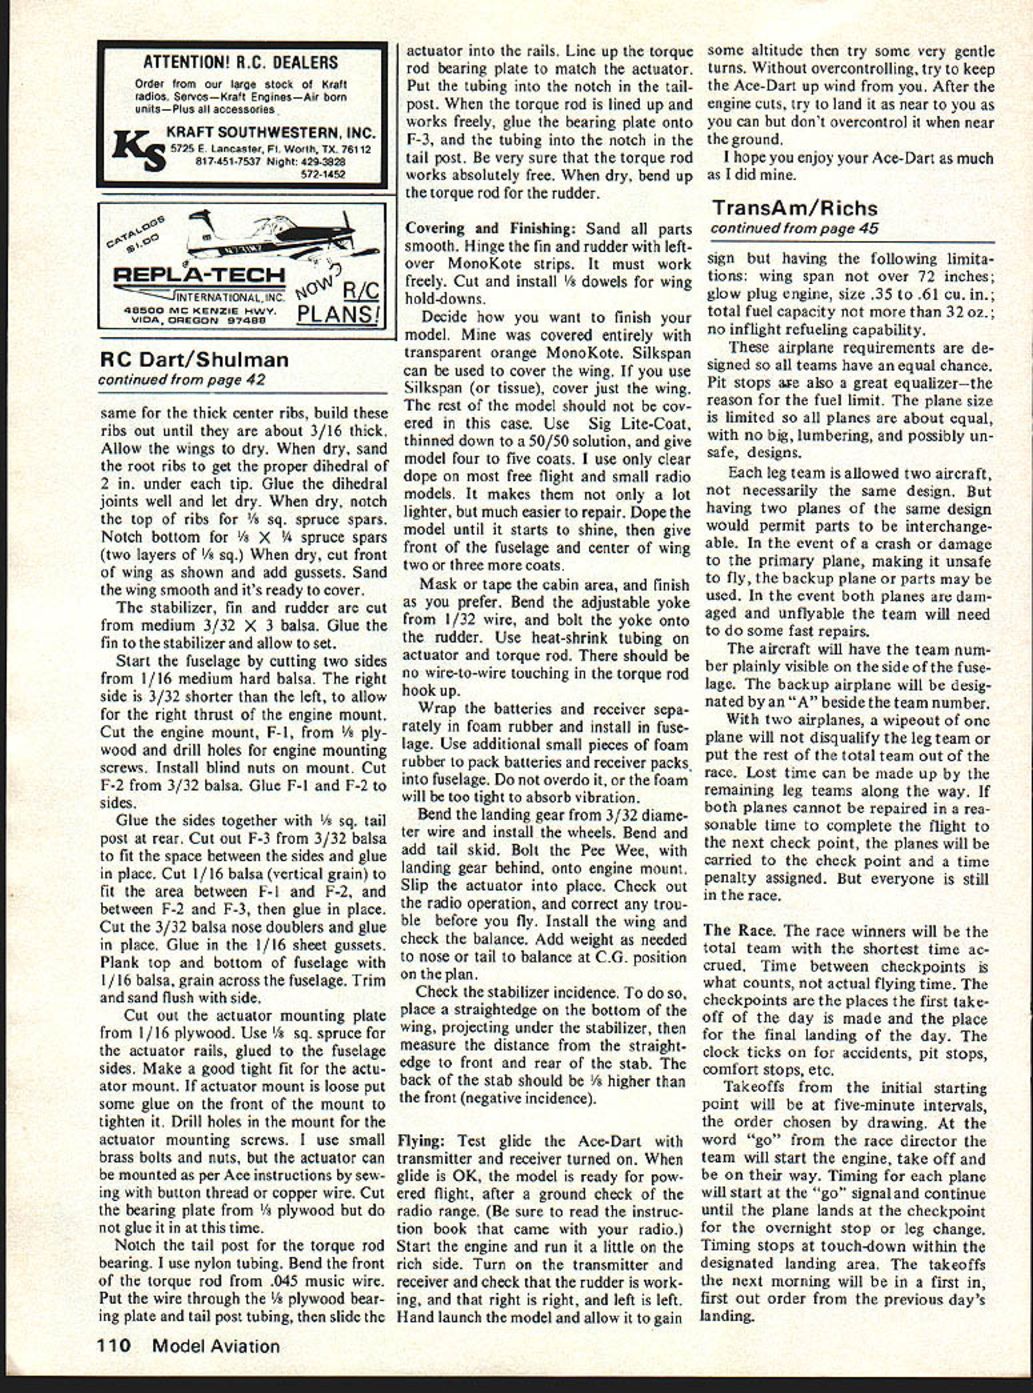
- Cut two fuselage sides from 1/16" medium-hard balsa. Make the right side 3/32" shorter than the left to provide right thrust for the engine mount.
- Cut engine mount F-1 from 1/8" plywood; drill holes for the engine mounting screws and install blind nuts.
- Cut F-2 from 3/32" balsa. Glue F-1 and F-2 to the sides, then glue the sides together.
- Use a 1/8" square tail post at the rear.
- Cut out F-3 from 3/32" balsa to fit the space between the sides; glue in place.
- Cut 1/16" vertical-grain balsa pieces to fit areas between F-1 and F-2 and between F-2 and F-3; glue in place.
- Cut 3/32" balsa nose doublers and glue in place. Glue 1/16" sheet gussets where required.
- Plank the top and bottom of the fuselage with 1/16" balsa, grain across the fuselage. Trim and sand flush with the sides.
Actuator, torque rod and bearings
- Cut an actuator mounting plate from 1/16" plywood. Glue 3/32" square spruce actuator rails to the fuselage sides.
- Make a tight fit for the actuator mount; if loose, add glue to the front mount to tighten. Drill holes for the actuator mounting screws and use small brass bolts and nuts.
- Mount the actuator per Ace instructions.
- Cut the bearing plate from plywood and glue in place. A sewing button and copper wire can be used to form the bearing interface if desired.
- Notch the tail post for the torque-rod bearing and use a short length of nylon tubing there.
- Bend the front torque rod from .045" music wire. Pass the wire through the plywood bearing plate and the tail-post tubing; slide the actuator rails in.
- Line up the torque-rod bearing plate to match the actuator. When the torque rod is aligned and works freely, glue the bearing plate onto F-3 and secure the tubing in the tail post.
- Be absolutely sure the torque rod works freely. Dry-bend up the torque rod for the rudder hookup.
Covering and finishing
- Sand all parts smooth. Hinge fin and rudder and make sure controls move freely.
- Cut and install 1/8" dowels for wing hold-downs.
- Decide on your finish. The author covered his model entirely with transparent orange MonoKote. Silkspan can be used for the wing if preferred.
- If using Silkspan, seal with Sig Lite-Coat thinned 50/50 with thinner; give the model four to five coats. For free-flight and small radio models, clear dope can be used — it is lighter and easier to repair. Dope until it starts to shine.
- Give the front fuselage and center wing two to three coats. Mask the cabin area for finishing if desired.
Controls and installation
- Bend an adjustable yoke from 1/32" wire and bolt the yoke onto the rudder.
- Use heat-shrink tubing to insulate connections so there is no bare wire-to-wire contact where the torque rod hooks up.
- Wrap batteries and receiver separately in foam rubber before installing in the fuselage. Use additional small foam pieces as needed for a snug fit.
RC Dart (continued)
Final assembly
- Bend the landing gear from 3/32" diameter wire, install the wheels and add a tail skid.
- Bolt the Pee Wee engine (with landing gear behind) onto the engine mount.
- Slip the actuator into place and check radio operation; correct any problems before flying.
- Install the wing and check the balance. Add weight as needed to the nose or tail to achieve the center-of-gravity position shown on the plan.
- Check stabilizer incidence: place a straightedge on the bottom of the wing projecting under the stabilizer, then measure from the straightedge to the front and rear of the stabilizer. The rear of the stabilizer should be 1/8" higher than the front (negative incidence).
Flying
- Test-glide the Ace-Dart with the transmitter and receiver turned on. When the glide is satisfactory, the model is ready for powered flight after a ground check of radio range (read your radio instruction manual first).
- Start the engine and run it slightly rich. Turn on transmitter and receiver and verify rudder operation — right is right, left is left.
- Hand-launch the model and allow it to gain some altitude, then try very gentle turns. Avoid overcontrolling; try to keep the Ace-Dart upwind from you.
- After the engine cuts, try to land it as close to you as possible, but don't overcontrol near the ground.
I hope you enjoy your Ace-Dart as much as I did mine.
Transcribed from original scans by AI. Minor OCR errors may remain.

