
RADIO CONTROL SCALE
Stan Alexander, 3709 Valley Ridge Dr., Nashville TN 37211; E-mail: onawing@mindspring.com
Toledo Expo Scale Competition
Each year at the Toledo expo there is a static competition for a variety of categories, including Non-Military Scale, Military Scale, Designer Scale, and many others. There was a good selection of models this year, and the prizes were great too. Most were radios from Futaba, Hitec, and Airtronics, which is a great incentive to participate.
The judges check documentation and look closely at all the models. It takes a small army of judges who volunteer on Saturday night to accomplish this task. Awards are announced Sunday afternoon at approximately 3:00, preceded by the Weak Signals raffle to benefit a scholarship fund.
Winners
- Non-Military Sport Scale
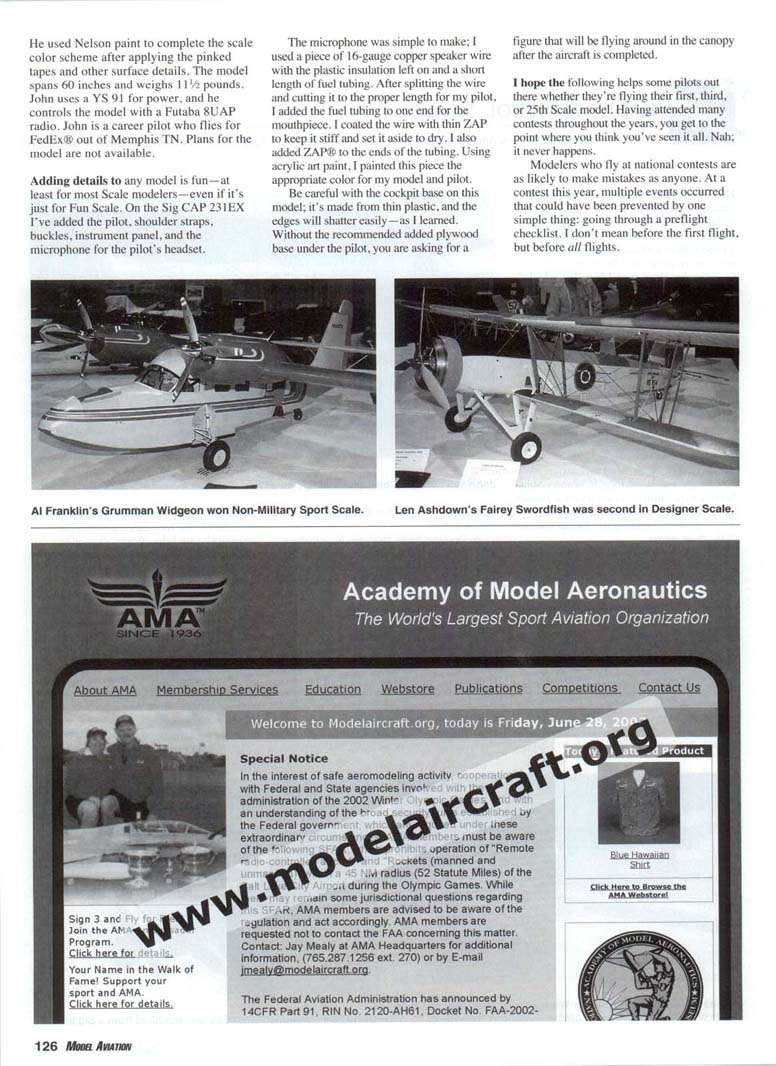
- 1st: Al Franklin, Gig Harbor, WA — Grumman Widgeon
- 2nd: David Nellis, Sterling, MI — heavily modified Sig J-3 Cub
- 3rd: Don Lawrence — Travelair Model R Mystery Ship
- Military Sport Scale
- 1st: James Jacobson, Rogers, MI — Grumman Wildcat
- 2nd: Dave Platt — Miles M.20
- 3rd: Bill Steffes — P-47 Thunderbolt (Nick Ziroli design)
- Best Jet
- 1st: Terry Nitsch — BobCat sport jet (not a scale model)
- 2nd: Robert Bush — North American F-100 Super Sabre (Bob Violett kit)
- 3rd: Jim Wiegel — F-18
- Designer Scale
- 1st: Dave Platt — Hawker Hunter Mk 6
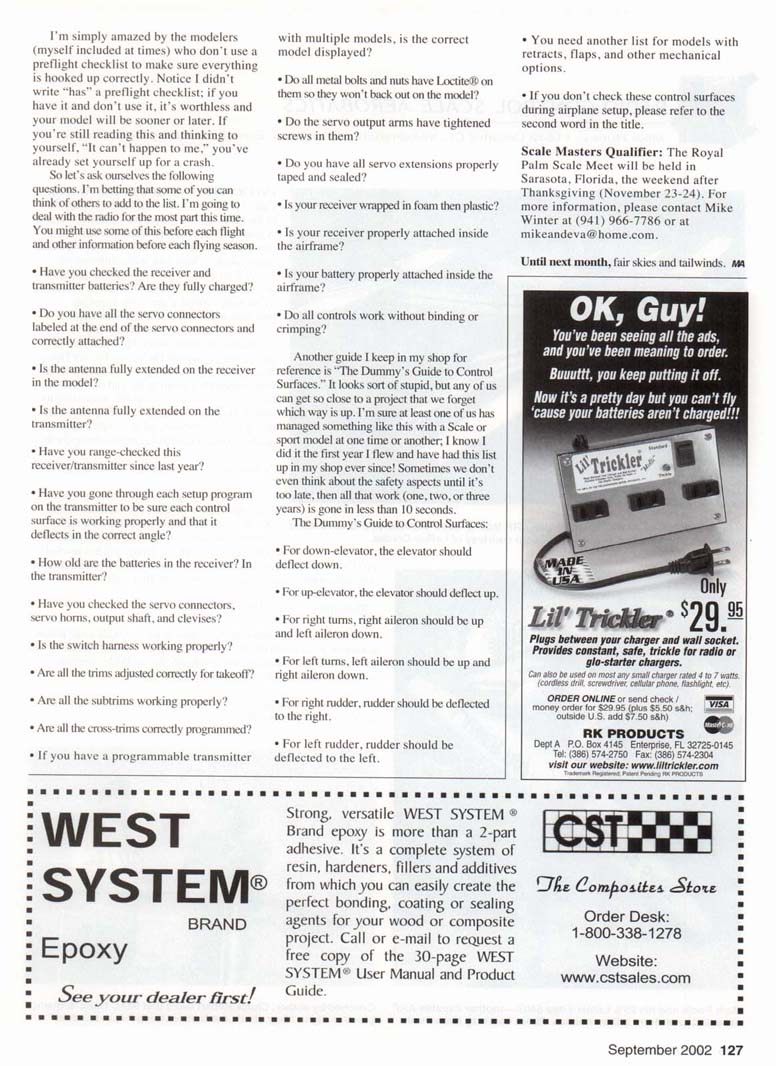
- 2nd: Len Ashdown, Ontario, Canada — Fairey Swordfish
Several were surprised to see a Cub as runner-up in Non-Military Sport Scale, but the final standings made sense after examining the documentation of the three entries. The landing gear on the winning Wildcat was a work of art.
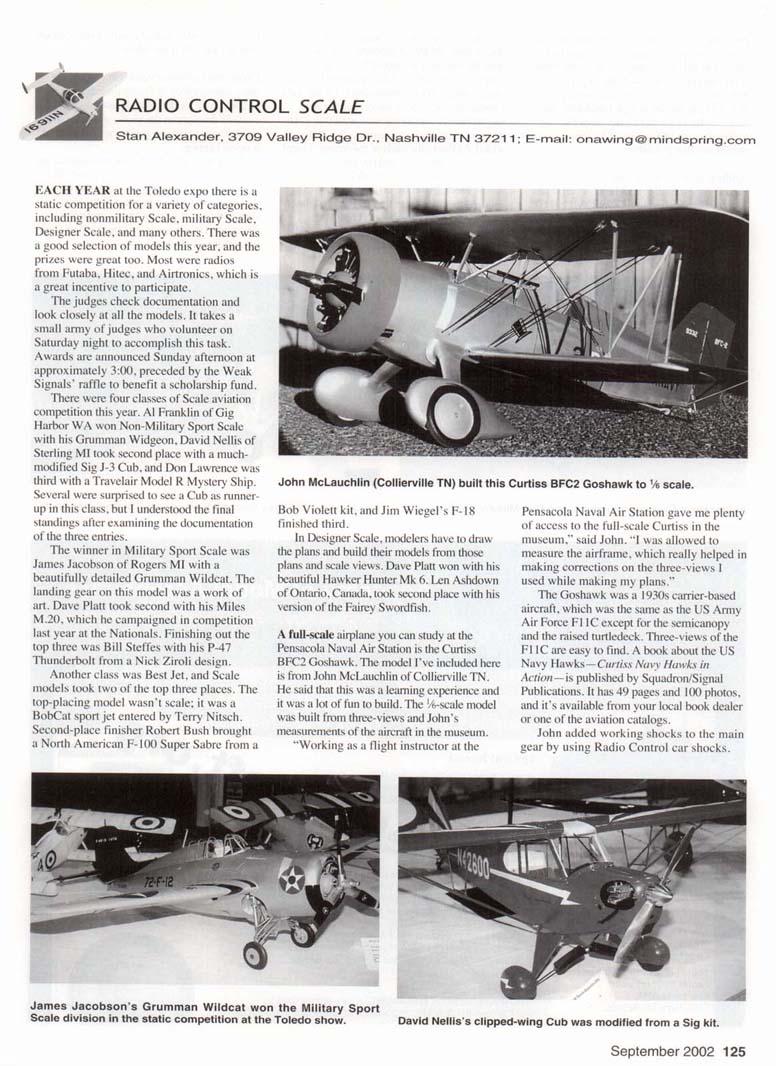
Curtiss BF2C-2 Goshawk model
A full-scale airplane you can study at the Pensacola Naval Air Station is the Curtiss BF2C-2 Goshawk. The model pictured here is from John McLauchlin of Collierville, TN. He said the project was a learning experience and a lot of fun to build. The 1/6-scale model was built from three-views and John's measurements of the aircraft in the museum.
"Working as a flight instructor at the Pensacola Naval Air Station gave me plenty of access to the full-scale Curtiss in the museum," said John. "I was allowed to measure the airframe, which really helped in making corrections on the three-views I used while making my plans."
The Goshawk was a 1930s carrier-based aircraft, similar to the US Army Air Corps F11C except for the semi-canopy and the raised turtledeck. Three-views of the F11C are easy to find. A book about the US Navy Hawks—Curtiss Navy Hawks in Action—is published by Squadron/Signal Publications. It has 49 pages and 100 photos and is available from your local book dealer or aviation catalogs.
John added working shocks to the main gear using radio-control car shocks. He uses a YS 91 for power and controls the model with a Futaba 8UAP radio. John is a career pilot who flies for FedEx out of Memphis, TN. Plans for the model are not available.
Adding details
Adding details to any model is fun—at least for most scale modelers—even if it's just for Fun Scale. On the Sig CAP 231 EX I added the pilot, shoulder straps, buckles, instrument panel, and the microphone for the pilot's headset. The microphone was simple to make:
- Use a piece of 16-gauge copper speaker wire with the plastic insulation left on and a short length of fuel tubing.
- Split the wire and cut it to the proper length for the pilot.
- Add the fuel tubing to one end for the mouthpiece.
- Coat the wire with thin ZAP to keep it stiff and set it aside to dry; add ZAP to the ends of the tubing.
- Paint the finished piece with acrylic art paint the appropriate color for the model and pilot.
Be careful with the cockpit base on this model; it's made from thin plastic and the edges will shatter easily—as I learned. Without the recommended added plywood base under the pilot, you are asking for a figure that will be flying around in the canopy after the aircraft is completed.
Preflight checklist and common mistakes
I hope the following helps some pilots out there whether they're flying their first, third, or 25th scale model. Having attended many contests throughout the years, you get to the point where you think you've seen it all. Nah; it never happens.
Modelers who fly at national contests are as likely to make mistakes as anyone. At a contest this year, multiple events occurred that could have been prevented by one simple thing: going through a preflight checklist. I don't mean before the first flight, but before all flights.
I'm simply amazed by the modelers (myself included at times) who don't use a preflight checklist to make sure everything is hooked up correctly. Notice I didn't write "has" a preflight checklist; if you have it and don't use it, it's worthless and your model will be sooner or later. If you're still reading this and thinking to yourself, "It can't happen to me," you've already set yourself up for a crash.
So let's ask ourselves the following questions. Some of you can think of others to add to the list. I'm going to deal with the radio for the most part this time. You might use some of this before each flight and other information before each flying season.
- Have you checked the receiver and transmitter batteries? Are they fully charged?
- Are all servo connectors labeled and correctly attached?
- Is the antenna fully extended on the receiver in the model?
- Is the antenna fully extended on the transmitter?
- Have you range-checked this receiver/transmitter since last year?
- Have you gone through each setup program on the transmitter to be sure each control surface is working properly and that it deflects to the correct angle?
- How old are the batteries in the receiver? In the transmitter?
- Have you checked the servo connectors, servo horns, output shafts, and clevises?
- Is the switch harness working properly?
- Are all the trims adjusted correctly for takeoff?
- Are all the subtrims working properly?
- Are all the cross-trims correctly programmed?
- If you have a programmable transmitter with multiple models, is the correct model displayed?
- Do all metal bolts and nuts have Loctite on them so they won't back out?
- Are the servo output arm screws tightened?
- Are all servo extensions properly taped and sealed?
- Is your receiver wrapped in foam and plastic?
- Is your receiver properly attached inside the airframe?
- Is your battery properly attached inside the airframe?
- Do all controls work without binding or crimping?
The Dummy's Guide to Control Surfaces
Another guide I keep in my shop for reference is "The Dummy's Guide to Control Surfaces." It looks sort of stupid, but any of us can get so close to a project that we forget which way is up. I'm sure at least one of us has managed something like this with a scale or sport model at one time or another; I know I did it the first year I flew and have had this list up in my shop ever since! Sometimes we don't even think about the safety aspects until it's too late, then all that work (one, two, or three years) is gone in less than 10 seconds.
- For down-elevator, the elevator should deflect down.
- For up-elevator, the elevator should deflect up.
- For right turns, right aileron should be up and left aileron down.
- For left turns, left aileron should be up and right aileron down.
- For right rudder, rudder should be deflected to the right.
- For left rudder, rudder should be deflected to the left.
- You need another list for models with retracts, flaps, and other mechanical options.
- If you don't check these control surfaces during airplane setup, please refer to the second word in the title.
Scale Masters Qualifier
The Royal Palm Scale Meet will be held in Sarasota, Florida, the weekend after Thanksgiving (November 23–24). For more information, contact Mike Winter at (941) 966-7786 or mikeandeva@home.com.
Until next month, fair skies and tailwinds. MA
Transcribed from original scans by AI. Minor OCR errors may remain.

