

RC "TRAINERS"
The designation "trainer" is assigned to scads of model airplanes, but as the author has discovered, not all are created equal. Here are some ways to determine which is the right one for you. — Jim Waterman
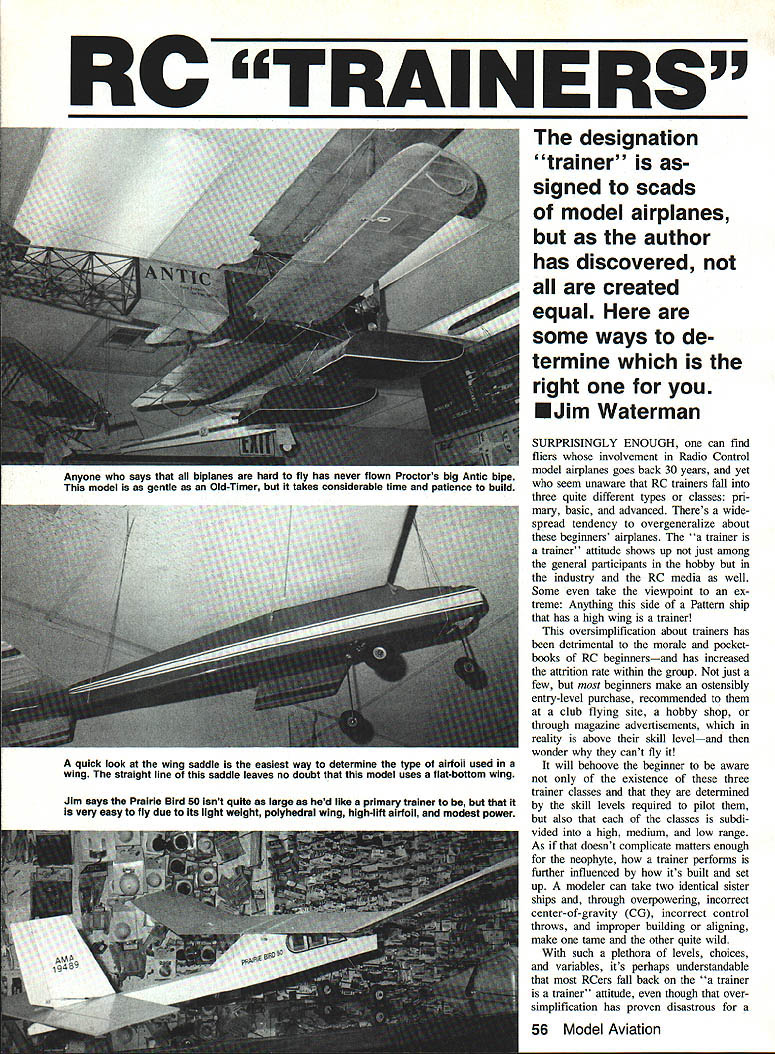
Surprisingly enough, one can find fliers whose involvement in radio-control (RC) model airplanes goes back 30 years, and yet who seem unaware that RC trainers fall into three quite different classes: primary, basic, and advanced. There's a widespread tendency to overgeneralize about beginners' airplanes. The "a trainer is a trainer" attitude shows up not just among the general participants in the hobby but in the industry and the RC media as well. Some even take the viewpoint to an extreme: anything short of a Pattern ship that has a high wing is called a trainer!
This oversimplification about trainers has been detrimental to the morale and pocketbooks of RC beginners—and has increased the attrition rate within the group. Many beginners make an ostensibly entry-level purchase, recommended at a club flying site, a hobby shop, or through advertisements, which in reality is above their skill level—and then wonder why they can't fly it.
It will behoove the beginner to be aware not only of the existence of these three trainer classes (primary, basic, advanced) and that they are determined by the skill levels required to pilot them, but also that each class is subdivided into high, medium, and low ranges.
As if that doesn't complicate matters enough for the neophyte, how a trainer performs is further influenced by how it's built and set up. A modeler can take two identical sister ships and, through overpowering, incorrect center-of-gravity (CG), incorrect control throws, and improper building or aligning, make one tame and the other quite wild.
These words of warning aren't intended to scare off the prospective beginner. On the contrary, the aim is to give you the information and tools you'll need to practically guarantee an easy initiation into RC flying, provided you're willing to be a patient and careful model builder. It's important to recognize that RC models are in fact real airplanes, not just toys you can buy on Saturday and fly on Sunday. The time spent at your workbench will be more than compensated by the time saved in learning to fly—in addition to sparing you disappointment and financial loss. While it won't please those who aren't keen on building, it's a general rule of thumb that the longer the building time, the quicker the soloing.
There are no aeronautical secrets. Everything below has been published in books and magazines and confirmed in practice. Yet, if you talk to the average flier or dealer about desirable characteristics in a trainer, the high-wing configuration is often the only thing mentioned.
The five "musts" of an effective RC trainer
An effective trainer should incorporate these five essentials:
- A high-wing or cabin-type configuration (shoulder wing at the least).
- As large as your car or workbench can accommodate.
- As light as is structurally feasible.
- A high-lift airfoil.
- Dihedral (or polyhedral) plus a long tail moment (distance from wing to tail surfaces).
Unless the model possesses these five characteristics, it's not going to be an easy-flying primary or basic trainer. Explanations follow.
High-wing configuration
The concentration of weight below the wing (the pendulum effect) gives high-wing designs added stability. Stability means you should be able to completely release the transmitter controls and expect the model to fly quite nicely on its own. Barring unexpected wind gusts and assuming the model has been correctly built and trimmed, the airplane can also be expected to right itself following a turn. Dihedral (the upward sweep of the wings from the center joint) and polyhedral improve stability. Whether or not you favor the more realistic, horizontally flat wings for their aesthetic appeal, stability is a must for beginners—and the more the better.
Large size
You might be inclined toward a smaller model to save money until you see whether this hobby takes hold. That's understandable, but erroneous caution will probably doom your new venture. Little airplanes usually flit around the sky like nervous butterflies, calling for very sharp reactions (and eyesight) on your part. Large airplanes are more sedate, docile, and forgiving. They fly relatively slower, respond more gently to control input, and are easier to see.
How large is large enough?
- If you can count on having a flight instructor: 50-inch wingspan is the absolute minimum.
- If you don't have an instructor: raise that figure to 70 inches (or more, depending on how many of the five precepts your model includes).
- A 100-inch wingspan is ideal if practical.
Large models are also less likely to behave unpredictably in gusty wind.
Light weight
Heavier airplanes must fly faster to stay airborne, which removes heavy designs from acceptable trainers. You want a slow airplane when first learning to fly; without one there's a good chance you might never solo or the training period will be unreasonably protracted.
Finding time to build light is largely a matter of priorities. One simple way to discern between light and heavy models is to compare engine requirements: lighter models need smaller engines; heavier models need larger ones. For a more precise determination, calculate wing loading (see next section).
Wing loading — how to calculate it
Wing loading helps you compare how heavy a model is relative to its lifting area. To calculate:
- Compute wing area in square inches: span (in inches) × chord (in inches).
- Convert to square feet: divide the wing area (sq. in.) by 144.
- Convert model weight from pounds to ounces: 1 lb = 16 oz.
- Divide total ounces by wing area in square feet to get ounces per square foot (oz./sq. ft.).
If the kit box, catalog, or advertisement lists weight and wing area, use those figures. If a minimum and maximum weight are shown, use the higher figure (beginners tend to build too heavy).
Compare the result with these approximate trainer categories:
- Primary trainers: under 10 oz./sq. ft.
- Basic trainers: 10 to 12 oz./sq. ft.
- Advanced trainers: over 12 oz./sq. ft.
If wing loading is greater than 20 oz./sq. ft., pass on that model—it will fly too fast for most beginners. If you won't have an instructor, lower that maximum to 15–16 oz./sq. ft. If you want a trainer that even grandma can fly, aim for under 12–13 oz./sq. ft.
Note: the maximum wing-loading figures above are based on a popular 60-inch wingspan. The larger the model, the safer it is to nudge these figures upward because large wings generate more lift per square inch than small ones. Conversely, if the wing uses a low-lift airfoil, move these figures downward.
Airfoil
A high-lift airfoil enables an airplane to fly more slowly without stalling than a low-lift airfoil. For your first airplane you don't want a compromise or a dual-purpose hybrid of trainer and acrobatic performer—you want everything working in your favor. A high-lift airfoil allows slower flight and lets you use a smaller, more economical engine.
Four common airfoil types (descending order of lift; ascending order of flying speed):
- A: Undercambered — highest lift, difficult to build and cover; rare on models but historically important (Wright Flyer).
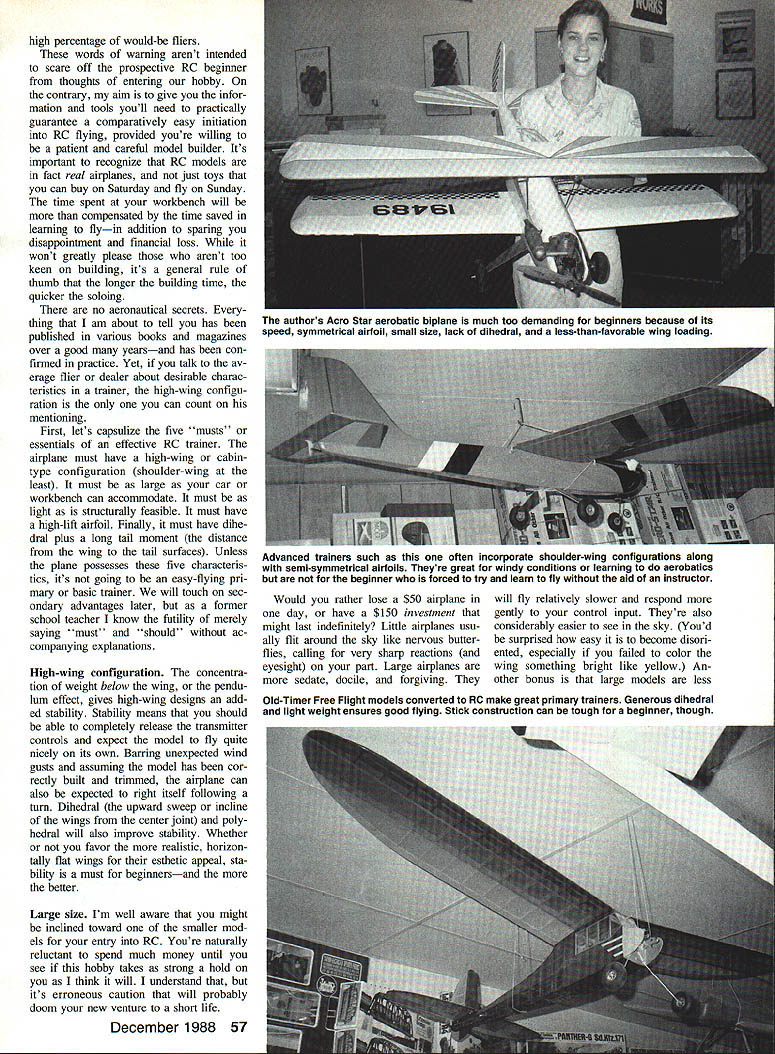
- B: Flat-bottomed — good lift, easy to build and strong; common on most RC trainers and non-competition sport aircraft.
- C: Semi-symmetrical — compromise, used on some higher-range basic trainers or sport aircraft.
- D: Symmetrical — low lift, for aerobatic and advanced aircraft only; not acceptable on a primary trainer.
Advertisements rarely specify the airfoil used; study photos for clues. If the wing saddle has a downward sweep or curve, the airfoil is likely not flat-bottomed (i.e., it will produce less lift). A combination of too much weight and a low-lift airfoil is especially unforgiving for beginners.
Primary, basic, and advanced trainers
With the five keys—large size, light weight, high wing, high-lift airfoil, and generous dihedral/polyhedral with a long tail moment—firmly in mind, the beginner still needs guidance in differentiating among the three broad categories. There are no definitive guidelines; classes overlap and distinctions blur. One person's primary trainer can be another's basic trainer.
The most useful distinction:
- A primary trainer incorporates more of the easy-flying features (and/or to a greater degree) than a basic trainer. A true primary trainer is the only class a "lone eagle" (someone without an instructor) can reasonably hope to solo with.
- A basic trainer will be substantially more difficult to fly due to compromises such as smaller size, easier building features, or semi-aerobatic characteristics. Even a licensed full-scale pilot will generally need an instructor for a basic trainer.
- An advanced trainer is usually identifiable by a low-lift airfoil and is intended for experienced pilots or competition flying.
You can sometimes force-fit a semisymmetrical airfoil into the basic category by giving it a huge wing, generous dihedral, and a light airframe, but such combinations are uncommon. Conversely, a model that would otherwise belong in the basic category can sometimes be moved into the primary camp by adding features like wing-tip washout, turbulator spars, and a lifting stabilizer—provided these additions don't add too much weight.
Examples and ranges:
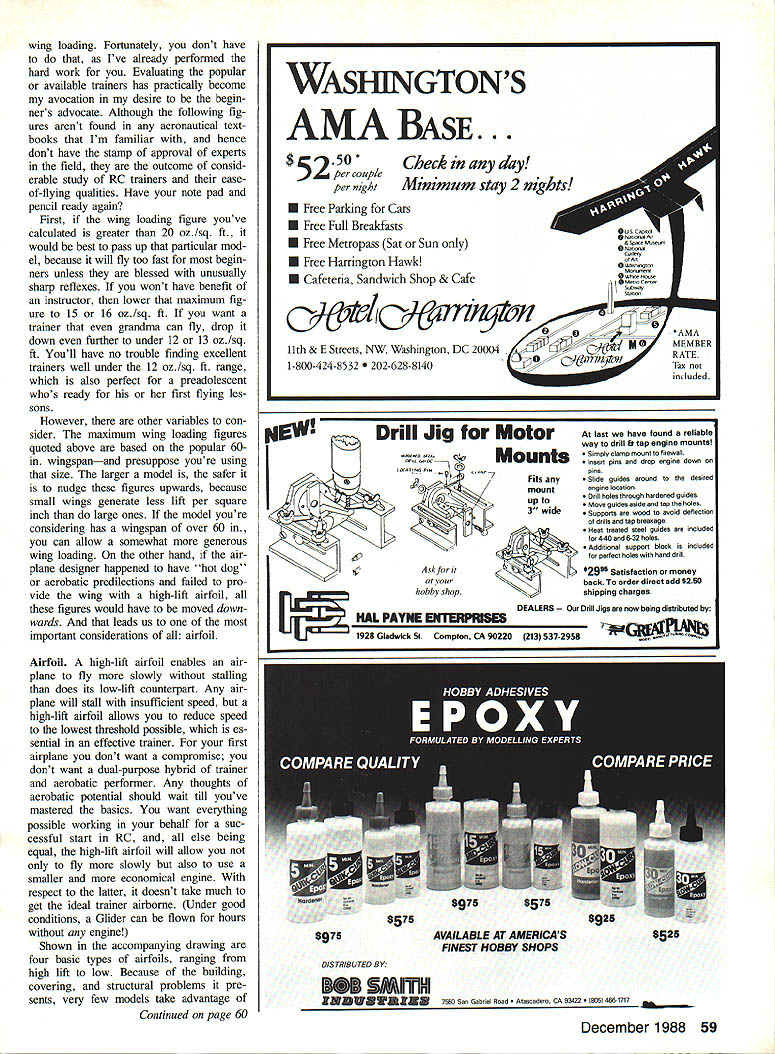
- Upper-range primary trainers: larger powered gliders and converted Old-Timers—very easy to fly but not quick to build.
- Midrange primary trainers: Senior Telemaster, Kadet Senior.
- Mid-to-lower-range primary trainers: Kadet Seniorita, Telemaster 40.
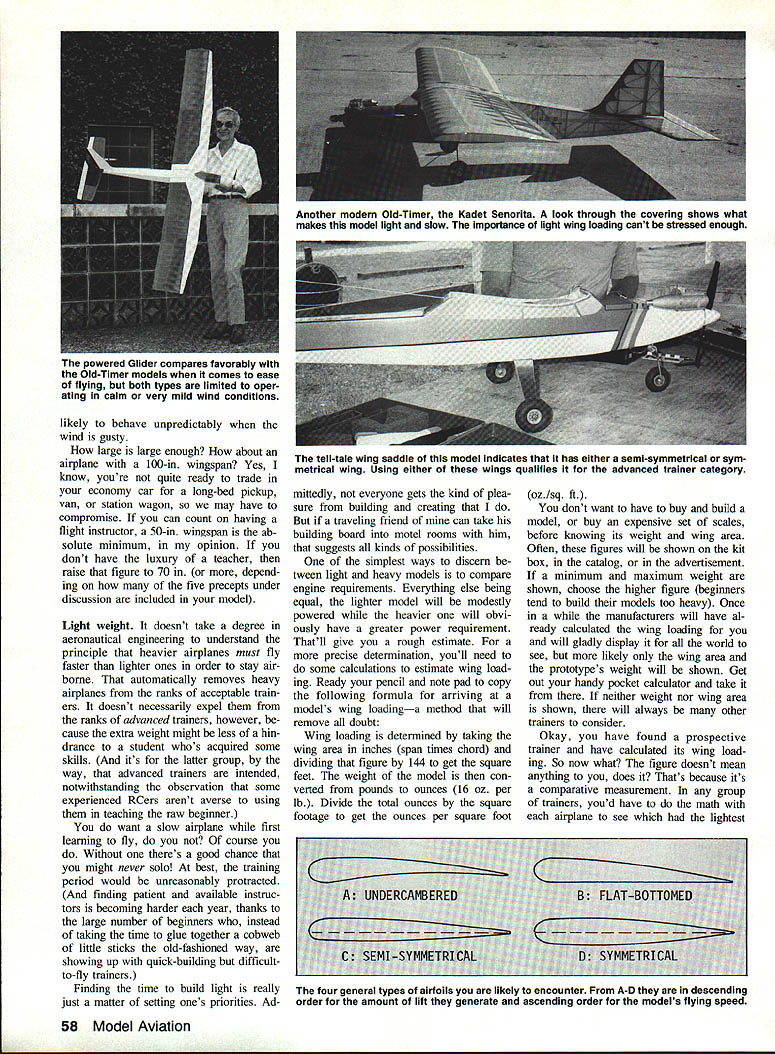
- Lower-range primary trainers: smaller Old-Timer types like the Prairie Bird 50, or power gliders such as the Ace High Mk. II that sacrifice some lightness to expedite building.
The majority of available trainers fall into the basic category. Typical traits of basic trainers:
- Conventional balsa or balsa-and-Lite-Ply slab-sided construction.
- Solid tail surfaces rather than built-up.
- Sometimes compromises in size and weight to speed building or increase crash resistance (note: lighter models are generally less likely to crash and crash more gently).
ARFs (Almost Ready to Fly)
ARF stands for "Almost Ready to Fly." There are ARFs and there are ARFs. The most desirable ARFs are conventionally built wood airplanes where someone else has already done the hard work; they may or may not be pre-covered and are often indistinguishable from a model you built yourself. Mass-produced plastic or foam ARFs require closer scrutiny. So far I haven't found a mass-produced plastic or foam model that meets the parameters for a primary trainer, though a few come close to qualifying as lower-range basic trainers if they have a high-lift airfoil.
If you're flying without an instructor
If you're a lone eagle, study piloting before your first flight—whether or not you have chosen an easy primary trainer. Proper trimming is the key. A well-trimmed primary trainer will often fly and land itself without constant manipulation. Having an experienced pilot perform first-flight trimming will be a comfort, even if you have to drive some distance. Crooked models fly crookedly, and our tolerances are much smaller than those of full-scale builders.
Pioneers used the trial-and-error test-glide method: aim the model into tall grass about 50 ft. away with the engine off, give a toss, and adjust on the ground until the glide is correct.
If you have an instructor, you don't necessarily need a pure primary trainer, but choosing one will likely increase your chances of success and decrease the time before you solo. If your primary trainer is ultra-easy, it may be too easy; consider progressing next to any basic trainer to gain experience with a faster, more responsive aircraft before moving to your dream ship.
Many RCers consider advanced trainers to be intermediate; I disagree. Flying a basic trainer constitutes the intermediate phase. After mastering a basic trainer, there's no need to move up to an advanced trainer unless competition flying is a goal. Watch wing loading and other parameters, and many sport or scale aircraft will be no more difficult than an advanced trainer.
I have flown contest-caliber scale aircraft that were as tractable as some trainers (though none were low-wing models). Once I used a Sopwith Pup biplane as a trainer when it was the only ship available—some biplanes can be easier to fly than aerobatic types.
Secondary considerations (less critical than the Big Five)
- Channels: Should beginners use three channels (rudder steer) or four channels (ailerons)? Three-channel models are easier to build and fly; if the student has help, a four-channel option is viable. Lone eagles must assess their own aptitude.
- Landing gear: Tricycle vs. conventional (taildragger). No substantial difference in difficulty. Tri-gear is usually better if a paved field is available; taildragger is suitable for grass fields.
- Engine choice: Upper-range vs. intermediate/lower-range engine—this matters but is of relatively minor importance compared with the Big Five.
Focus on the Big Five aeronautical factors and make sure your trainer incorporates them. You'll be assured of a pleasant, discouragement-free start in the wonderful world of RC model airplanes.
About the author: Jim Waterman is the author of Ease-of-Flying Ratings of R/C Trainers, a guide based on his extensive testing of available trainers. For additional information, send a pre-addressed, stamped envelope to: Jim Waterman, 3818 Deerfield Dr., San Antonio, TX 78218.
Transcribed from original scans by AI. Minor OCR errors may remain.

