
Repair That
Ray Teliczan
I KNOW, you're saying to yourself, "to heck with repairing it—build a new one." But stop. Think about this. It's always a lot, lot cheaper to rebuild and it's a much quicker way to get back in the air than building new. I hate rebuilding. I would rather build three new aircraft than do major surgery in rebuilding, but the two reasons stated above are the only ones that keep me from throwing the remains in the circular file and starting anew.
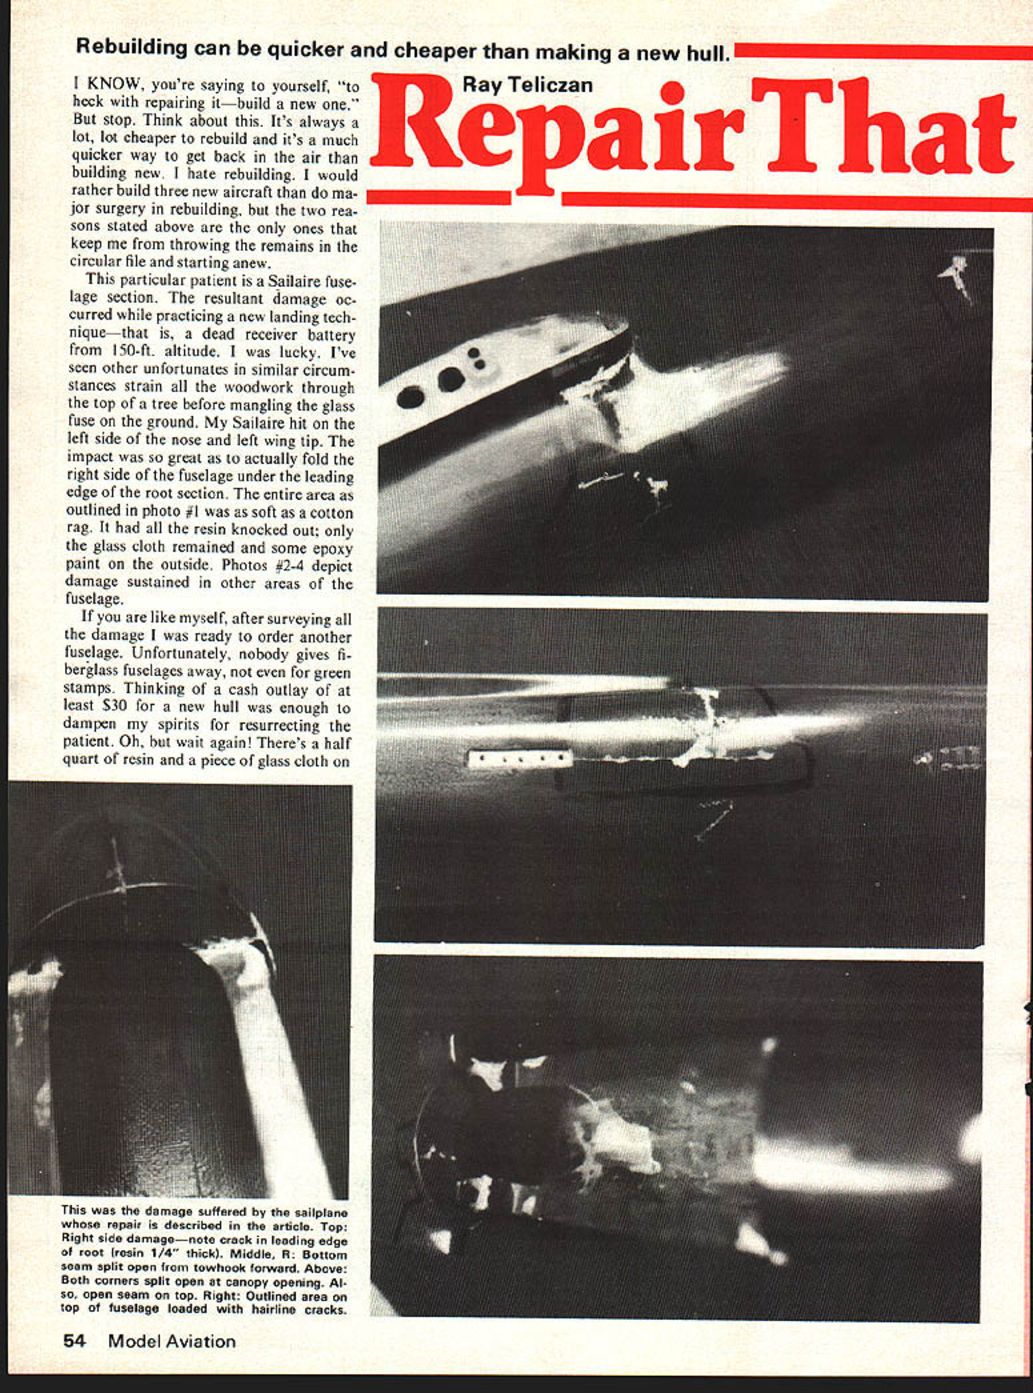
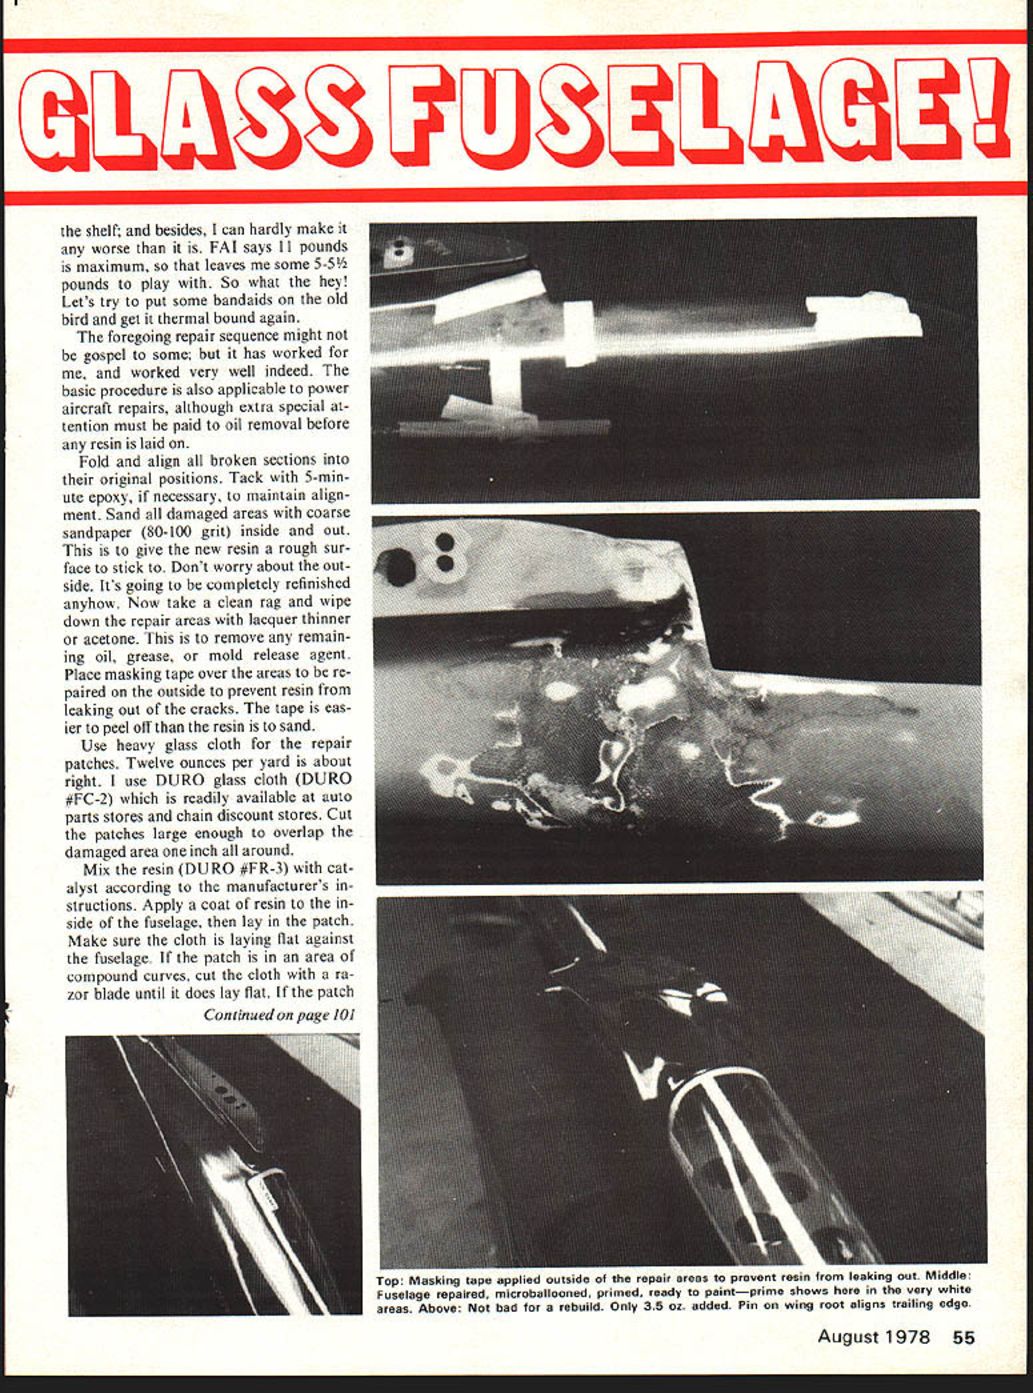
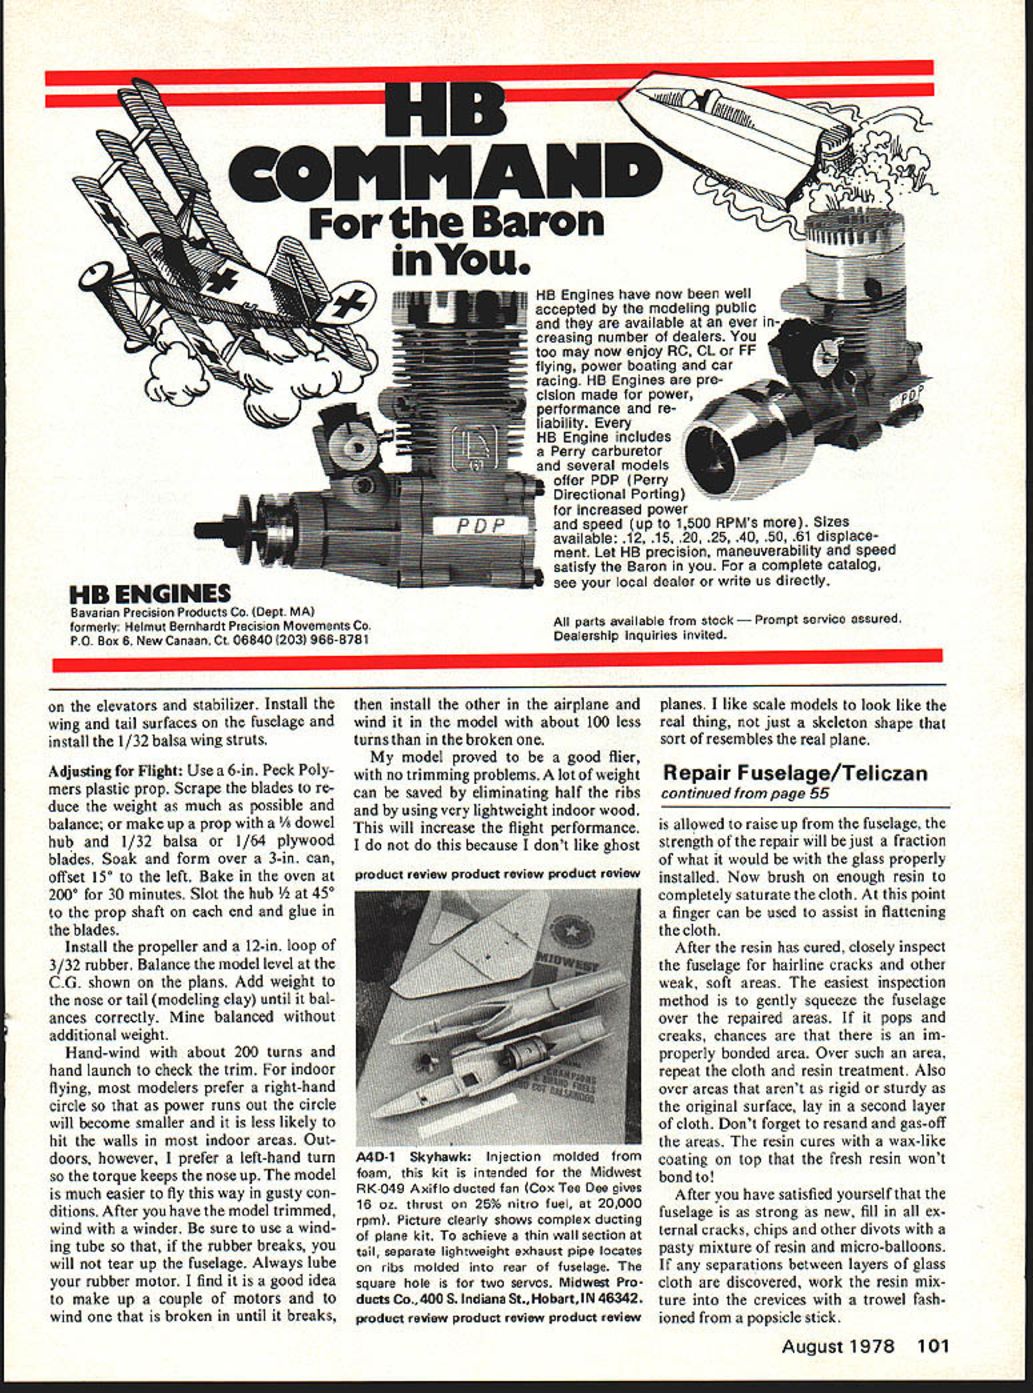
This particular patient is a Sailaire fuselage section. The resultant damage occurred while practicing a new landing technique—that is, a dead receiver battery from 150-ft. altitude. I was lucky. I've seen other unfortunates in similar circumstances strain all the woodwork through the top of a tree before mangling the glass fuse on the ground. My Sailaire hit on the left side of the nose and left wing tip. The impact was so great as to actually fold the right side of the fuselage under the leading edge of the root section. The entire area as outlined in photo #1 was as soft as a cotton rag. It had all the resin knocked out; only the glass cloth remained and some epoxy paint on the outside. Photos #2-4 depict damage sustained in other areas of the fuselage.
If you are like myself, after surveying all the damage I was ready to order another fuselage. Unfortunately, nobody gives fiberglass fuselages away, not even for green stamps. Thinking of a cash outlay of at least $30 for a new hull was enough to dampen my spirits for resurrecting the patient. Oh, but wait again! There's a half quart of resin and a piece of glass cloth on the shelf; and besides, I can hardly make it any worse than it is. FAI says 11 pounds is maximum, so that leaves me some 5-5½ pounds to play with. So what the hey! Let's try to put some bandaids on the old bird and get it thermal bound again.
The foregoing repair sequence might not be gospel to some; but it has worked for me, and worked very well indeed. The basic procedure is also applicable to power aircraft repairs, although extra special attention must be paid to oil removal before any resin is laid on.
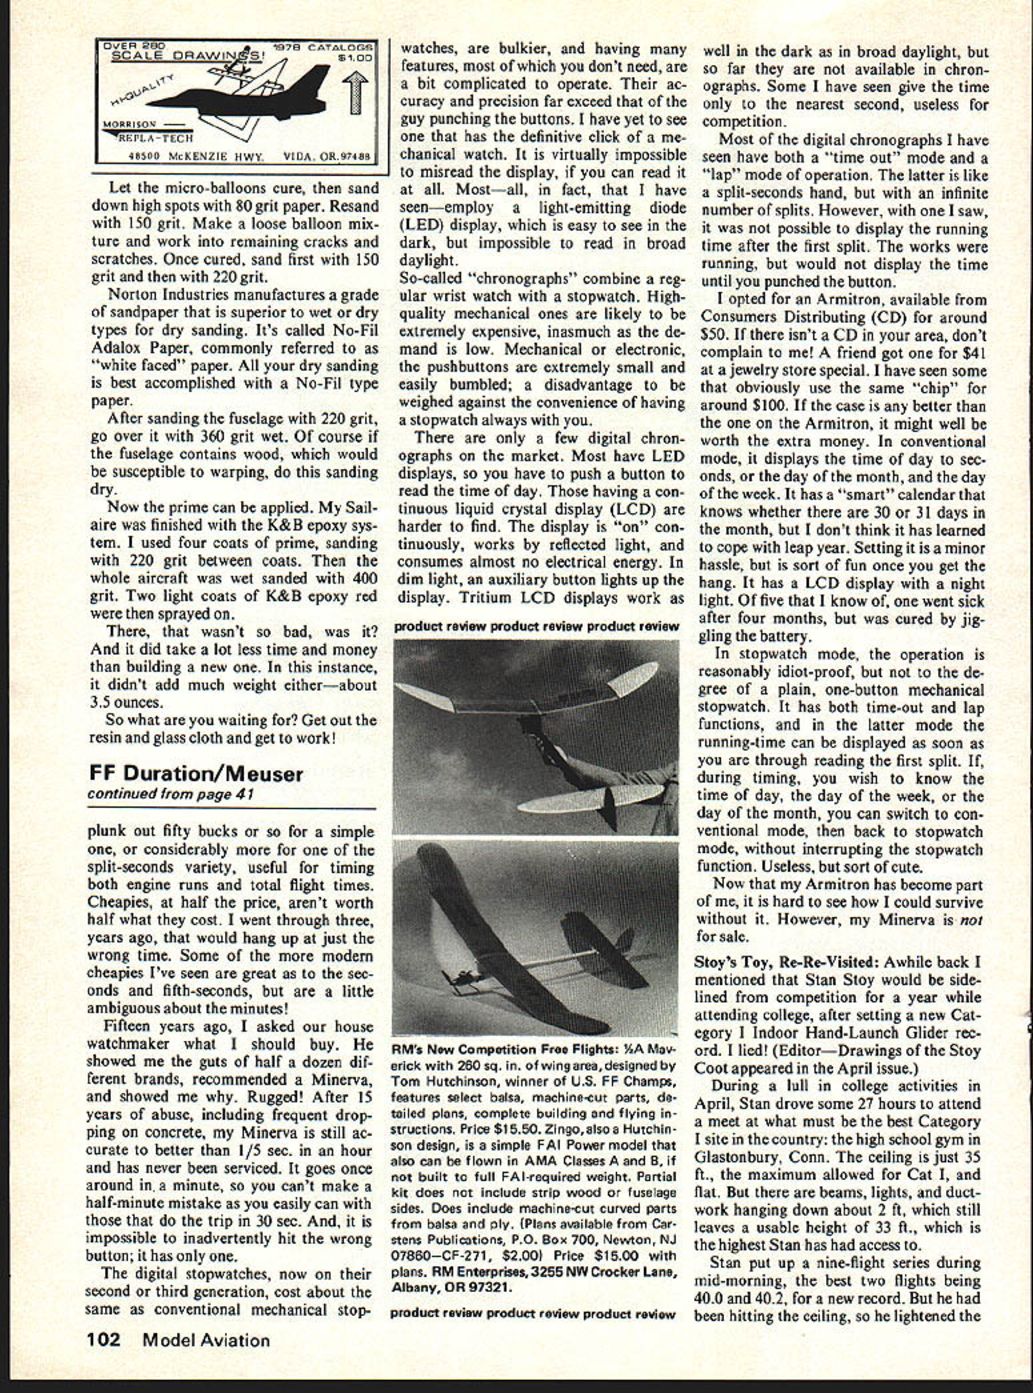
Fold and align all broken sections into their original positions. Tack with 5-minute epoxy, if necessary, to maintain alignment. Sand all damaged areas with coarse sandpaper (80-100 grit) inside and out. This is to give the new resin a rough surface to stick to. Don't worry about the outside. It's going to be completely refinished anyhow. Now take a clean rag and wipe down the repair areas with lacquer thinner or acetone. This is to remove any remaining oil, grease, or mold release agent. Place masking tape over the areas to be repaired on the outside to prevent resin from leaking out of the cracks. The tape is easier to peel off than the resin is to sand.
Use heavy glass cloth for the repair patches. Twelve ounces per yard is about right. I use DURO glass cloth (DURO #FC-2) which is readily available at auto parts stores and chain discount stores. Cut the patches large enough to overlap the damaged area one inch all around.
Mix the resin (DURO #FR-3) with catalyst according to the manufacturer's instructions. Apply a coat of resin to the inside of the fuselage, then lay in the patch. Make sure the cloth is laying flat against the fuselage. If the patch is in an area of compound curves, cut the cloth with a razor blade until it does lay flat. If the patch
Repair Fuselage/Teliczan continued from page 55
is allowed to raise up from the fuselage, the strength of the repair will be just a fraction of what it would be with the glass properly installed. Now brush on enough resin to completely saturate the cloth. At this point a finger can be used to assist in flattening the cloth.
After the resin has cured, closely inspect the fuselage for hairline cracks and other weak, soft areas. The easiest inspection method is to gently squeeze the fuselage over the repaired areas. If it pops and creaks, chances are that there is an improperly bonded area. Over such an area, repeat the cloth and resin treatment. Also over areas that aren't as rigid or sturdy as the original surface, lay in a second layer of cloth. Don't forget to re-sand and gas-off the areas. The resin cures with a wax-like coating on top that the fresh resin won't bond to!
After you have satisfied yourself that the fuselage is as strong as new, fill in all external cracks, chips and other divots with a pasty mixture of resin and micro-balloons. If any separations between layers of glass cloth are discovered, work the resin mixture into the crevices with a trowel fashioned from a popsicle stick.
When cured, sand outside smooth using coarse then finer paper. Begin reshaping any airfoil errors such as wrong dihedral, etc., by sanding and filling with more microballoon-resin paste, sanding to shape. When the fuselage is completely smooth, wipe off all dust with a clean rag and lacquer thinner.
If an area appears thin because of removed glass cloth over the surface, apply a coat of Duro resin alone (no cloth) to fill the cloth weave and provide a good cosmetic surface to prime over. All joints and edges (stringers, canopy opening, etc.) should be glassed with a 3-inch strip of cloth one side only. This will keep corners and edges from breaking again. For the canopy area, lay the cloth over the closed canopy and bond it to the fuselage, then cut out the canopy area.
Mask off the outside and prime the inside with spray primer. I use an acrylic lacquer primer. Sand the primer with 400 grit paper, wipe off all dust and apply a final fill coat of primer into any low spots. After this primer coats the outside is ready to be painted to match the original finish.
If the inside brass tubes for the wing bolts are damaged, cut out the bad area and reinforce with 2 layers of 1-in. cloth, then drill out the holes for new brass tubes and install with epoxy. I've had very good luck using aluminum or brass tube with epoxy and micro-balloons. Make sure the tubes are exactly aligned before the epoxy sets.
If the canopy hinge area is torn, glass the inside with a 3-inch strip, bond, then drill small holes and insert blind rivets or screws with epoxy to form a stronger hinge area.
For extreme damage — where the shell of the fuselage has been smashed in or has large missing sections — cut out the damaged areas to sound glass edges and lay in new cloth patches, building up in layers until the shell is restored to shape. Use temporary bulkheads or forms inside the fuselage to hold the shape.
If you have time, post-cure the resin by placing the fuselage in a warm oven (about 150°F) for several hours to fully cure the resin — this will improve the strength and stiffness.
Reattach hardware, canopy, tail surfaces, control linkages, etc., and recheck alignment. Balance the model and recheck C.G.
Good luck — these techniques will resurrect many a dead fuselage. Ray Teliczan Let the micro-balloons cure, then sand down high spots with 80 grit paper. Resand with 150 grit. Make a loose balloon mixture and work into remaining cracks and scratches. Once cured, sand first with 150 grit and then with 220 grit.
Norton Industries manufactures a grade of sandpaper that is superior to wet or dry types for dry sanding. It's called No-Fil Adalox Paper, commonly referred to as "white faced" paper. All your dry sanding is best accomplished with a No-Fil type paper.
After sanding the fuselage with 220 grit, go over it with 360 grit wet. Of course if the fuselage contains wood, which would be susceptible to warping, do this sanding dry.
Now the prime can be applied. My Sailaire was finished with the K&B epoxy system. I used four coats of prime, sanding with 220 grit between coats. Then the whole aircraft was wet sanded with 400 grit. Two light coats of K&B epoxy red were then sprayed on.
There, that wasn't so bad, was it? And it did take a lot less time and money than building a new one. In this instance, it didn't add much weight either—about 3.5 ounces.
So what are you waiting for? Get out the resin and glass cloth and get to work!
Transcribed from original scans by AI. Minor OCR errors may remain.

