
Rig a Biplane
by Roy Day
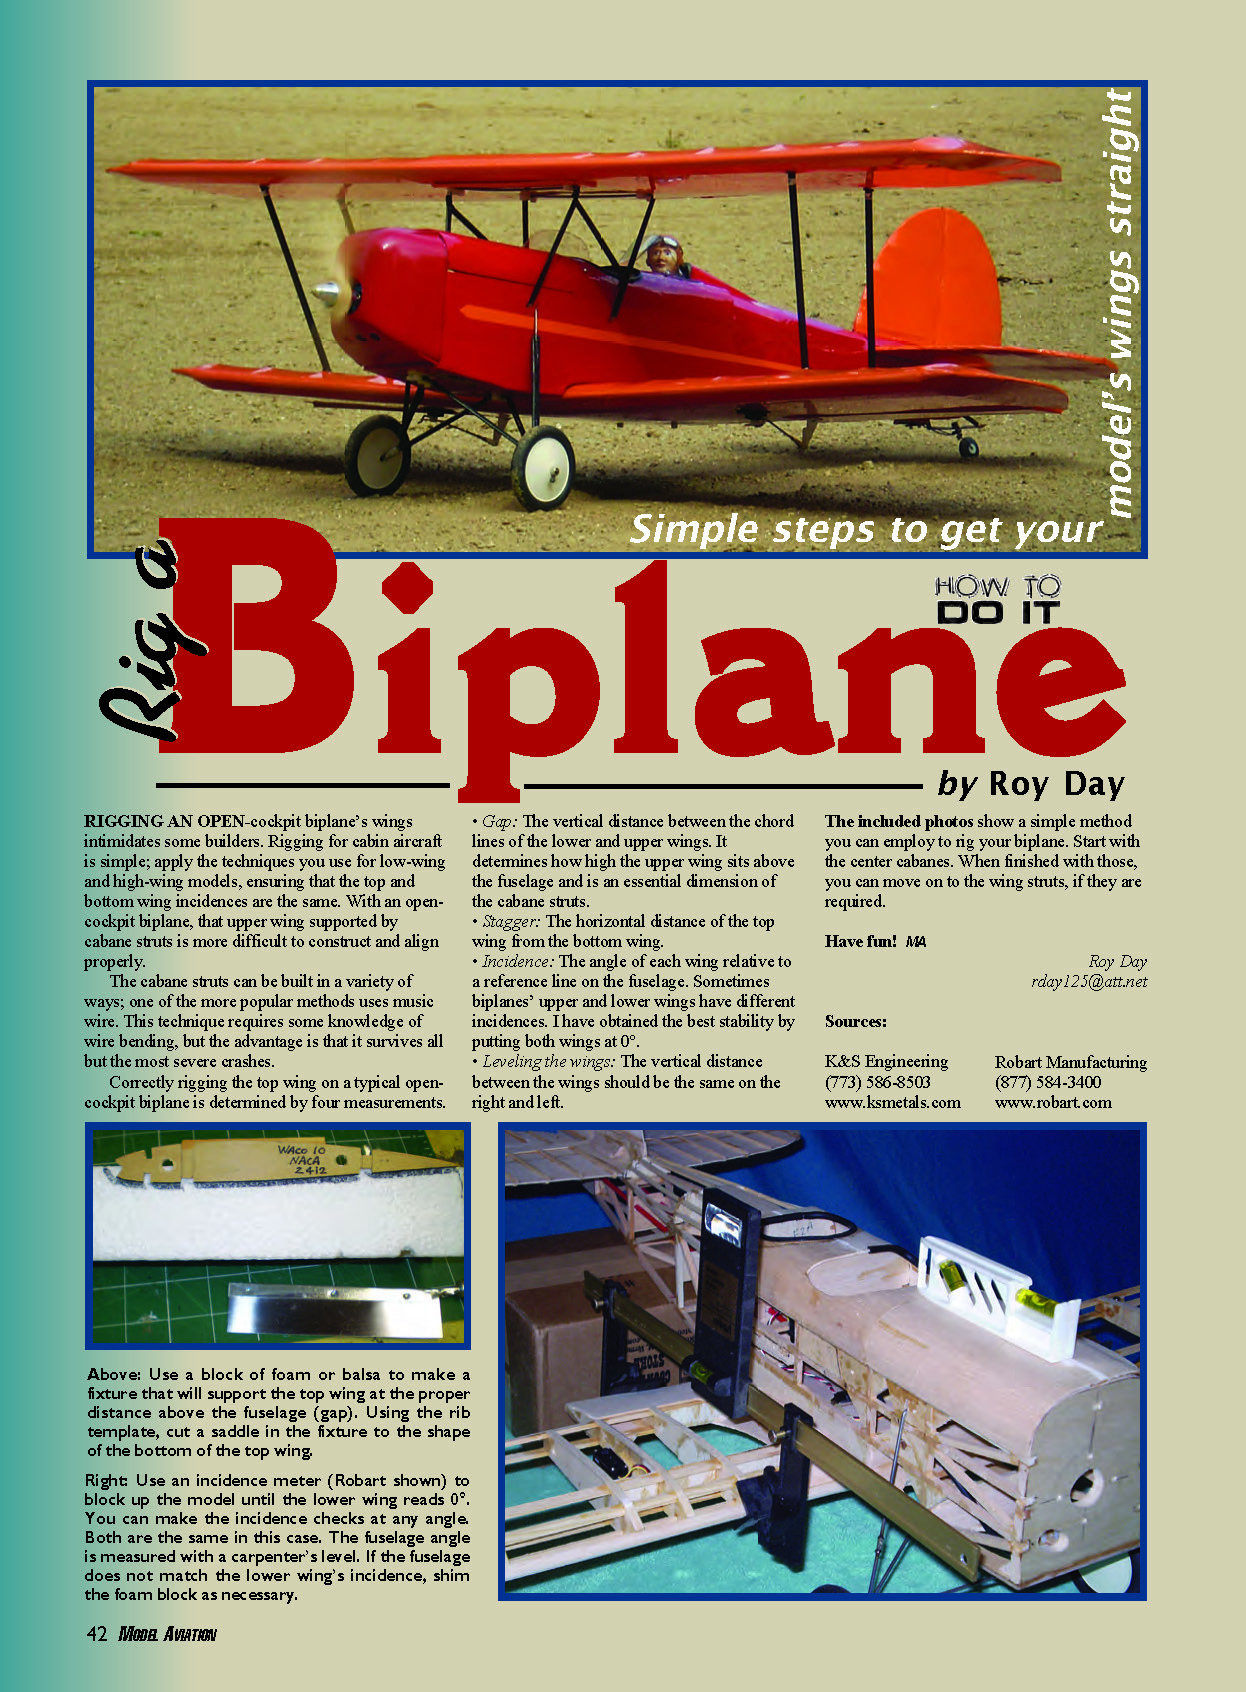
RIGGING AN OPEN‑cockpit biplane’s wings intimidates some builders. Rigging for cabin aircraft is simple; apply the techniques you use for low‑wing and high‑wing models, ensuring that the top and bottom wing incidences are the same. With an open‑cockpit biplane, the upper wing supported by cabane struts is more difficult to construct and align properly.
The cabane struts can be built in a variety of ways; one of the more popular methods uses music wire. This technique requires some knowledge of wire bending, but the advantage is that it survives all but the most severe crashes.
Four critical measurements
- Gap: The vertical distance between the chord lines of the lower and upper wings. It determines how high the upper wing sits above the fuselage and is an essential dimension of the cabane struts.
- Stagger: The horizontal distance of the top wing from the bottom wing.
- Incidence: The angle of each wing relative to a reference line on the fuselage. Sometimes a biplane’s upper and lower wings have different incidences. I have obtained the best stability by putting both wings at 0°.
- Leveling the wings: Ensure the vertical distance between the wings is the same on the right and left.
Cabane strut construction
- Build the cabane struts with music wire fastened to the bottom of the top wing using landing gear straps and nylon bolts.
- The cabane struts will terminate in plywood mounts built into the fuselage.
- The music‑wire diagonal cabane strut is patterned using a soft wire (coat hanger) and must be soldered in place to ensure accuracy.
- Secure the wire inside the fuselage with wheel collars. The wire can be dressed with wooden fairings or painted to match the final scheme and to prevent corrosion.
Rigging procedure
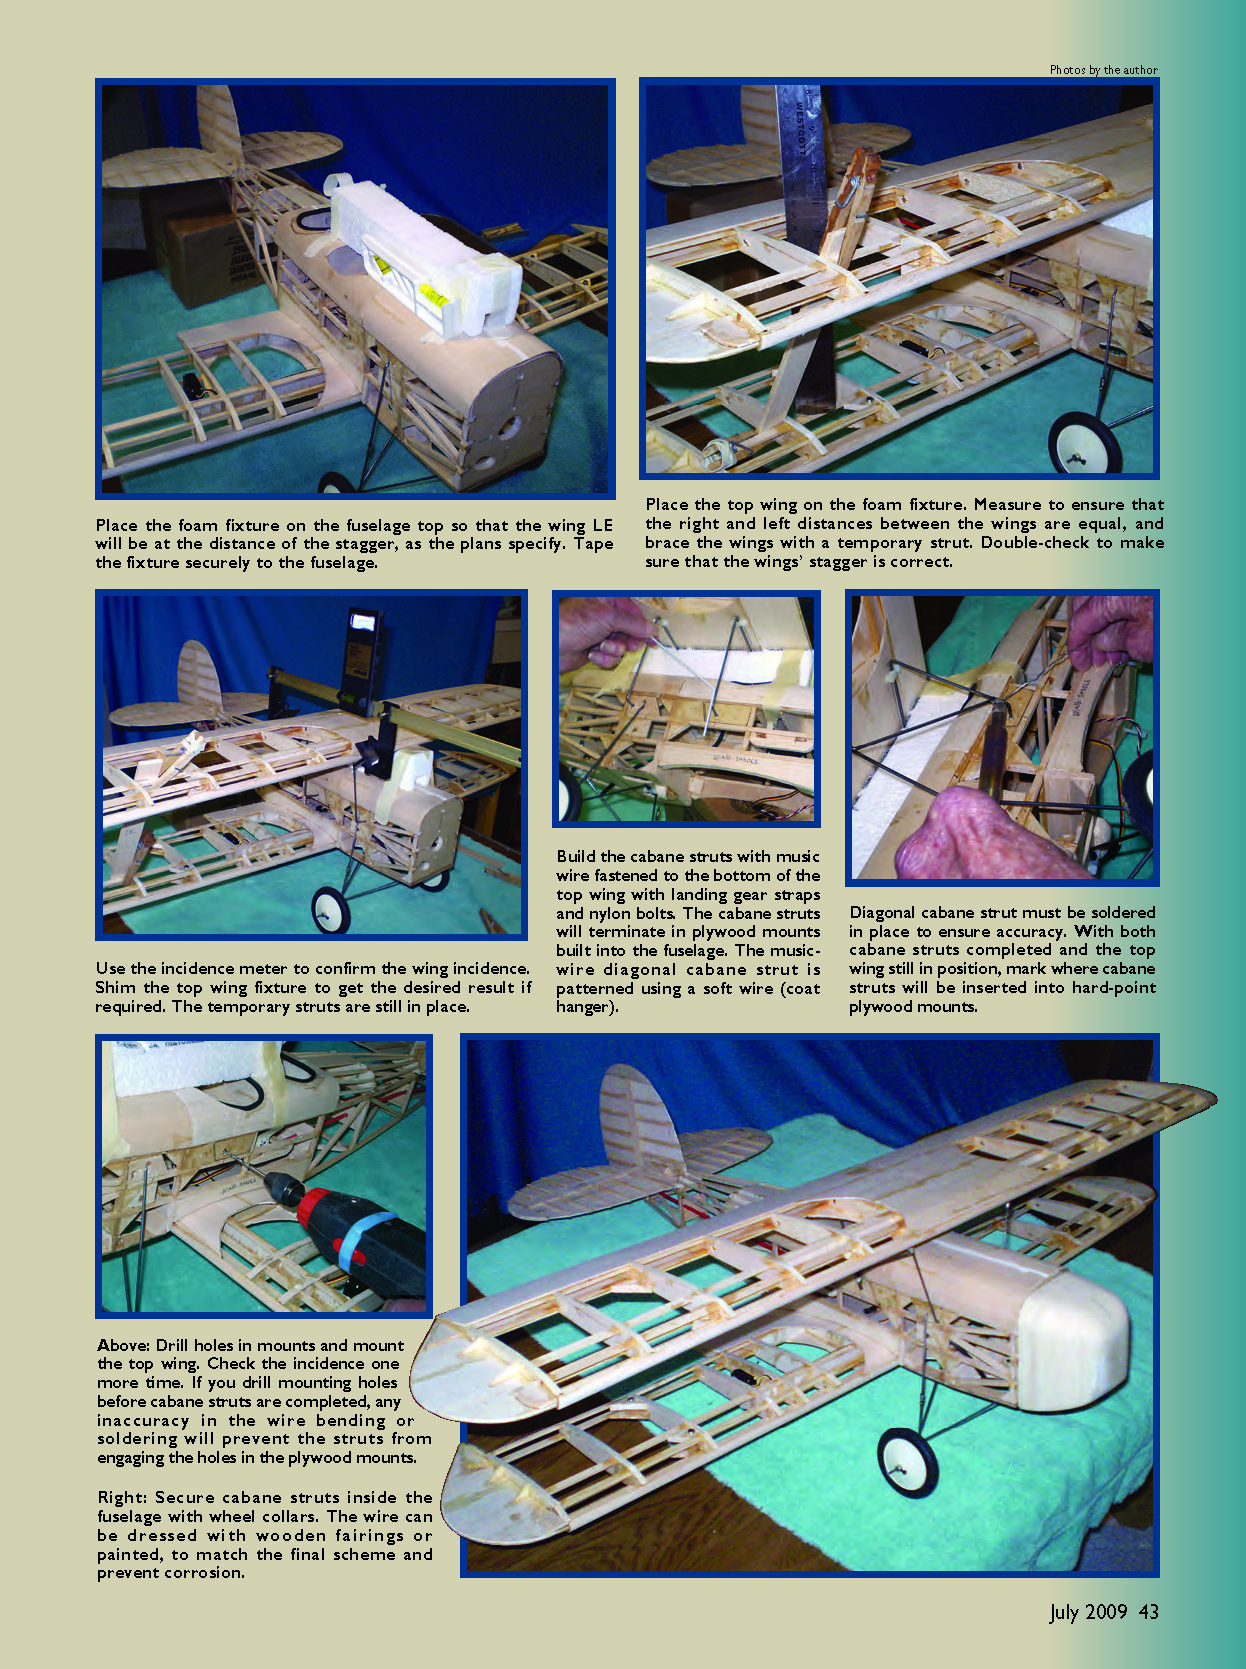
- Place a foam fixture on the fuselage top so that the wing LE (leading edge) will be at the distance of the stagger specified by the plans. Tape the fixture securely to the fuselage.
- Use an incidence meter to confirm the wing incidence. Shim the top wing fixture to obtain the desired incidence if required. Temporary struts should remain in place while adjusting.
- Place the top wing on the foam fixture. Measure to ensure the right and left distances between the wings are equal, and brace the wings with a temporary strut. Double‑check the wings’ stagger.
- Start with the center cabanes. Pattern the diagonal cabane struts using the soft wire, then bend and solder the music‑wire struts to the required shape and length.
- With both cabane struts completed and the top wing still in position, mark where the cabane struts will be inserted into the hard‑point plywood mounts.
- Drill mounting holes in the plywood mounts and mount the top wing. Check the incidence one more time after mounting.
Warning: Do not drill mounting holes before the cabane struts are completed and soldered. Any inaccuracy in wire bending or soldering will prevent the struts from engaging the holes in the plywood mounts.
Final checks and finishing
- Verify incidence and stagger again after final mounting.
- Secure cabane struts inside the fuselage with wheel collars.
- Dress the exposed wire with wooden fairings or paint to match the finish and to reduce the risk of corrosion.
Have fun!
Roy Day rday125@att.net
Sources
- K&S Engineering
(773) 586‑8503 www.ksmetals.com
- Robart Manufacturing
(877) 584‑3400 www.robart.com
Transcribed from original scans by AI. Minor OCR errors may remain.

