
Gary A. Shaw
Safety Comes First
1013 Vernon Loop, Oviedo, FL 32765-6013
Listen to That Flutter
It's always a pleasure to receive mail from around the country, especially when the mail arrives in the form of club newsletters. One very informative newsletter is the Texarkana R/C Flyer, produced by the hard-working members of the Texarkana R/C Flying Club, Inc., and edited by Joe Cole. Of particular note in their August newsletter was an article by Ted Cannelongo describing how to identify and correct control surface flutter — a serious condition that can lead to in-flight aircraft failure. Since I've personally experienced how quickly surface flutter can tear an airplane apart, I can really relate to what Ted had to say in his article:
"Many times while at the flying field I've noticed models flying with a buzzing sound, also known as flutter. More recently one of these models happened to be one of my own.
"As many of you may already know, flutter can be a serious problem to correct, because the cause can be very difficult to find. Some modelers who are unsuccessful at solving the problem just continue to fly the model at a slower speed to minimize the effects, accepting the problem as 'unsolvable.' After talking with model manufacturers and researching model aviation magazines, books, and model assembly instructions, I assembled a checklist of possible causes of flutter. Hopefully, I can save some of you a little grief and possibly help you prevent an accident.
"As mentioned, control surface flutter is generally indicated by a low-frequency buzzing sound. If you hear this sound while flying a model, land the model immediately. Flutter can quickly destroy the components of your airplane and, as we all know, deterioration of any one component can (and probably will) result in a crash. Find the cause and correct it! If it fluttered once, it will flutter again!
"Continuing to fly a model with flutter is an accident waiting to happen. If you must test-fly the model after attempting to cure the problem, try to keep away from pit and spectator areas. Test-fly during off-hours when few people are at the field. If the model vibrates apart and crashes, you don't want it to come down in a populated area of the field.
"Begin diagnosing the problem. First check servo mounts — deterioration is often said to be an indication that the surface is causing the flutter. Successful cures of some causes of flutter include the following solutions:
- Pushrod stop flexing linkage.
- Play — clevis pin/control horn attachment. Replace horn; use a different hole that allows no play.
- Play — clevis pin/servo arm attachment. Replace servo arm; use another hole — no play.
- Sloppy Z-bend fit in servo arm; servo arm hole too large. Replace servo arm; use another hole — no play.
- Control horns not solidly mounted. Use CYA (cyanoacrylate) glue to harden wood; be sure screws are secure.
- Side play from plastic pushrod caused by tight bends. Reroute pushrod.
- Elasticity of flexible plastic pushrods. Use heavy-duty flexible rods, wood, or fiberglass pushrods. Don't use control wire.
- Improperly mounted flexible pushrods (insufficiently supported along the center portion). Flexible pushrods must be secured at increments along the entire length, not just at the ends.
- Poorly glued aileron torque rod. Drill proper-size hole and use sufficient epoxy where the torque rod goes into the aileron wood.
- Poorly glued elevator joiner wire. Drill proper-size hole and use sufficient epoxy.
- Excessive hinge gap. Remove hinges and reinstall with less gap and/or iron on a plastic film strip to seal the gap.
- Aileron flex due to wood that is too soft. Build and install new, stiffer ailerons.
- Insufficient or poorly fastened hinges.
- Hinges installed too far from the end of the control surfaces. Install hinges according to the plans.
- Excessive play (backlash) in servo gears. Replace servo or install new gears.
- Poor servo mounting. Remount according to the manufacturer's instructions.
"Using this checklist, I solved the flutter problem in my model. I had drilled holes in the aileron servo arm to make it easier to install the Z-bend rods; however, I had drilled them too large, allowing a fraction of a millimeter of play in the linkage. Simply drilling the proper-size hole in a replacement servo arm solved the problem. I wouldn't have believed only a fraction of a millimeter of play could cause such flutter if I hadn't seen it for myself. I was reminded that attention to the smallest details is important in building a model that is safe and fun to fly."
Field Box Starters
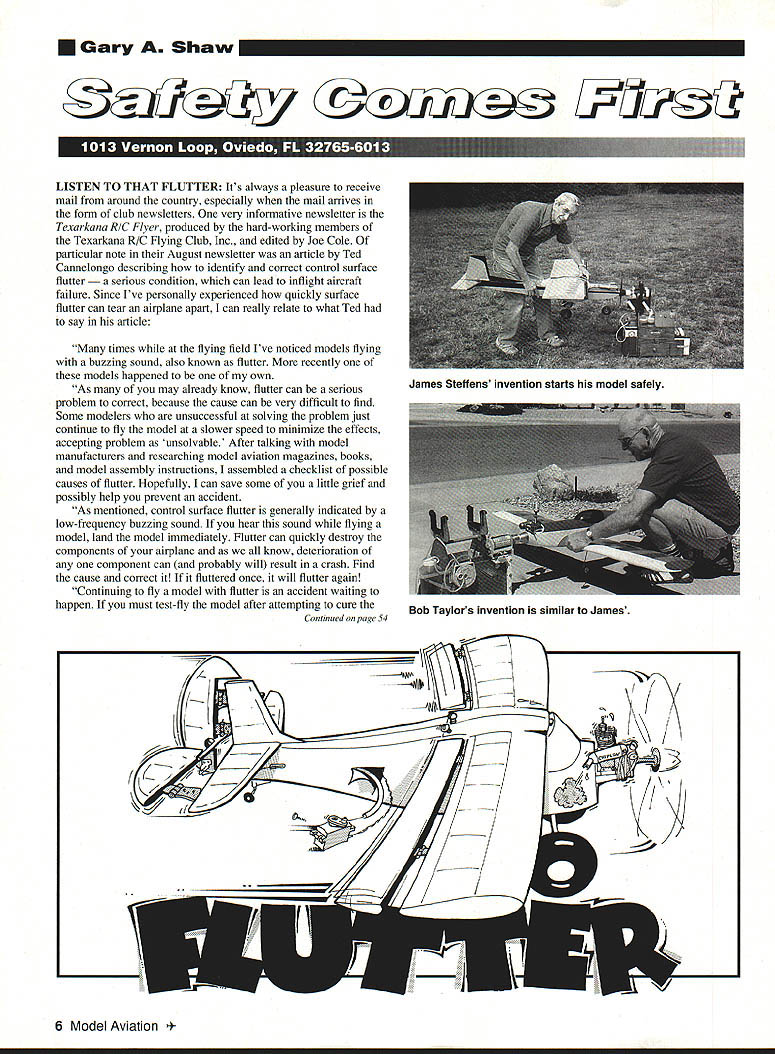
In several of my recent columns I've indicated that hands, fingers, and body parts in the prop continue to be the lead in injuries described in mail I've received. A letter from James E. Steffens of Hendersonville, North Carolina, provided some insight into a new invention he's developed and is currently using to protect himself from spinning propellers during startups.
"After having been nicked by a spinning prop, I devised a unit that mounts on my field box. As you can see in the enclosed photo, I never have any part of my anatomy exposed to the propeller while starting the motor. Instead of pushing the starter onto the spinner, I push the spinner onto the starter. The spinner is engaged as long as the spinner is pressed into the starter cone. I have successfully used the unit for a year and a half and would never consider going back to starting the motor from the front of my plane. Not only is it safer, but much less cumbersome."
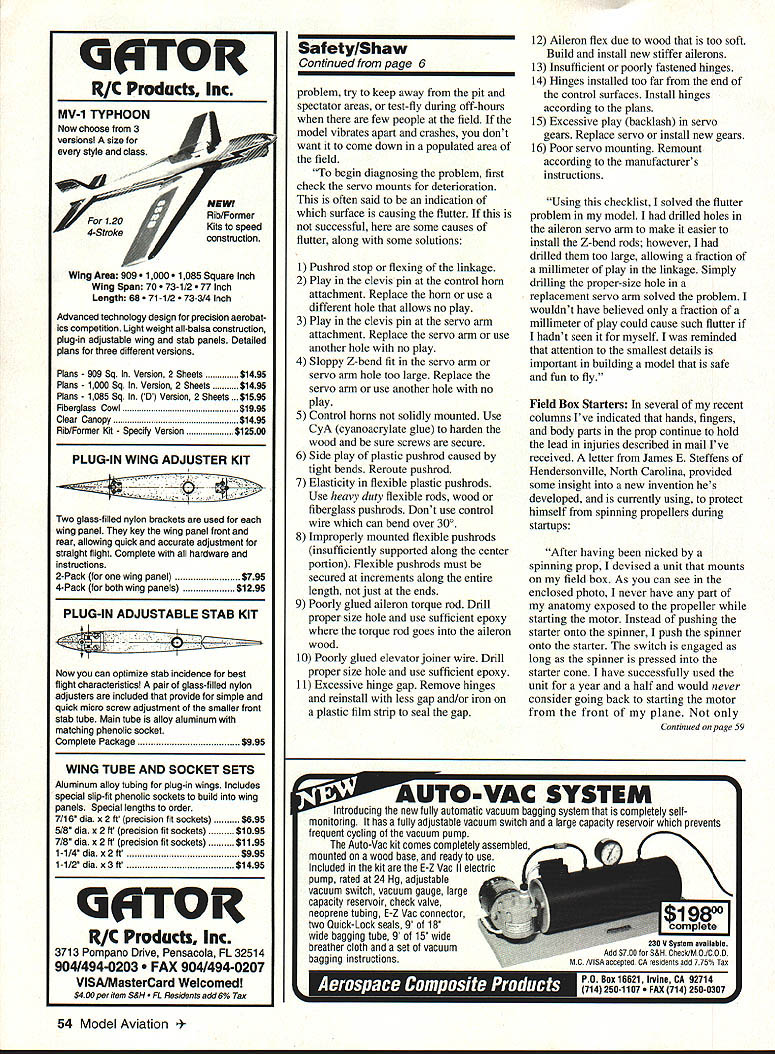
Coincidentally, only a week after having received James' letter, Bob Taylor of Gilbert, Arizona, sent a letter describing a similar invention that also mounts to a field box and is used to start aircraft. James' and Bob's inventions are almost identical and very practical. Since both have expressed a desire to market their inventions, and since I'm not sure if a similar piece of equipment exists, you may want to write to one of these gentlemen and request one for yourself:
- James E. Steffens, 6 Samara Dr., Hendersonville, NC 28739-7125.
- Bob Taylor, 809 S. Cancun Dr., Gilbert, AZ 85234.
Dos and Don'ts Around Engines
Hot off the press of the Bellevue R/C Flyers club is a newsletter forwarded to me by editor Darwin Evelsizer entitled The Transmitter. While scanning the pages I ran across an excellent column by Jules Hunkovick which provides some applicable dos and don'ts we should all consider each time we get ready to start a model engine.
- Don't try to start a flooded engine with your electric starter. Remove the glow plug, and with the fuel line disconnected, hit the engine with your starter for a few seconds to expel the excess fuel. Make sure you have the glow plug washer removed from the head so it won't pop out and smack you in the face.
- Don't make adjustments to the high- or low-speed needles while in front of the aircraft! Get behind the model to make all the adjustments after startup.
- Do start your engine at half throttle or less.
- Do perform frequent checks on engine mounts to ensure engine mounting screws are all tightened. A little vibration can cost you glow plugs, mufflers, and damage radios.
- Do check the propeller for damage after a rough landing or crash. If nothing else, at least wipe the dirt off the prop and from behind the spinner.
- Do ask for help if you are having problems! You would be surprised at how quickly someone else can recognize obvious problems that you may have overlooked.
As mentioned in my last column, my family and I have recently relocated to Orlando, Florida. The weather is great for year-round flying, and the fresh-squeezed orange juice is fantastic. My new address is:
Safety Comes First Gary A. Shaw 1013 Vernon Loop Oviedo, FL 32765
Until next month, may your air be smooth and your landings light! +
Transcribed from original scans by AI. Minor OCR errors may remain.

