
S.A.I. = 207
Dave Linstrum
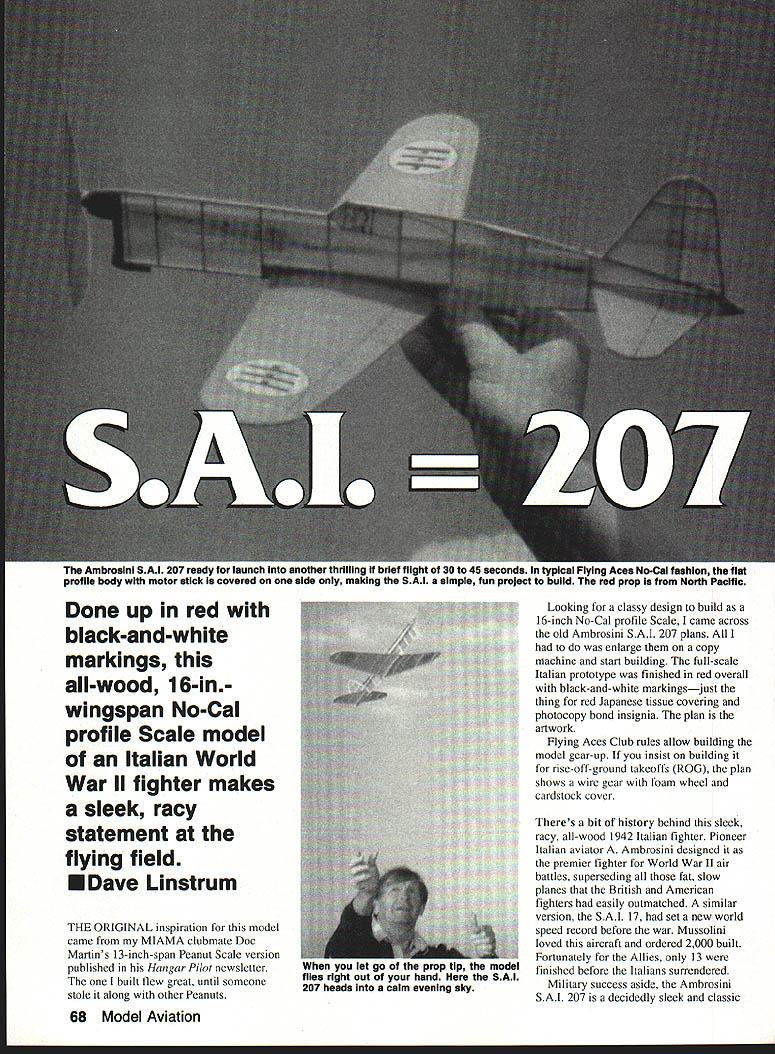
Done up in red with black-and-white markings, this all‑wood, 16‑in. wingspan No‑Cal profile scale model of an Italian World War II fighter makes a sleek, racy statement at the flying field.
Origin and history
The original inspiration for this model came from my Miami clubmate Doc Martin's 13‑inch‑span Peanut Scale version published in his Hangar Pilot newsletter. The one I built flew great until someone stole it along with other Peanuts.
Looking for a classy design to build as a 16‑inch No‑Cal profile scale, I came across the old Ambrosini S.A.I. 207 plans. All I had to do was enlarge them on a copy machine and start building. The full‑scale Italian prototype was finished in red overall with black‑and‑white markings—perfect for red Japanese tissue covering and photocopy bond insignia. The plan is the artwork.
There's a bit of history behind this sleek, all‑wood 1942 Italian fighter. Pioneer Italian aviator A. Ambrosini designed it as a premier fighter for World War II air battles. A similar version, the S.A.I. 17, had set a new world speed record before the war. Mussolini ordered 2,000 built; fortunately, only 13 were finished before the Italians surrendered.
One minor modeling problem: the nose is so long that I had to add a strip of solder at the tail to get the center of gravity right on the prototype No‑Cal. Nose‑heavy scale subjects are a rarity.
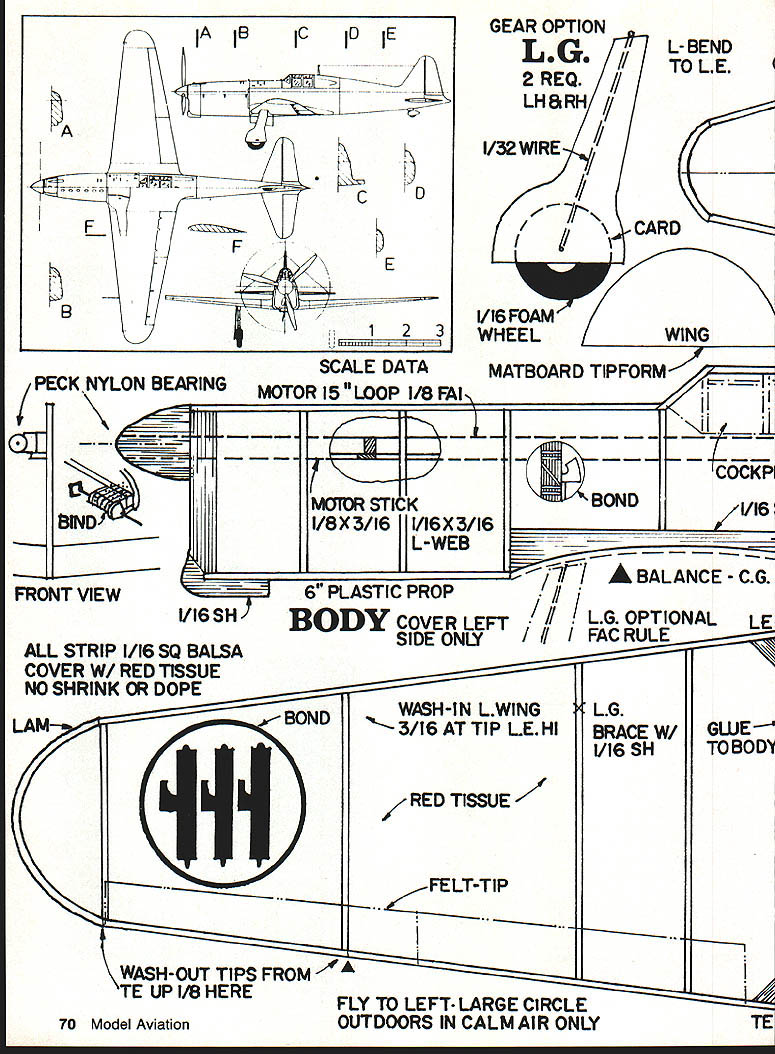
A three‑view is included on the full‑size plan for those who might want to build their own three‑dimensional flying scale version. Note the fuselage cross sections and details on the plan inset.
Construction
It would be wise to try a few simple models (AMA Delta Darts, Peck ROGs, etc.) before attempting the S.A.I. 207. Building with balsa sticks and covering with paper takes some skill.
Tools
- No. 11 X‑Acto or other craft knife
- Straight pins
- Small artist's brush
- Scissors
- Small needle‑nose pliers
- Flat building board at least 11 x 17 in.
- Straightedge and sanding tools (emery board nail file or similar)
Adhesives and finishes
- Thin UFO Hot Stuff (use the thick variety if you make crude joints)
- Cyanoacrylate (CA) for quick joints (Hot Stuff / CYA)
- Elmer's Craft Bond (thin 50% for covering) or thinned white glue for covering
- Waxed paper and clear tape
Materials
- Several feet of 1/8‑in. FAI gray rubber (13–15 in. loop recommended); if only FAI tan rubber is available, try 3/16 in. width
- Peck 5:1 cranked rubber winder
- 1/32 and 1/16 in. sheet balsa scraps
- 1/16‑sq. balsa strips (lots of)
- 1/8 x 3/16 in. hard balsa strip (motor stick)
- Scrap of 1/32 ply for rib pattern
- Scrap of artist's matboard for tip forms
- 1/32 in. wire (rear hook, optional gear wire)
- Photocopy bond for insignia
- Japanese tissue (red)
- Small plastic 6 in. prop and washer
- Small felt‑tip for marking balance and washout
- Clay or strip solder for tail ballast
Optional: landing gear
- Flying Aces Club rules allow building the model gear‑up.
- If you want rise‑off‑ground (ROG) takeoffs, the plan shows a wire gear with foam wheel and cardstock cover.
Scale data (from plan)
- Type: Outdoor/Indoor No‑Cal profile scale
- Wingspan: 16 inches
- Recommended rubber motor: 13–15 in. loop of 1/8‑in. FAI gray rubber
- Construction: Stick‑and‑tissue
- Covering/finish: Japanese tissue; photocopy bond insignia
- Motor stick: 1/8 x 3/16 in.; motor stick web: 1/16 x 3/16 L‑web
- Prop: 6 in. plastic prop (mount with small washer and bend L on prop end to fit hub)
- All strip: 1/16‑sq. balsa; cover with red tissue (no shrink or dope)
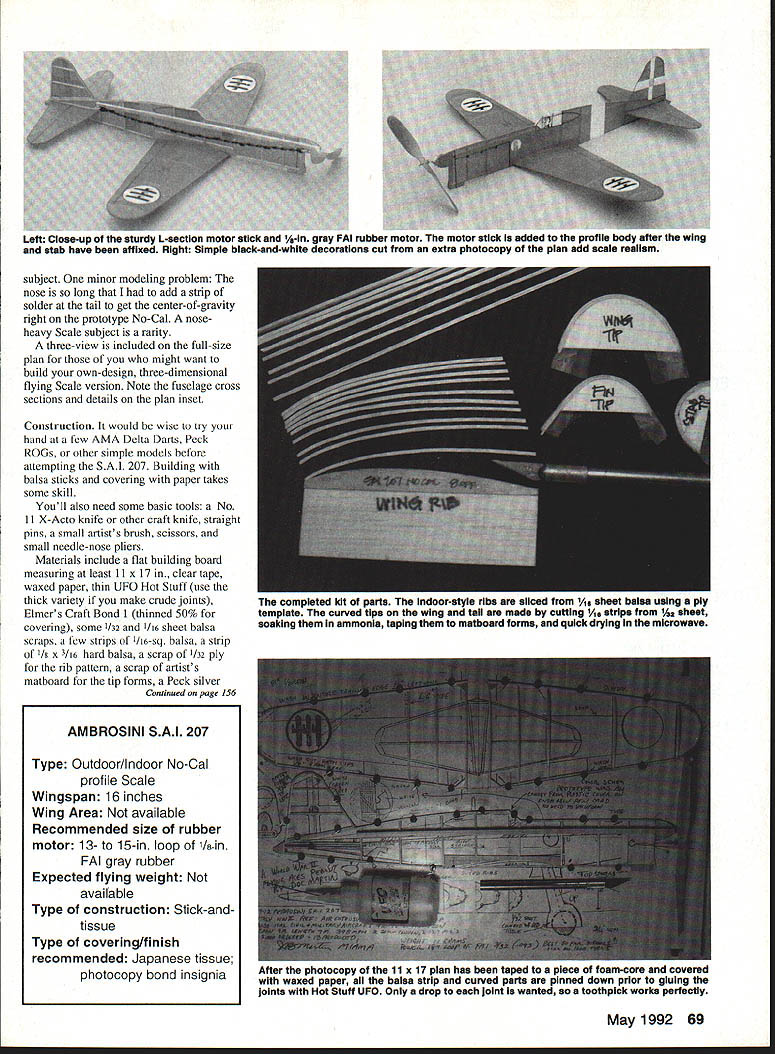
Building the kit of parts
- Make two 11 x 17 in. photocopies of the full‑size plan. Use the second copy for patterns and insignia.
- Glue the wing root rib pattern to 1/32 ply to make a template for slicing wing ribs.
- Cut ribs overlength from 1/16 sheet balsa.
- Slice along the curve, move the pattern down 1/16 in., slice again (hold the knife vertical) to form each rib.
- Ribs will be cut to fit when building the wing.
- Cut tip patterns (wing and tail) and glue them to artist's matboard to make tip forms.
- Cut some 5‑in. lengths of 1/32 sheet balsa into 1/16‑wide strips and pair them with the tip forms.
- Wax the edge of the strips to prevent glue bond to the form.
- Soak strips about a minute in household ammonia (do not inhale fumes); dry on paper towel.
- Tape pairs to form the curve, quick‑dry in the microwave on high for one minute.
- Laminate each tip by running a light bead of Hot Stuff between the two strips.
- Cut the motor stick to length and add a 1/16 L‑brace for stiffness.
- Use a 1/8‑in. piece of scrap balsa for the nose; glue the Peck nylon bearing to the front and the 1/32 wire rear hook to the rear (both on the right side of the stick where the brace is visible).
- Bind bearing and hook with thread and glue securely.
- Prepare the profile body.
- Cut the profile body parts from medium 1/16‑sq. balsa; cut small sheet balsa pieces to connect them using the second photocopy as pattern.
- Everything else is 1/16‑sq. balsa cut to tight butt joints.
- Pin the 1/16‑sq. strips to the plan in an X fashion (never pin through the strip).
- Use Hot Stuff applied with the end of a round toothpick for joints.
- Tail surfaces.
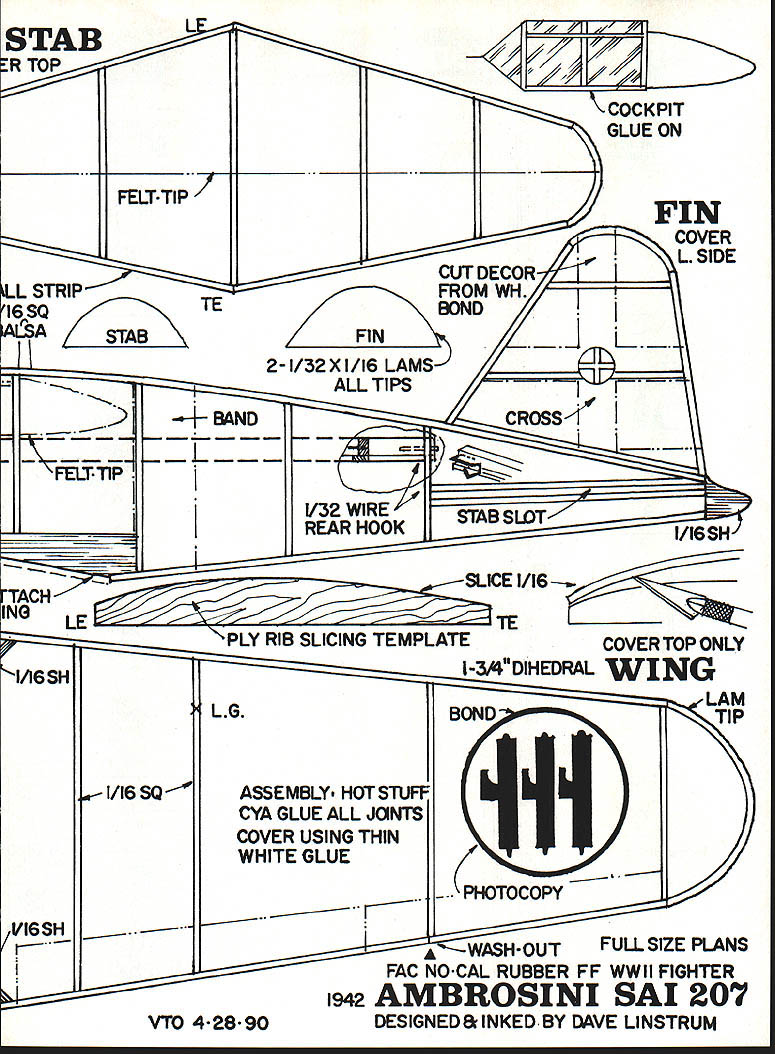
- The fin is built integrally with the body; cut the curved part to fit and butt join to 1/16‑sq. strip.
- Build the tapered stabilizer as you did the fin.
- Note: the motor stick is not attached to the body until after covering. Some builders attach the stick only to the front three uprights to allow some flex under full winds.
Wing assembly
- Pin down the leading and trailing edge strips (do not glue them at the center).
- Add the cut‑to‑fit tips.
- Glue the paired root ribs together and set aside for the root rib.
- Cut and fit remaining ribs, pinning them from the rear for a tight fit.
- Crack the trailing edge at the arrow marks and raise it off the plan by slipping a bit of 1/8‑in. sq. balsa under it at the tips to provide washout for stability. Glue all but the root ribs in place.
- Remove the right wing from the board and bevel the roots of the leading and trailing edges for dihedral.
- Raise the left leading edge off the board by 3/16 in. at the tip to create washin—critical for left‑turn climb stability.
- Glue the wing halves together with the right tip elevated 3 1/2 in. off the board. Glue the paired root ribs and gussets in place, aligning the rib halfway between the dihedral angles. Ensure the center joint is strong and well glued.
Assembly note: Hot Stuff/CYA works well for all joints; use thin white glue (thinned Craft Bond or Elmer's) for covering.
Covering and decoration
- Two ways to avoid warps:
- Preshrink the tissue by ironing it between moist paper towels; or
- Cover the model in a very dry room.
- Cut red tissue slightly oversize and adhere it with thinned Elmer's or Craft Bond to one side of the structure only. Use a thin bead of glue and pat the tissue in place.
- Use thinned Elmer's glue to affix the photocopied insignia (Roman wing symbol is black on white).
- Remove excess tissue with a sharp X‑Acto blade or carefully rub an emery board nail file at a 45° angle along the edge (sands off tissue border—be careful not to sand through the wood).
- Cover the left side of the profile body first, then add the motor stick to the right side, positioning it as shown on the plan.
- Cut away tissue from the stabilizer slot, slip in and align the stabilizer, and spot glue at the leading and trailing edges.
- Run glue along the root rib and install the wing, sighting from the front to assure level alignment.
Final assembly and finishing touches
- Add the prop shaft, small washer, and plastic prop. Bend an L in the end of the prop to make it fit the hub.
- Balance: you may need to add tail weight (clay or strip solder glued to the rear of the structure) to achieve the balance point shown on the plan. The nose can be heavy on this design—adjust accordingly.
- Landing gear: if using the optional gear, glue the gear brace with 1/16 shims to the body and glue the foam wheel/cardstock cover as shown on the plan.
Preparing to fly
- Fly outdoors only in calm air or fly indoors. This profile No‑Cal is sturdy but will not resist strong gusts.
- If the day is windy and you must transport the model, put it in a box or paper grocery sack to protect it en route.
- Wash‑out/washin notes:
- Wash‑in left wing 3/16 in. at tip leading edge (for climb stability).
- Wash‑out tips from trailing edge up 1/8 in. at specified locations.
- Flight trim: the model tends to fly left in a large circle outdoors in calm air—tune trim accordingly.
Plans and credits
- Full‑size plans included (three‑view and fuselage cross sections).
- FAC No‑Cal rubber free‑flight WWII fighter — 1942 Ambrosini S.A.I. 207
- Designed & inked by Dave Linstrum
- VTO 4‑28‑90
Have fun with your race plane turned fighter—and remember to fly in relatively calm conditions.
Transcribed from original scans by AI. Minor OCR errors may remain.

