
Simitar 61-P
By Bill Evans
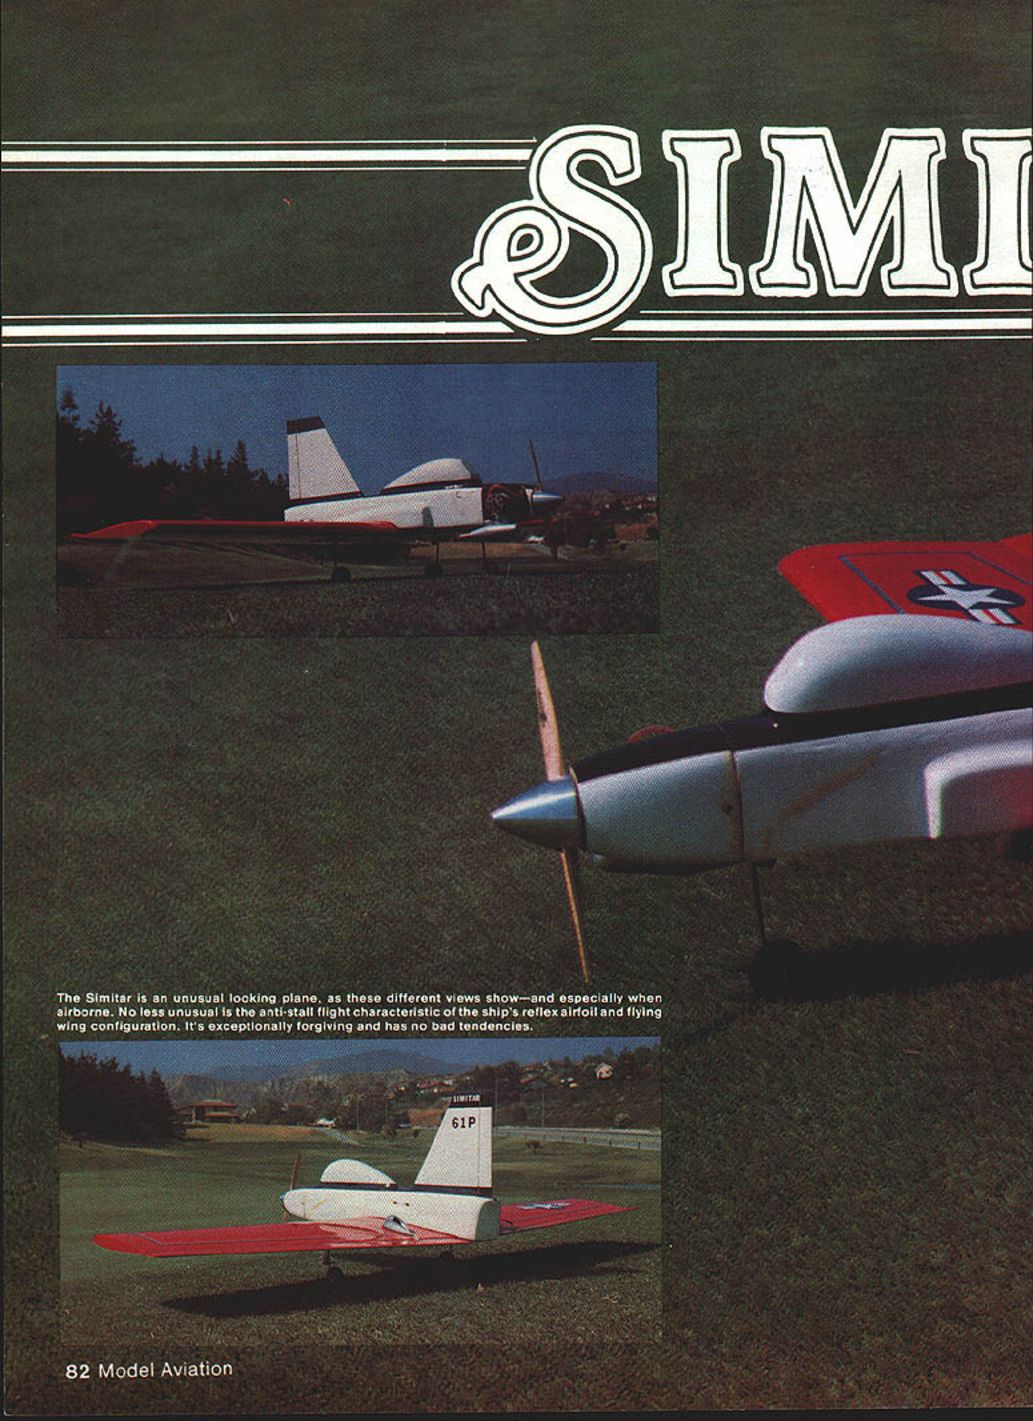
The Simitar is an unusual-looking airplane, as these different views show—and especially when airborne. No less unusual are the anti-stall flight characteristics of the ship's reflex airfoil and flying-wing configuration. It's exceptionally forgiving and has no bad tendencies.
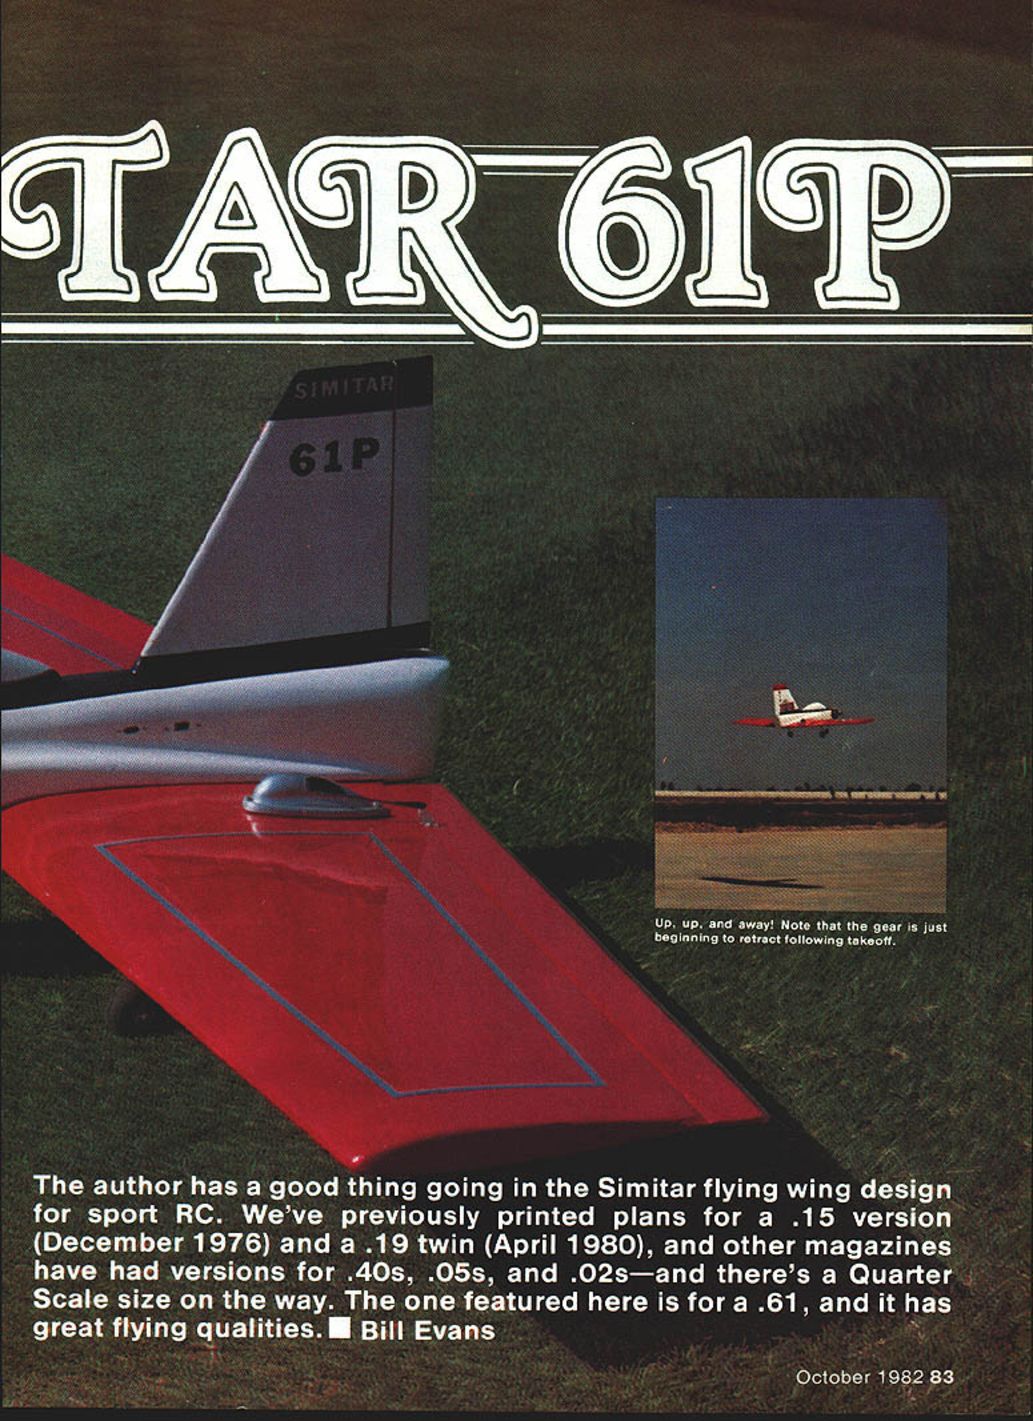
I have a good thing going in the Simitar flying-wing design for sport RC. We've previously printed plans for a .15 version (December 1976) and a .19 twin (April 1980), and other magazines have had versions for .40s, .05s, and .02s—and there's a Quarter Scale size on the way. The one featured here is for a .61, and it has great flying qualities.
Concept and performance
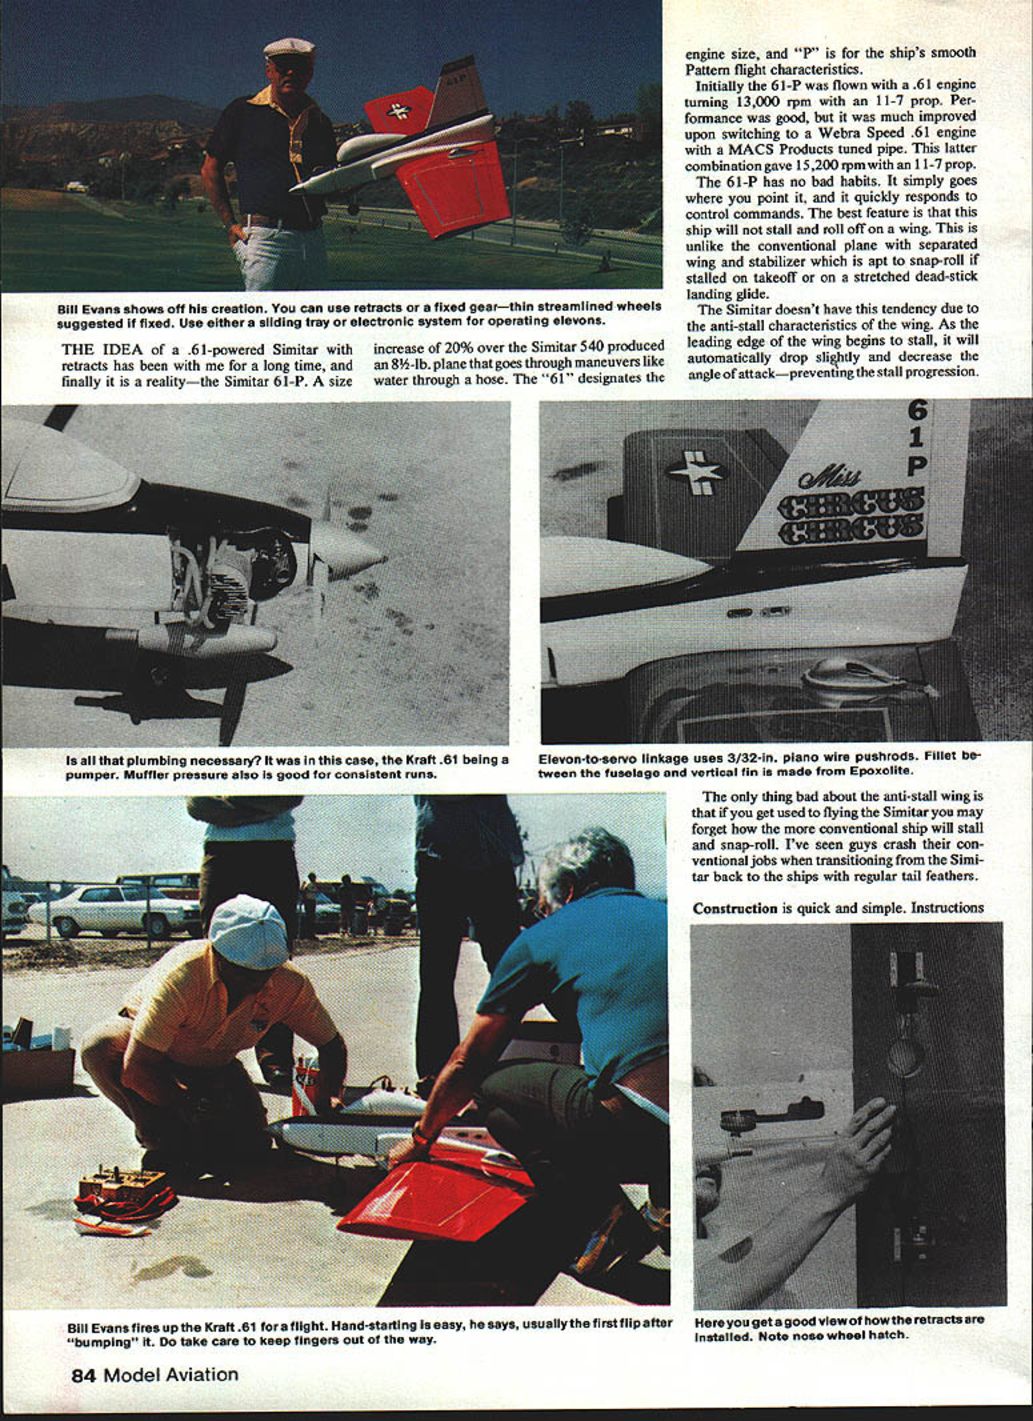
The idea of a .61-powered Simitar with retracts has been with me for a long time, and finally it is a reality—the Simitar 61-P. A size increase of 20% over the Simitar .540 produced an 8-1/2-lb. plane that goes through maneuvers like water through a hose. The "61" designates the engine size, and "P" is for the ship's smooth pattern-flight characteristics.
Initially the 61-P was flown with a .61 engine turning 13,000 rpm with an 11x7 prop. Performance was good, but it was much improved upon switching to a Webra Speed .61 engine with a MACS Products tuned pipe. This latter combination gave 15,200 rpm with an 11x7 prop.
The 61-P has no bad habits. It simply goes where you point it, and it quickly responds to control commands. The best feature is that this ship will not stall and roll off on a wing. This is unlike a conventional airplane with separated wing and stabilizer, which is apt to snap-roll if stalled on takeoff or on a stretched dead-stick landing glide.
The Simitar doesn't have this tendency due to the anti-stall characteristics of the wing. As the leading edge of the wing begins to stall, it will automatically drop slightly and decrease the angle of attack—preventing the stall progression.
The only drawback of the anti-stall wing is that if you get used to flying the Simitar you may forget how a more conventional ship will stall and snap-roll. I've seen pilots crash their conventional models when transitioning from the Simitar back to ships with regular tail feathers.
Construction
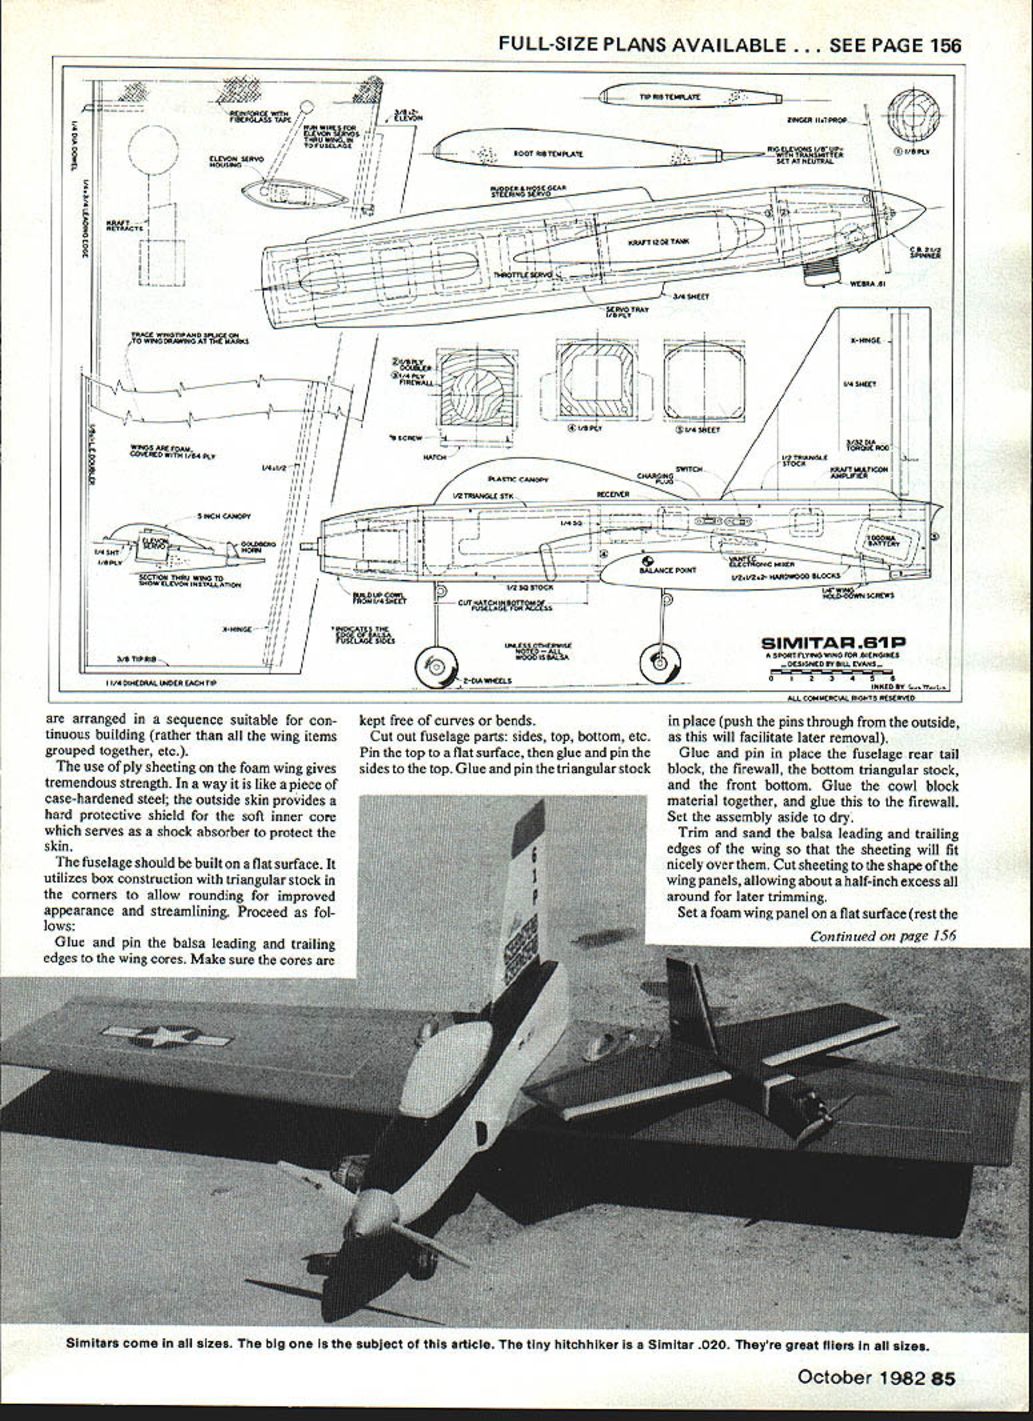
Construction is quick and simple. Instructions are arranged in a sequence suitable for continuous building (rather than grouping all the wing items together, etc.). The use of plywood sheeting on the foam wing gives tremendous strength. In a way it is like a piece of case-hardened steel: the outside skin provides a hard protective shield for the soft inner core, which serves as a shock absorber to protect the skin.
The fuselage should be built on a flat surface. It utilizes box construction with triangular stock in the corners to allow rounding for improved appearance and streamlining.
Building sequence (recommended)
- Glue and pin the balsa leading and trailing edges to the wing cores. Make sure the cores are kept free of curves or bends.
- Cut out fuselage parts: sides, top, bottom, etc.
- Pin the top to a flat surface, then glue and pin the sides to the top.
- Glue and pin the triangular stock in place (push the pins through from the outside, as this will facilitate later removal).
- Glue and pin in place the fuselage rear tail block, the firewall, the bottom triangular stock, and the front bottom.
- Glue the cowl block material together, and glue this to the firewall. Set the assembly aside to dry.
Trim and sand the balsa leading and trailing edges of the wing so that the sheeting will fit nicely over them. Cut sheeting to the shape of the wing panels, allowing about a 1/2-inch excess all around for later trimming.
Set a foam wing panel on a flat surface (rest the bottom side in the scrap-foam cradle). Vacuum the top surface of the foam core and the side of the sheeting that will mate to it. Apply wing sheeting tape such as Corefilm. Trim the tape around the wing edges. Remove the paper backing from the tape, and put the sheeting in place on the core. To avoid splinters, use a piece of foam sponge material for smoothing down the sheeting—don't use too much pressure.
Trim the plywood to the shape of the wing panel. Use the same technique for the remainder of the wing. Glue on the wing tip plates and the balsa leading-edge cap. Trim and sand the wing to shape. Join the wing panels with 5-minute epoxy. Don't attempt a perfect joint—it's better to leave a slight gap so that an I-beam of epoxy will be formed.
Locate and mark gear mounting blocks on the underside of the wing, then make cutouts and glue in the blocks with 5-minute epoxy. If you don't wish to use retracts, 2-inch streamlined wheels are recommended for minimum drag.
Cut the elevons from 1/16-inch sheet. Trim and sand them to shape. Attach the elevons to the wing with hinges (such as X-hinges).
Trim and sand the fuselage to shape. Add air scoops. Do final sanding, then trim and fit for engine, servo mounts, etc. Paint the model or cover it with a heat-shrink material.
Controls and rigging
- Use either a sliding-tray system or an electronic mixer to control the elevons. Both work fine.
- Install control linkage, making sure that the elevon control on the transmitter will make the left elevon go up and the right one go down (for proper aileron/elevator mixing).
- When installing the rudder, ensure the linkage is tight and unyielding to finger pressure. A loose rudder linkage can result in flutter.
- To test the rudder for proper tightness: turn on the transmitter and receiver, and push left and right on the trailing edge with your finger. There shouldn't be more than 1/16 inch of play.
- It is important that the elevons be set with about 1/8 inch of up-trim when the transmitter trim is neutral. This up-trim provides the necessary reflex airfoil action required for a flying wing.
Equipment and supplies
Simitar 61-P foam wing cores ($14.00), 1/64-inch plywood wing sheeting ($16.00), and epoxy/fiberglass fuselages ($55.00) are available from Soaring Research, 454 Wildrose Ln., Bishop, CA 93514. Phone: (714) 873-4932. Add $6.50 for shipping. California residents add 6% tax.
Flying
There are no special flying instructions. Just fly it as you would any normal aircraft. The differences are that the Simitar 61-P will be more responsive, and the visual appearance will take a flight or two to become used to.
Build the Simitar 61-P according to the plans, and it will be a rewarding project.
Transcribed from original scans by AI. Minor OCR errors may remain.

