
So You Crashed Your Model, Huh?
Rebuild It!
Bob Fiorenze
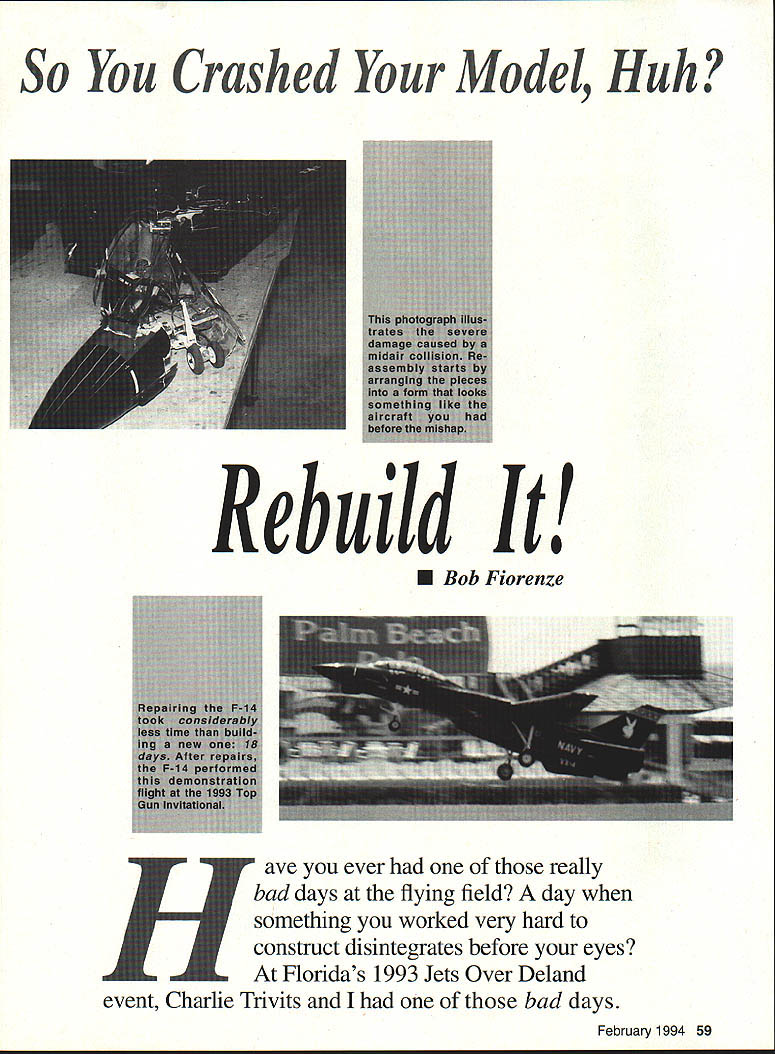
Have you ever had one of those really bad days at the flying field—when something you worked hard to construct disintegrates before your eyes? At Florida's 1993 Jets Over Deland event, Charlie Trivits and I had one of those days. While flying in formation, a midair collision cost Charlie's yellow twin‑engine F‑14 Tomcat its right vertical fin. The aircraft immediately lost yaw stability and went into a flat spin.
After helping Charlie land his model safely, I inspected my own damage. Much of the forward center section was wrecked, and at first glance you might think the airplane was headed for the garbage man. However, with a few simple techniques for repairing fiberglass aircraft, rebuilding can be faster and easier than constructing a new balsa‑framed model.
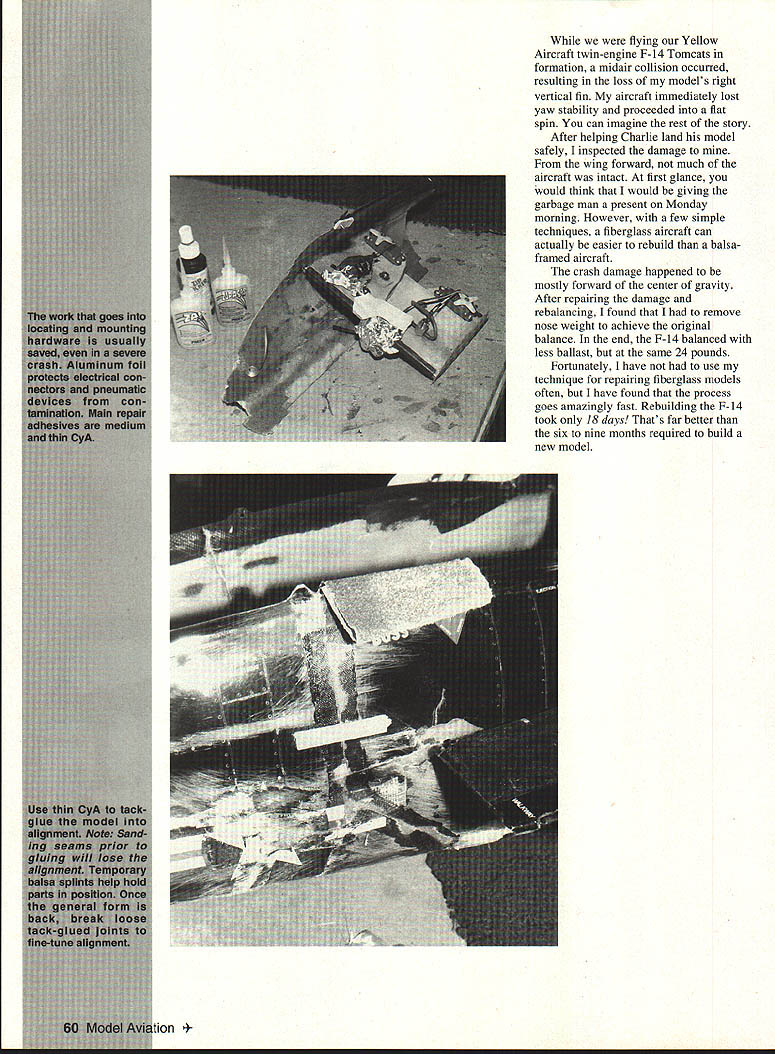
The crash damage was mostly forward of the center of gravity. After repairs and rebalancing I had to remove nose weight to return to the original balance; in the end the F‑14 balanced with about 24 ounces less ballast than before. Rebuilding the F‑14 took 18 days — far quicker than the six to nine months needed to build a new model. The process goes quickly, but take time to carefully restore the structure before doing cosmetic work.
Repair philosophy and initial steps
- Pick up every piece at the crash site. Reassemble the model the same way you originally put it together — like piecing a puzzle.
- Start at the rear‑most structural damage and work forward. Repair hairline cracks early; they become serious if left undiscovered.
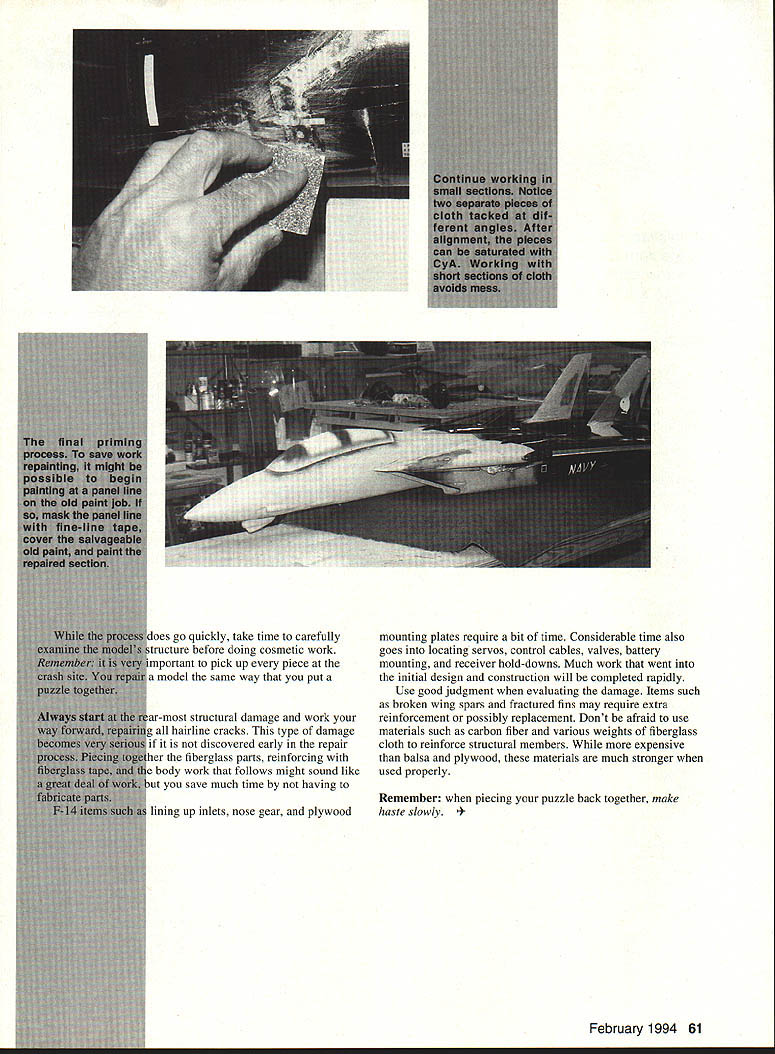
- Restore structure before finishing. Piecing fiberglass parts, reinforcing with fiberglass tape, and following with bodywork sounds like a lot, but it saves time compared with fabricating new parts.
Allow time to align critical components such as inlets, nose‑gear, and plywood mounting plates. Locating servos, control cables, valves, battery mounts, and receiver hold‑downs also takes considerable time. Much of the work from the initial design and construction can be completed rapidly during a rebuild.
Materials and reinforcement
Use good judgment when evaluating damage. Some items, such as broken wing spars or fractured fins, may require extra reinforcement or replacement. Don’t hesitate to use stronger materials when appropriate:
- Fiberglass cloth (various weights) for large area repairs and reinforcement.
- Carbon fiber (various weights) for spars and critically loaded members.
- Plywood or hardwood doublers where bolt or servo screws need secure backing.
These materials are more expensive than balsa or ordinary plywood, but when used properly they provide much greater strength and longevity.
Practical tips
- Inspect seams carefully — most structural damage shows there.
- Reinforce repaired joints with overlapping layers of cloth, not just surface filler.
- Rebalance after structural repairs; damage and repairs often change the weight distribution.
- Take photos during teardown and as you refit parts — they help with alignment and assembly.
- Allow proper cure times for resins and fillers; rushing cures can lead to failures later.
Remember: when piecing your puzzle back together, make haste slowly. Careful structural restoration now saves time and trouble later.
Transcribed from original scans by AI. Minor OCR errors may remain.

