


Sorta Kanary
By James G. Ruggiero
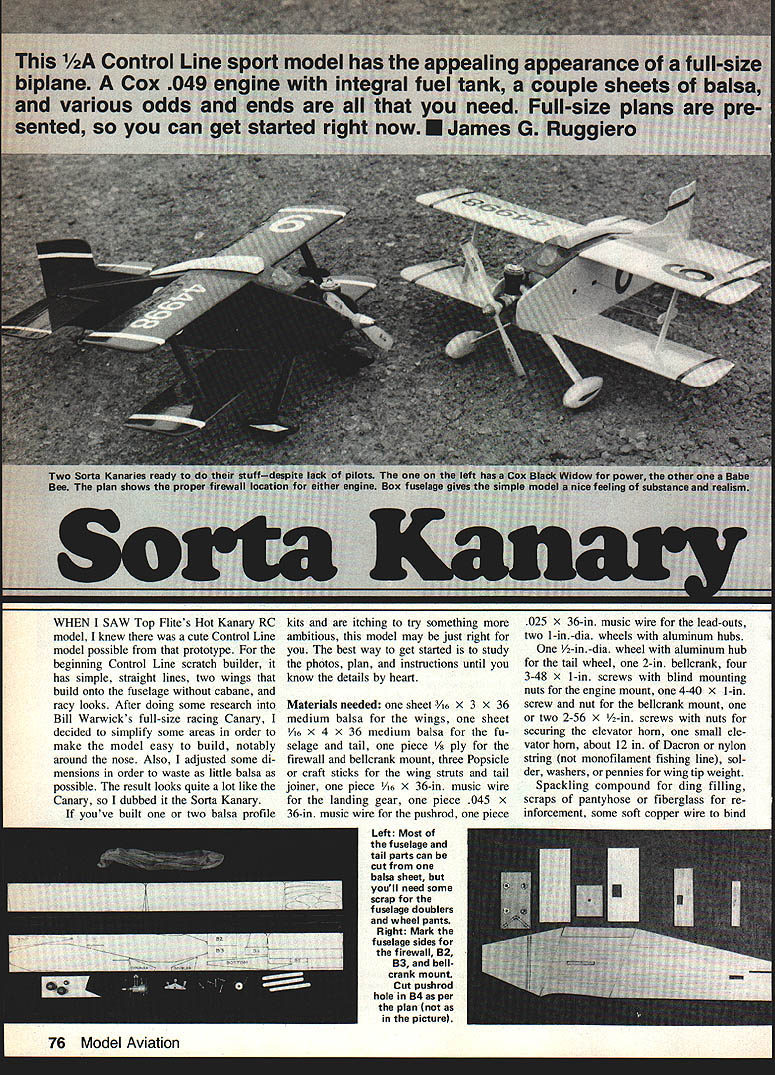
This 1/2A control-line sport model has the appealing appearance of a full-size biplane. A Cox .049 engine with integral fuel tank, a couple sheets of balsa, and various odds and ends are all you need. Full-size plans are presented so you can get started right now.
When I saw Top Flite's Hot Canary RC model, I knew a cute control-line model was possible from that prototype. For the beginning control-line scratch builder it has simple straight lines, two wings that build onto the fuselage without a cabane, and racy looks. After researching Bill Warwick's full-size racing Canary, I simplified some areas to make the model easy to build—notably around the nose—and adjusted dimensions to waste as little balsa as possible. The result looks a lot like the Canary, so I dubbed it the Sorta Kanary.
If you've built one or two balsa-profile kits and are itching to try something more ambitious, this model may be just right. Study the photos, plan, and instructions until you know the details by heart.
Materials needed
- 1 sheet 3/16 x 3 x 36 in medium balsa (wings)
- 1 sheet 1/16 x 4 x 36 in medium balsa (fuselage and tail)
- 1 piece 1/8 in plywood for firewall and bellcrank mount
- 3 Popsicle or craft sticks (wing struts and tail joiner)
- 1 piece 1/16-in. (≈0.062") x 36-in. music wire for landing gear
- 1 piece .045 x 36-in. music wire for pushrod
- 1 piece .025 x 36-in. music wire for lead-outs
- 2 wheels, 1 in. dia., aluminum hubs (main)
- 1 wheel, 1/2 in. dia., aluminum hub (tail)
- 2-in. bellcrank
- 4 × 3-48 x 1-in. screws with blind mounting nuts (engine mount)
- 1 × 4-40 x 1-in. screw and nut (bellcrank mount)
- 2 × 2-56 x 1/2-in. screws with nuts (elevator horn)
- 1 small elevator horn (about 1/2 in.)
- About 12 in. Dacron or nylon string (not monofilament)
- Solder washers, pennies, or a 1/4-in. steel washer (wing tip weight)
- Spackling compound for ding filling
- Scraps of pantyhose or fiberglass for reinforcement
- Soft copper wire to bind landing gear
- Glue of choice: slow-drying epoxy for firewall and doublers; fuel-proof epoxy where required; general wood glue
- Fuel-resistant finish (dope or polyurethane paint), clear and color
- Baby powder (for making sanding sealer)
- Pressure-stick vinyl trim and numbers (optional)
- Cox .049 engine (Babe Bee, Black Widow, Golden Bee, or similar)
- Brushes (including throwaways), pins, tape, sharp knife, spare blades
- Sandpaper: garnet or equivalent grits #80, #180, #320
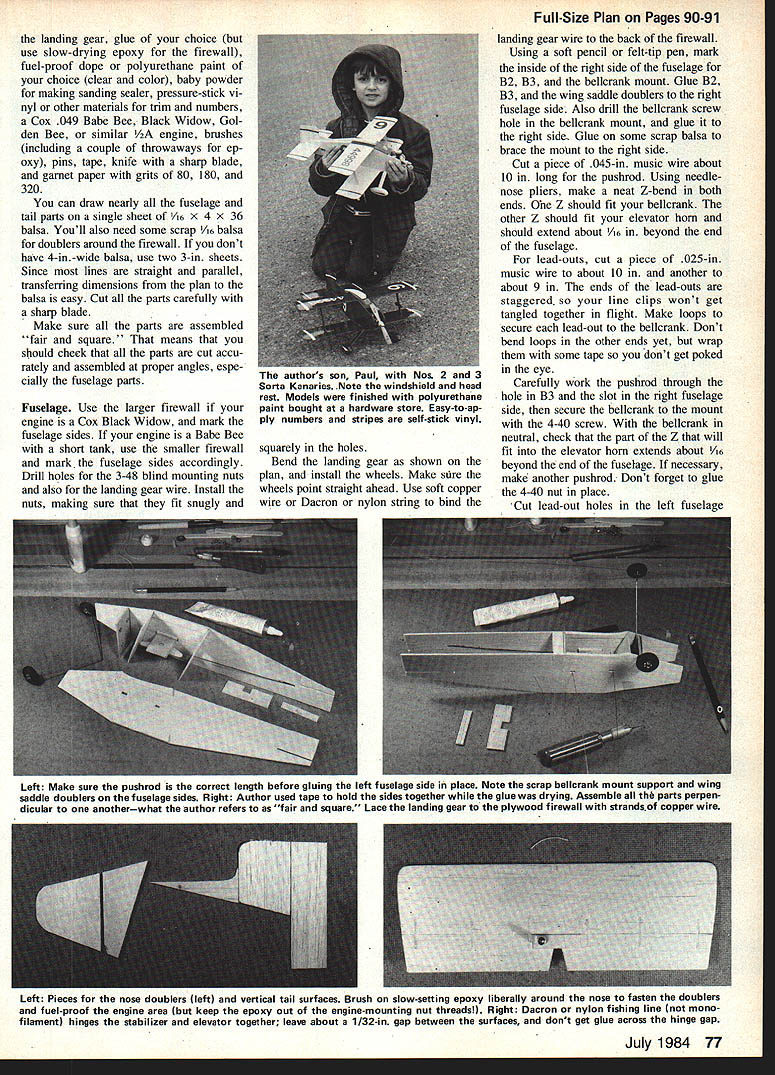
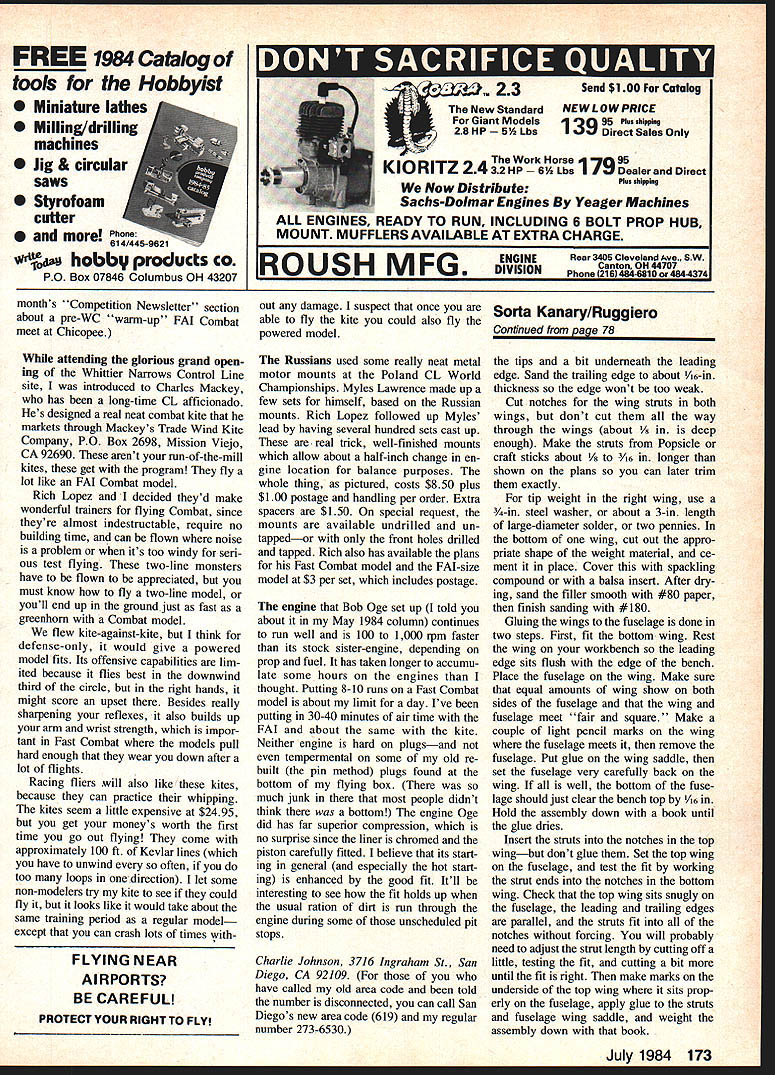
You can draw nearly all fuselage and tail parts on a single sheet 1/16 x 4 x 36 balsa. You will also need some scrap 1/16 balsa for firewall doublers. If you don't have 4-in.-wide balsa, use two 3-in. sheets. Since the lines are straight and parallel, transferring dimensions to balsa is easy. Cut parts carefully with a sharp blade and make sure parts are assembled fair and square.
Fuselage
- Select the correct firewall for your engine:
- Use the larger firewall for the Cox Black Widow; mark fuselage sides accordingly.
- For the Babe Bee (short tank) use the smaller firewall and mark fuselage sides accordingly.
- Drill holes for the 3-48 blind mounting nuts and for the landing-gear wire. Install the nuts, making sure they fit snugly and squarely in the holes.
- Bend the landing gear as shown on the plan and install wheels. Make sure wheels point straight ahead. Use soft copper wire and Dacron or nylon string to bind the landing-gear wire back to the firewall.
- Using a soft pencil or felt-tip pen, mark the inside of the right fuselage side for B2, B3, and the bellcrank mount. Glue B2, B3 and the wing-saddle doublers to the right fuselage side. Drill the bellcrank screw hole in the bellcrank mount and glue the mount to the right side. Glue scrap balsa braces to support the mount.
- Cut a piece of .045-in. music wire about 10 in. long for the pushrod. Using needle-nose pliers, make neat Z-bends on both ends. One Z should fit the bellcrank; the other should fit into the elevator horn and extend about 1/8 in. beyond the end of the fuselage.
- For the lead-outs, cut one piece of .025-in. music wire about 10 in. and another about 9 in. Stagger the ends so the line clips won't tangle in flight. Make loops to secure each lead-out to the bellcrank; do not bend the loops on the free ends yet—wrap them with tape to avoid poking yourself.
- Carefully work the pushrod through the hole in B3 and the slot in the right fuselage side, then secure the bellcrank to the mount with the 4-40 screw. With the bellcrank neutral, check that the Z-bend will fit the elevator horn and that the pushrod extends about 1/8 in. beyond the end of the fuselage. If necessary, make another pushrod. Glue the 4-40 nut in place.
- Cut lead-out holes in the left fuselage side. Make sure the pushrod is the correct length before gluing the left fuselage side in place.
- Glue the left side to B2, B3, and the bellcrank mount. Use scrap to secure the bellcrank mount to the left side. Glue the wing-saddle doublers to the left side.
- When dry, pull the rear ends of the fuselage together and glue them, ensuring the sides bend evenly so the fuselage is fair and square. Use tape or a clamp to hold ends while glue dries. Glue in B4 and B5, holding them snug with tape or pins.
- Cut fuselage doublers to fit around your firewall installation. Glue the firewall in place, making sure it faces straight ahead or a bit toward the outside of the flight circle.
- When the firewall is dry, use slow-drying epoxy to install the 3-48 nuts and the landing gear—avoid getting epoxy into the threaded holes. Paint the front and back of the firewall, the area inside the fuselage in front of B2, and all firewall doublers with epoxy. Use tape or pins to hold parts in place until epoxy sets.
- After wings, stabilizer, and controls are installed, trace the top and bottom fuselage panels onto 1/16 balsa. Cut them a bit oversize, trial-fit, trim, and glue in place. Use tape or pins to hold while glue dries.
Notes on setup
- Make sure the firewall and engine alignment are straight or slightly outward from the flight circle to help tracking.
- Check wheel tracking by rolling the model across a flat surface and adjust the tailwheel strut as needed.
Stabilizer and elevator
- As the plan shows, cut six shallow slits across the line that separates the stabilizer and elevator. Do not cut through to the other side—cut trenches wide enough for Dacron or nylon string.
- Use a Popsicle or craft stick for the elevator joiner. Drill holes in the joiner for elevator-horn screws, but don't install the horn yet.
- Cut six pieces of Dacron (or nylon) string to length and glue them into the slots in the stabilizer.
- Space the elevator about 1/32 in. from the stabilizer, then glue the string ends into the slots in the elevator. Avoid using too much glue or the hinge action will be stiff. Aim for about 30° of elevator movement each way.
- (This hinge method is simple and inexpensive; idea adapted from James M. Petro.)
- You may wish to use 3/32-in. balsa for tail surfaces instead of 1/16 in. for increased strength—note this may affect balance.
- Temporarily install the stabilizer/elevator into the fuselage slot. Attach the elevator horn to the pushrod and screw the elevator horn to the joiner. Work the controls to check for free movement. If the pushrod binds on the slot edges, open the slot with a knife and sandpaper or bend the pushrod slightly for clearance.
- Check for equal up and down travel. If travel is unequal, shift the stabilizer in its slot until movement is about equal. If no adjustment yields equal travel, you will need a new pushrod: remove the bellcrank, bend a new pushrod, reinstall, and glue B3 and B4 back together.
Wings
- Take care sanding the airfoil to the section shown on the plan. Use #80 sandpaper backed with a block and work evenly. Round the tips and a bit underneath the leading edge. Sand the trailing edge to about 1/16 in. thickness so it will not be too weak.
- Cut notches for the wing struts in both wings, but do not cut all the way through (about 1/8 in. deep is enough). Make the struts from Popsicle or craft sticks about 1/8 to 3/16 in. longer than shown on the plans so you can trim to fit later.
- For tip weight in the right wing, use a 1/4-in. steel washer, about a 3-in. length of large-diameter solder, or two pennies. In the bottom of the right wing, cut out the appropriate shape, cement the weight in place, and cover with spackling compound or a balsa insert. After drying, sand smooth with #80 then #180 paper.
- Glue the wings to the fuselage in two steps:
- Fit the bottom wing first. Rest the wing on the bench so the leading edge sits flush with the bench edge. Place the fuselage on the wing, check alignment, mark the wing where the fuselage meets it, remove the wing, apply glue to the wing saddle, and reset the fuselage. The bottom of the fuselage should clear the bench top by about 1/16 in. Hold with a book until dry.
- Insert the struts into the notches in the top wing but do not glue. Set the top wing on the fuselage and work the strut ends into the bottom-wing notches. Check that top and bottom struts are parallel, leading and trailing edges are parallel, and struts fit without forcing. Trim strut length as needed. Then mark the underside of the top wing where it sits on the fuselage, apply glue to the struts and wing saddle, and weight the assembly until dry.
Miscellaneous construction
- Bend the tailwheel strut from .045-in. wire and bind it to a piece of craft stick as shown on the plan. If necessary, drill the wheel hub to fit the axle. Glue the assembly to the fuselage. When dry, roll the model to check tracking and bend the strut if adjustment is needed. If a tailwheel is too much trouble, simply bend a hook in the end of the strut.
- Make the lead-out guide from a piece of craft stick and drill holes for the lead-outs. Slip the guide over the lead-outs and glue it to the left strut. Bend the ends of the lead-outs into loops, keeping the stagger as shown on the plan.
- Make wheel pants from wing scrap. Use a bit of 3/32-in. balsa for the pant sides. Cut slots in the sides for the wire to clear. Reinforce the pant-to-gear joint and the gear fairing with scraps of fiberglass or pantyhose. Use epoxy to glue the up-bent axle end to the inside of the pant—do not glue the wheel to the axle or pant. Paint the outside of the pants with slow-drying epoxy to add strength.
- Make the headrest from three laminations of 1/16 balsa. Sand smooth and round in cross section, then cement to the fuselage.
- Cut the windshield from thin acetate (about .020 in.). You can use curved acetate from discarded blister packs.
- Assemble fin and rudder fair and square on the fuselage. Set the rudder to point about 1/4 in. to the outside of the flight circle. Ensure generous clearance around the elevator joiner.
Finishing
- Carefully round the edges of the top and bottom fuselage by sanding—don't sand too far or through glue joints. Sand the entire model with #320 paper until surfaces are smooth, including epoxy around the firewall and wheel pants.
- For a fuel-resistant finish, polyurethane paint is recommended: it cleans up with ordinary thinner, won't warp thin balsa, and is less toxic than dope. It dries slower and colors may be less vivid.
- For a simple clear finish, apply two coats of clear, sanding between coats with #180. To make a sanding sealer, mix about two tablespoons of baby powder into four fluid ounces of clear and mix thoroughly. Brush on at least two coats, letting each dry before sanding and applying the next.
- Apply color finish with light strokes in the direction of flight. Light colors may require at least six coats for good coverage—sand between coats with #320. Apply two final coats without sanding and let dry thoroughly.
- Apply trim and numbers. If using pressure-sensitive vinyl, spray a little soapy water on the surface so you can slide the trim into exact position before it sets.
Flight setup reminders
- Check that the rudder points slightly outward from the flight circle (about 1/4 in.).
- Ensure the pushrod and lead-outs are free and do not bind.
- Balance the model with the recommended tip weight in the right wing and check overall CG before flying.
Enjoy building and flying your Sorta Kanary!
Transcribed from original scans by AI. Minor OCR errors may remain.

