
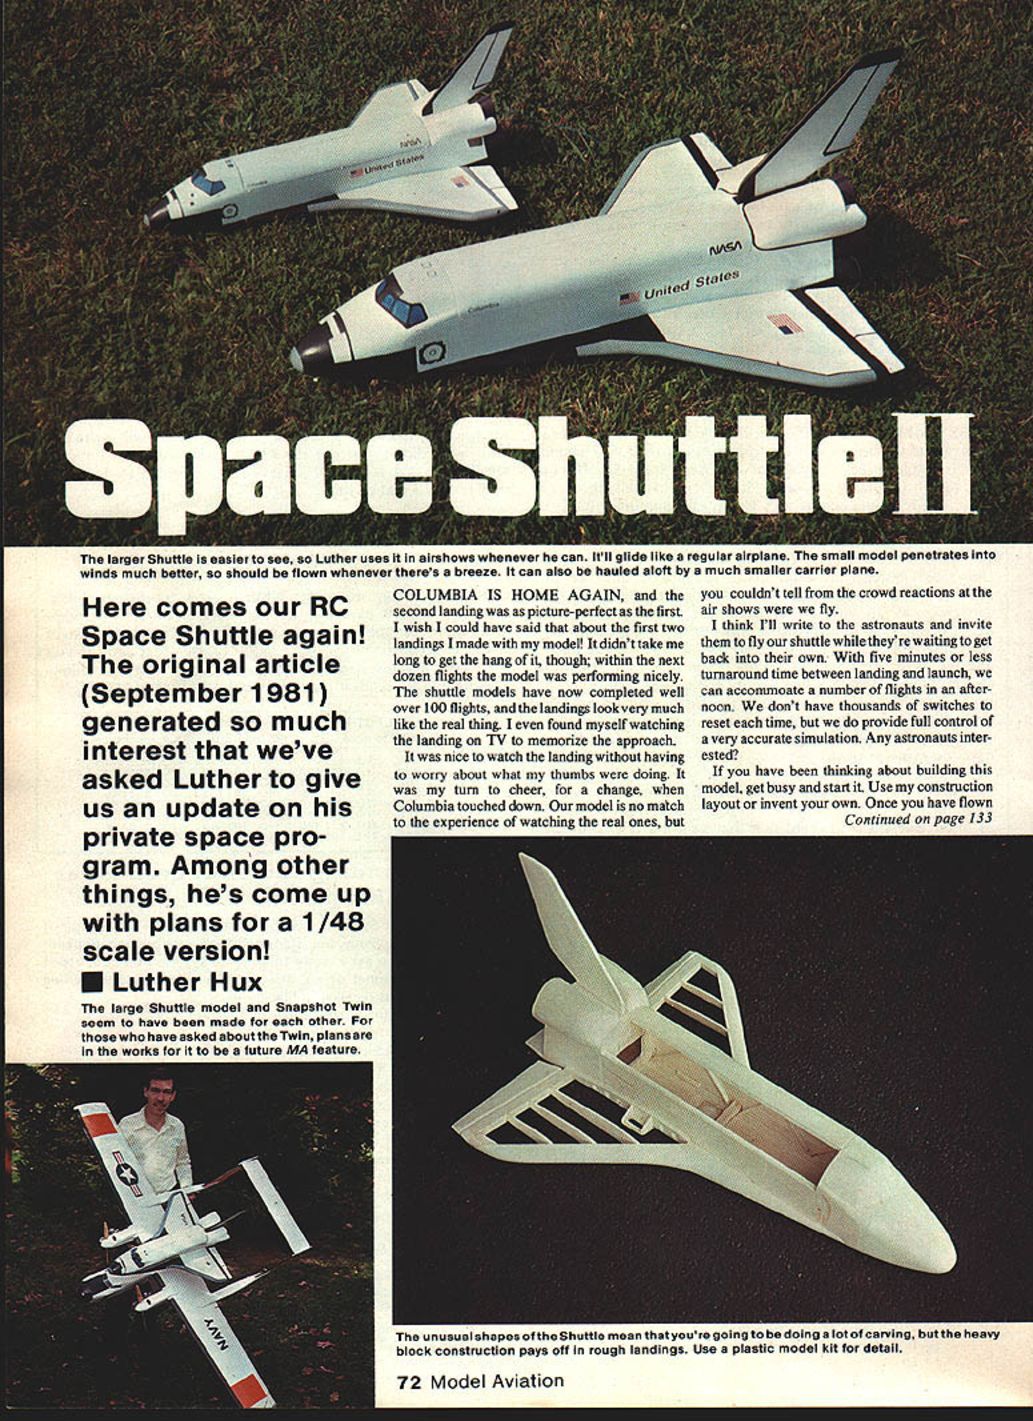

Space Shuttle II
Luther Hux
COLUMBIA IS HOME AGAIN, and the second landing was as picture-perfect as the first. I wish I could have said that about the first two landings I made with my model! It didn't take me long to get the hang of it, though; within the next dozen flights the model was performing nicely. The shuttle models have now completed well over 100 flights, and the landings look very much like the real thing. I even found myself watching the landing on TV to memorize the approach.
It was nice to watch the landing without having to worry about what my thumbs were doing. It was my turn to cheer, for a change, when Columbia touched down. Our model is no match for the experience of watching the real ones, but you couldn't tell from the crowd reactions at the air shows where we fly.
I think I'll write to the astronauts and invite them to fly our shuttle while they're waiting to get back into their own. With five minutes or less turnaround time between landing and launch, we can accommodate a number of flights in an afternoon. We don't have thousands of switches to reset each time, but we do provide full control of a very accurate simulation. Any astronauts interested?
If you have been thinking about building this model, get busy and start it. Use my construction layout or invent your own. Once you have flown the shuttle you'll find it to be one of the most interesting models around. One friend of mine has described the shuttle as a controlled falling body. That's pretty accurate. The design resists stalling, preferring a level sink. This larger lightweight model looks the most like it is actually flying rather than falling. Both this and the smaller one will immediately upright themselves from any attitude in flight.
Plans and Construction
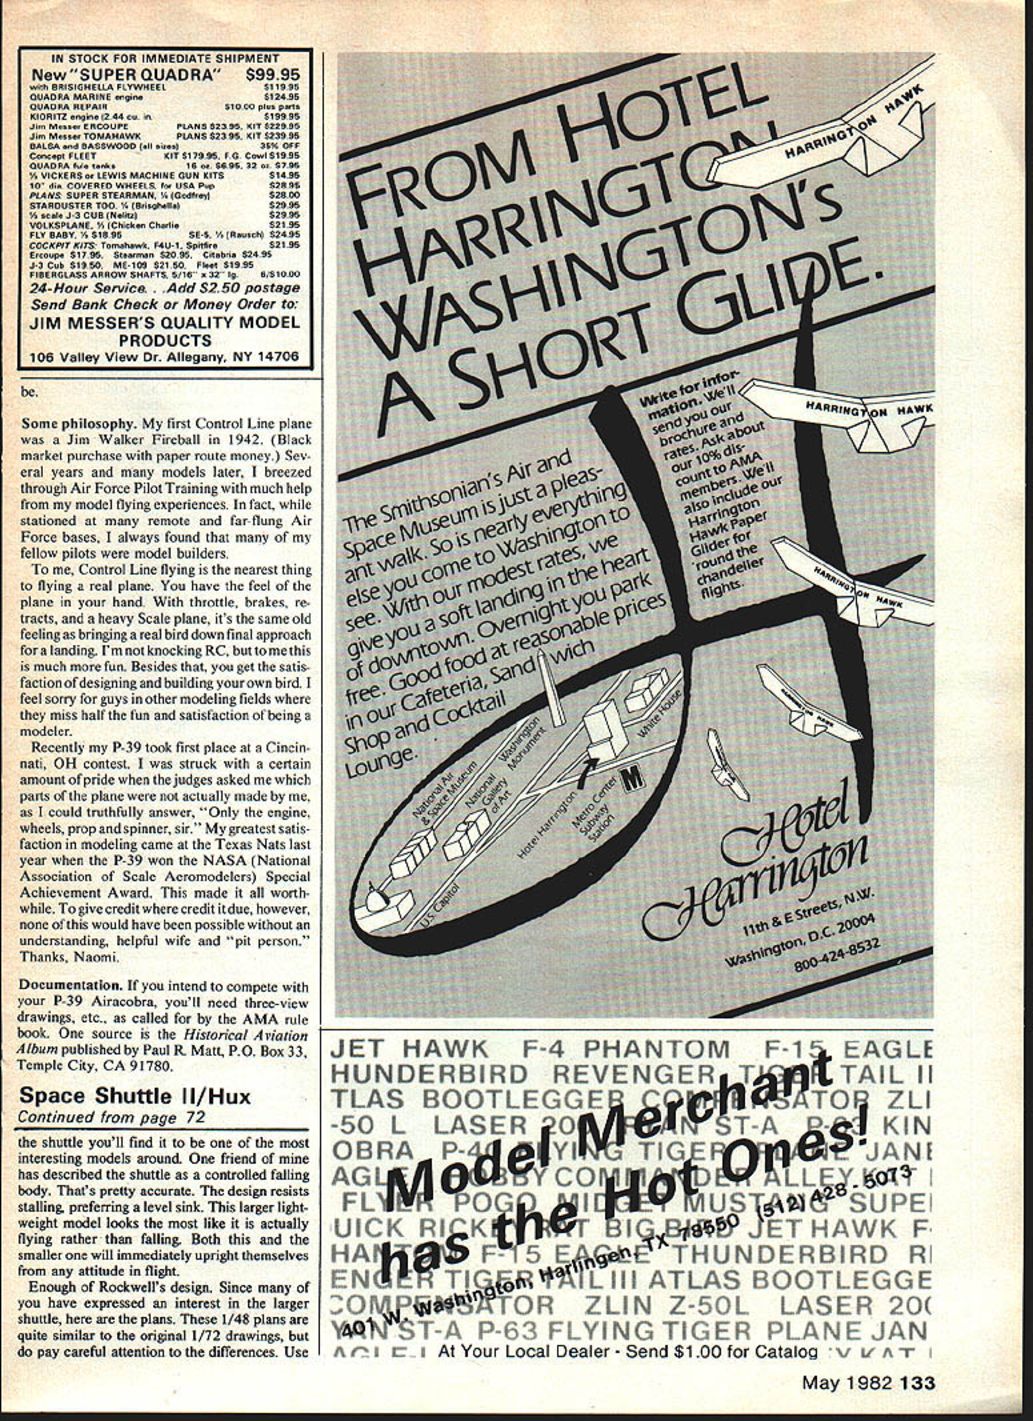
Since many of you have expressed an interest in the larger shuttle, here are the plans. These 1/48 plans are quite similar to the original 1/72 drawings, but do pay careful attention to the differences. Use the heavy block construction — it pays off in rough landings. Use plastic model-kit detail where desired.
Refer to the story printed in the September 1981 issue, and substitute the dimensions on the new plan. The larger shuttle requires pre-shaping the 1/16" x 6" sheeting for the payload-bay doors and sides. This is a simple process. After wetting the sheeting, I placed it on a form and dried it with a heat gun. The pre-shaped sides are much easier to glue to the bulkheads. If you can't find a good form to shape the balsa against, try the edge of your bathtub.
On the larger model, the wing loading drops enough to use standard-size radio gear. It is also more forgiving of heavy-handed construction. I didn't hold back on the strength of the design. After one mid-air and one mid-tree incident with no damage, I'm glad it's as tough as it is. I recommend light balsa throughout, with the exception of the rudder (which should be medium hard). This will improve your chances of coming through a cartwheel landing; in a cartwheel the shuttle seems to roll around every axis at once.
If built to the suggested weight, the model can be slowed to a float in a light wind. Please don't do it in front of anyone, though, as it just doesn't look right; the shuttle should fly as if it weighed a dozen pounds. The model can dive as steeply as 45° and rotate to a relatively short landing at normal speed.
The vertical center of gravity (CG) is lower on the larger shuttle, so less dihedral is needed. Please don't build the wing without dihedral; with a flat wing the model is likely to forget which way is up.
The landing gear is borrowed from gliders. A scale-like gear could have trouble on grass, and the nose gear could snag on separation from the carrier plane. I would like to use scale gear, but I haven't tested it yet.
Controls and Radio
I still prefer to use an elevon mixer, so I have included a drawing of my homebuilt unit. Note that the design makes the ailerons less effective than the elevator. The shuttle rolls easily enough without much aileron.
The receiver was moved to the top of the cockpit to get it as far away as possible from the receiver in the carrier plane. As we noted in the Letters column in the October 1981 issue, if the two receivers are too close they can interfere with each other, no matter what frequencies they are on.
I still fly the small shuttle at air shows if it is windy and I need the heavier wing loading. At one show the wind was over 35 mph.
Finish and Graphics
The large shuttle is covered with white Permagloss Coverite, and black trim is done with satin Varathane paint. The Permagloss was washed with alcohol before painting. (Editor: Read the instructions that came with Coverite before applying paint. DRP) The decals were printed on a white trim sheet using a silkscreen. Graphics are provided to aid in making your own screen. The graphics can be hand-lettered if you prefer; place the panel on a light table with the trim sheet over it.
Tips and Recommendations
- Use heavy block construction for durability in rough landings.
- Pre-shape 1/16" x 6" sheeting for payload-bay doors and sides by wetting, forming, and drying with a heat gun.
- Use light balsa throughout except for a medium-hard rudder.
- Include dihedral in the wing to ensure stability.
- Consider glider-style landing gear for grass operations and safer separation from the carrier plane.
- Move the shuttle receiver away from the carrier-plane receiver to minimize interference.
- Wash Permagloss Coverite with alcohol before painting; follow the manufacturer's instructions.
Closing
When you have completed your shuttle, write and let me know how it flies (in care of MA). I would very much like to see successful rocket-powered or engine-powered designs. Now, back to work on my next shuttle, which is about three feet long. Do you think NASA would forgive me if I have to tow it up with a quarter-scale J-3 Cub?
Transcribed from original scans by AI. Minor OCR errors may remain.

