

SPINNER
DESIGNED & DRAWN LEE SPECTOR ALL COMMERCIAL RIGHTS RESERVED
COMBINED PITCH & DIHEDRAL JIG. WITH ONE BLADE FLAT PLACE OPPOSITE TIP IN JIG (BEFORE INSTALLING TIP DOUBLER.)
ROTOR BEARING 3/32" I.D. BRASS OR ALUMINUM TUBING
EPOXY ROTOR SHAFT 1/32" O.D. WIRE
NOTE RT. THRUST
TOP VIEW
BUILD LIGHT!! USE LIGHT BALSA
NOTE DOUBLER (BOTTOM ONLY)
1/16" BODY
1/16" BOTTOM BODY
3/16" x 1/16" BOTTOM DOUBLER (BOTH SIDES)
1/16" RUDDER
1/32" WIRE — THIN EPOXY FILM TO HERE
1/32" LOOP 1/8" x 1/32" FOR RUBBER MOTOR (WITH BODY LEVEL)
NOTE USE OF PITCH DIHEDRAL JIG.
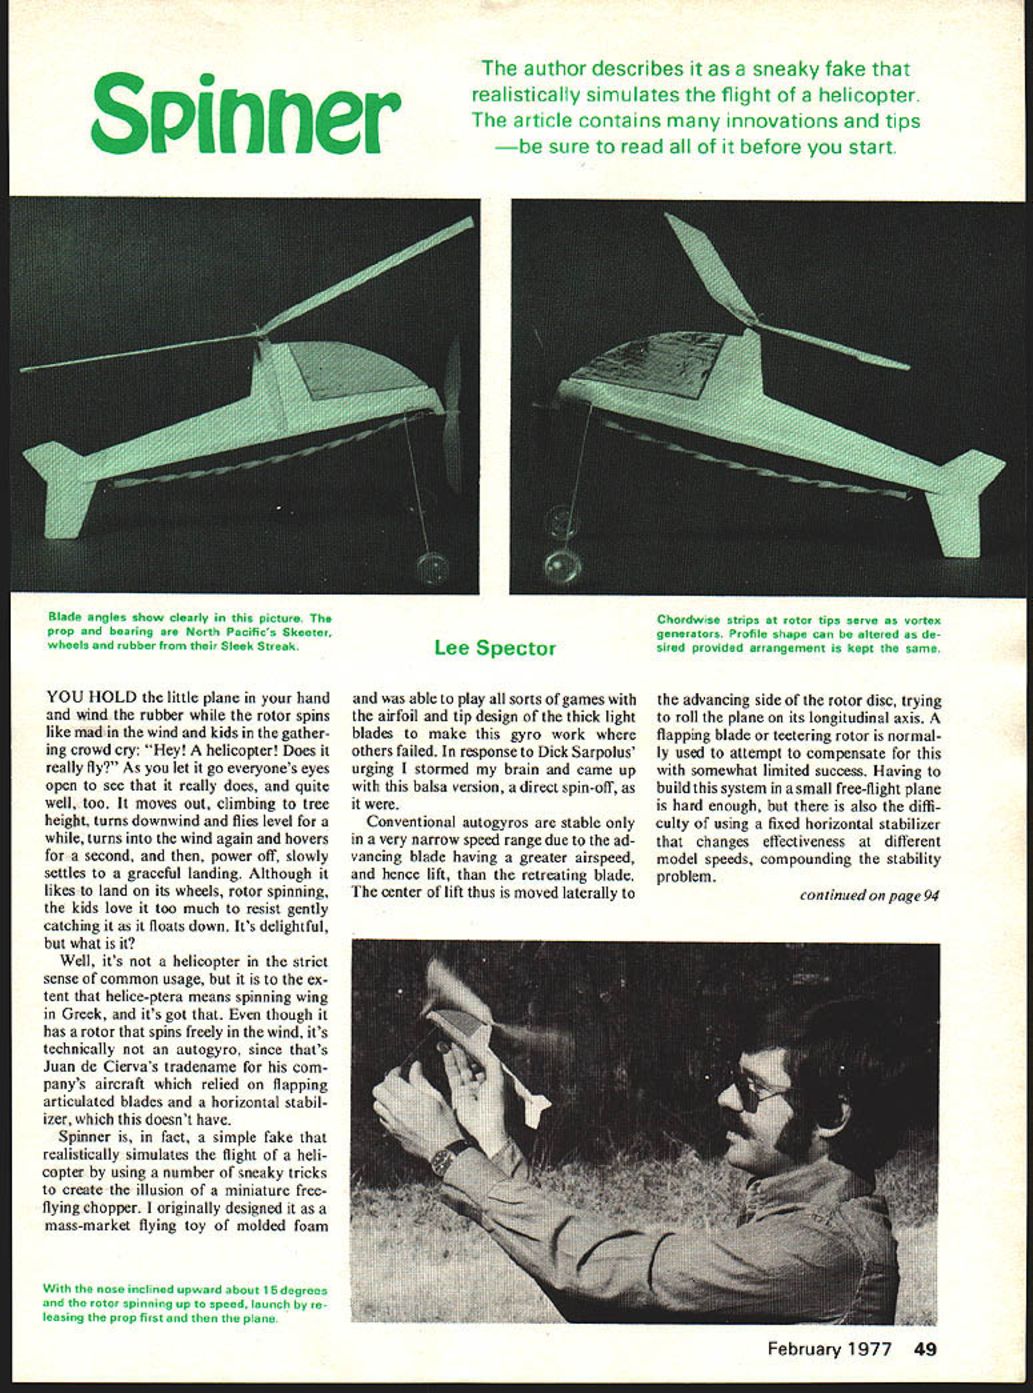
NOTE OVERLAP YOU HOLD the little plane in your hand and wind the rubber while the rotor spins like mad in the wind and kids in the gathering crowd cry: "Hey! A helicopter! Does it really fly?" As you let it go everyone's eyes open to see that it really does, and quite well, too. It moves out, climbing to tree height, turns downwind and flies level for a while, turns into the wind again and hovers for a second, and then, power off, slowly settles to a graceful landing. Although it likes to land on its wheels, rotor spinning, the kids love it too much to resist gently catching it as it floats down. It's delightful, but what is it?
Well, it's not a helicopter in the strict sense of common usage, but it is to the extent that helice-ptera means spinning wing in Greek, and it's got that. Even though it has a rotor that spins freely in the wind, it's technically not an autogyro, since that's Juan de Cierva's tradename for his company's aircraft which relied on flapping articulated blades and a horizontal stabilizer, which this doesn't have.
Spinner is, in fact, a simple fake that realistically simulates the flight of a helicopter by using a number of sneaky tricks to create the illusion of a miniature free-flying chopper. I originally designed it as a mass-market flying toy of molded foam and was able to play all sorts of games with the airfoil and tip design of the thick light blades to make this gyro work where others failed. In response to Dick Sarpolus' urging I stormed my brain and came up with this balsa version, a direct spin-off, as it were.
Conventional autogyros are stable only in a very narrow speed range due to the advancing blade having a greater airspeed, and hence lift, than the retreating blade. The center of lift thus is moved laterally to the advancing side of the rotor disc, trying to roll the plane on its longitudinal axis. A flapping blade or teetering rotor is normally used to attempt to compensate for this with somewhat limited success. Having to build this system in a small free-flight plane is hard enough, but there is also the difficulty of using a fixed horizontal stabilizer that changes effectiveness at different model speeds, compounding the stability problem.
Spinner
Spinner's design does away with the finickiness of trying to get a gyro to fly at a variety of speeds by the simple expedient of flying at only one speed (how's that for a cheap trick?). It uses four systematically related main functional design elements to achieve this and provide stability at that speed: 1) Constant speed rotor, 2) Balance of all forces at the singular flight speed, 3) Pendulum stability, and 4) Light weight.
A controlled amount of induced drag makes an almost constant-speed rotor that provides a lift/drag vector that tends to stay put and can be balanced by proper alignment of prop thrust, center of gravity, slipstream/rotor stream interaction, and rudder thrust. Perturbations in flying attitude are quickly damped by the pendulum action of the landing gear. The heavier this plane is, the less stable it is due to the inertial effects of momentary gain/loss of airspeed in up/downwind turns or launches that are too fast or slow. It will fly with much more weight but launch speed becomes highly critical and any wind will upset it. Try it yourself if you like by adding weight just rearward of the CG (to generate higher angle of attack and more lift) and watch the interesting variety of crashes as the plane destabilizes from what starts out as a smooth flight.
Construction
You will find this model very quick to make but a few procedures slightly different from convention should be followed or else it won't work right. This balsa version uses North Pacific's 4" dia. Skeeter prop and bearing (or equivalent if the size is the same and it is no heavier than can be compensated by bending the landing gear aft), and the wheels and rubber from the Sleek Streak (or equivalent; note that rubber size is fairly critical). Select very light straight sheets of 1/16" and 1/32" balsa (no denser than the Skeeter's wings). I used a contest grade 1/32" for the blades; it was soft and rigid and turned out to be slightly thicker than 1/32" (.020"); it was perfect. If you can't get light wood you'd best forget the whole thing and make a plastic model instead. You can use the Sleek Streak landing gear and simply bend the wheels forward and out, but you'll need 1/32" wire for the rotor shaft and you might as well use it to make the longer landing gear as it's that much more stable. Just follow the bends in the original but extend the legs.
The rotor-shaft bearing must be metal or nylon or else it will quickly wear out and allow the rotor disc to tilt out of specs. The indicated CG produces a nice climb but for either a real steep climb or flat penetration use a rearward or forward CG by building the rotor mast respectively forward or rearward 1/4" (redraw the fuselage). The fuselage is mostly cosmetic and can vary greatly in shape, provided the same thrust, rotor position and CG are used. Build your own favorite.
This design uses parameters resulting from about 30 hours of flight testing so following them closely should definitely put you in the ballpark. Make the rotor first. Cut out the blades and glue them together with a water-based glue, wetting the outside of the joint with water. Holding the joint close to a heat source such as a heat gun, twist negative pitch and dihedral into the blades (remember, the unpowered blades screw downward, just as a glider points down even when rising in a thermal). Use the jig on the plans to get the angles exact. To be sure the blades are straight along their diameter, sight along their respective leading edges at the opposite tips. Keep the joint hot and keep checking until it dries with the correct angles. Cut and glue the vortex generators to the bottom of the tips using minimum glue (the tips must be light; use minimal decorations if you must). Do not sand the rotor. Square edges are required and a rough surface actually helps.
Make the rotor shaft and bearing. Balance the inverted rotor on a pin, push it through and use a very small amount of quick epoxy to install the bearing. Before it gets rock hard, spin the rotor on its shaft and check that the bearing is exactly centered (both blades same pitch and dihedral). When it is, reinforce the top and bottom of the joint with more epoxy, feathering it out to the end of the blade hub taper (if the epoxy isn't faired in but ends abruptly, a potential stress line is created and the blade will break there if it hits).
To make the fuselage: cut out the pieces, glue the rudder to the body and the bottom doublers to both sides. Bend the proper angles into the rotor shaft, score the rotor mast doubler to accept it, and epoxy them to the right side of the body. Double check for correct angles. Notch the nose for the prop bearing. Epoxy the rubber hook sufficiently far back to hold the new rubber snug. Decorate the body sparingly with felt marker, trim Monokote, etc. Don't dope; keep it light (it will fly better and won't break when it hits things).
Trimming and Flying
Make sure the rotor bearing is absolutely free: whip the plane around pinwheel fashion until it is. This is a critical item. When sufficiently loose the rotor tip can wobble about 1/16" up and down. Be careful not to use an oil that will congeal (as in cold weather). A slightly tight bearing is evidenced by a spiral to the right in the glide.
Test glide indoors by spinning the rotor and running with the fuselage nose-up vertical and the rotor to the rear. With the rotor at maximum speed, release smoothly with the nose forward and the body parallel to the ground. The glide path should be 45°. Bend the landing gear forward or back to flatten or steepen the glide respectively. If it turns consistently right or left, respectively decrease or increase the rotor pitch. For example, increasing the (negative) pitch decreases the lift vector which is on the left (advancing) side of the disc and makes the plane tilt left. Avoid changing the shaft angles, but if you feel you must, remember that tilting the rotor forward with respect to the body is also tilting the body up and forward with respect to the rotor, which moves the CG forward and tilts the rotor forward with respect to the ground (down elevator), etc.
Once the glide is good, on a calm day wind in about ten knots and launch as in the glide with the rotor whizzing like mad. Use two hands at first, release the prop before the plane, and make sure the nose is inclined about 15° above the intended flight path. Trim as for the glide, but note that as the CG moves aft, the rotor tilts back, lift increases, and a right turn develops. Use left rudder to correct this if you want, but under no condition allow a left turn under power. Use right prop thrust to correct a slow roll to the left — in addition to flattening the pitch (but not so much as to stall the blades and slow the rotor) — and consider using less power in terms of a smaller rubber, flatter pitch prop (bend it with a steam kettle), or less turns. Gradually increase the power and learn to control the launch. Try different adjustments of the CG by bending the landing gear and try for different flight patterns (for instance, with the gear removed an 85° glide path provides a 12' right circle which will take it around the living room several times on the right number of turns).
Don't fly in more than about a 5–10 mph wind, and in which case simply release the plane without running and throwing or else the airspeed will be too great. After a bit of practice you can throw the plane up, launch crosswind, catch, etc. To ROG get the rotor spinning by itself in the wind and let it go off a car top. If it isn't spinning fast it won't fly. Windless and indoor ROG's are possible if you can get the rotor going fast enough. A doubly disengaging rubberband suitably hooked and wound around the hub and stretched to the rudder can also be used to ground spin up the rotor: it twirls and releases the hub and shoots rearward off the rudder. A simple spin-up device for hand launches is a 3/4"-dia. knurled balsa or foam ring extending about 1/4" below the hub which the index finger strikes rearward on the right side. Let us know if anyone succeeds in either doing loops or exceeding 1 min. (thermal OK). Have fun.
Transcribed from original scans by AI. Minor OCR errors may remain.

