
Straight-up
Joe Mekina
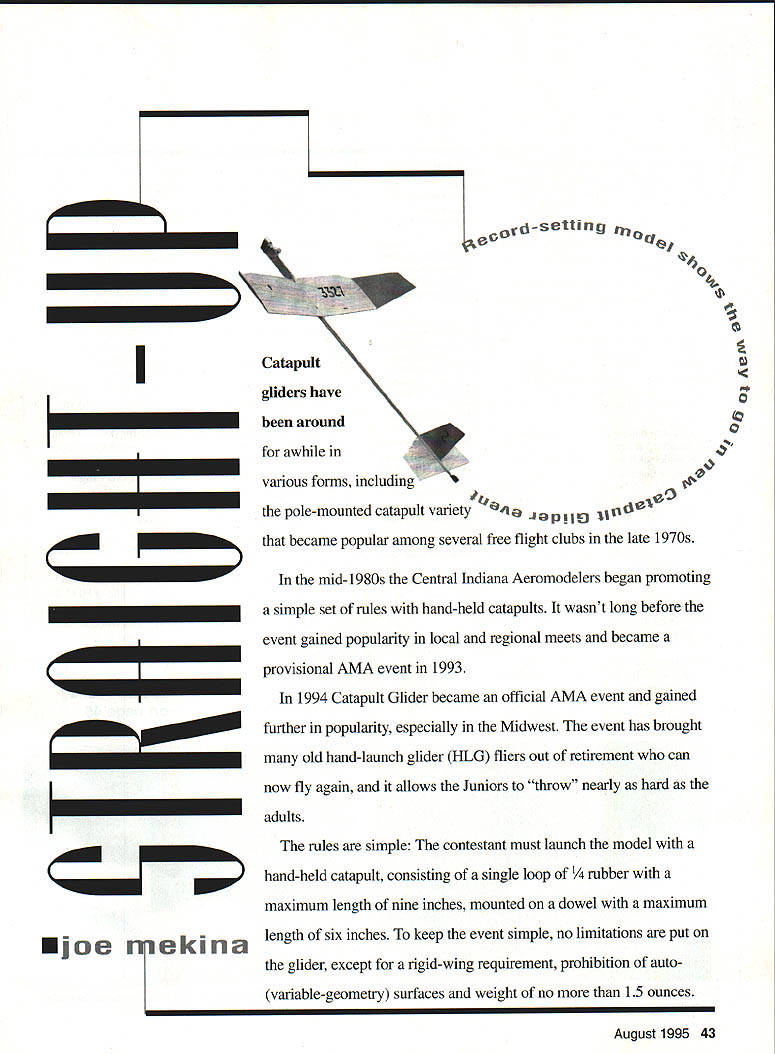
Catapult gliders have been around for a while in various forms, including the pole-mounted catapult variety that became popular among several free flight clubs in the late 1970s.
In the mid-1980s the Central Indiana Aeromodelers began promoting a simple set of rules with hand-held catapults. The event gained popularity in local and regional meets and became a provisional AMA event in 1993. In 1994 Catapult Glider became an official AMA event and gained further popularity, especially in the Midwest. The event has brought many old hand-launch glider (HLG) fliers out of retirement and allows Juniors to "throw" nearly as hard as the adults.
The rules are simple:
- Launch with a hand-held catapult consisting of a single loop of 1/4" rubber with a maximum loop length of nine inches, mounted on a dowel with a maximum length of six inches.
- Gliders must have rigid wings, no auto- (variable-geometry) surfaces, and a weight no more than 1.5 ounces.
- Six flights are scored, with a maximum flight time ("max") of two minutes per flight. All flights are scored regardless of duration.
- If the contestant scores three maxes in the six flights, he proceeds to the flyoff. Flyoff flights continue with the same two-minute max until a max is missed. All flights are scored, so consistency is crucial.
One way for a catapult glider to achieve its highest potential is to trim it for a nearly straight-up climb—hence this model's name. HLG fliers have long known of this technique, but since it's nearly impossible to throw an HLG straight up, incidence was usually added for a shallower launch. Because a hand-held catapult glider can be launched at a consistent angle, the straight-up trim technique can be fully exploited. Combined with simple construction, light weight, and a spin-tab dethermalizer (DT), Straight-Up is a very competitive model.
Construction
Attention to detail is the difference between an average glider and a great one.
Adhesive
- Thick cyanoacrylate (CyA) glue works well, though other types may be substituted.
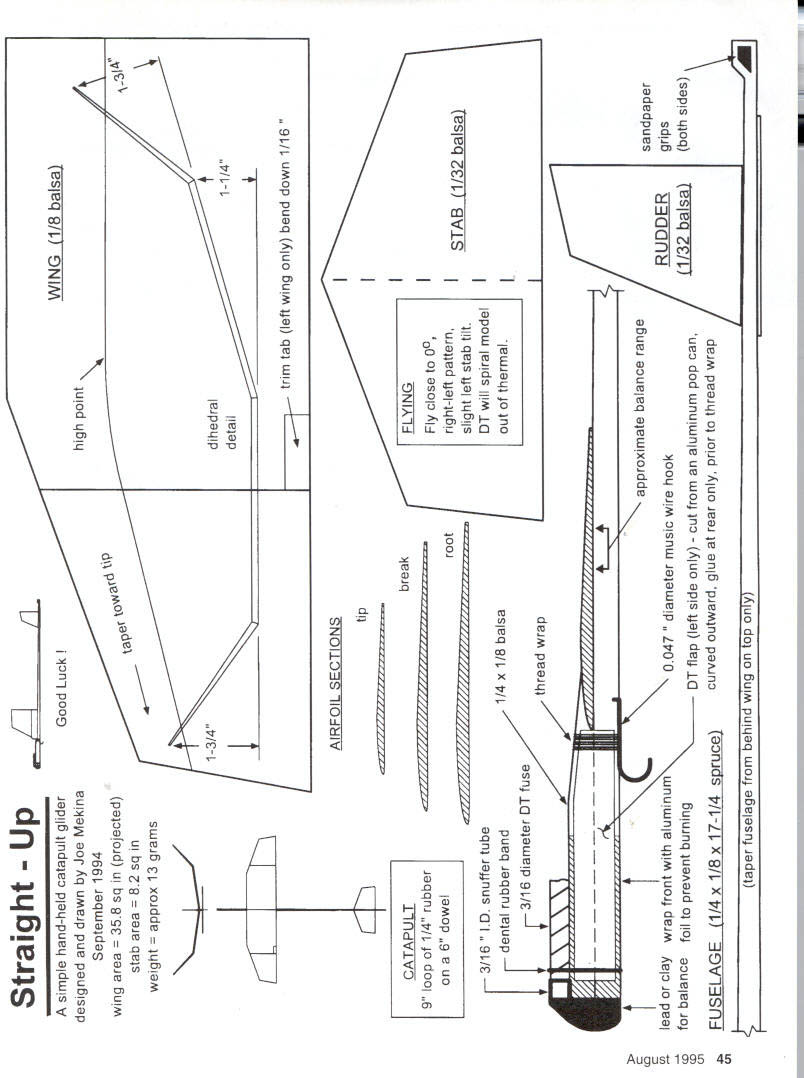
Wing
- Material: medium-weight (7-lb.) 1/8" balsa, preferably C-grain.
- Cut to the planform shown, then carve and sand the airfoil, being careful to maintain the high point indicated on the plan.
- Begin sanding with 180-grit, then 220, and finish with 400. After the wing is sanded to shape, cut the dihedral breaks and sand to the angles shown. Glue the dihedral joints and set aside for final assembly.
- The wing should taper toward the tip.
Airfoil sections
- Tip
- Break
- Root
Fuselage
- Material: straight piece of 1/8" x 1/4" spruce.
- Mark the wing and stabilizer positions on top and bottom.
- Taper the top of the fuselage from behind the wing only. Do not sand the areas marked for the wing and stab to help with alignment.
- The rear of the fuselage has a small finger grip to aid launching.
Stabilizer and Rudder
- Cut from light (5–7 lb.) 1/32" balsa, preferably C-grain.
- Round the edges and thin toward the tips, maintaining a symmetrical airfoil.
- Attention to detail here is important.
Hook
- Bend a piece of .047" music wire as shown on the plans. The hook must have a smooth radius so the catapult can disengage freely.
- Drill a small hole in the fuselage to anchor the hook, and cut a slot forward of the hole for the straight part of the hook to lay in.
- Do not glue the hook in place until final assembly.
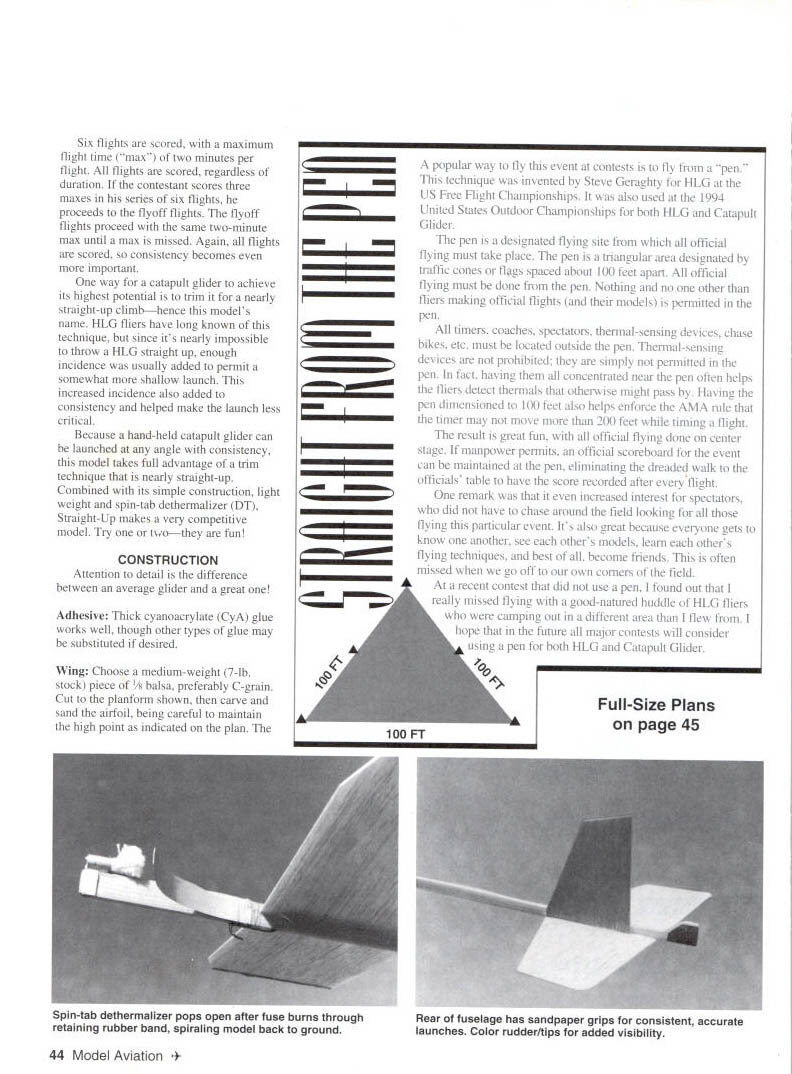
Dethermalizer (DT)
- Optional but highly recommended for contest flying.
- The DT is a simple fuse-operated spin tab cut from an aluminum soft-drink can. Cut the tab with scissors and set aside for final assembly.
- The snuffer tube is made from 3/16" I.D. aluminum tubing.
- Add the piece of 1/8" x 1/4" balsa to form the top front of the fuselage; this increases the size and effectiveness of the DT spin tab.
- Cover the front area with aluminum foil to prevent the DT fuse from burning the wood.
Final Assembly
- Glue the stab to the fuselage by placing it on the building surface and shimming the front of the fuselage with a scrap of 1/32" balsa (to maintain near-zero incidence).
- Glue the wing in place by placing blocks under each wing half to achieve a slight left stab tilt (left wing down). Keep the 1/32" scrap under the front of the fuselage during this process.
- Glue on the rudder, ensuring it is aligned as straight as possible.
- Add the catapult hook and dethermalizer spin tab, wrap with thread, and cover with glue.
- Glue small pieces of sandpaper to the finger grip to assist in holding the model during launch.
Finish
- Wing and tail surfaces: sanding sealer and nitrate dope.
- Wing: two coats of sealer thinned 50%.
- Tail: one coat of sealer thinned 50%.
- Apply two coats of clear nitrate dope (also thinned 50%) to the entire model.
- Always sand between coats with 500-grit sandpaper.
- Simpler option: lightly spray the entire model with clear lacquer (heavier but works).
- Add color sparingly—lightly spray tips with orange fluorescent paint. Too much color makes the model overweight.
Catapult
- Dowel: 1/2" diameter, six inches long.
- Slot: 1/4" deep slot cut in the top to hold the loop of 1/4" rubber.
- Rubber: single loop of 1/4" rubber, maximum loop length nine inches (tied with several knots to keep it from slipping through the slot).
- Note: Nine inches is often too long for many people due to arm length. Tuning the rubber length is important—7-1/2" works best for some fliers.
- Tilting the dowel forward about 20° during launch can give extra "stretch distance" and more clearance.
Flying
Flying site (the "pen")
- A popular contest technique is to fly from a "pen," invented by Steve Geraghty for HLG at the US Free Flight Championships.
- The pen is a triangular area designated by traffic cones or flags spaced about 100 feet apart. All official flying must be done from the pen.
- Only fliers making official flights (and their models) are permitted in the pen. All timers, coaches, spectators, thermal-sensing devices, chase bikes, etc., must be outside the pen.
- Thermal-sensing devices are not prohibited, but they are not permitted in the pen. Having them concentrated near the pen often helps fliers detect thermals.
- The 100-foot pen dimension helps enforce the AMA rule that a timer may not move more than 200 feet while timing a flight.
- If manpower permits, maintain an official scoreboard at the pen to avoid walking to the officials' table after each flight.
- The pen increases spectator interest and fosters camaraderie among fliers.
Preflight and trim
- Test-fly in calm air—preferably early morning or evening when thermal conditions are minimal and the DT is not needed.
- Balance the model with clay or lead at the indicated point.
- Test glide and set the rudder for a slight left turn as a starting point for catapult launches.
- Fly close to 0° (level) in pattern; use a slight right-left pattern. A slight right stall in DT will spiral the model out of a thermal.
- Adjust incidence and rudder to obtain a nearly straight-up climb with 1/2 to 3/4 turn to the top.
- Glide can be fine-tuned by adding or removing nose weight for a gentle glide.
- A small amount of wash-in may be necessary to keep the model from spiraling out of a thermal. If needed, cut a small tab in the left main panel, deflect about 1/16", and glue in place.
Launch
- Begin catapult launches at roughly an 80° launch angle, with a slight bank to the right and slightly less than a full pull.
- Once the model is close to final trim, always launch with a full pull to maintain consistent launch velocity.
- Launch consistency is crucial—always use the same pull once trim is finalized.
Contests and Thermal Flying
- The still-air capability of this model is about 60–70 seconds; thermals are needed to achieve max flights.
- Flying at the right time is critical. A great model in poor air can be beaten by a mediocre model in great air.
- Signs of thermals:
- Bubbles, fluff, streamers
- Marker models
- Temperature indicators
- Timing intervals between thermals
- Butterflies flying at 50 feet
- A hawk circling overhead
- Heat mirage on the horizon
- Intuition and experience
- Thermals vary; choose the right type for your glider. Don't be fooled by high-altitude thermals that models with greater climb capability can exploit.
- On a typical day, low-altitude thermal activity is best between about 11:00 a.m. and 2:30 p.m.; plan to fly during this time.
- Know your glider—its quirks, where it pulls out relative to launch, behavior in calm and windy conditions, and how it centers in lift. Practice is the best way to learn.
See you at the flying field.
Transcribed from original scans by AI. Minor OCR errors may remain.

