
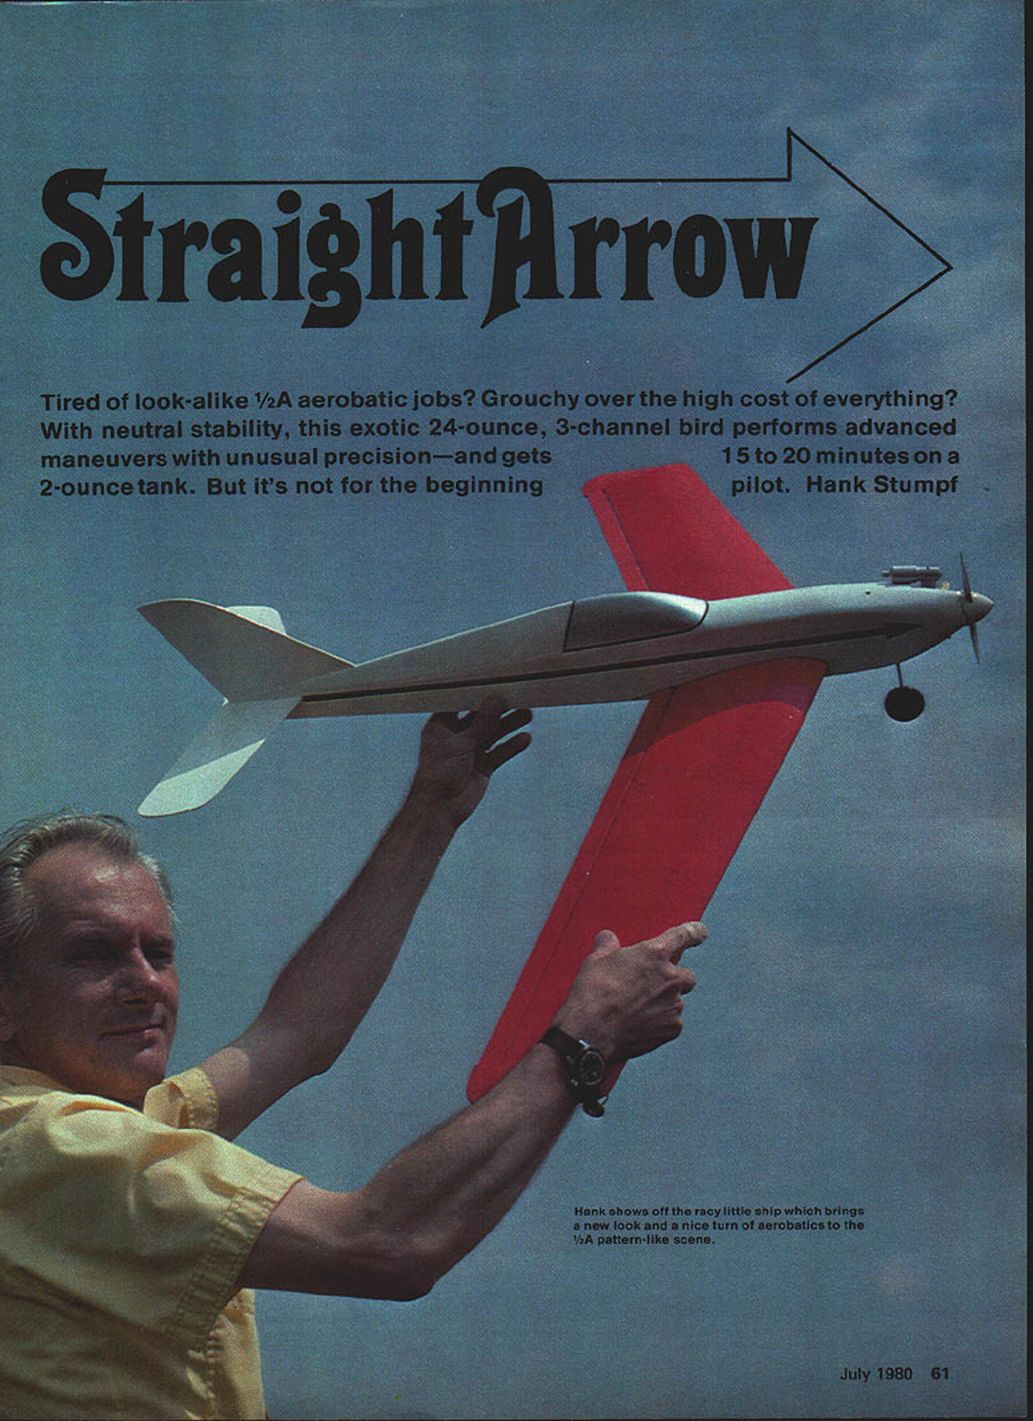
Straight Arrow
By Hank Stumpf
Tired of look-alike 1/2A aerobatic jobs? Grouchy over the high cost of everything? With neutral stability, this exotic 24-ounce, 3-channel bird performs advanced maneuvers with unusual precision—and gets 15 to 20 minutes on a 2-ounce tank. But it's not for the beginning pilot.
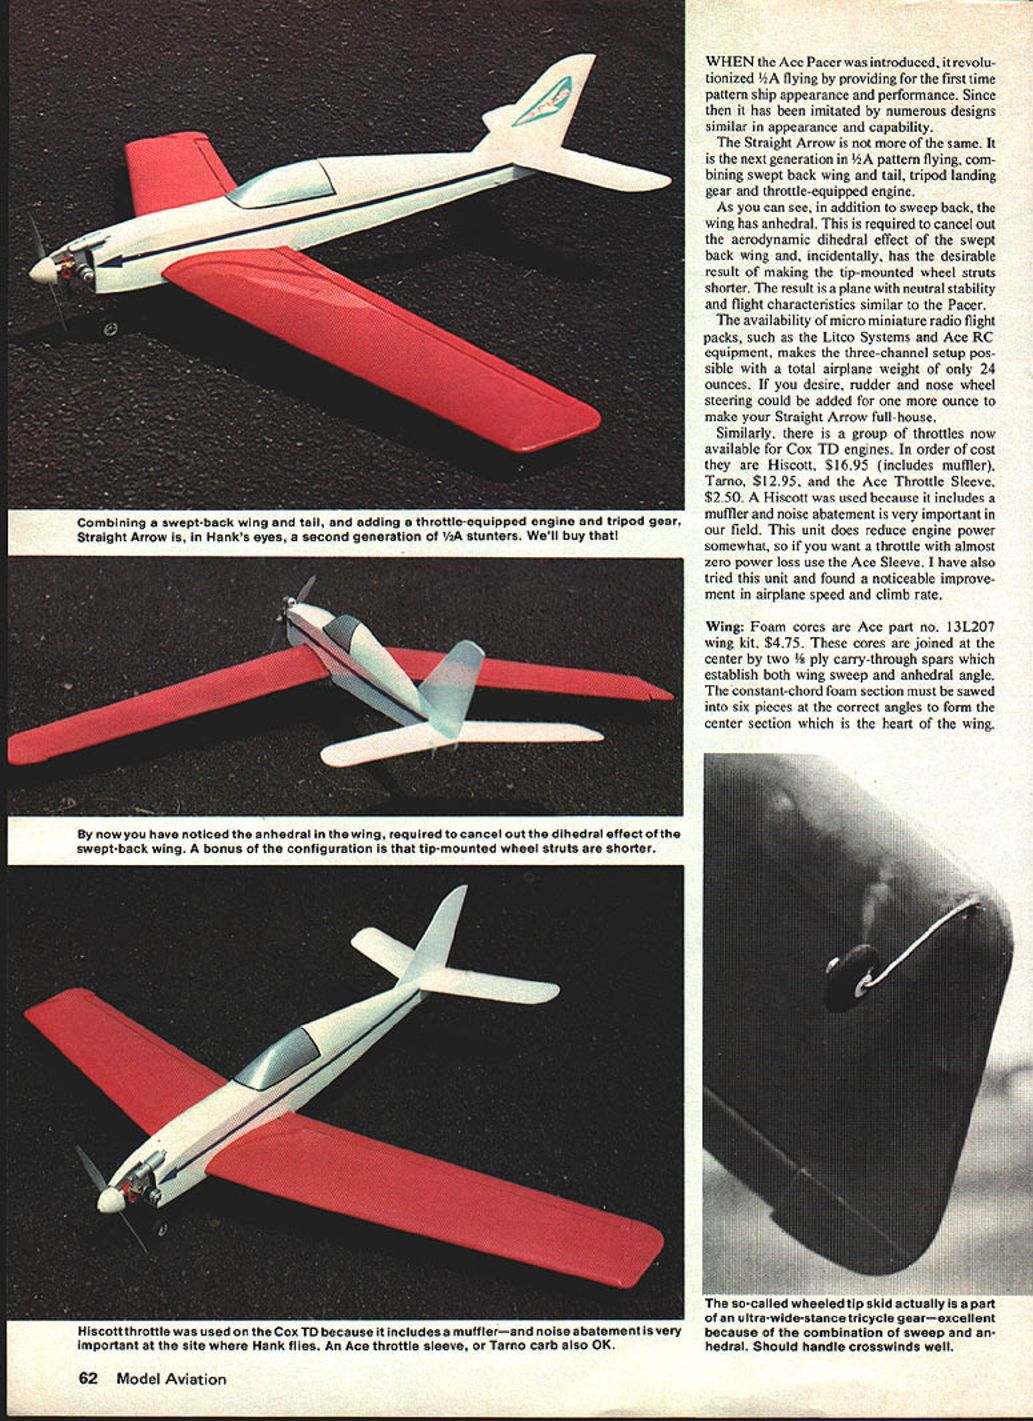
When the Ace Pacer was introduced, it revolutionized 1/2A flying by providing for the first time pattern-ship appearance and performance. Since then it has been imitated by numerous designs similar in appearance and capability.
The Straight Arrow is not more of the same. It is the next generation in 1/2A pattern flying, combining swept-back wing and tail, tripod landing gear and a throttle-equipped engine. In addition to sweepback, the wing has anhedral. This is required to cancel out the aerodynamic dihedral effect of the swept-back wing and, incidentally, has the desirable result of making the tip-mounted wheel struts shorter. The result is a plane with neutral stability and flight characteristics similar to the Pacer.
The availability of micro miniature radio flight packs, such as Litco Systems and Ace RC equipment, makes the three-channel setup possible with a total airplane weight of only 24 ounces. If you desire, rudder and nose-wheel steering could be added for one more ounce to make your Straight Arrow full-house.
Similarly, there is a group of throttles now available for Cox TD engines. In order of cost they are:
- Hiscott — $16.95 (includes muffler)
- Tamo — $12.95
- Ace Throttle Sleeve — $2.50
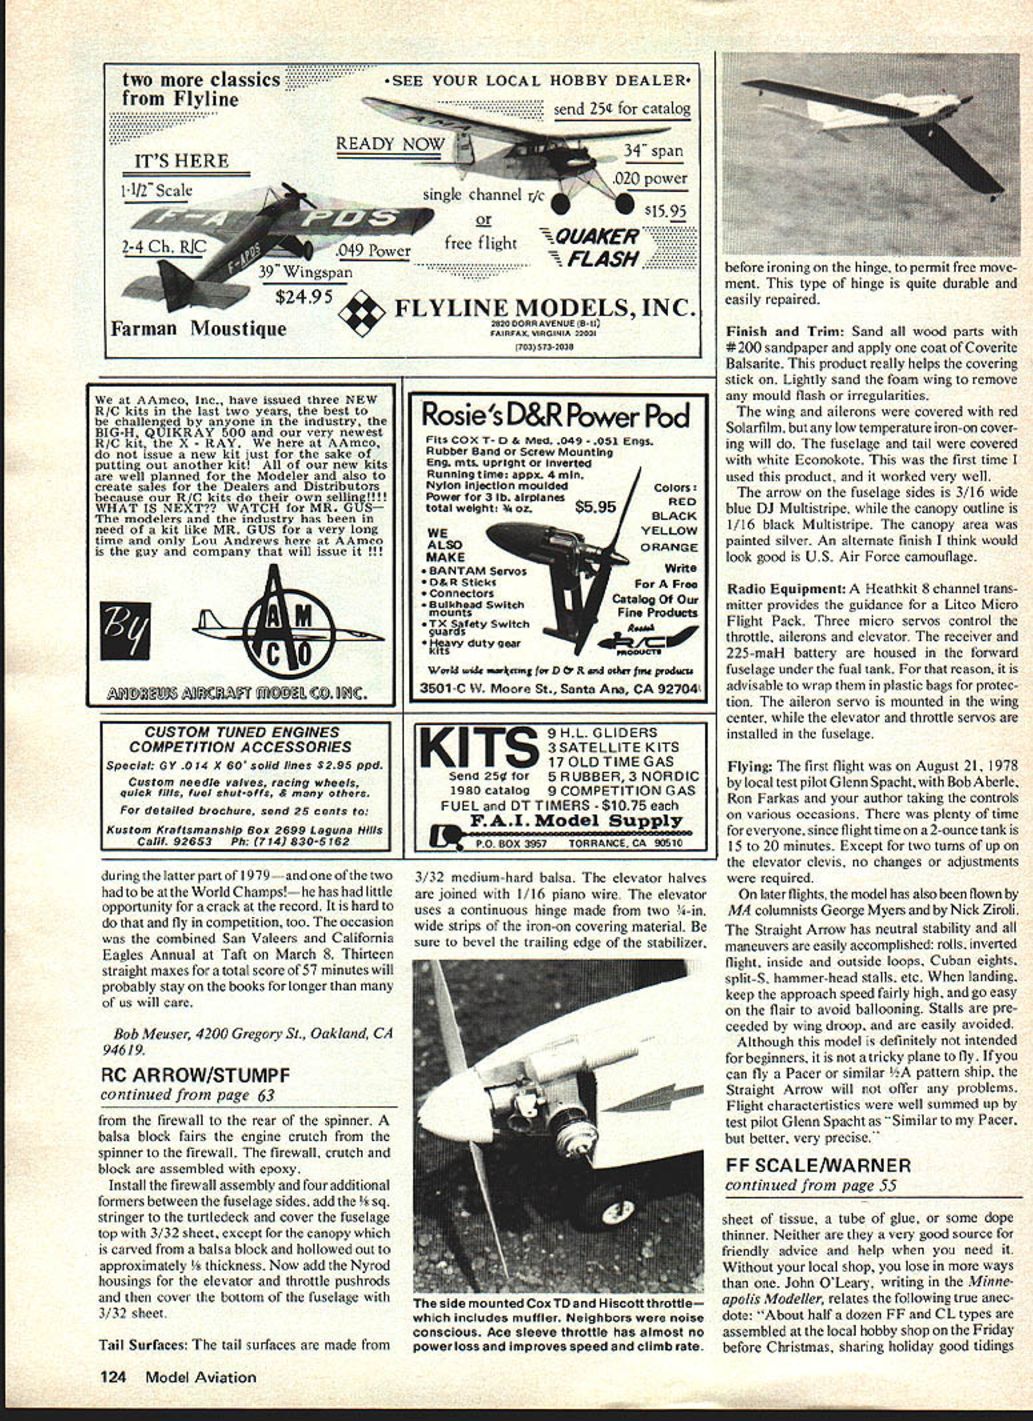
A Hiscott unit was used because it includes a muffler and noise abatement is very important in our field. This unit does reduce engine power somewhat, so if you want a throttle with almost zero power loss use the Ace Sleeve. I have also tried this unit and found a noticeable improvement in airplane speed and climb rate.
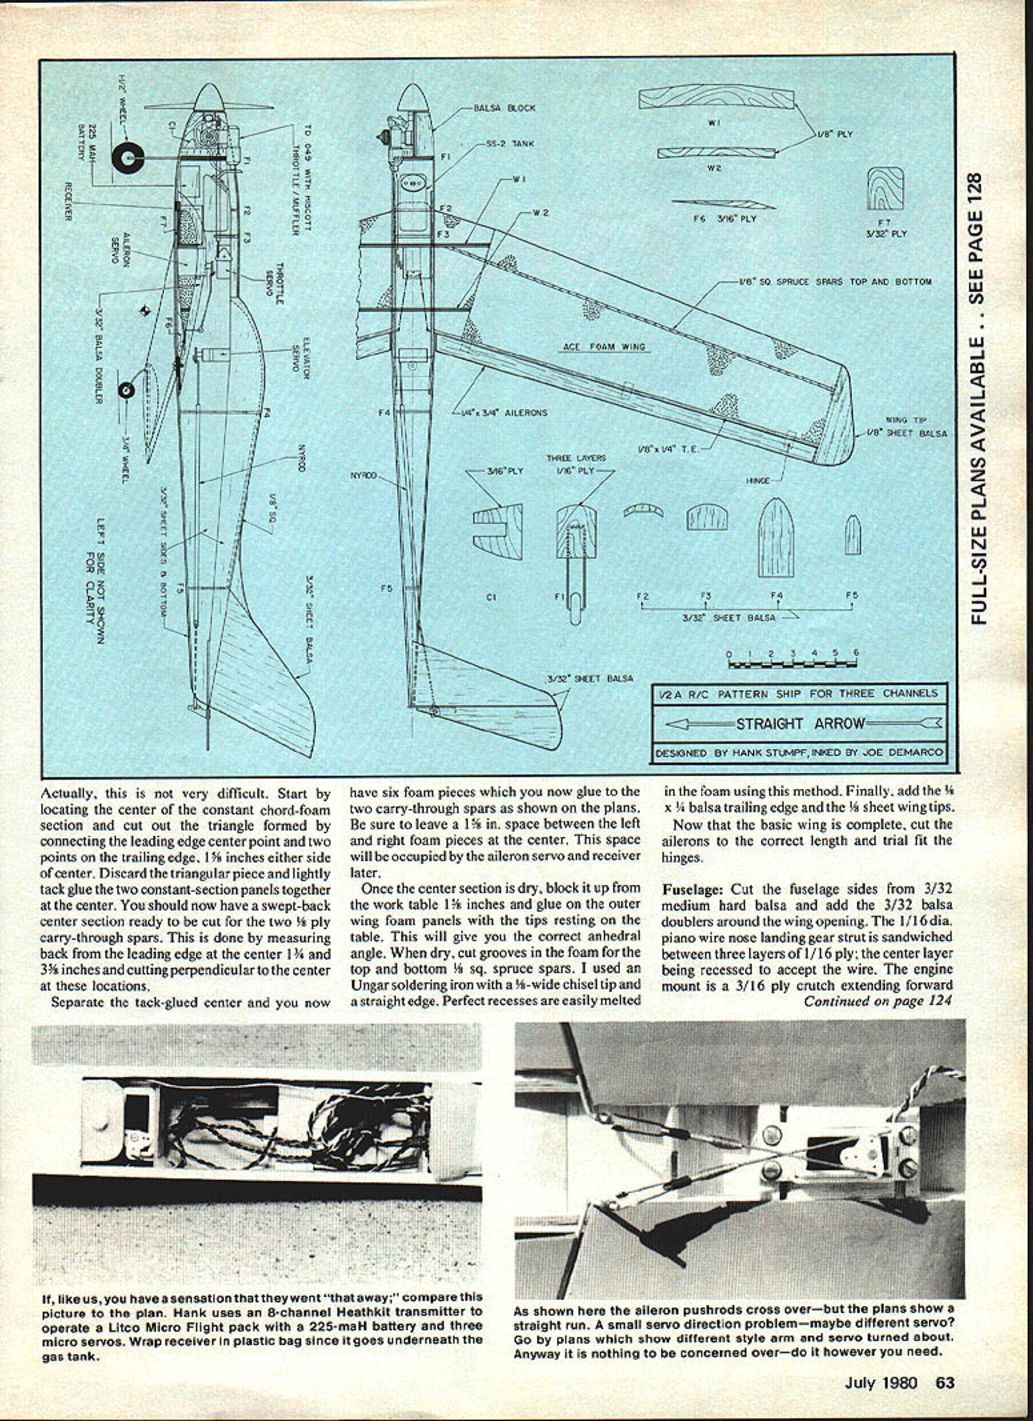
Wing
Foam cores are Ace part no. 13L207 wing kit, $4.75. These cores are joined at the center by two 1/8" ply carry-through spars which establish both wing sweep and anhedral angle. The constant-chord foam section must be sawed into six pieces at the correct angles to form the center section, which is the heart of the wing.
Construction steps:
- Locate the center constant-chord foam section. Cut out the triangle formed by connecting the leading-edge center point and two points on the trailing edge 1" either side of center. Discard the triangular piece.
- Lightly tack-glue two constant-section panels together. The center should now have the swept-back center section ready.
- Cut two carry-through spars by measuring back from the leading-edge center 1 3/8" and cutting perpendicular at the center locations.
- Separate the tack-glued center so you now have six foam pieces. Glue the two carry-through spars as shown on the plans. Be sure to leave 1/8" space between left and right foam pieces; the center space will be occupied later by the aileron servo and receiver.
- Once the center section is dry, block up the assembly on the work table 1 1/8" and glue the outer wing foam panels with the tips resting on the table. This will give the correct anhedral angle.
- After drying, cut grooves in the foam top and bottom for the spruce spars using an Ungar soldering iron with a wide chisel tip and a straight edge. Perfect recesses are easily melted in the foam using this method.
- Finally add a 1/8" trailing edge and the wing tips. Cut ailerons to the correct length and trial-fit hinges.
Fuselage
Cut fuselage sides from 3/32" medium-hard balsa. Add 3/32" balsa doublers around the wing opening. The 1/16" dia. piano-wire nose-landing-gear strut is sandwiched between three layers of 1/16" ply, the center layer being recessed to accept the wire. The engine mount is a 3/16" ply crutch extending forward from the firewall to the rear of the spinner. A balsa block fairs the engine crutch from the spinner to the firewall. The firewall, crutch and block are assembled with epoxy.
Install the firewall assembly and four additional formers between the fuselage sides, add the 1/8" sq. stringer to the turtledeck and cover the fuselage top with 3/32" sheet, except for the canopy, which is carved from a balsa block and hollowed out to approximately 1/8" thickness. Add the Nyrod housings for the elevator and throttle pushrods, then cover the bottom of the fuselage with 3/32" sheet.
Tail Surfaces
The tail surfaces are made from 3/32" medium-hard balsa. The elevator halves are joined with 1/16" piano wire. The elevator uses a continuous hinge made from two 1/2" wide strips of the iron-on covering material. Be sure to bevel the trailing edge of the stabilizer and sand the hinge area before ironing on the hinge to permit free movement. This type of hinge is quite durable and easily repaired.
Finish and Trim
Sand all wood parts with #200 sandpaper and apply one coat of Coverite Balsarite. This product really helps the covering stick on. Lightly sand the foam wing to remove any mold flash or irregularities.
The wing and ailerons were covered with red Solarfilm, but any low-temperature iron-on covering will do. The fuselage and tail were covered with white Econokote; this was the first time I used this product, and it worked very well.
The arrow on the fuselage sides is 3/16" wide blue Du Multistripe, while the canopy outline is 1/16" black Multistripe. The canopy area was painted silver. An alternate finish I think would look good is U.S. Air Force camouflage.
Radio Equipment
A Heathkit 8-channel transmitter provides the guidance for a Litco Micro Flight Pack. Three micro servos control the throttle, ailerons and elevator. The receiver and 225-mAh battery are housed in the forward fuselage under the fuel tank; for that reason it is advisable to wrap them in plastic bags for protection. The aileron servo is mounted in the wing center, while the elevator and throttle servos are installed in the fuselage.
Flying
The first flight was on August 21, 1978, by local test pilot Glenn Spaeth, with Bob Aberle, Ron Farkas and the author taking the controls on various occasions. There was plenty of time for everyone, since flight time on a 2-ounce tank is 15 to 20 minutes. Except for two turns of up on the elevator clevis, no changes or adjustments were required.
On later flights, the model has also been flown by MA columnists George Myres and Nick Ziroli.
The Straight Arrow has neutral stability and all maneuvers are easily accomplished: rolls, inverted flight, inside and outside loops, Cuban eights, split-S, hammer-head stalls, etc. When landing, keep the approach speed fairly high and go easy on the flare to avoid ballooning. Stalls are preceded by wing drop and are easily avoided.
Although this model is definitely not intended for beginners, it is not a tricky plane to fly. If you can fly a Pacer or similar 1/2A pattern ship, the Straight Arrow will not present any problems. Flight characteristics were well summed up by test pilot Glenn Spaeth as: "Similar to my Pacer, but better—very precise."
Transcribed from original scans by AI. Minor OCR errors may remain.

