

Strip Show
L. F. Randolph
A failing in some kit plans and instructions (and magazine plans, too) is not detailing commonplace construction steps. That's usually all right for experienced modelers, but newcomers can get hung up on strip ailerons. If that's you, here's help.
Strip-type ailerons
Strip-type ailerons are almost universal in R/C aircraft—and for several good reasons. They are relatively easy to install, totally contained within the wing and fuselage, use simple hardware, are lightweight, and they become part of the hinging system. Most kits provide this type of aileron and include the hardware as part of the complete package. But in many cases the instructions for installation are not clear, mostly because their use is so universal that the installation is taken for granted. The photos in the original article show a typical strip aileron system; it can be slightly modified to fit almost any situation calling for this type of aileron.
Installation steps
- Prepare the wing by sanding ramp-type notches the width of the servo arm and equidistant from the center in the top half of the trailing edge. These notches provide clearance for the torque rods.
- In this example the torque rods are 3/32-in. wire and the bearings are 1/8-in. brass tube. Shape the fairing blocks with the same tool used to notch the ailerons. Sand the torque-rod clearance notches in the same way as the trailing-edge notches.
- Epoxy the torque-rod bearings and the fairing blocks to the trailing edge; keep the glue out of the bearings. The fairing blocks should meet at the center, and the notches should line up. Bend the torque rods to conform with the dihedral angle, if necessary.
- Hold the ailerons in position against the trailing edge and mark where the torque anchors will go into them. Use a drill the same size as the anchor (in this case 3/32 in.) and drill a hole in each aileron at this location—slightly deeper than the anchor.
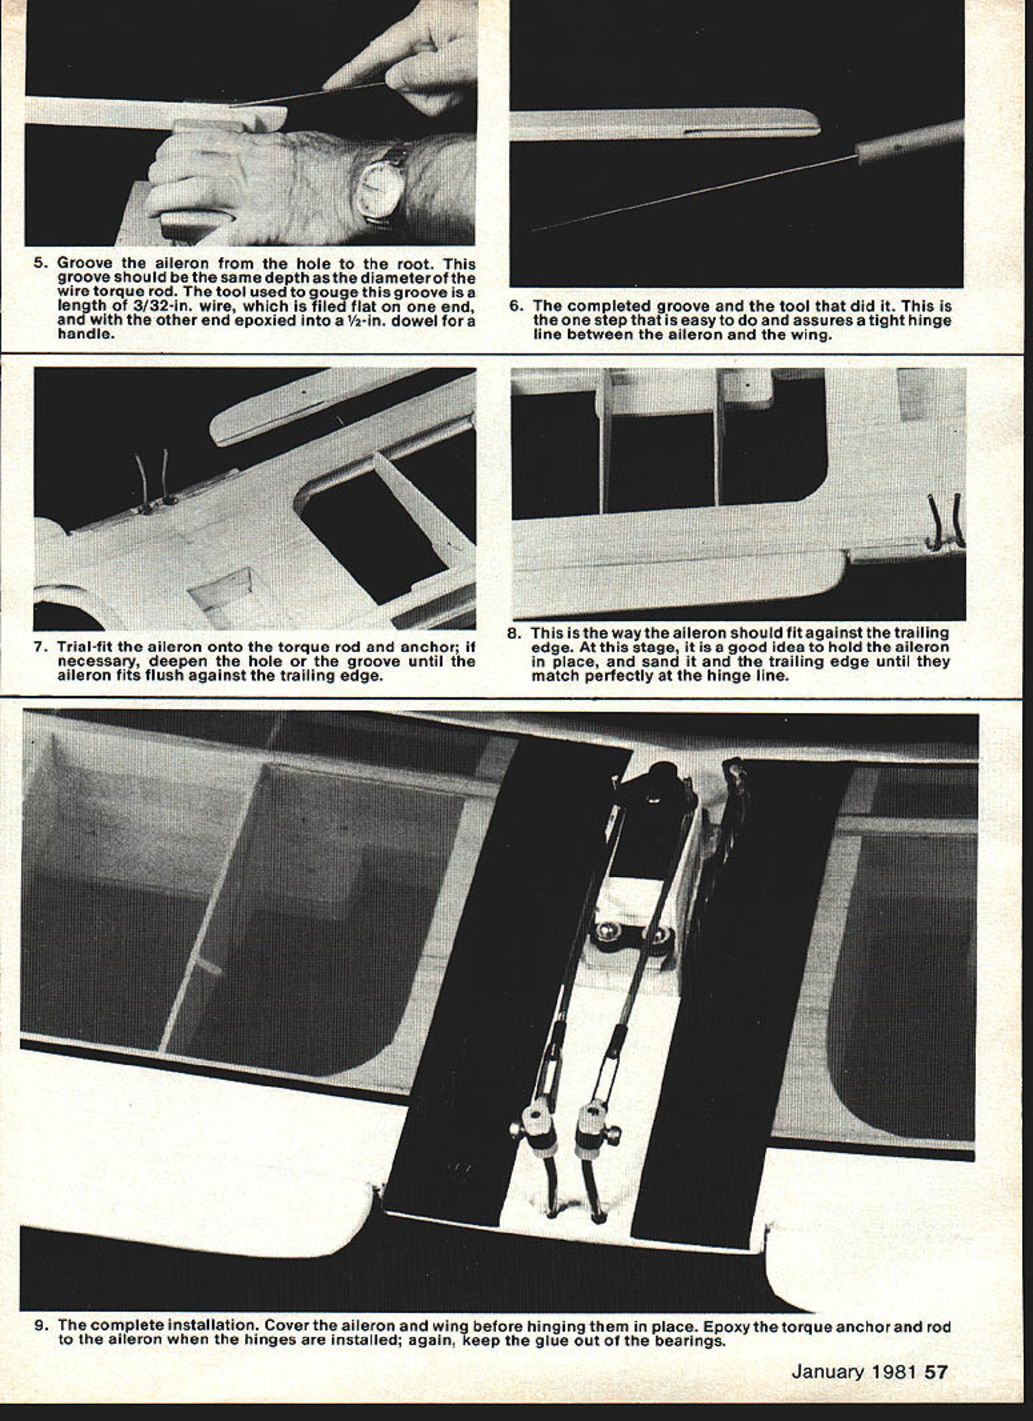
- Groove the aileron from the anchor hole to the root. This groove should be the same depth as the diameter of the wire torque rod. The tool used to gouge this groove is a length of 3/32-in. wire, filed flat on one end, with the other end epoxied into a 1/2-in. dowel for a handle.
- The completed groove and the tool that made it ensure a tight hinge line between the aileron and the wing. This is an easy step that pays off with a clean hinge.
- Trial-fit the aileron onto the torque rod and anchor; if necessary, deepen the hole or the groove until the aileron fits flush against the trailing edge.
- With the aileron held in place, sand it and the trailing edge until they match perfectly at the hinge line.
- Cover the aileron and wing before hinging them in place. Epoxy the torque anchor and rod to the aileron when the hinges are installed; again, keep glue out of the bearings.
Transcribed from original scans by AI. Minor OCR errors may remain.

