
A Strong, Lightweight Foam Wing
Bill Evans
Introduction
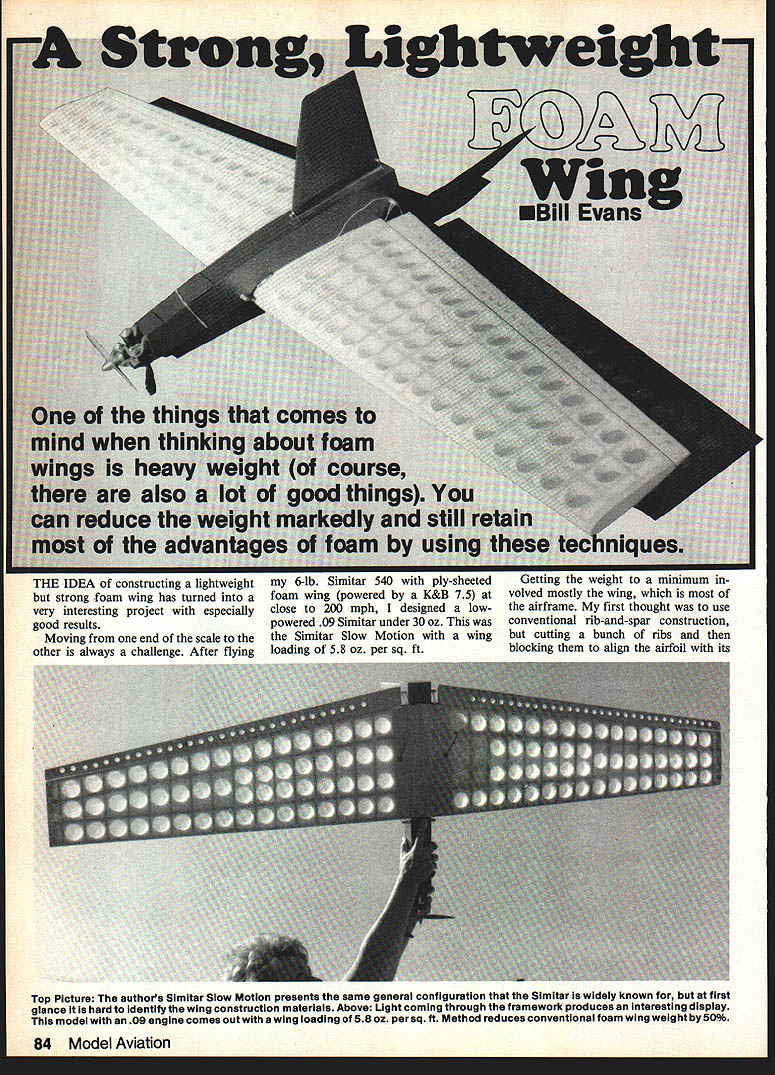
One of the first things that comes to mind when thinking about foam wings is heavy weight. You can reduce the weight markedly and still retain most of the advantages of foam by using a few simple construction techniques. The idea of constructing a lightweight but strong foam wing turned into a very interesting project with especially good results.
Project background
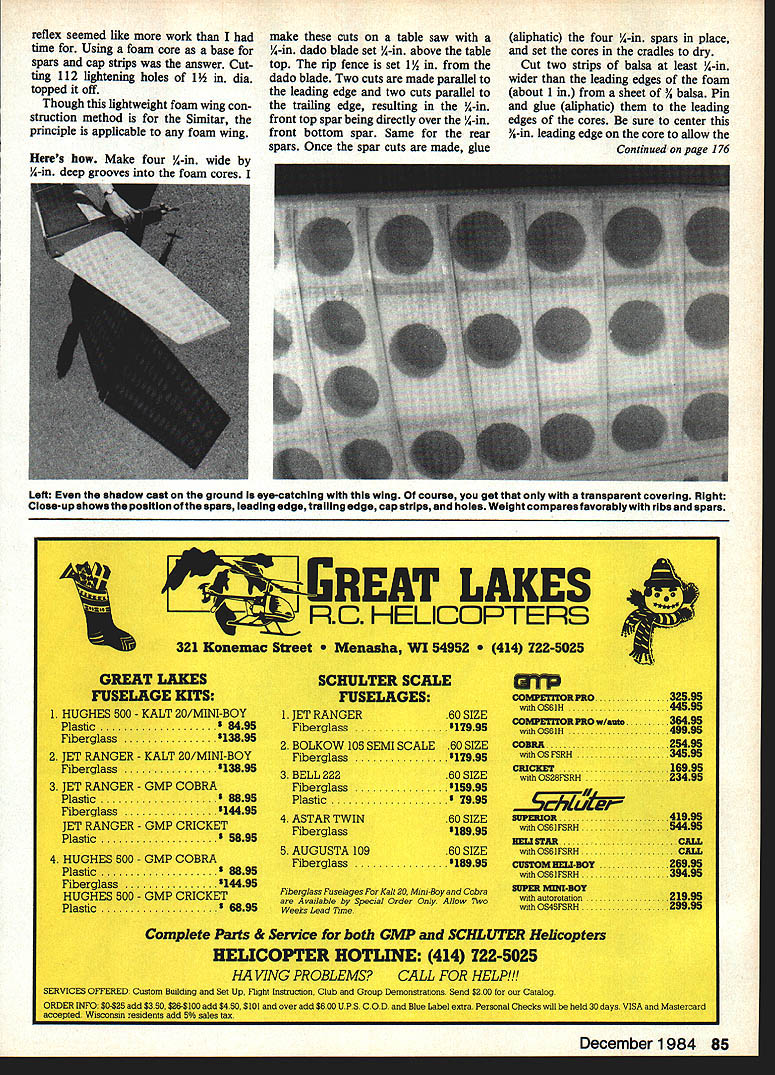
After flying my 6-lb. Simitar 540 with a ply-sheeted foam wing (powered by a K&B .7.5) at close to 200 mph, I designed a low-powered .09 Simitar under 30 oz. This was the Simitar Slow Motion, with a wing loading of 5.8 oz. per sq. ft. Getting the weight to a minimum involved mostly the wing, which is most of the airframe. Using a foam-core base, spars and cap strips proved to be the answer. Cutting 112 lightening holes 1" dia. finished the job. Although described for the Simitar, the same lightweight foam-wing construction principle is applicable to any foam wing.
Construction concept
The basic idea is to rout spar grooves in the foam cores, glue in 3/4-in. spars, add balsa leading and trailing edges, sheet the inboard area, and glue on 1/4 x 1/4 cap strips between the edges. Marking and aligning top and bottom cap strips keeps the wing strong and warp-free. Lightening holes and a transparent covering complete the finished look.
Materials and tools (suggested)
- Foam wing cores (matched pair)
- Table saw with a 1/8-in. dado blade
- Rip fence
- Wing cradles (to support cores while drying)
- Aliphatic wood glue (or comparable adhesive)
- 3/32-in. balsa sheet (for leading-edge strips)
- 1/8-in. balsa sheet (for trailing-edge strips)
- 1/4 x 1/4-in. balsa cap strips
- 3/4-in.-wide spar stock (fits grooves)
- 1/8-in. cap strip (to butt against leading-edge core, if used)
- Hole saw (1-in. dia. recommended for lightening holes)
- Pin nails or small pins for holding parts while drying
- Transparent covering film
Step-by-step construction
- Prepare the table saw:
- Install a 1/8-in. dado blade and set it so the blade is 1/8-in. above the table top.
- Set the rip fence 1/2-in. from the dado blade.
- Cut the spar grooves in each core:
- Make four 1/8-in.-wide, 1/8-in.-deep grooves from one end to the other in each core.
- Make two cuts parallel to the leading edge and two cuts parallel to the trailing edge. This layout results in a 3/4-in. front top spar directly over a 3/4-in. front bottom spar; repeat the same for the rear spars.
- Install the spars:
- Glue the four 3/4-in. spars into the grooves using aliphatic glue.
- Set the cores in cradles (bottom side up) and allow the glue to dry.
- Add the balsa leading-edge strips:
- Cut two strips of 3/32-in. balsa at least 1/4-in. wider than the foam leading edge.
- Pin and glue these strips to the leading edges of the cores, centering them so that the center 1/8-in. leading-edge core allows the 1/8-in. cap strip to butt against it.
- Add the balsa trailing-edge strips:
- Cut two strips from 1/8-in. balsa at least 1/4-in. wider than the foam trailing edge.
- Glue and pin these to the trailing edges, again centering to allow for the cap strips.
- Mark cap-strip and sheeting locations:
- Mark both top and bottom of the cores at 2-in. intervals to locate the cap strips, ensuring top cap strips will be directly over bottom cap strips.
- Mark the location of the 3/4-in.-wide inboard sheeting.
- Apply the bottom sheeting and bottom cap strips:
- Place the wing core top-side on a flat surface, then put it on the cradles with the bottom side up.
- Cut the inboard sheeting to fit and glue and pin it in place on the bottom of the wing.
- Cut the 1/4 x 1/4-in. cap strips to fit between the leading and trailing edges, and glue and pin them in place.
- Repeat for the other wing panel.
- Apply the top cap strips:
- After the bottom cap strips have dried, repeat the cap-strip installation for the top of the wing.
- Use the wing cradles to keep the wing free of warps while drying.
- Finish the edges:
- After the assemblies are dry, trim and sand the leading and trailing edges flush with the cap strips.
- Lighten the wing:
- Mark the locations for lightening holes and cut them with a 1-in. hole saw. (In my project, I cut 112 lightening holes 1" dia.)
- Covering:
- Cover the wing with a transparent film to show the internal work and finish the surface.
Results
The construction method described produced a wing weight reduction of about 50%—from 16 oz. to 8 oz.—while maintaining more than adequate strength. The technique is straightforward, repeatable, and can be adapted to other foam-wing designs.
Transcribed from original scans by AI. Minor OCR errors may remain.

