
Super Star
Jerry Caldwell
Introduction
I'm never quite sure exactly how I get into building one plane or another, but this particular plane has to be one of the most unusual. I have been modeling for more than 30 years. I've run the entire spectrum, from Rubber through Free Flight to Control Line, and finally to Radio Control. My son, Jerry, and my best friend, Jack Sheeks, talked me into going back to Control Line. My son is thoroughly hooked on it, so along with Jack they double-teamed me into trying another CL ship.
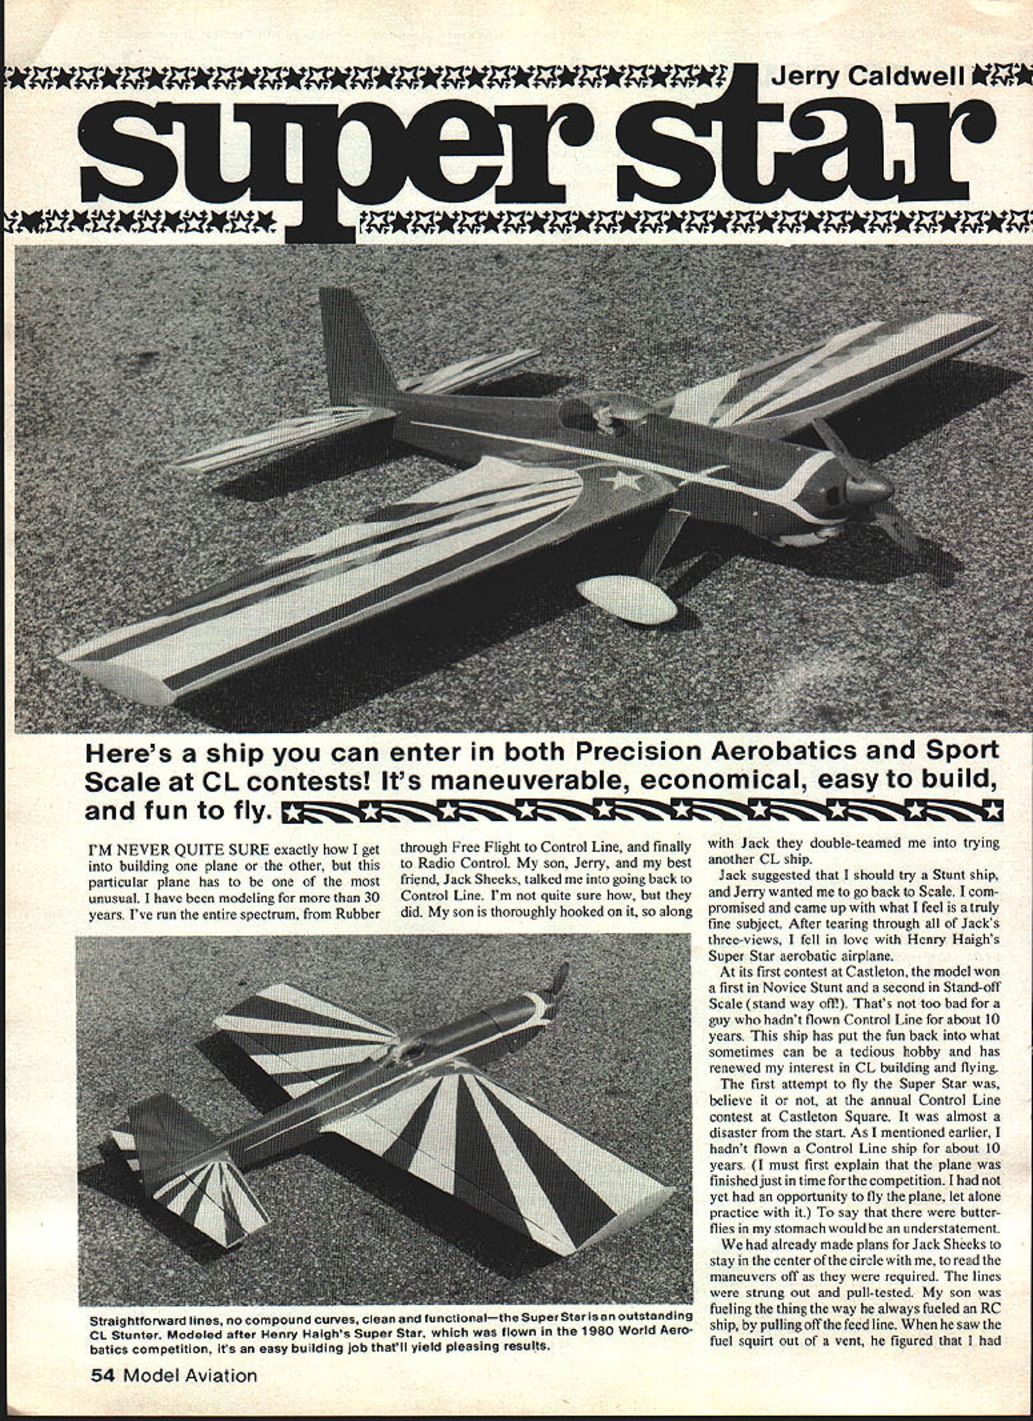
Jack suggested that I should try a Stunt ship, and Jerry wanted me to go back to Scale. I compromised and came up with what I feel is a truly fine subject. After tearing through all of Jack's three-views, I fell in love with Henry Haigh's Super Star aerobatic airplane.
Henry Haigh's Super Star competed in the 1980 World Aerobatic Championships at Oshkosh, WI. The full-size plane is a fine competitor; the model grooves very well and turns the squarest corners of any model I have ever flown, considering the particular airplane. This plane was designed with one thing in mind: easy construction. The ship is a simple and straightforward design and is quickly built.
Contest debut
At its first contest at Castleton, the model won a first in Novice Stunt and a second in Stand-off Scale (stand way off!). That's not too bad for a guy who hadn't flown Control Line for about 10 years. This ship has put the fun back into what sometimes can be a tedious hobby and has renewed my interest in CL building and flying.
My first attempt to fly the Super Star was at the annual Control Line contest at Castleton Square. It was almost a disaster from the start. The plane was finished just in time for the competition; I had not yet had an opportunity to fly the plane, let alone practice with it. To say that there were butterflies in my stomach would be an understatement.
We had already made plans for Jack Sheeks to stay in the center of the circle with me to read the maneuvers off as they were required. The lines were strung out and pull-tested. My son was fueling the thing the way he always fueled an RC ship, by pulling off the feed line. When he saw the fuel squirt out of a vent, he figured that I had already filled the tank. Surprise—at that time he noticed I hadn't put a hole in the cowling for the needle valve; panic reigned. Jerry ripped the prop and cowling off, performing surgery to accept the needle valve, and tried to borrow Jack's twin Mosquito. I still don't know how I got it started.
Quickly now, bonus points at starting time were gone. I still couldn't understand why it wasn't drawing fuel. After several suggestions (all of the "don't go back" ones), we finally filled the tank. Ding-dong—the Fox came to life. The jitters really came into play. Would it fly? Could I still remember the maneuvers? Well, it flew like a homesick angel. First round disaster; the next two rounds were enough to do the job. Stand-off Scale had to fly its circle over again. Without the help of other competitors it wouldn't have been possible.
Design and construction overview
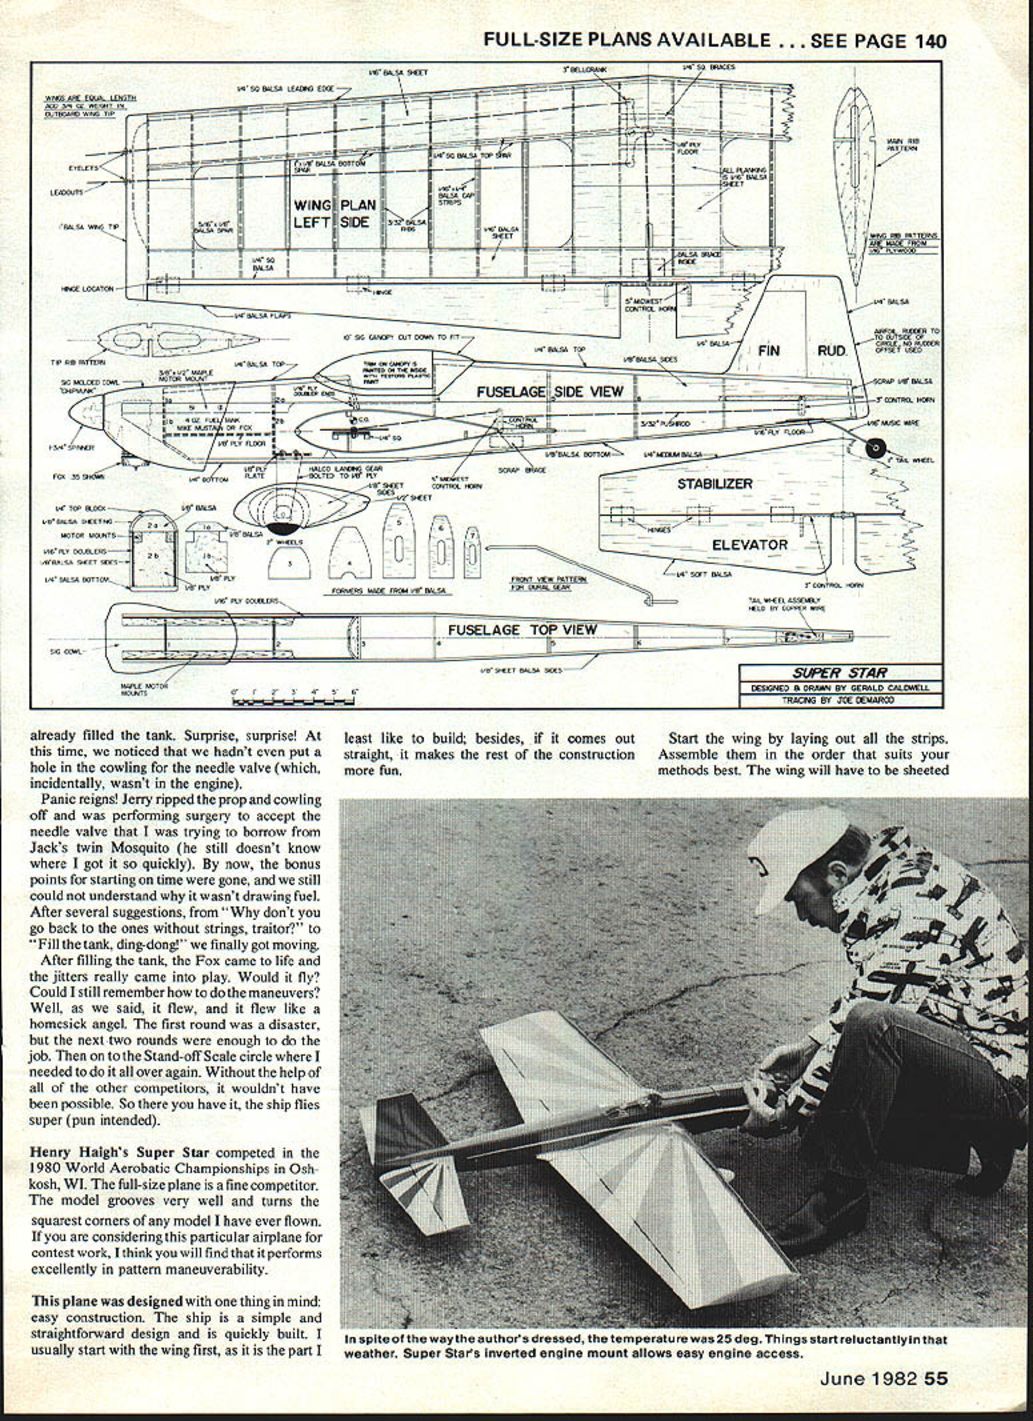
I usually start with the wing first, as it is the part I least like to build; besides, if it comes out straight, it makes the rest of the construction more fun. The best wing will have the panels sheeted. Start the wing by laying out all the strips and assemble them in the order that suits your methods best.
With all controls installed and hooked up, including flaps, check everything before going on to the fuselage.
Building the fuselage and final assembly
- Lay out the fuselage sides with the doublers and motor mounts installed.
- The width can be adjusted to suit the fuel tank that you use. Our tank was a custom-made one by Jack Sheeks (and it even works).
- Once the wing is in place, install the stabilizer and elevator and line them up.
- Install the wheel blocks and landing gear, then sheet the bottom.
- The canopy is a 1/10-in. bubble cut down to fit.
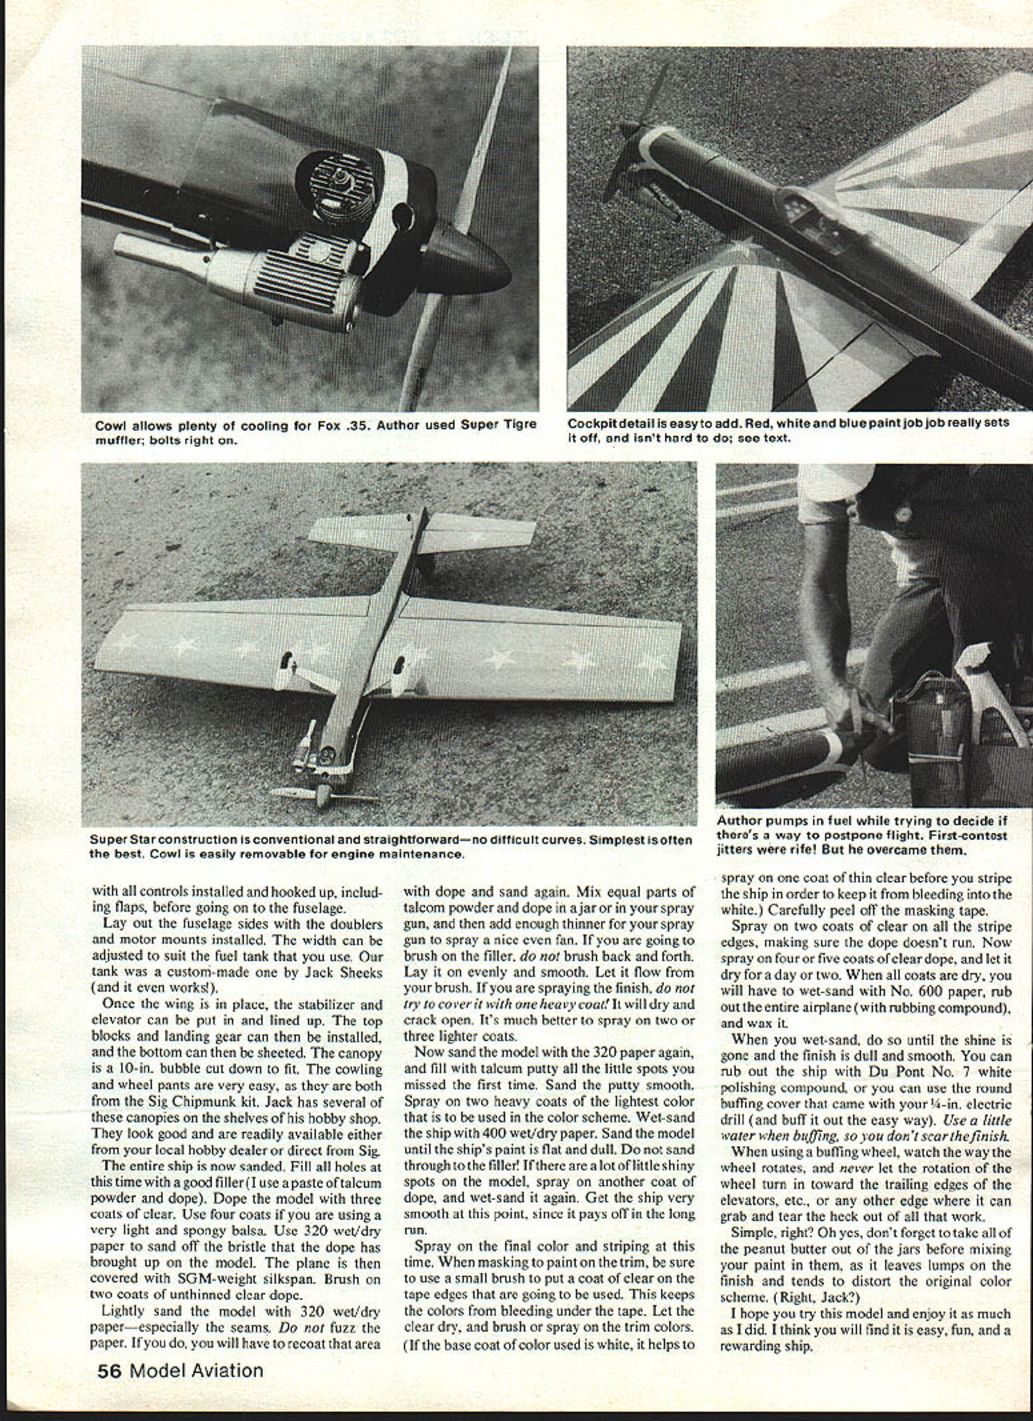
- The cowl and wheel pants are very easy, as they are both from the Sig Chipmunk kit. Jack has several of these canopies on the shelves of his hobby shop. They look good and are readily available either from your local hobby dealer or direct from Sig.
Sand the entire ship and fill all holes at this time with a good filler (I use a paste of talcum powder and dope).
Covering and finishing
- Dope the model with three coats of clear (four coats if you are using very light, spongy balsa).
- Use 320 wet/dry paper to sand off the bristle that the dope has brought up on the model.
- Cover the plane with SIG-weight silkspan.
- Brush on two coats of unthinned clear dope.
- Lightly sand the model with 320 wet/dry paper—especially the seams. Do not fuzz the paper; if you do, you will have to recoat that area with dope and sand again.
- Mix equal parts talcum powder and dope in a jar or in your spray gun, then add enough thinner for your spray gun to produce a nice even fan. If you are going to brush on the filler, do not brush back and forth—lay it on evenly and smooth and let it flow from your brush. If you are spraying, apply two or three lighter coats rather than one heavy coat to avoid drying and cracking.
Now sand the model with 320 paper again, and fill with talcum putty all the little spots you missed the first time. Sand the putty smooth.
Painting and striping
- Spray on two heavy coats of the lightest color that is to be used in the color scheme.
- Wet-sand the ship with 400 wet/dry paper. Sand until the paint is flat and dull—do not sand through to the filler. If there are a lot of little shiny spots, spray on another coat of dope and wet-sand again. Get the ship very smooth at this point; it pays off in the long run.
- Spray on the final color and striping.
Masking tips:
- When masking to paint trim, use a small brush to put a coat of clear on the tape edges that are going to be used. This keeps the colors from bleeding under the tape. Let the clear dry, then brush or spray on the trim colors.
- If the base coat is white, it helps to spray on one coat of thin clear before you stripe the ship to keep the stripes from bleeding into the white.
- Carefully peel off the masking tape.
- Spray on two coats of clear on all the stripe edges, making sure the dope doesn't run.
- Then spray on four or five coats of clear dope, and let it dry for a day or two.
Final sanding, rub-out, and waxing
- Wet-sand with No. 600 paper.
- Rub out the entire airplane with rubbing compound and then wax it.
- When wet-sanding, do so until the shine is gone and the finish is dull and smooth.
- You can rub out the ship with DuPont No. 7 white polishing compound, or use the round buffing cover that came with your 1/4-in. electric drill to buff it out the easy way. Use a little water when buffing so you don't scar the finish.
- When using a buffing wheel, watch the wheel's rotation and never let the rotation turn in toward trailing edges of elevators or any other sharp edge where it can grab and tear the covering.
Simple, right? Oh yes—don't forget to take all of the peanut butter out of the jars before mixing your paint in them, as it leaves lumps on the finish and tends to distort the pattern you are trying for. (Right, Jack?)
Closing
I hope you try this model and enjoy it as much as I did. I think you will find it easy, fun, and a rewarding ship.
Transcribed from original scans by AI. Minor OCR errors may remain.

