
Swallow
By Fred Reese
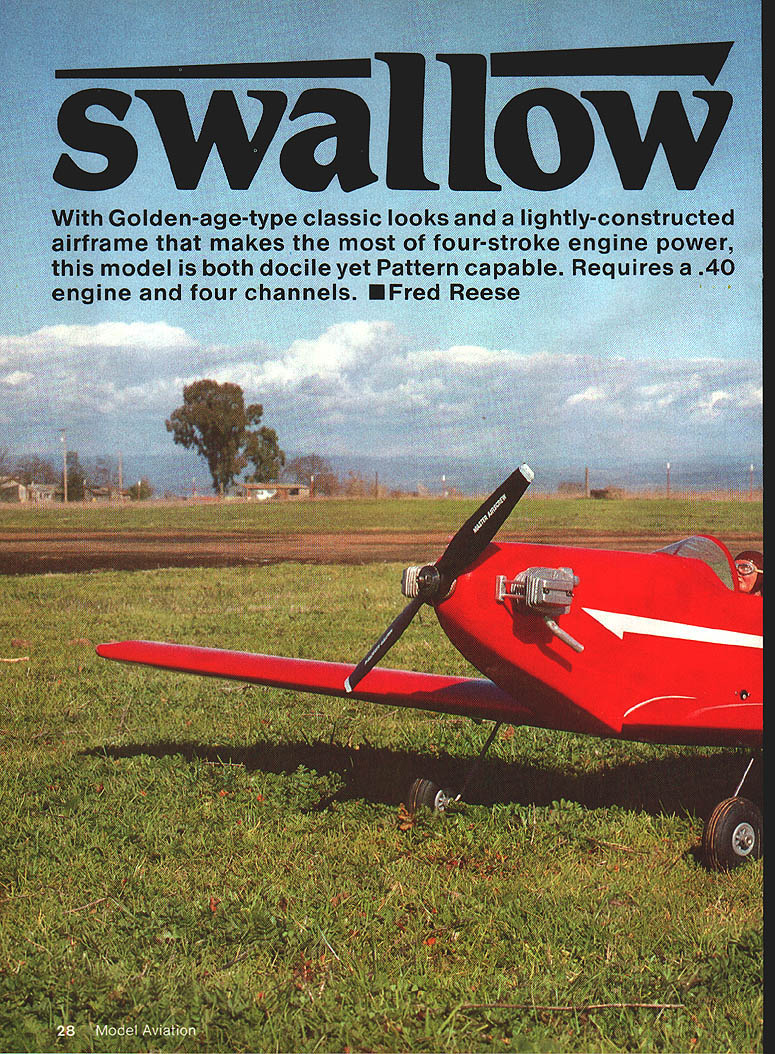
With Golden-age–type classic looks and a lightly constructed airframe that makes the most of four‑stroke engine power, the Swallow is docile yet Pattern capable. It requires a .40 four‑cycle engine and four channels. The Master Airscrew 10 x 7 proved to be the perfect propeller for this type of model.
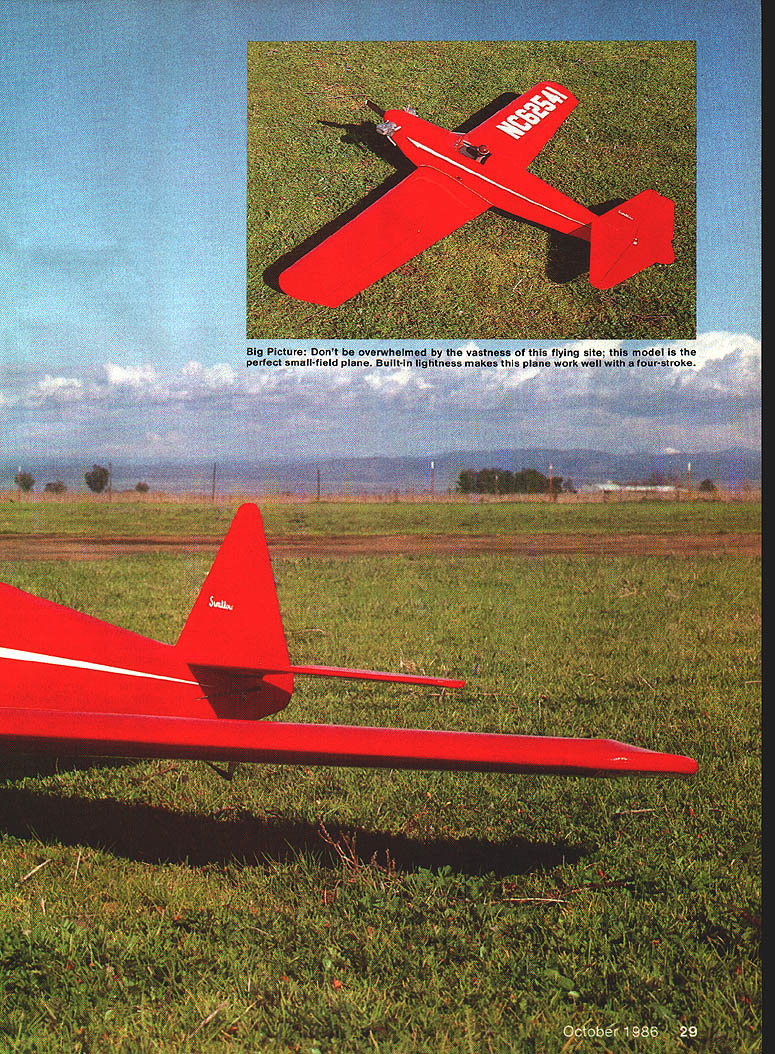
This design grew from an effort to utilize the performance of .40 four‑cycle engines (Enya, Saito, O.S.). Club members were flying Falcons that weighed about 5 lb with marginal performance. A modified Midwest Taylorcraft weighing about 4½ lb with a strong O.S. FS‑40 showed how a well‑matched propeller and light airframe could make the docile four‑cycle engines perform well. After discussion we aimed for a lightweight model with over 500 sq in of wing area; the practical target became under 3½ lb. My finished Swallow, with large wheels, dummy engine and pilot, weighs 3 lb 7 oz ready to fly.
The design priorities were:
- Good inside and outside looping ability
- Neutral knife‑edge flight
- Capable snap rolls (outside snaps easy; inside snaps require forcing)
- Docile, comfortable handling while remaining very responsive
Control and hardware features:
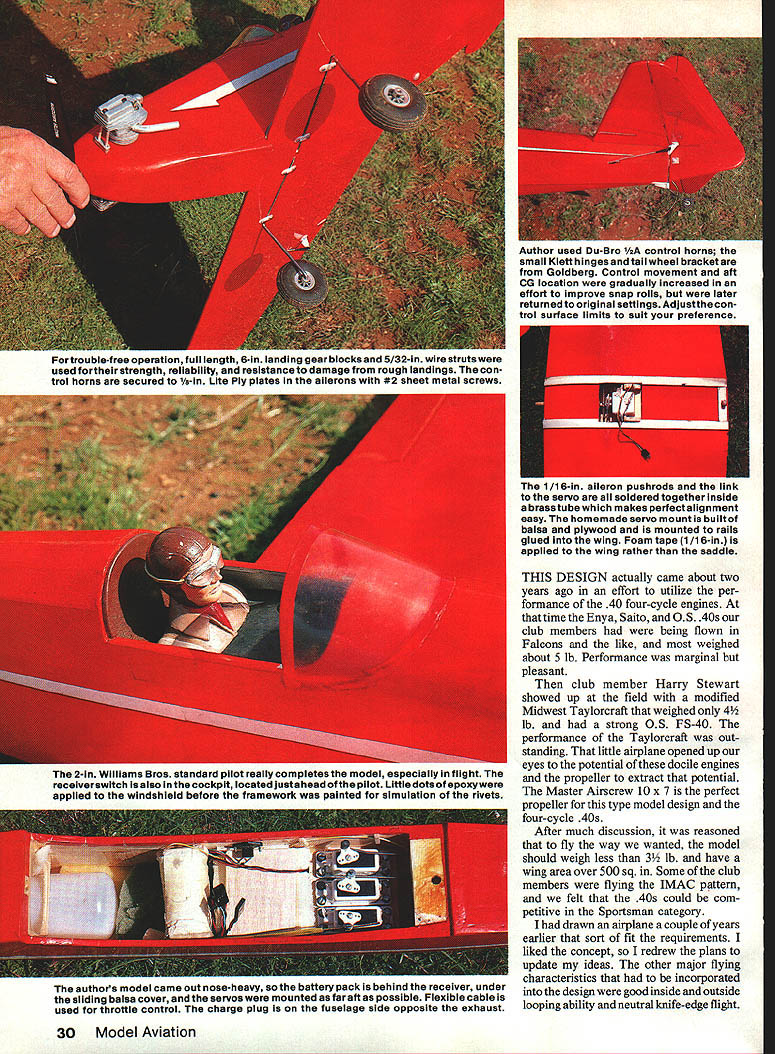
- Landing‑gear blocks and 5/32‑in. wire struts for strength and resistance to rough landings
- Control horns secured to 1/8‑in. Lite Ply plates with #2 sheet‑metal screws (Du‑Bro 1/2A control horns used)
- Small Klett hinges and a Goldberg tailwheel bracket
- 1/16‑in. aileron pushrods, soldered together inside a brass tube for perfect alignment
- Homemade servo mount of balsa and plywood on rails glued to the wing
- 1/16‑in. foam tape applied to the wing instead of a saddle
- Battery pack placed behind the receiver under a sliding balsa cover; servos mounted as far aft as possible
- Flexible cable for throttle control; charge plug on fuselage side opposite the exhaust
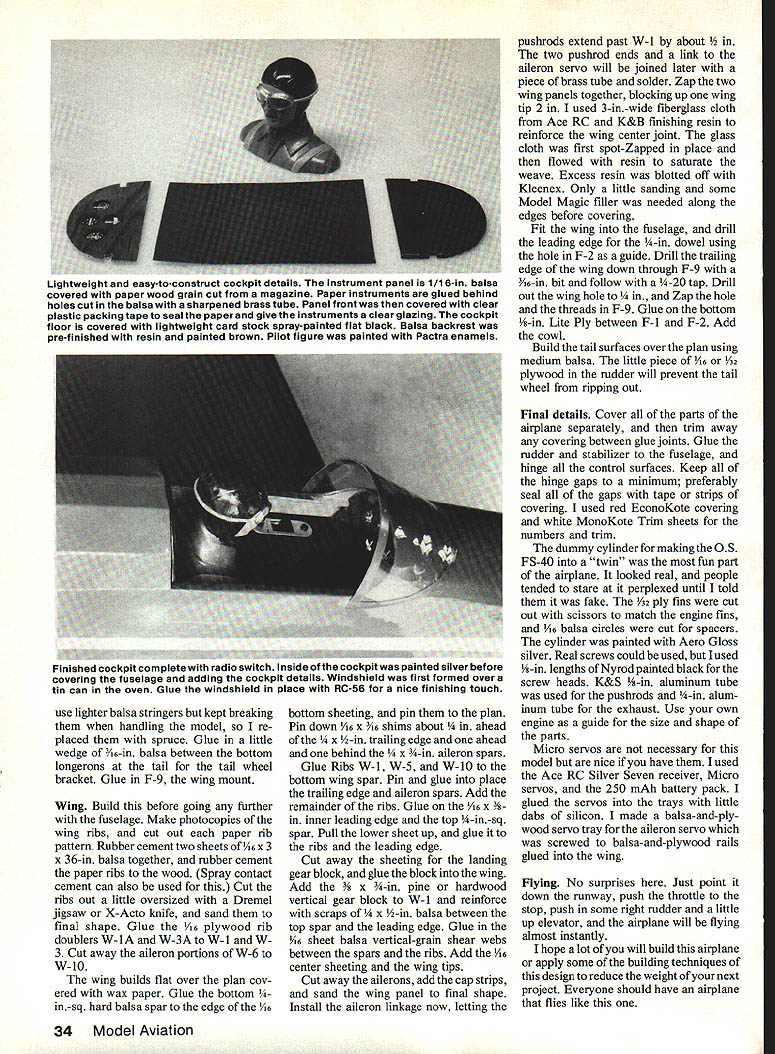
- Little dots of epoxy applied to the windshield before painting to simulate rivets
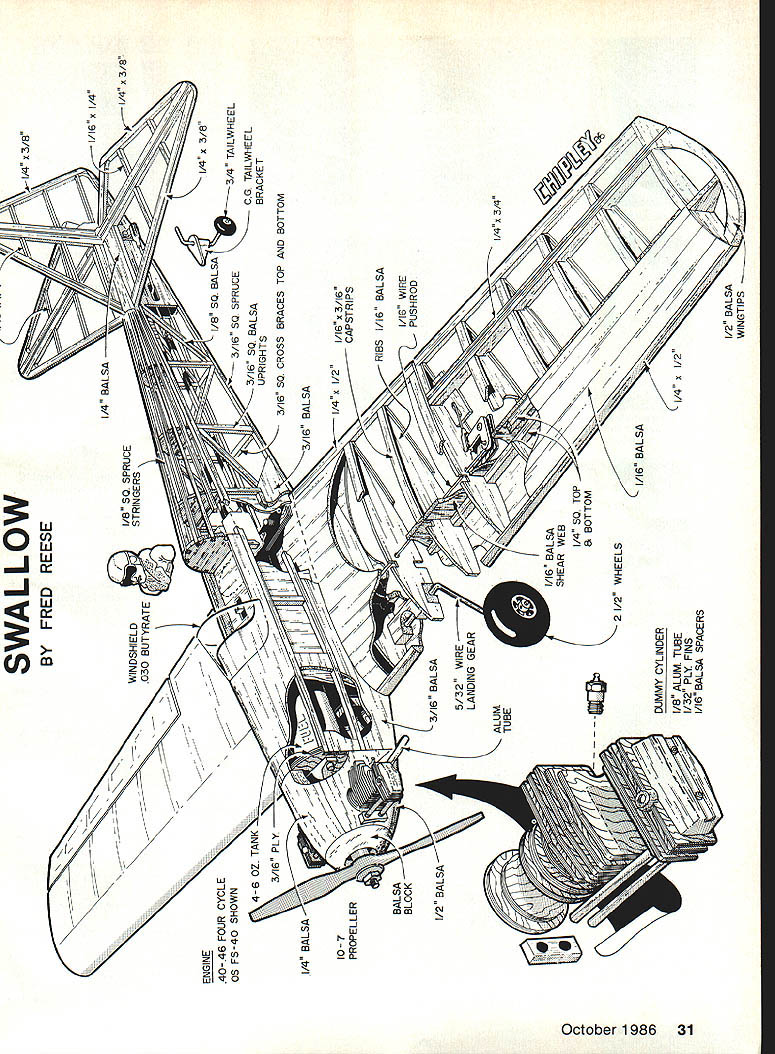
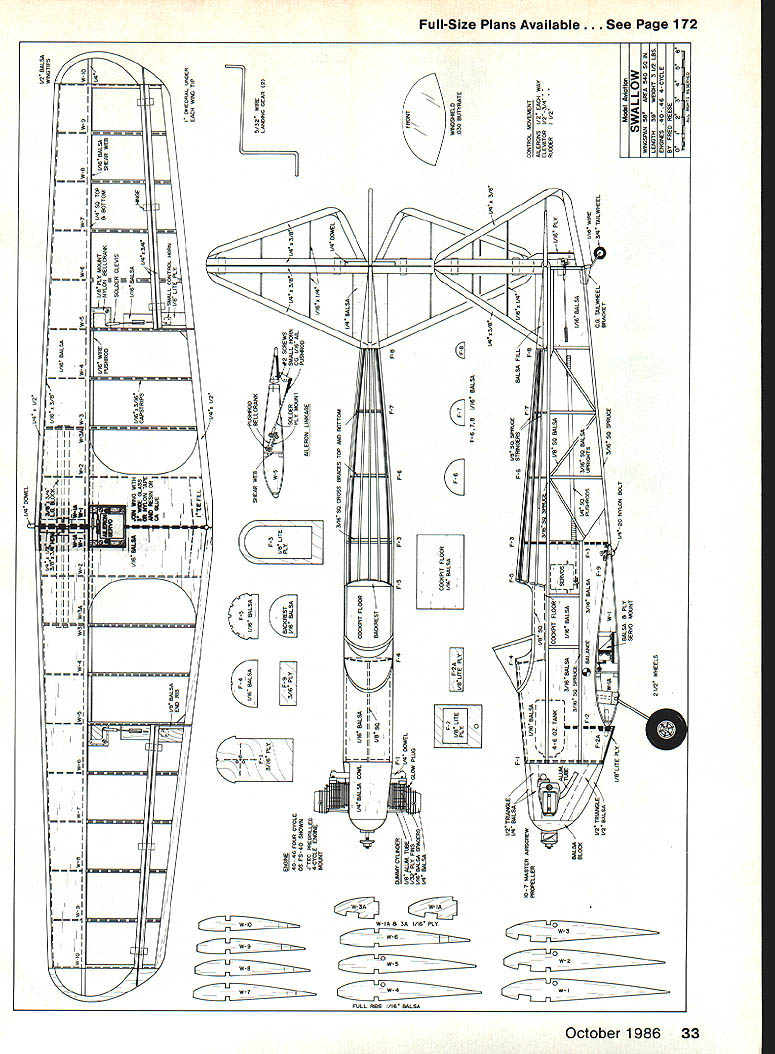
Materials
- Engine: 40–46 four‑cycle (O.S. FS‑40 shown)
- Propeller: 10 x 7 (Master Airscrew recommended)
- Windshield: .030" butyrate (1/16" x 1/4" .030 butyrate)
- 1/4" balsa (various blocks and stock)
- 1/16" balsa (ribs, capstrips, shear webs, spacers, wingtips)
- 1/8" spruce stringers
- 1/8" sq. tailwheel stock
- 1/16"‑sq. spruce longerons
- 3/16" sq. spruce and 3/16" sq. balsa uprights
- 1/4" x 3/8" balsa, 1/4" x 1/2" and 1/4" x 3/8" cap/wedge stock (use two pieces of 1/4" x 3/8" where shown)
- 3/16" ply / balsa blocks (4–6 oz. where noted)
- 3/16" sq. cross braces (top and bottom)
- Ribs: 1/16" balsa (W‑1 through W‑9 templates on plans)
- 1/16" wire pushrod with aluminum tube at the servo end
- 5/32" wire landing gear
- 3/16" balsa landing gear fairing
- 1/4" sq. top and bottom landing‑gear box
- Dummy cylinder: 1/8" aluminum tube; 1/32" ply fins; 1/16" balsa spacers
- Fins: 1/32" ply or 1/16" balsa as shown
- Wing join hardware: 1/4" dowel for leading edge; 1/4–20 screw/tapped hole in F‑9 for trailing hold‑down
- 2½" wheels (or 2" as shown in some callouts)
- Covering: red EconoKote and white MonoKote trim sheets (or equivalent)
- Adhesives/finishing: Zap CA+, K&B finishing resin, fiberglass cloth (3" wide), Model Magic filler, thin epoxy for small spots
Construction
Swallow is engineered to be strong without oversizing members. Adding larger wood sizes or unnecessary reinforcement only increases weight and requires stronger structure—a vicious circle. Build carefully and thoughtfully; avoid epoxy for primary structure (use Zap CA+ for construction). The finished model with dummy engine, pilot and big wheels weighs about 3 lb 7 oz.
Fuselage
- Build the fuselage first. Make the two sides over the plan covered with wax paper or Saran Wrap.
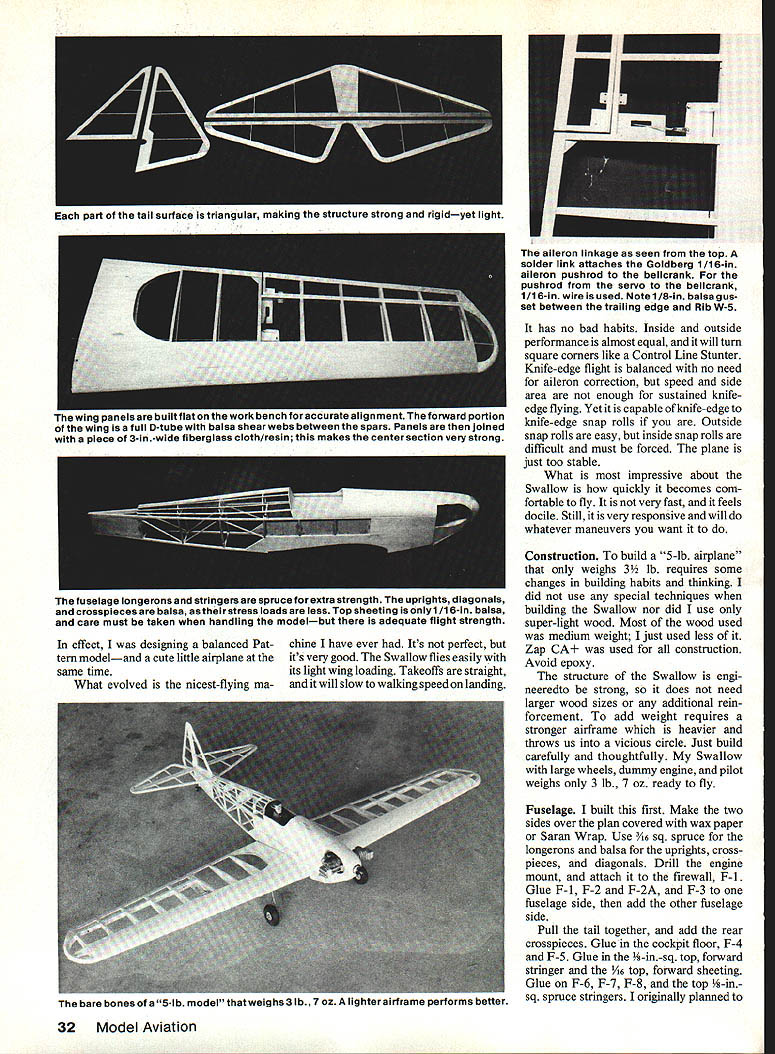
- Use 1/16"‑sq. spruce for the longerons and balsa for uprights, crosspieces and diagonals.
- Drill and attach the engine mount to firewall F‑1.
- Glue F‑1, F‑2, F‑2A and F‑3 to the fuselage sides, then add the other fuselage side.
- Pull the tail together, add the rear crosspieces, and glue in the cockpit floor, F‑4 and F‑5.
- Glue in the 1/16"‑sq. top forward stringer and the 1/16" top forward sheeting. Glue on F‑6, F‑7, F‑8 and the top 1/8"‑sq. spruce stringers.
- Install the tailwheel bracket and reinforce the rudder with a small piece of 1/8" or 1/16" plywood to prevent the tailwheel from ripping out.
Wing
- Build the two wing panels over the plans using 1/16" ribs and the specified spars and capstrips. Install the aileron linkage now, letting the pushrods extend past W‑1 by about 1/2".
- The two pushrod ends and the servo link will be joined later with a piece of brass tube and solder.
- Zap the two wing panels together, blocking one wing tip up 2" to set dihedral.
- Reinforce the wing center joint with 3"‑wide fiberglass cloth and K&B finishing resin: spot‑Zap the cloth in place, flow the resin to saturate, blot excess with Kleenex. Sand lightly and fill edges with Model Magic as needed before covering.
- Fit the wing into the fuselage and drill the leading edge for the 1/4" dowel using the hole in F‑2 as a guide. Drill the trailing edge of the wing down through F‑9 with a 1/16" bit and follow with a 1/4‑20 tap. Drill the wing hole to 1/4" and Zap the hole and the threads in F‑9. Glue on the bottom 3/8" Lite Ply between F‑1 and F‑2. Add the cowl.
Tail and final details
- Build the tail surfaces over the plan using medium balsa.
- Cover all parts of the airplane separately, then trim away any covering between glue joints before final assembly.
- Glue the rudder and stabilizer to the fuselage and hinge all control surfaces. Keep hinge gaps to a minimum; seal gaps with tape or strips of covering.
- Use red EconoKote (or similar) for covering and white MonoKote (or similar) for numbers and trim.
- The dummy twin cylinder on the cowl is optional but realistic: cut 3/32" ply fins to match the engine, use 1/16" balsa discs as spacers, and paint Aero Gloss silver. Use 1/8" aluminum tube for pushrods and 1/4" aluminum tube for the exhaust. Paint Nyrod lengths black for simulated screw heads if desired.
Hardware, servos and radio
- Control horns are mounted on 1/8" Lite Ply plates with #2 sheet‑metal screws.
- I used Du‑Bro 1/2A control horns and small Klett hinges.
- 1/16" aileron pushrods soldered in a brass tube make alignment easy.
- A homemade servo mount of balsa and plywood is mounted on rails glued into the wing. Micro servos are not necessary but convenient.
- I used Ace RC Silver Seven receiver, micro servos, and a 250 mAh battery pack. Glue servos into trays with thin dabs of silicone.
- Place the battery pack behind the receiver under a sliding balsa cover; mount servos as far aft as practical to correct nose heaviness.
- Use a flexible cable for throttle control; locate the charge plug on the fuselage side opposite the exhaust.
Final assembly
- Trim and align all control linkages, adjust control throws to suit your preference.
- Keep control surface gaps minimal and sealed.
- Install the pilot figure (a 2" Williams Bros. standard pilot fits well) and cockpit details; place the flight‑receiver switch near the cockpit if desired.
- Check CG location as shown on the plans; adjust battery and servo placement to achieve it. My airplane came out nose‑heavy until I positioned the battery and servos aft.
Flying
- The Swallow has no bad habits. Inside and outside performance is nearly equal, and it will turn square corners like a Control Line stunter.
- Knife‑edge flight is balanced with no need for aileron correction, though sustained knife‑edge flight is limited by speed and side area.
- Outside snap rolls are easy; inside snap rolls are more difficult and must be forced because the airplane is quite stable.
- Takeoff: point down the runway, open throttle to the stop, apply some right rudder and a little up elevator—airborne almost instantly.
- The airplane is not very fast but feels docile and very comfortable to fly while remaining responsive enough for pattern maneuvers.
I hope many of you will build this airplane or apply some of these building techniques and design ideas to your next project. Everyone should have an airplane that flies like this one.
Transcribed from original scans by AI. Minor OCR errors may remain.

