
Taylor Cub E-2
By Don Srull
Overview
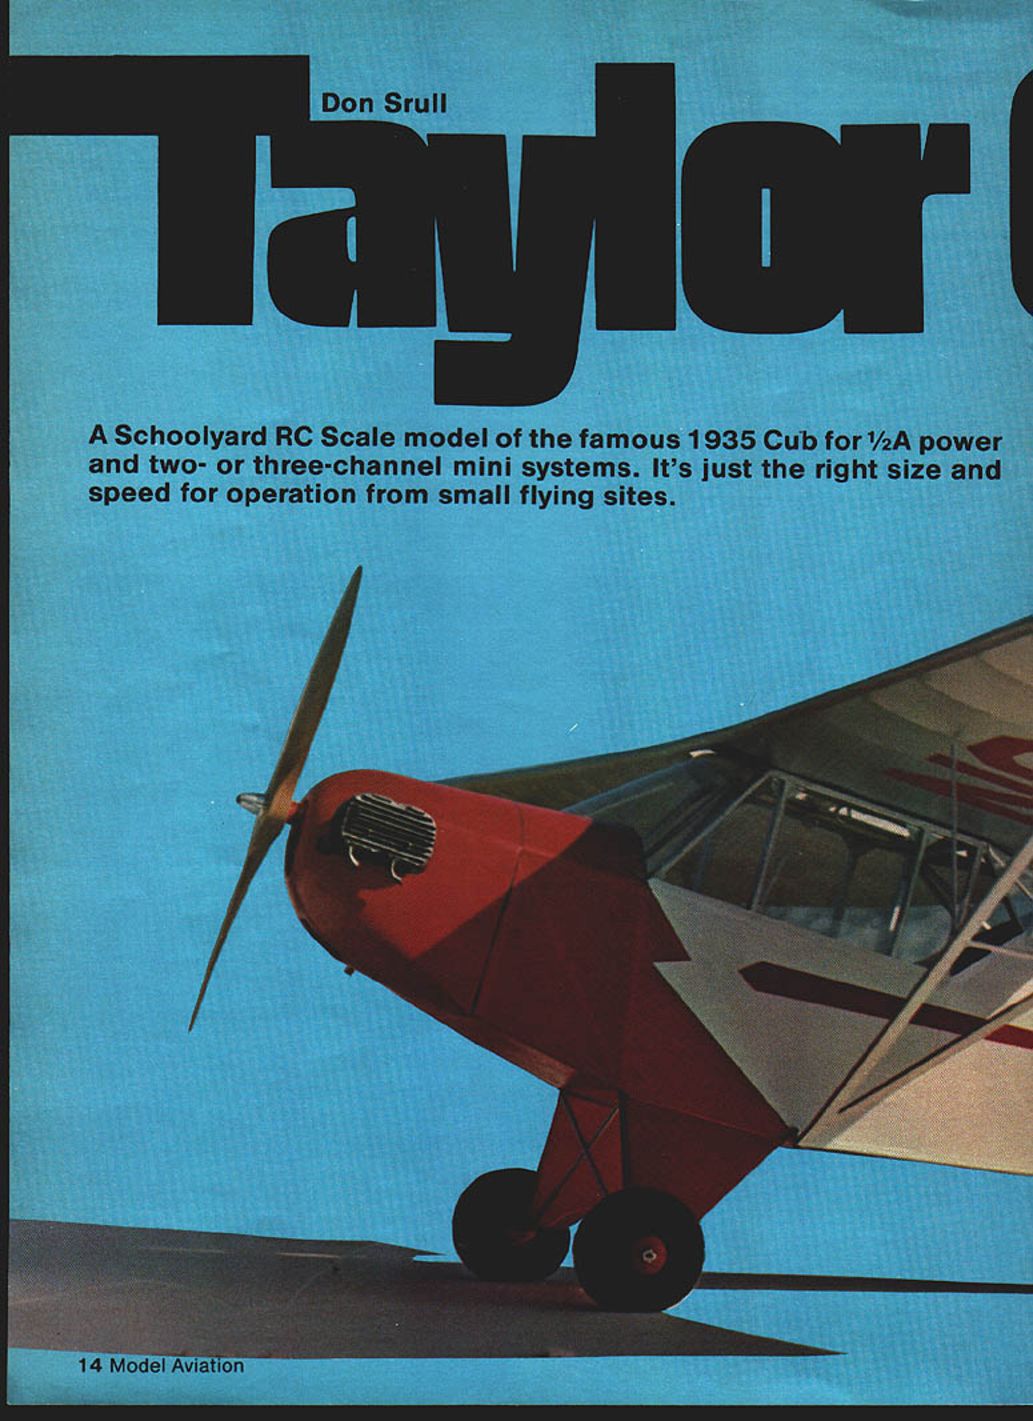
A Schoolyard RC scale model of the famous 1935 Cub for 1/2A power and two- or three-channel mini systems. It's just the right size and speed for operation from small flying sites.
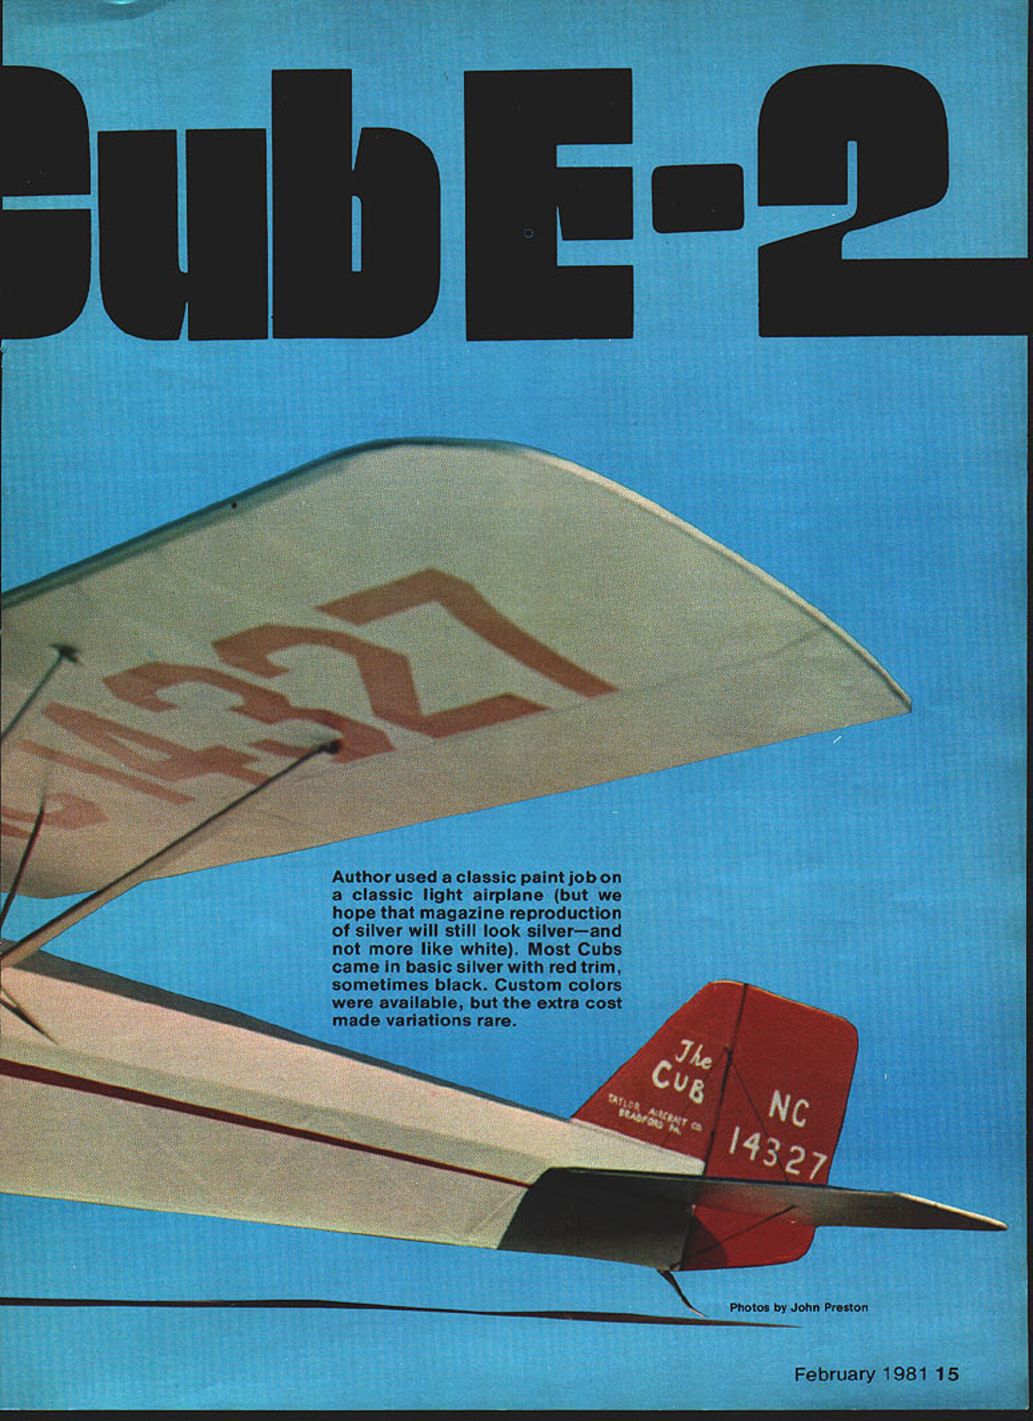
The author used a classic paint job on a classic light airplane (we hope that magazine reproduction of silver will still look silver — and not more like white). Most Cubs came in basic silver with red trim, sometimes black. Custom colors were available, but the extra cost made variations rare.
Any list of all-time trend-setting aircraft would have to include the ubiquitous Cub. Mr. Taylor's modest entry into the commercial sport-airplane market on the eve of the Great Depression helped to shape the face of aviation in the U.S. and throughout the world. This little two-place wonder made flying available to hundreds of budding aviators and helped revitalize local airport businesses, which had all but withered away during the depths of the Depression.
The Cub's low purchase price and low operating costs were targets for the rest of the market to shoot for. The Cub established the flat, opposed four-cylinder aircraft engine as the standard for efficiency, simplicity, reliability, and economy. Before long, "Taylor Cub" meant small lightplane, just as "Coke" meant soft drink.
The Cub was actually three different designs: the Taylor Cub E-2, the Piper Cub J-2, and the most numerous and well-known Cub of them all, the Piper Cub J-3. Of these three basic designs, I have always preferred the more classic lines of the original E-2 as a modeling subject. The straighter lines and the very basic shape of the old E-2 have an appeal that the later versions lost. The subject chosen for this Schoolyard Scale RC model is the original Cub — the Model E-2.
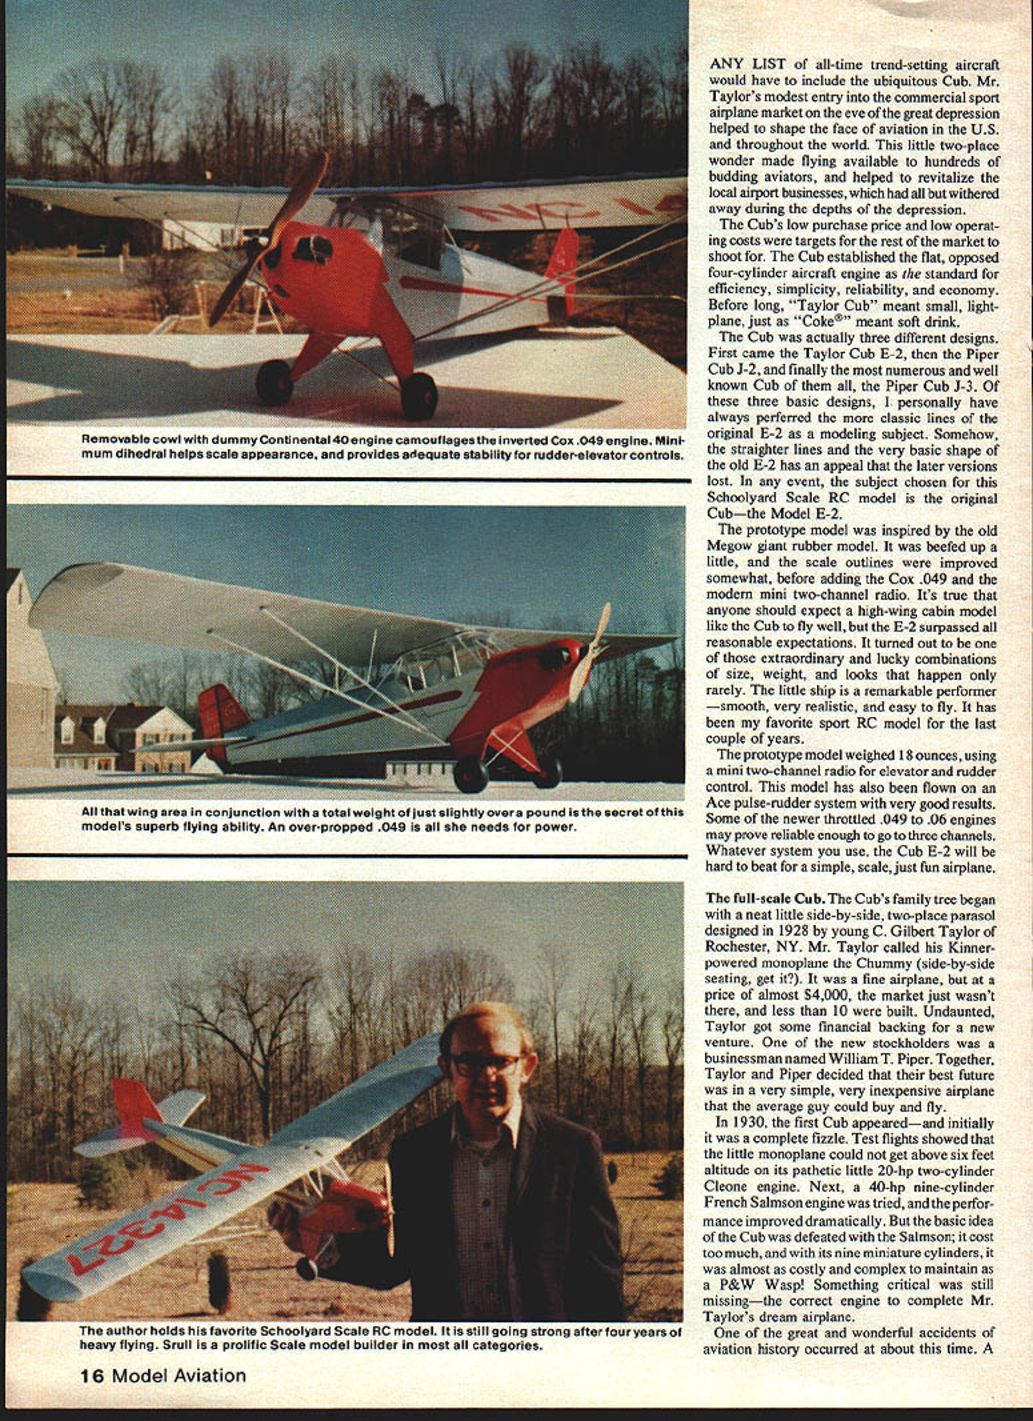
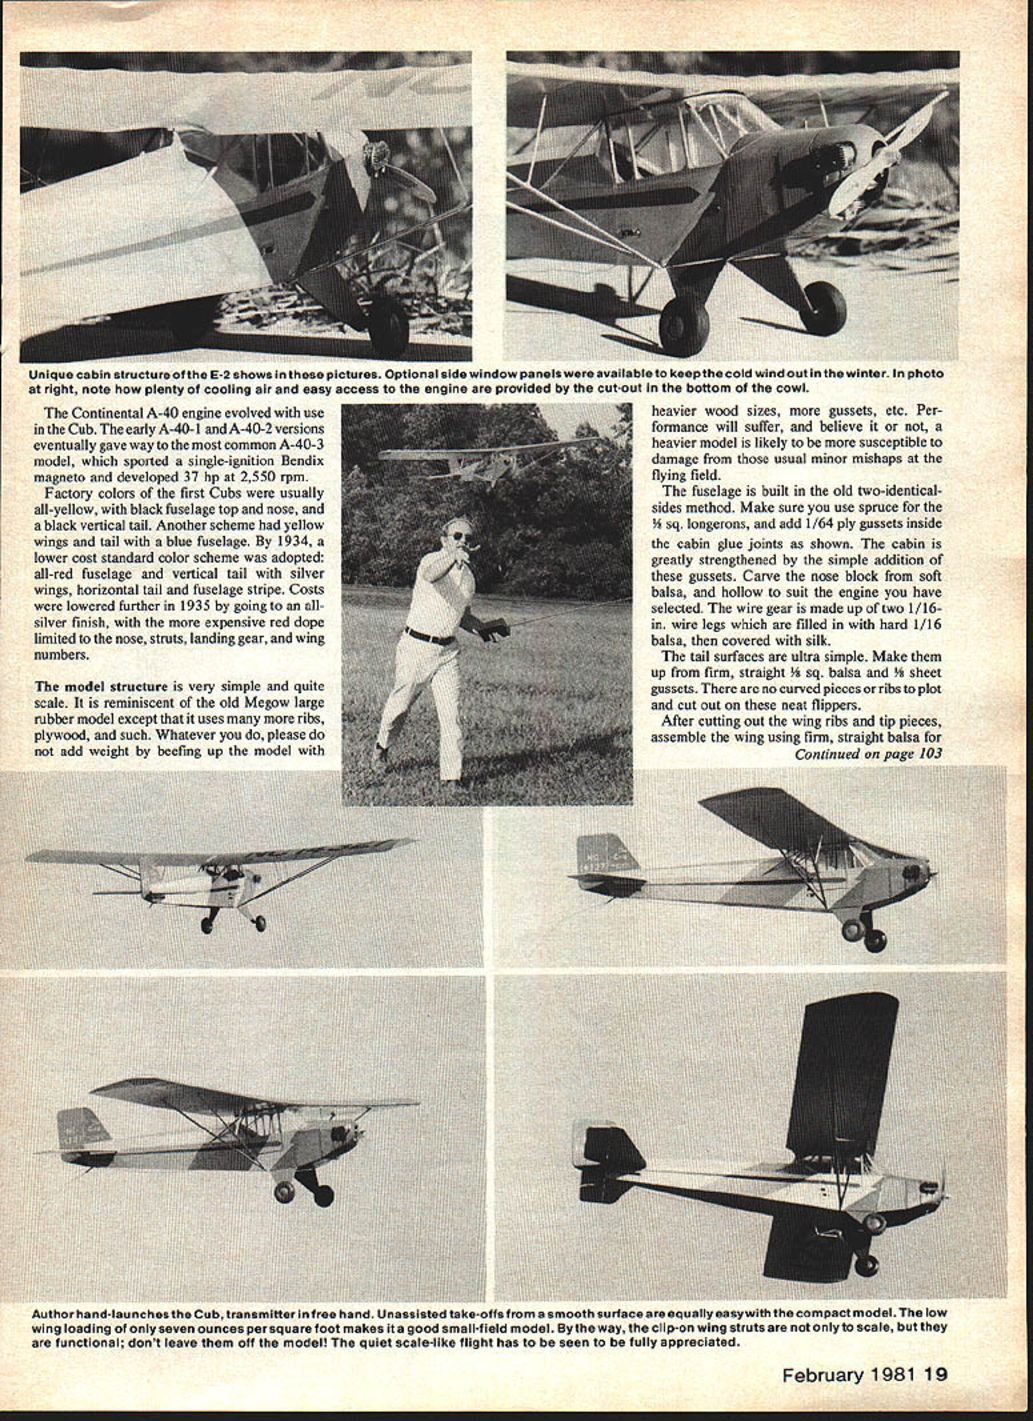
The prototype model was inspired by the old Megow giant rubber model. It was beefed up a little, the scale outlines were improved somewhat, then a Cox .049 and a modern mini two-channel radio were added. It's true that anyone should expect a high-wing cabin model like the Cub to fly well, but the E-2 surpassed all reasonable expectations. It turned out to be one of those extraordinary and lucky combinations of size, weight, and looks that happen only rarely. The little ship is a remarkable performer — smooth, very realistic, and easy to fly. It has been my favorite sport RC model for the last couple of years.
The prototype model weighed 18 ounces, using a mini two-channel radio for elevator and rudder control. This model has also been flown on an Ace pulse-rudder system with very good results. Some of the newer throttled .049 to .06 engines may prove reliable enough to go to three channels. Whatever system you use, the Cub E-2 will be hard to beat for a simple, scale, just-fun airplane.
History — The full-scale Cub
The Cub's family tree began with a neat little side-by-side, two-place parasol designed in 1928 by C. Gilbert Taylor of Rochester, NY. Taylor called his Kinner-powered monoplane the Chummy (side-by-side seating). It was a fine airplane, but at a price of almost $4,000 the market just wasn't there; fewer than 10 were built. Undaunted, Taylor got some financial backing for a new venture. One of the new stockholders was William T. Piper. Together, Taylor and Piper decided their best future was in a very simple, very inexpensive airplane that the average guy could buy and fly.
In 1930, the first Cub appeared — and initially it was a complete fizzle. Test flights showed the little monoplane could not get above six feet altitude on its pathetic little 20-hp two-cylinder Cleone engine. Next, a 40-hp nine-cylinder French Salmson engine was tried, and the performance improved dramatically. But the Salmson cost too much, and with its nine miniature cylinders it was almost as costly and complex to maintain as a P&W Wasp. Something critical was still missing — the correct engine to complete Taylor's dream airplane.
One of the great and wonderful accidents of aviation history occurred at about this time. A company in Michigan called Continental had begun a search for potential users for its brand-new, and rather novel, four-cylinder 37-hp engine. Continental's designation for this flat, opposed engine was A-40. The Cub and the A-40 went together like bacon and eggs.
Production was begun, and it slowly picked up until a total of 351 Cubs were sold by 1936. Little local airports came back to life, as the little Cub became a permanent fixture in American aviation. (An E-2 model was also offered with the 40-hp three-cylinder Aeromarine engine, but it was not nearly as popular as the Continental-powered E-2.) The Cub's low price of under $1,500, and a clever installment buying plan, kept sales at a profitable level all through the worst of the Depression. Its modest operating and maintenance costs became the new standard for sport aviation.
The simple appearance of the Cub hid a truly fine piece of aerodynamic and structural engineering by Taylor. To get even modest performance out of a two-place airplane on a 37-hp engine was no small trick. Very close attention was required to weight saving and clever use of conventional materials. The 35-ft. 3-in. span and 63-in. chord gave a decent aspect ratio of about seven. At 930 lbs. takeoff weight, the wing loading was a very low 5.1 lbs. per sq. ft. The power loading of 25 lbs. per hp resulted in a modest climb, a top speed of 85 mph, and a cruising speed of about 60 to 70 mph. Stalls were soft and gentle, at about 38 mph.
The Continental A-40 engine evolved with use in the Cub. The early A-40-1 and A-40-2 versions eventually gave way to the most common A-40-3 model, which sported a single-ignition Bendix magneto and developed 37 hp at 2,550 rpm.
Factory colors of the first Cubs were usually:
- All-yellow with black fuselage top and nose, and a black vertical tail.
- Yellow wings and tail with a blue fuselage.
By 1934, a lower-cost standard color scheme was adopted: all-red fuselage and vertical tail with silver wings, horizontal tail, and fuselage stripe. Costs were lowered further in 1935 by going to an all-silver finish, with the more expensive red dope limited to the nose, struts, landing gear, and wing numbers.
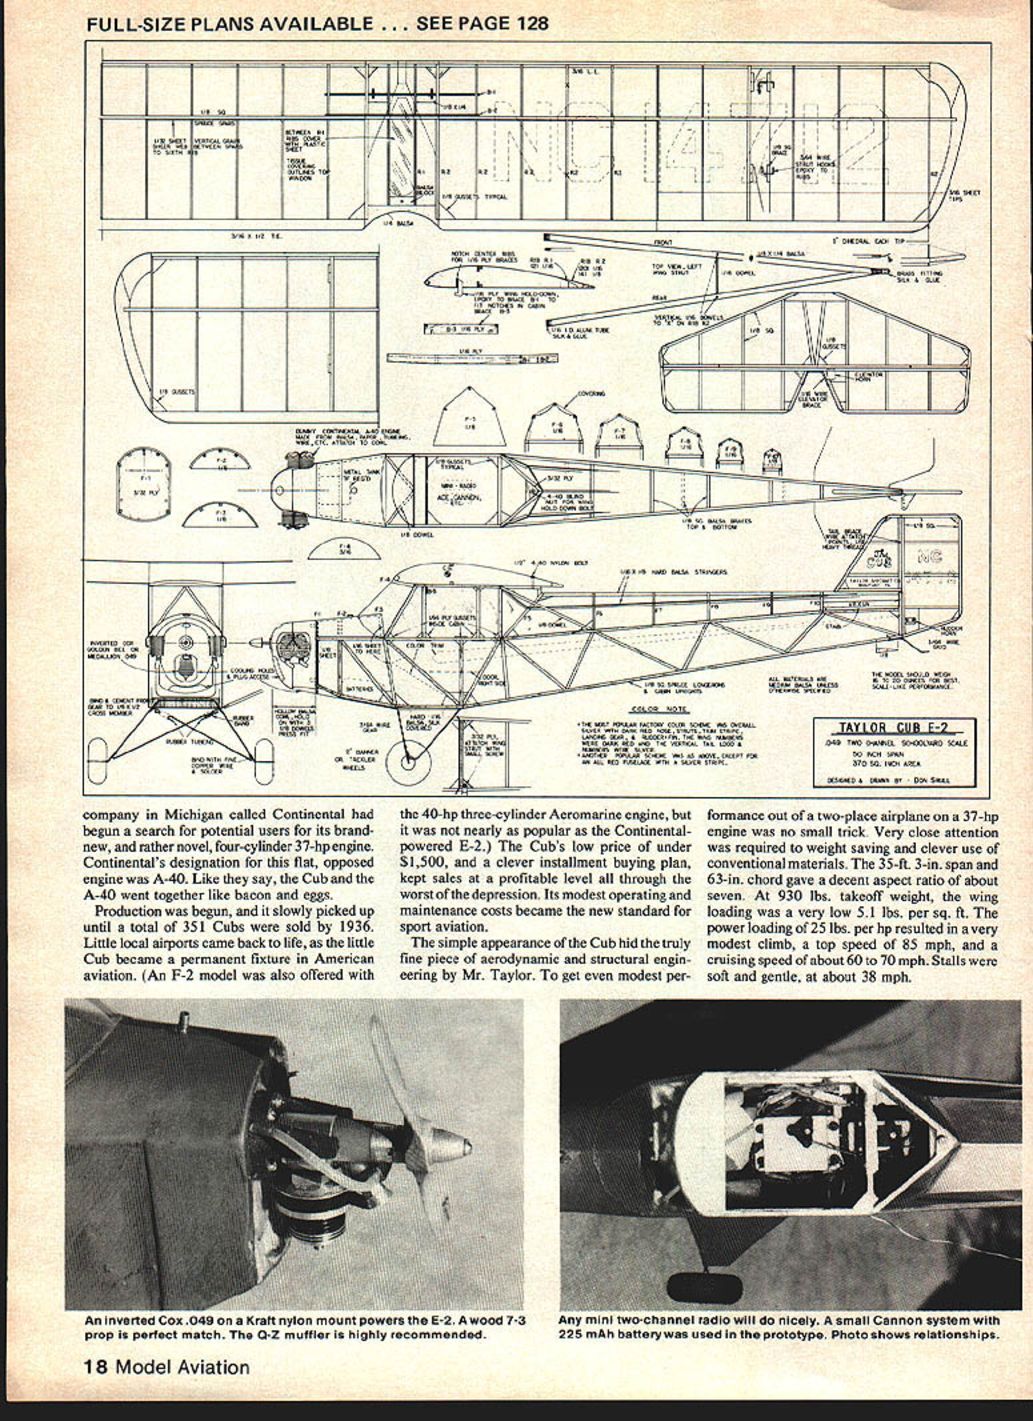
Model structure
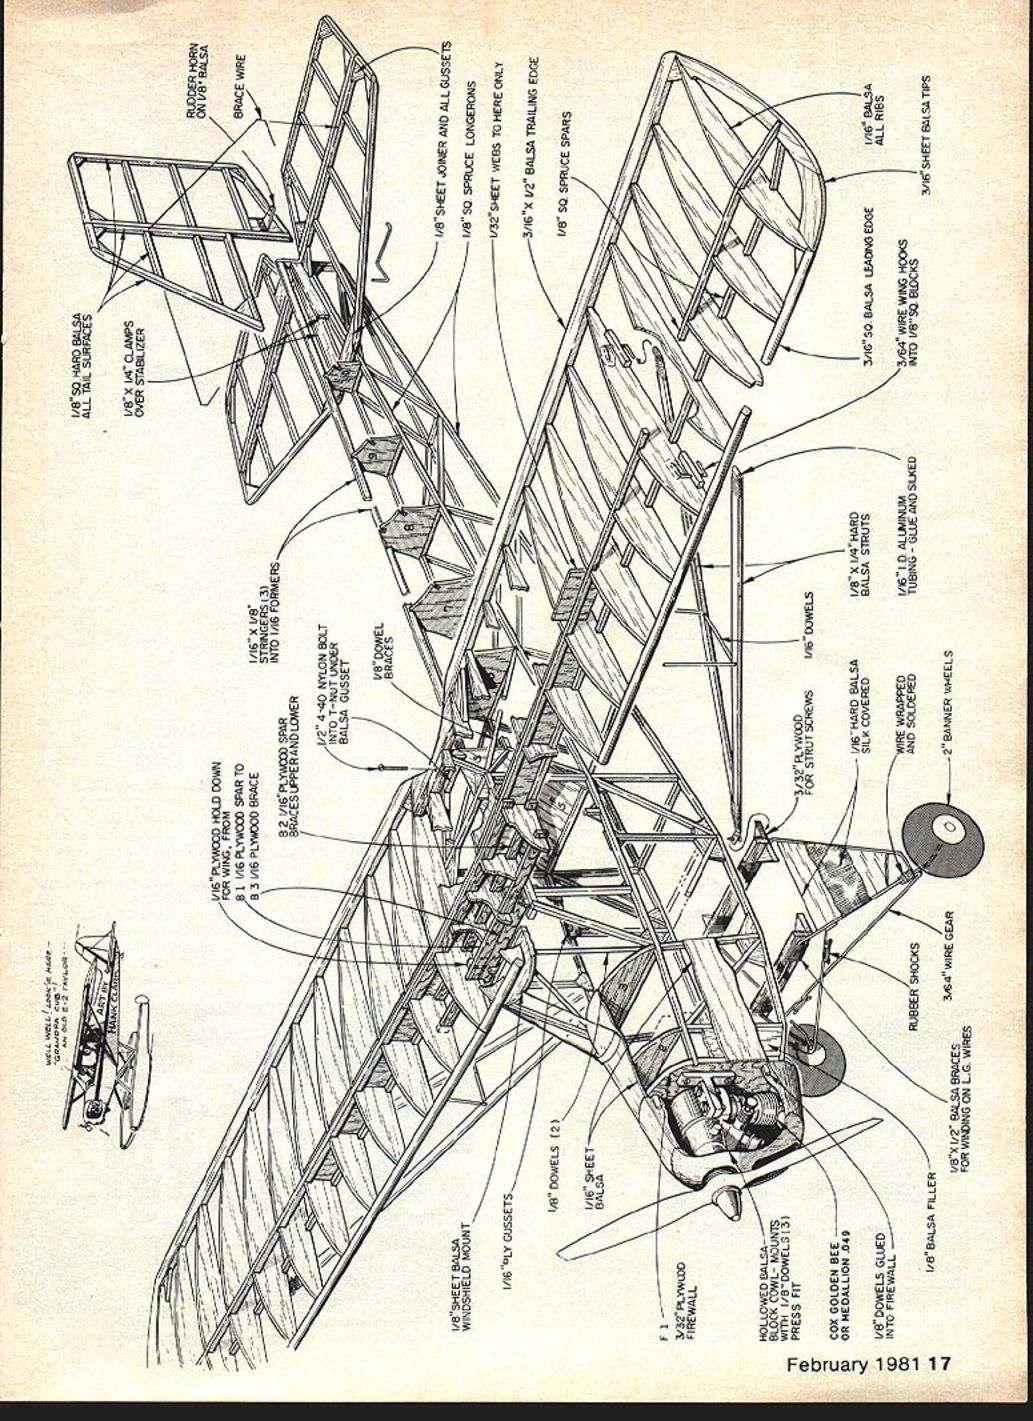
The model structure is very simple and quite scale. It is reminiscent of the old Megow large rubber model except that it uses many more ribs, plywood, and such. Whatever you do, please do not add weight by beefing up the model with heavier wood sizes, more gussets, etc. Performance will suffer, and, believe it or not, a heavier model is likely to be more susceptible to damage from the usual minor mishaps at the flying field.
Fuselage
The fuselage is built in the old two-identical-sides method. Use spruce for the 1/8 sq. longerons, and add 1/64-in. ply gussets inside the cabin glue joints as shown. The cabin is greatly strengthened by the simple addition of these gussets. Carve the nose block from soft balsa and hollow to suit the engine you have selected. The wire gear is made up of two 1/16-in. wire legs which are filled in with hard 1/16-in. balsa, then covered with silk.
Tail surfaces
The tail surfaces are ultra simple. Make them from firm, straight 1/8-in. sq. balsa with 1/8-in. sheet gussets. There are no curved pieces or complex ribs to plot and cut out on these neat flippers.
Wing
After cutting out the wing ribs and tip pieces, assemble the wing using firm, straight balsa for the leading and trailing edges. The spars are 1/8-in. sq. spruce and are webbed with 1/32-in. balsa sheet as far out as the strut attachment ribs. After adding dihedral and the ply dihedral braces and gussets, form the 1/32-in. wire strut attachment clips and epoxy them to the appropriate ribs.
Struts and fitting the wing
Fit the wing to the fuselage cabin top. When it is perfectly aligned, drill the bolt hold-down screw hole through the wing and cabin top plate; at this time also epoxy the ply hold-down clip to the wing spar. While the wing is still in position on the fuselage, make up the two wing struts from 5/32 x 4 balsa. After trimming to fit well, spot-glue the aluminum tubing and pieces in place, and slide the brass strut-to-fuselage fitting into a slot in the "V" end of the strut. Do not glue it yet. Slip the struts in place and screw the brass fittings to the fuselage attachment points. After making sure the wing is all lined up properly, use Hot Stuff to secure the brass clips in place. Remove the struts and reinforce all fittings with silk and glue.
Covering and finishing
I covered my Cub with medium-weight silkspan. Lightweight silk would work well, but use low-shrink dope for finishing to keep warping to a minimum. Plastic film covering could also be used and would probably provide the lightest and simplest covering and finish possible, though it would not look as scale-like on this model as a painted finish. In any case, try to keep the weight down as much as possible; pigmented dopes can build up weight very fast if you aren't careful.
After covering with silkspan, water-shrink the covering, then brush on three thin coats of thinned-down aluminum dope — to which add a small amount of talcum powder for filling. When dry, sand carefully with 600-grit paper until the surface is smooth and ready for color. Finally, spray a wet coat of aluminum dope. Mask off the trim areas and spray with Sig Tennessee Red dope.
Two-inch diameter Banner wheels look about right and are a little more durable than Trexlers. Make the dummy cylinders from scraps of balsa, paper, tubing, and wire; paint them with a mixture of black and silver dope and attach them to the removable nose block.
Install your favorite mini, lightweight radio, and you're ready to fly.
Flying
Make sure the model balances a little forward of the spars. Check for any warps or misalignments and remove any that are visible. Our model weighed 18 ounces ready-to-fly and performed best when the Cox Medallion engine was overloaded with a 7x3 or 7x4 prop. When pegged out on a 6x3 or 6x4 prop, the model's speed and rate of climb were much too fast to be scale-like — and not to my personal liking for a model of this type. On the larger props and with a muffler, speed and climb are much more scale-like and graceful.
Even with the power reduced in this way, the Cub's performance is more than adequate to fly in almost any restricted area. Baseball fields, the corner schoolyard, and empty parking lots are ready airports for the Cub.
Take my word for it — the Taylor E-2 Cub, a little can of fuel, and a starting battery can give you as much flying fun as any RC model you have flown. Enjoy!
Transcribed from original scans by AI. Minor OCR errors may remain.

