
THINGAMABOB
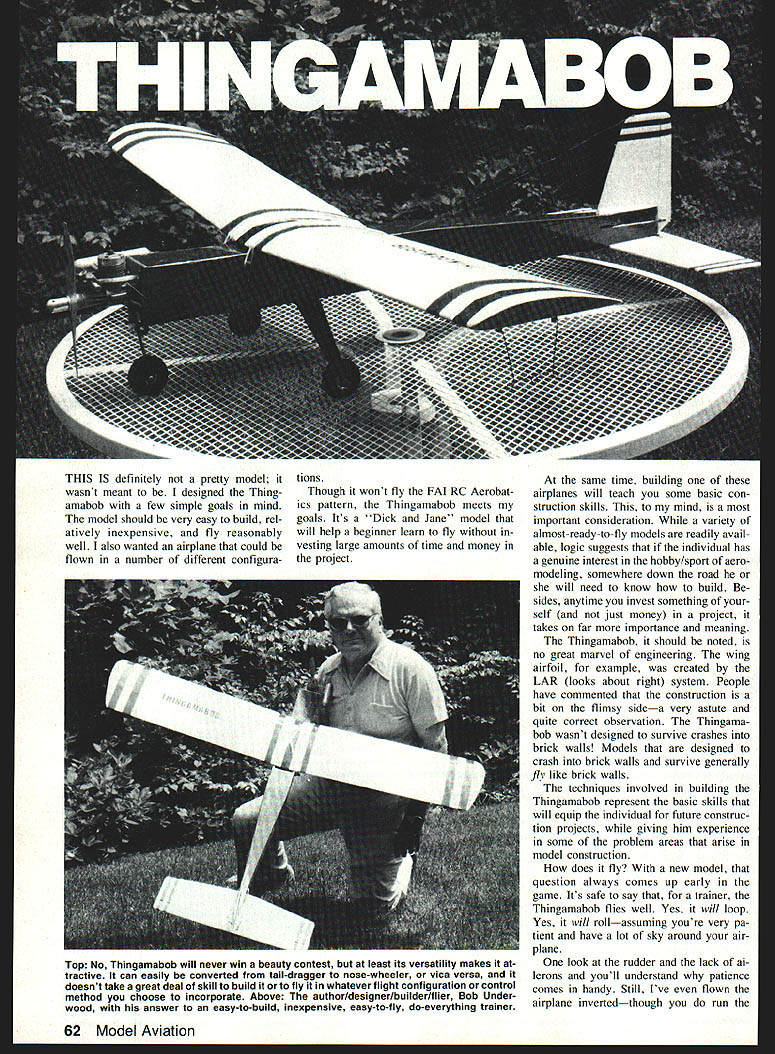
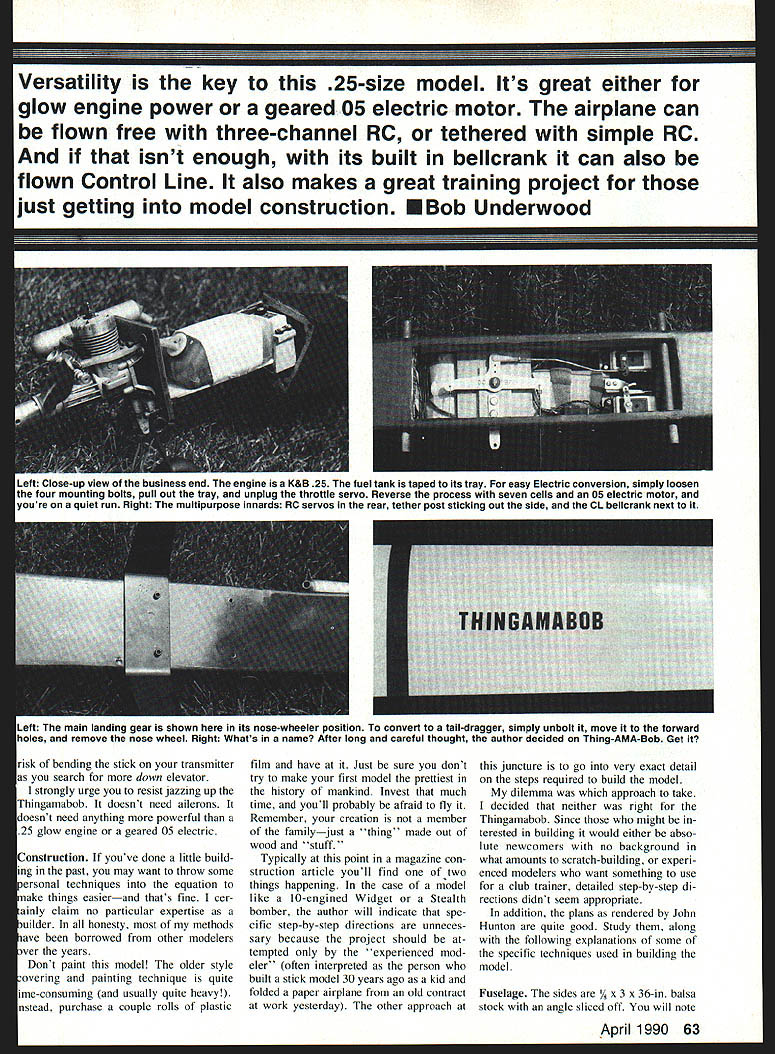
This is definitely not a pretty model; it wasn't meant to be. I designed the Thingamabob with a few simple goals in mind. The model should be very easy to build, relatively inexpensive, and fly reasonably well. I also wanted an airplane that could be flown in a number of different configurations.
Though it won't fly the FAI RC Aerobatics pattern, the Thingamabob meets my goals. It's a "Dick and Jane" model that will help a beginner learn to fly without investing large amounts of time and money in the project.
At the same time, building one of these airplanes will teach you some basic construction skills. This, to my mind, is a most important consideration. While a variety of almost-ready-to-fly models are readily available, logic suggests that if the individual has a genuine interest in the hobby/sport of aeromodeling, somewhere down the road he or she will need to know how to build. Besides, anytime you invest something of yourself (and not just money) in a project, it takes on far more importance and meaning.
The Thingamabob, it should be noted, is no great marvel of engineering. The wing airfoil, for example, was created by the LAR (looks about right) system. People have commented that the construction is a bit on the flimsy side — a very astute and quite correct observation. The Thingamabob wasn't designed to survive crashes into brick walls! Models that are designed to crash into brick walls and survive generally fly like brick walls.
The techniques involved in building the Thingamabob represent the basic skills that will equip the individual for future construction projects, while giving him experience in some of the problem areas that arise in model construction.
How does it fly? With a new model, that question always comes up early in the game. It's safe to say that, for a trainer, the Thingamabob flies well. Yes, it will loop. Yes, it will roll — assuming you're very patient and have a lot of sky around your airplane. Look at the rudder and the lack of ailerons and you'll understand why patience comes in handy. Still, I've even flown the airplane inverted — though you do run the risk of bending the stick on your transmitter as you search for more down elevator.
I strongly urge you to resist jazzing up the Thingamabob. It doesn't need ailerons. It doesn't need anything more powerful than a .25 glow engine or a geared .05 electric.
Construction
If you've done a little building in the past, you may want to throw some personal techniques into the equation to make things easier — and that's fine. I certainly claim no particular expertise as a builder. In all honesty, most of my methods have been borrowed from other modelers over the years.
Don't paint this model! The older-style covering and painting technique is quite time-consuming (and usually quite heavy). Instead, purchase a couple rolls of plastic film and have at it. Just be sure you don't try to make your first model the prettiest in the history of mankind. Invest that much time, and you'll probably be afraid to fly it. Remember, your creation is not a member of the family — just a "thing" made out of wood and stuff.
Typically at this point in a magazine construction article you'll find one of two things happening. In the case of a model like a 10-engined Widget or a Stealth bomber, the author will indicate that specific step-by-step directions are unnecessary because the project should be attempted only by the "experienced modeler" (often interpreted as the person who built a stick model 30 years ago as a kid and folded a paper airplane from an old contract work yesterday). The other approach at this juncture is to go into very exact detail on the steps required to build the model. My dilemma was which approach to take. I decided that neither was right for the Thingamabob. Since those who might be interested in building it would either be absolute newcomers with no background in what amounts to scratch-building, or experienced modelers who want something to use for a club trainer, detailed step-by-step directions didn't seem appropriate.
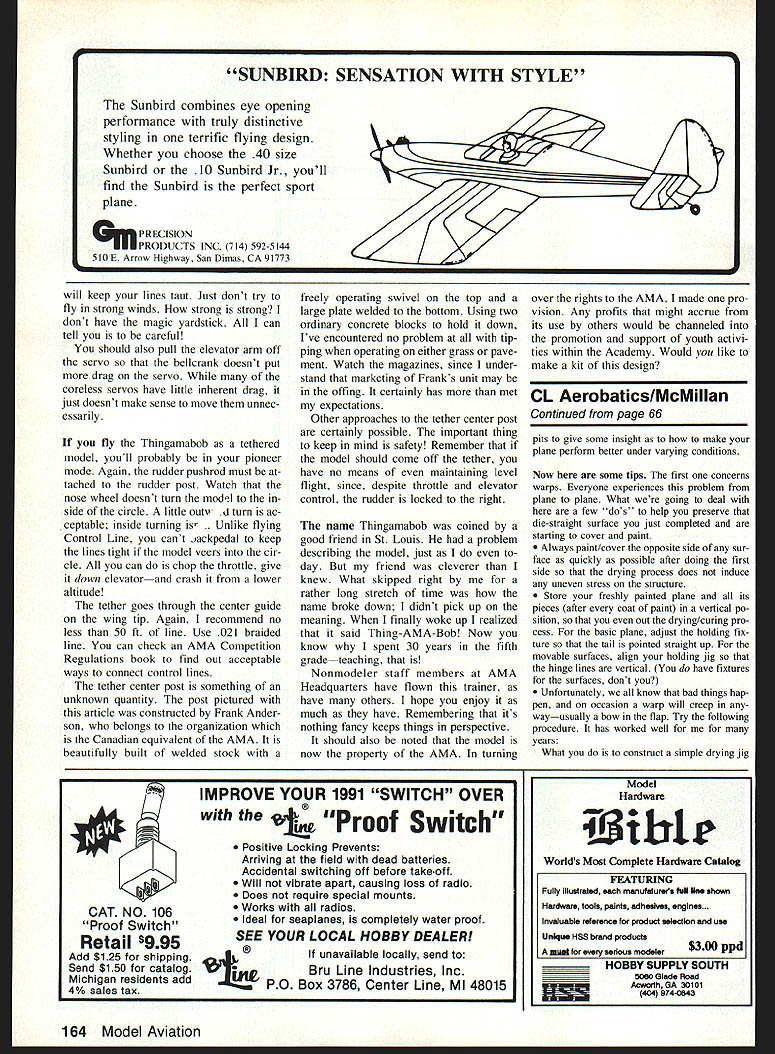
In addition, the plans as rendered by John Hunton are quite good. Study them, along with the following explanations of some of the specific techniques used in building the model.
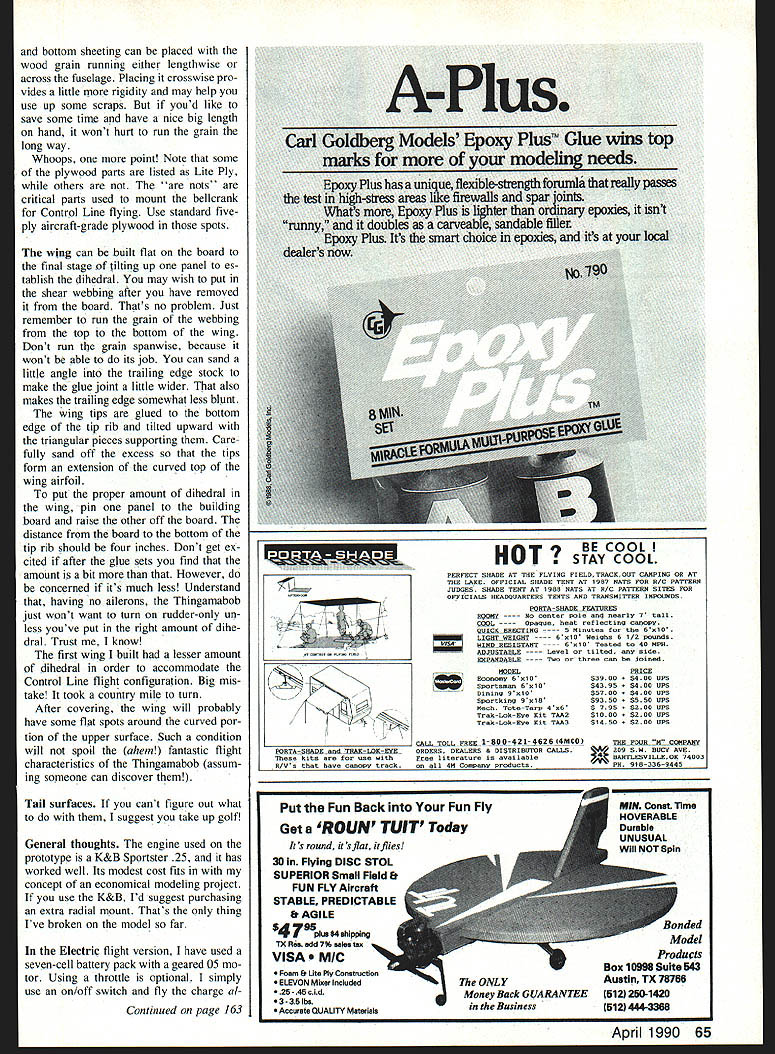
Fuselage
The sides are 3/16 x 3 x 36 in. balsa stock with an angle sliced off. You will note that the nose section has no plywood doubler. If that makes you uncomfortable, go ahead and add a 1/32-ply piece extending back to the wing hold-down dowel.
Another feature that may make you squirm a tad is the angle break in the fuselage sides behind the wing. I wanted to eliminate the need to bend the fuselage sides when joining them at the tail.
Those of you with building experience know what happens when you take two pieces of dissimilar balsa and try to bend them. The fuselage comes out looking like a sideways airfoil, leaning either to the right or the left. I once succeeded in building a fuselage that remained straight all the way to the tail, but boy did that look weird! So my technique for the Thingamabob was to make a partial cut into the fuselage sides from the inside, cracking them inward to come together at the tail exactly on center.
You'll need to sand the sides of the former that fits in at that point so that it has a little "V" on the outside edges. Then, glue it well! The advantage is that you can draw a simple line down your building board and very easily check whether your fuselage is straight. There's also less tendency for the harder wood that might exist in one fuselage side to draw the softer piece toward it.
A hard landing might separate the fuselage at that point, you say? Right you are. Just don't land hard!
There is nothing magical about the tray behind the firewall. Old-timer modelers will recognize the method used as a throw-back to the old ignition days when we carried a coil, condenser, batteries, and what have you and had to get to them frequently (often after every flight!).
If you're planning to alternate between using glow and electric power, build two firewalls and trays. That way you can easily switch them at the flying field. Use rubber bands or a strap to hold the tank in place on the tray.
Drill the mounting holes to attach the firewall to the fuselage by sandwiching the pieces of plywood together before the inside piece is glued into the fuselage. If you don't do that the chances are almost a thousand (or more)-to-one that you'll never get the holes to line up properly. It's kind of like cutting off chair legs.
A last thought on the fuselage: the top and bottom sheeting can be placed with the wood grain running either lengthwise or across the fuselage. Placing it crosswise provides a little more rigidity and may help you use up some scraps. But if you'd like to save some time and have a nice big length on hand, it won't hurt to run the grain the long way.
Note that some of the plywood parts are listed as Lite Ply, while others are not. The "are nots" are critical parts used to mount the bellcrank for Control Line flying. Use standard five-ply aircraft-grade plywood in those spots.
Wing
The wing can be built flat on the board to the final stage of tilting up one panel to establish the dihedral. You may wish to put in the shear webbing after you have removed it from the board. That's no problem. Just remember to run the grain of the webbing from the top to the bottom of the wing. Don't run the grain spanwise, because it won't be able to do its job.
You can sand a little angle into the trailing edge stock to make the glue joint a little wider. That also makes the trailing edge somewhat less blunt. The wing tips are glued to the bottom edge of the tip rib and tilted upward with the triangular pieces supporting them. Carefully sand off the excess so that the tips form an extension of the curved top of the wing airfoil.
To put the proper amount of dihedral in the wing, pin one panel to the building board and raise the other to the proper height. The distance from the board to the bottom of the tip rib should be four inches. Don't get excited if after the glue sets you find that the amount is a bit more than that. However, don't be concerned if it's much less! Understand that, having no ailerons, the Thingamabob just won't want to turn on rudder-only unless you've put in the right amount of dihedral. Trust me, I know!
The first wing I built had a lesser amount of dihedral in order to accommodate the Control Line flight configuration. Big mistake! It took a country mile to turn.
After covering, the wing will probably have some flat spots around the curved portion of the upper surface. Such a condition will not spoil the (ahem!) fantastic flight characteristics of the Thingamabob (assuming someone can discover them!).
Tail surfaces
If you can't figure out what to do with them, I suggest you take up golf!
General thoughts
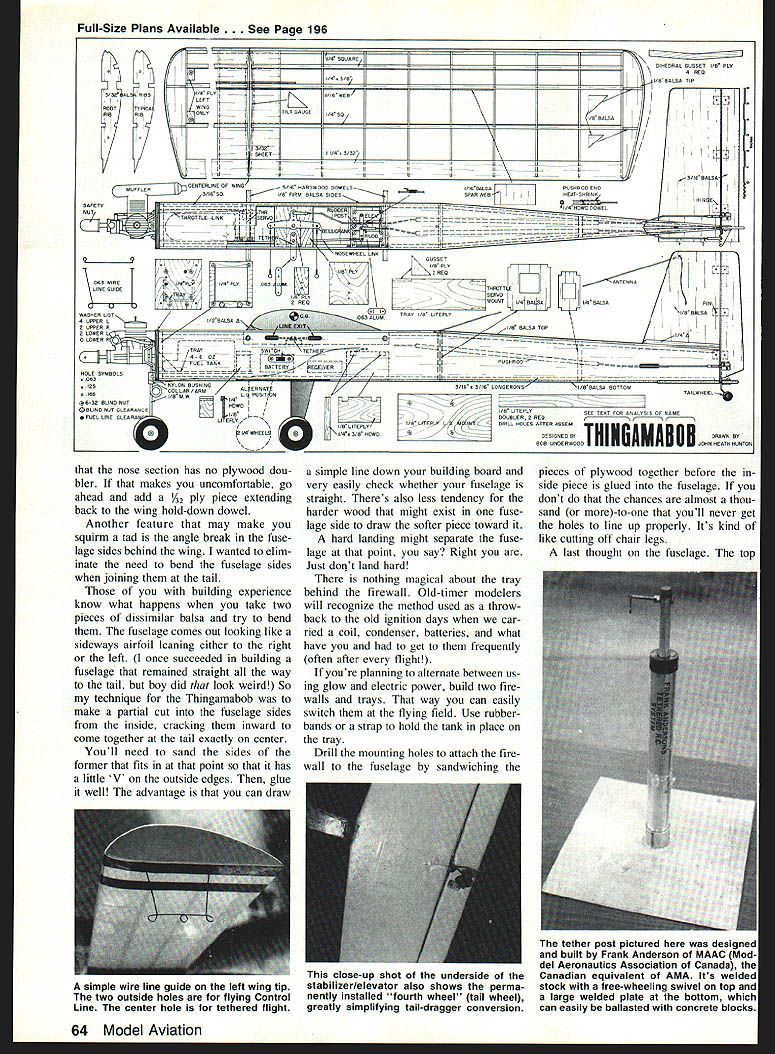
The engine used on the prototype is a K&B Sportster .25, and it has worked well. Its modest cost fits in with my concept of an economical modeling project. If you use the K&B, I'd suggest purchasing an extra radial mount. That's the only thing I've broken on the model so far.
In the electric-flight version, I have used a seven-cell battery pack with a geared .05 motor. Using a throttle is optional. I simply use an on/off switch and fly the battery charge almost out so that I don't have to land dead-stick. Determining the flight time, however, will take some practice on your part.
Deciding where to locate the on/off switch does present a little problem. If you mount it in the fuselage side, you'll have to demount it each time you change from electric to glow or back again. I put a switch on the firewall under the electric motor. That falls under the heading of dumb, since I had to exercise extreme caution in keeping my fingers out of the prop. Don't do it!
When flying Control Line use at least 50-ft. lengths of .018 braided lines. The model will fly on 60-ft. lines with no trouble. Seventy-footers would probably be stretching the limits of credibility.
The one thing that you must not do, unless you want to screw yourself into the ground, is to overfill the fuel tank! A .25 engine will run for what seems like a jillion hours on even four ounces of fuel.
It had been quite a while since I had flown much Control Line when I test flew the Thingamabob in that version. I had been up about three or four minutes when it dawned on me that I had filled the tank. And wouldn't you know it, I got a beautiful, fast engine run that lasted for almost 30 minutes of mind-numbing, dizzying circular flight. Get a syringe-type filler and measure an ounce or two to start with!
For the Control Line version, remove the rudder pushrod from the servo and attach it to the rudder post. This will induce a right turn into the rudder that will keep the model out on the end of the lines. I found that it was unnecessary to put weight in the outboard wing tip. The right rudder and the small amount of right thrust in the engine will keep your lines taut. Just don't try to fly in strong winds. How strong is strong? I don't have the magic yardstick. All I can tell you is to be careful!
You should also pull the elevator arm off the servo so that the bellcrank doesn't put more drag on the servo. While many of the coreless servos have little inherent drag, it just doesn't make sense to move them unnecessarily.
If you fly the Thingamabob as a tethered model, you'll probably be in your pioneer mode. Again, the rudder pushrod must be attached to the rudder post. Watch that the nose wheel doesn't turn the model to the inside of the circle. A little out-turn is acceptable; inside turning is not. Unlike flying Control Line, you can't jack-pedal to keep the lines tight if the model veers into the circle. All you can do is chop the throttle, give it down elevator — and crash it from a lower altitude!
The tether goes through the center guide on the wing tip. Again, I recommend no less than 50 ft. of line. Use .021 braided line. You can check an AMA Competition Regulations book to find out acceptable ways to connect control lines.
The tether center post is something of an unknown quantity. The post pictured with this article was constructed by Frank Anderson, who belongs to the organization which is the Canadian equivalent of the AMA. It is beautifully built of welded stock with a freely operating swivel on the top and a large plate welded to the bottom. Using two ordinary concrete blocks to hold it down, I've encountered no problem at all with tipping when operating on either grass or pavement. Watch the magazines, since I understand that marketing of Frank's unit may be in the offing. It certainly has more than met my expectations.
Other approaches to the tether center post are certainly possible. The important thing to keep in mind is safety! Remember that if the model should come off the tether, you have no means of even maintaining level flight, since, despite throttle and elevator control, the rudder is locked to the right.
The name Thingamabob was coined by a good friend in St. Louis. He had a problem describing the model, just as I do even today. But my friend was cleverer than I knew. What skipped right by me for a rather long stretch of time was how the name broke down; I didn't pick up on the meaning. When I finally woke up I realized that it said Thing-AMA-Bob! Now you know why I spent 30 years in the fifth grade — teaching, that is!
Nonmodeler staff members at AMA Headquarters have flown this trainer, as have many others. I hope you enjoy it as much as they have. Remembering that it's nothing fancy keeps things in perspective.
It should also be noted that the model is now the property of the AMA. In turning over the rights to the AMA, I made one provision: any profits that might accrue from its use by others would be channeled into the promotion and support of youth activities within the Academy. Would you like to make a kit of this design?
Transcribed from original scans by AI. Minor OCR errors may remain.

