
Hal Stewart
Thorp T-18 Tiger
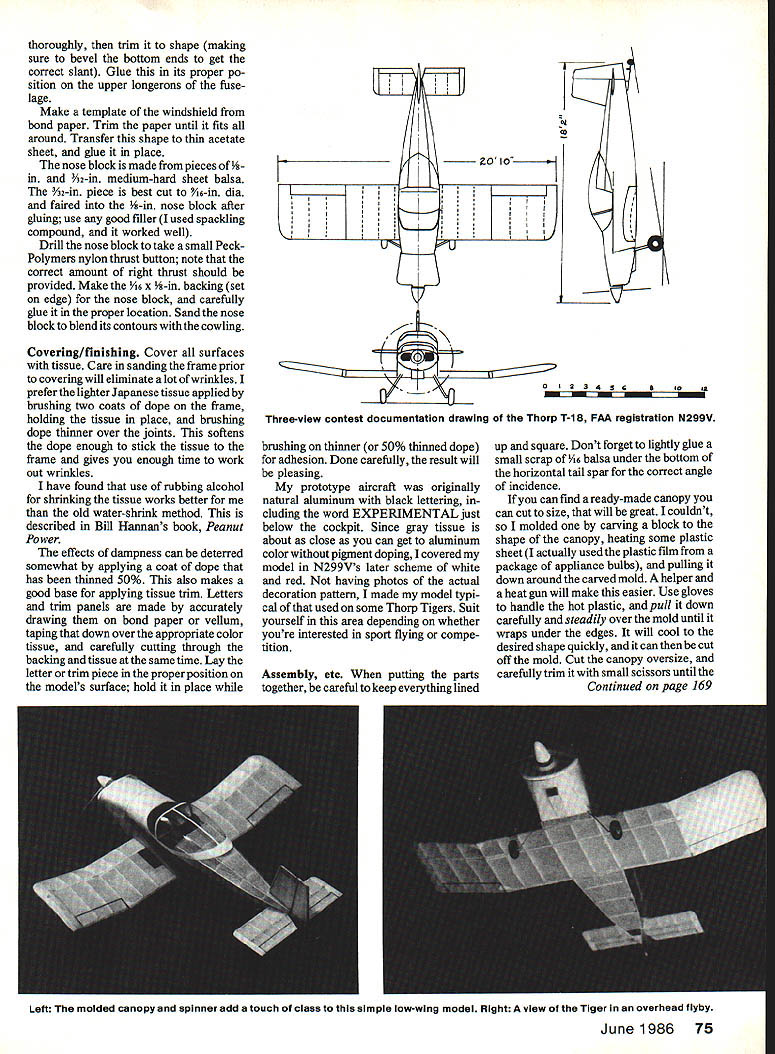
Full-size plans on pages 86–87
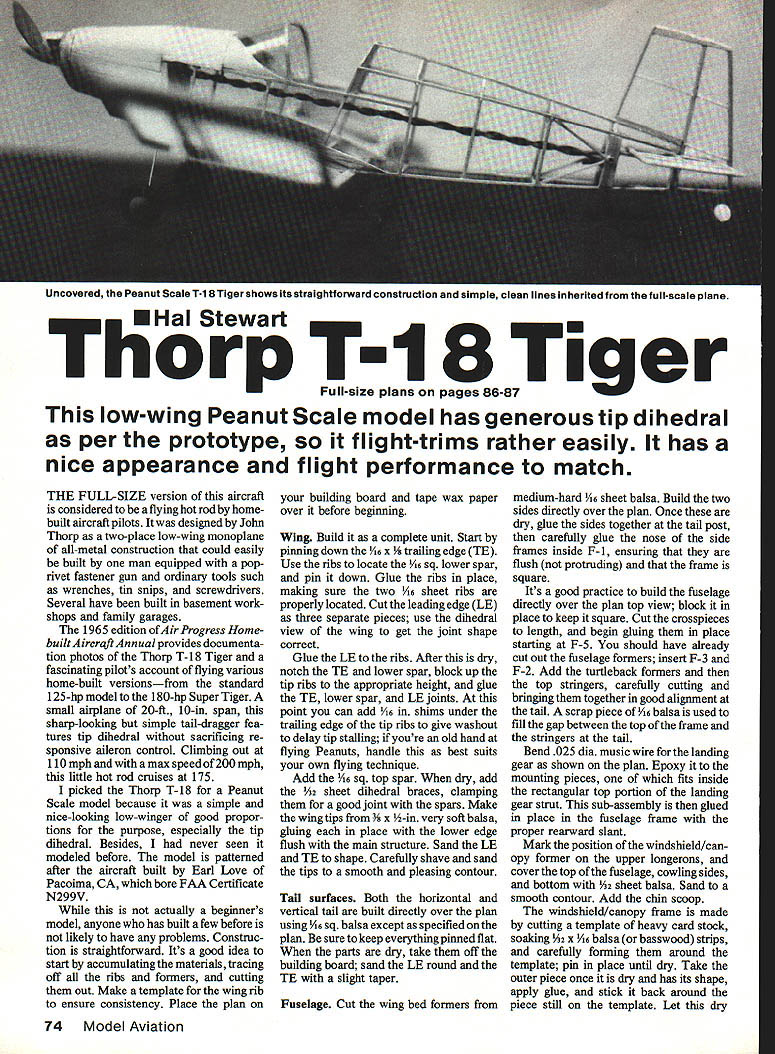
This low-wing Peanut Scale model has generous tip dihedral as per the prototype, so it flight-trims rather easily. It has a nice appearance and flight performance to match.
The full-size version of this aircraft is considered to be a flying hot rod by home-built aircraft pilots. It was designed by John Thorp as a two-place low-wing monoplane of all-metal construction that could easily be built by one man equipped with a pop-rivet fastener gun and ordinary tools such as wrenches, tin snips, and screwdrivers. Several have been built in basement workshops and family garages.
The 1965 edition of Air Progress Homebuilt Aircraft Annual provides documentation photos of the Thorp T-18 Tiger and a fascinating pilot’s account of flying various home-built versions — from the standard 125-hp model to the 180-hp Super Tiger. A small airplane of 20 ft. 10 in. span, this sharp-looking but simple tail-dragger features tip dihedral without sacrificing responsive aileron control. Climbing out at 110 mph and with a max speed of 200 mph, this little hot rod cruises at 175 mph.
I picked the Thorp T-18 for a Peanut Scale model because it was a simple and nice-looking low-winger of good proportions for the purpose, especially the tip dihedral. Besides, I had never seen it modeled before. The model is patterned after the aircraft built by Earl Love of Pacoima, CA, which bore FAA Certificate N299V.
While this is not actually a beginner’s model, anyone who has built a few before is not likely to have any problems. Construction is straightforward. It’s a good idea to start by accumulating the materials, tracing off all the ribs and formers, and cutting them out. Make a template for the wing rib to ensure consistency. Place the plan on your building board and tape wax paper over it before beginning.
Wing
Build the wing as a complete unit.
- Pin down the 1/16 x 1/8-in. trailing edge (TE).
- Use the ribs to locate the 1/16-in. square lower spar and pin it down.
- Glue the ribs in place, making sure the two 1/16-in. sheet ribs are properly located.
- Cut the leading edge (LE) in three separate pieces; use the dihedral view of the wing to get the joint shape correct. Glue the LE to the ribs.
- After the glue is dry, notch the TE and the lower spar, block up the tip ribs to the appropriate height, and glue the TE, lower spar, and LE joints.
- Optionally add 1/16-in. shims under the trailing edge of the tip ribs to give washout to delay tip stalling. Experienced Peanut flyers should tailor washout to their own flying technique.
- Add the 1/16-in. square top spar.
- When dry, add 1/32-in. sheet dihedral braces, clamping for a good joint with the spars.
- Make the wing tips from 3/32 x 1/2-in. very soft balsa, gluing each in place with the lower edge flush with the main structure. Sand the LE and TE to shape. Carefully shave and sand the tips to a smooth, pleasing contour.
Tail surfaces
Both the horizontal and vertical tail are built directly over the plan using 1/8-in. square balsa except as specified on the plan.
- Keep everything pinned flat while parts dry.
- When dry, remove from the building board; sand the leading edges round and the trailing edges with a slight taper.
- Lightly glue a small scrap of 1/16-in. balsa under the bottom of the horizontal tail spar to set the correct angle of incidence.
Fuselage
- Cut the wing bed formers from medium-hard 1/16-in. sheet balsa.
- Build the two fuselage sides directly over the plan. Once dry, glue the sides together at the tail post.
- Carefully glue the nose side frames inside F-1, ensuring they are flush (not protruding) and that the frame is square.
- It’s good practice to build the fuselage directly over the top-view block; lock it in place to keep it square.
- Cut the crosspieces to length and begin gluing them in place starting at F-5. Insert fuselage formers F-3 and F-2.
- Add the turtleback formers and then the top stringers, carefully cutting and bringing them together in good alignment at the tail. Use a scrap piece of 1/16-in. balsa to fill the gap between the top of the frame and the stringers at the tail.
- Bend .025-in. dia. music wire for the landing gear as shown on the plan.
- Epoxy mounting pieces, one of which fits into the rectangular top portion of the landing gear strut. Glue this sub-assembly into the fuselage frame with the proper rearward slant.
- Mark the position for the windshield/canopy former on the upper longerons, and cover the top of the fuselage, cowling sides, and bottom with 1/32-in. sheet balsa. Sand to a smooth contour.
- Add the chin scoop.
Windshield/canopy frame
- Cut a template of heavy card stock.
- Soak 1/32 x 1/16-in. balsa (or basswood) strips and carefully form them around the template; pin in place until dry.
- Take the outer piece once it is dry, apply glue and stick it back around the template. Let dry thoroughly, trim the shape, and bevel the bottom ends to get the correct slant.
- Glue the canopy frame to its proper position on the upper longerons and fuselage.
- Make a template for the windshield from bond paper. Trim the paper until it fits; transfer the shape to thin acetate sheet and glue in place.
Nose block
- Make the nose block from pieces of 3/32-in. medium-hard sheet balsa.
- Drill the nose block to take a small Peck-Polymers nylon thrust button; provide the correct amount of right thrust.
- Make the 1/16 x 1/8-in. backing (set on edge) for the nose block, and carefully glue it in the proper location.
- Sand the nose block to blend its contours with the cowling.
Covering and finishing
- Cover all surfaces with tissue. Careful sanding of the frame prior to covering will eliminate a lot of wrinkles.
- Preferred method: brush two coats of dope on the frame, hold the tissue in place, then brush dope thinner over the tissue. This softens the dope enough to stick the tissue to the frame and gives time to work out wrinkles.
- I have found that using rubbing alcohol for shrinking the tissue works better for me than the old water-shrink method (see Bill Hannan’s Peanut Power).
- Effects of dampness can be deterred somewhat by applying a coat of dope thinned 50%. This also makes a good base for applying tissue trim.
- Make letters and trim panels by drawing them accurately on bond paper or vellum, taping that down over the appropriate color tissue, and cutting through the backing and tissue at the same time. Lay the letter or trim piece in position on the model’s surface; hold it while brushing on thinner (or 50% thinned dope) for adhesion.
Decoration
- My prototype aircraft was originally natural aluminum with black lettering, including the word EXPERIMENTAL just below the cockpit. Since gray tissue is as close as you can get to aluminum color without pigment doping, I covered my model in N299V’s later scheme of white and red. Suit yourself depending on whether you’re interested in sport flying or competition.
Assembly, canopy and final touches
- When putting the parts together, be careful to keep everything lined up and square.
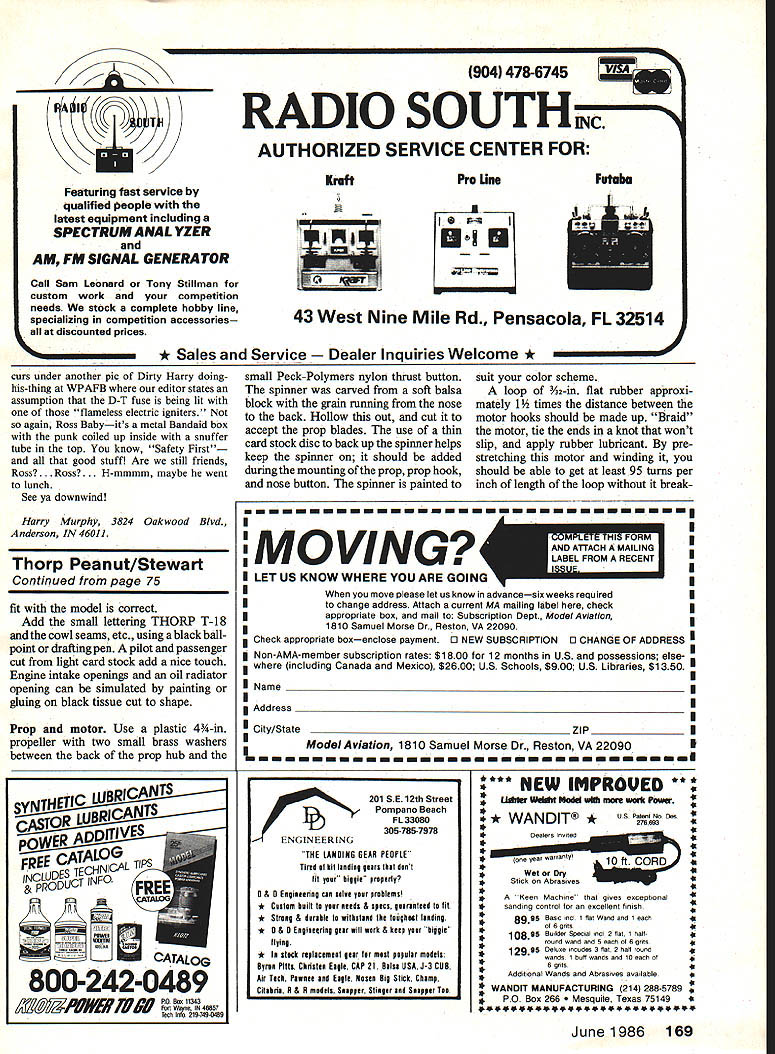
- If you can find a ready-made canopy you can cut to size, that will be great. If not, mold one by carving a block to the shape of the canopy, heating some plastic sheet, and pulling it down around the carved mold. A helper and a heat gun make this easier. Use gloves to handle the hot plastic, and pull it down carefully until it wraps under the edges. Cool, then trim until the fit with the model is correct.
- Add small lettering (THORP T-18), cowl seams, etc., using a black ballpoint or drafting pen.
- A pilot and passenger cut from light card stock add a nice touch.
- Engine intake openings and oil radiator opening can be simulated by painting or gluing on black tissue cut to shape.
Prop and motor
- Use a plastic 4-3/4-in. propeller with two small brass washers between the back of the prop hub and the small Peck-Polymers nylon thrust button.
- The spinner is carved from a soft balsa block with the grain running from nose to back. Hollow it out and cut to accept the prop blades.
- Use a thin card stock disc to back up the spinner; add it during mounting of the prop, prop hook, and nose button. Paint the spinner to suit your color scheme.
- Make a loop of 3/32-in. flat rubber approximately 1-1/2 times the distance between the motor hooks. “Braid” the motor, tie the ends in a knot that won’t slip, and apply rubber lubricant.
- By prestretching the motor and winding it, you should be able to get at least 95 turns per inch of length of the loop without it breaking.
Flying
- Your model should balance at the wing spar location. Add ballast as needed to get it to balance there.
- Hand-glide the model, adjusting the tail or wing incidence to get a long, smooth glide with no gallop or dive. This is one reason for lightly tack-gluing the wing during assembly; it can be cut loose easily for adding shims of balsa in the wing bed (sanding them away as necessary) for incidence adjustment.
- Try a few flights with a small number of motor turns. If the balance point is correct and the glide is okay, concentrate on thrust-line adjustments. Add down and side thrust as needed; observe each flight and increase motor turns in stages when the model is flying well at each stage.
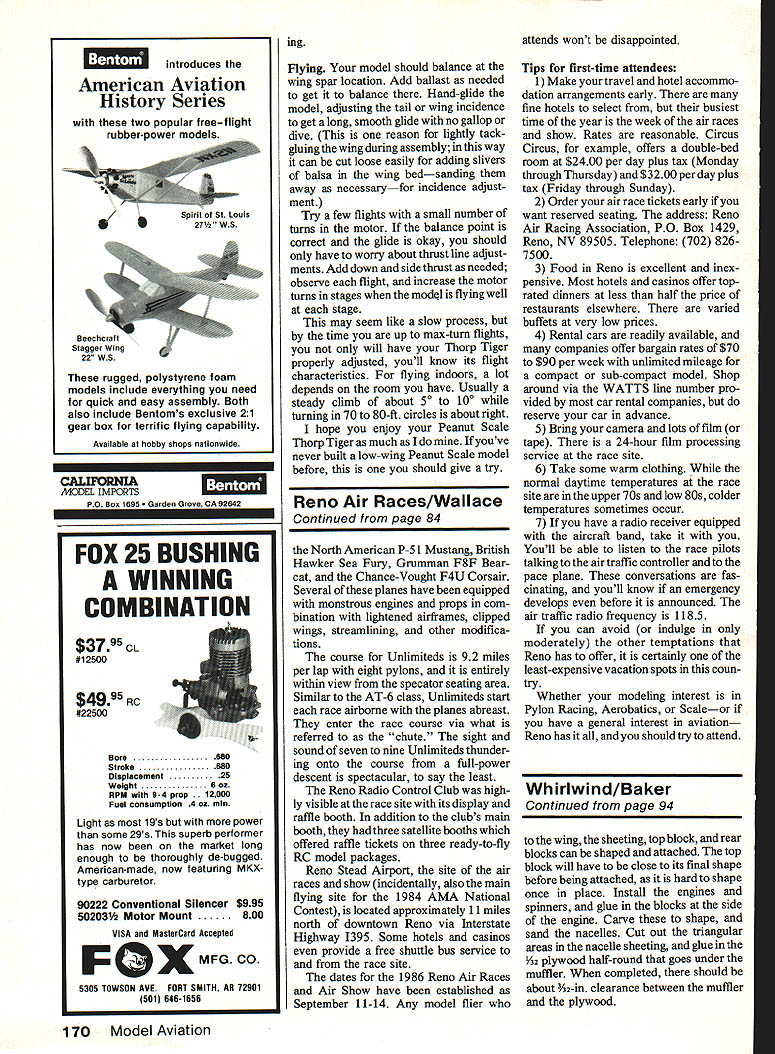
- For indoor flying, a steady climb of about 5° to 10° while turning in 70 to 80-ft. circles is about right.
I hope you enjoy your Peanut Scale Thorp Tiger as much as I do mine. If you've never built a low-wing Peanut Scale model before, this is one you should give a try; attendees won't be disappointed.
Transcribed from original scans by AI. Minor OCR errors may remain.

