
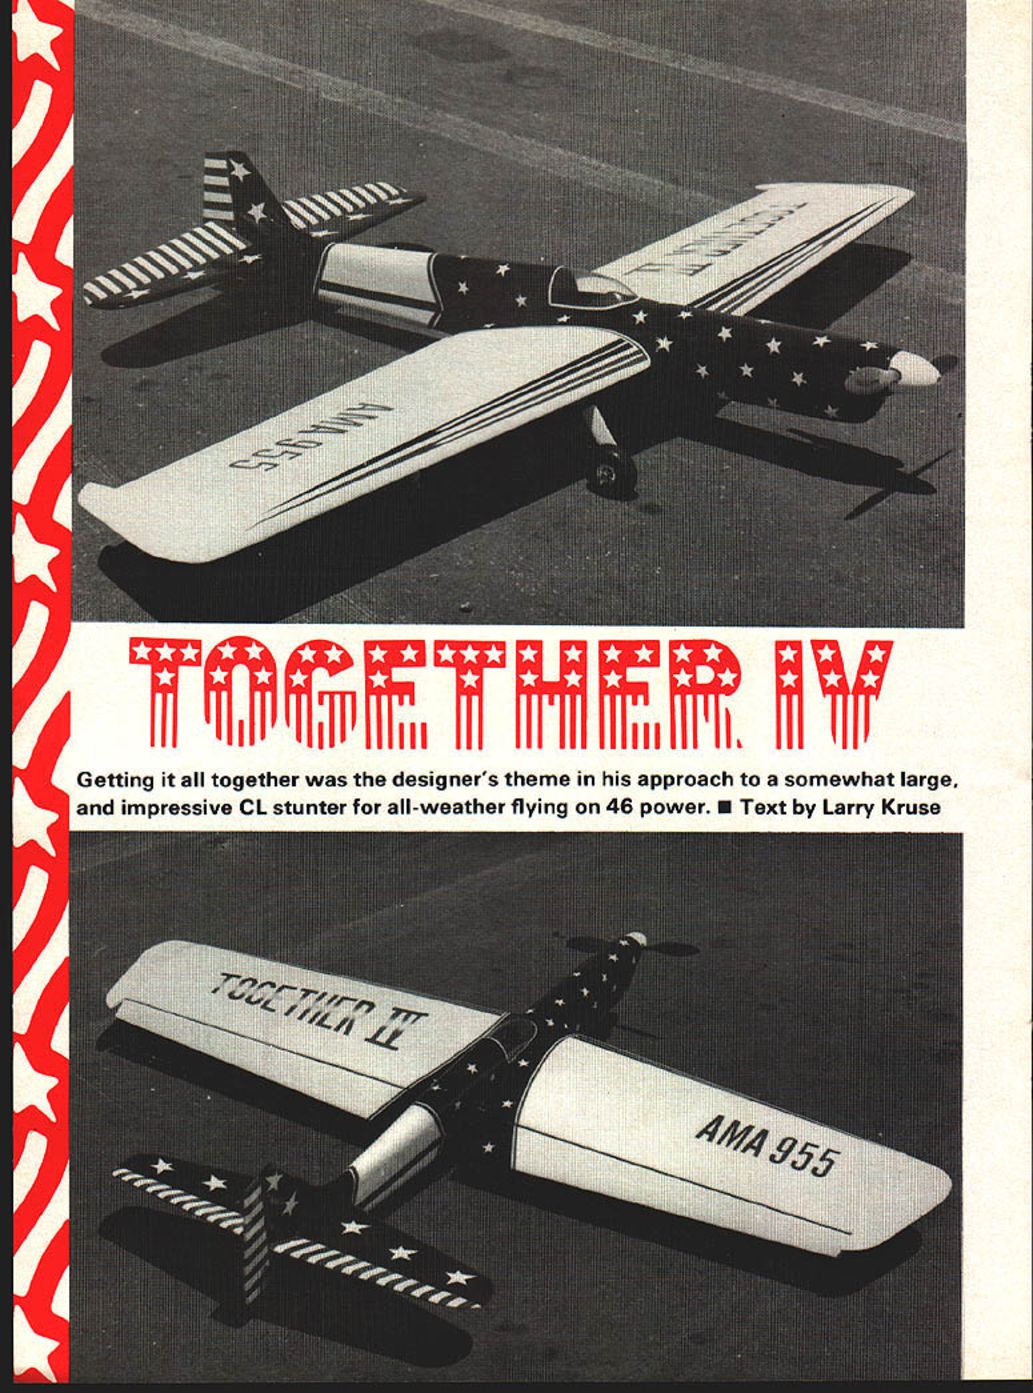
Together IV
Getting it all together was the designer's theme in his approach to a somewhat large, and impressive CL stunter for all-weather flying on 46 power. Text by Larry Kruse
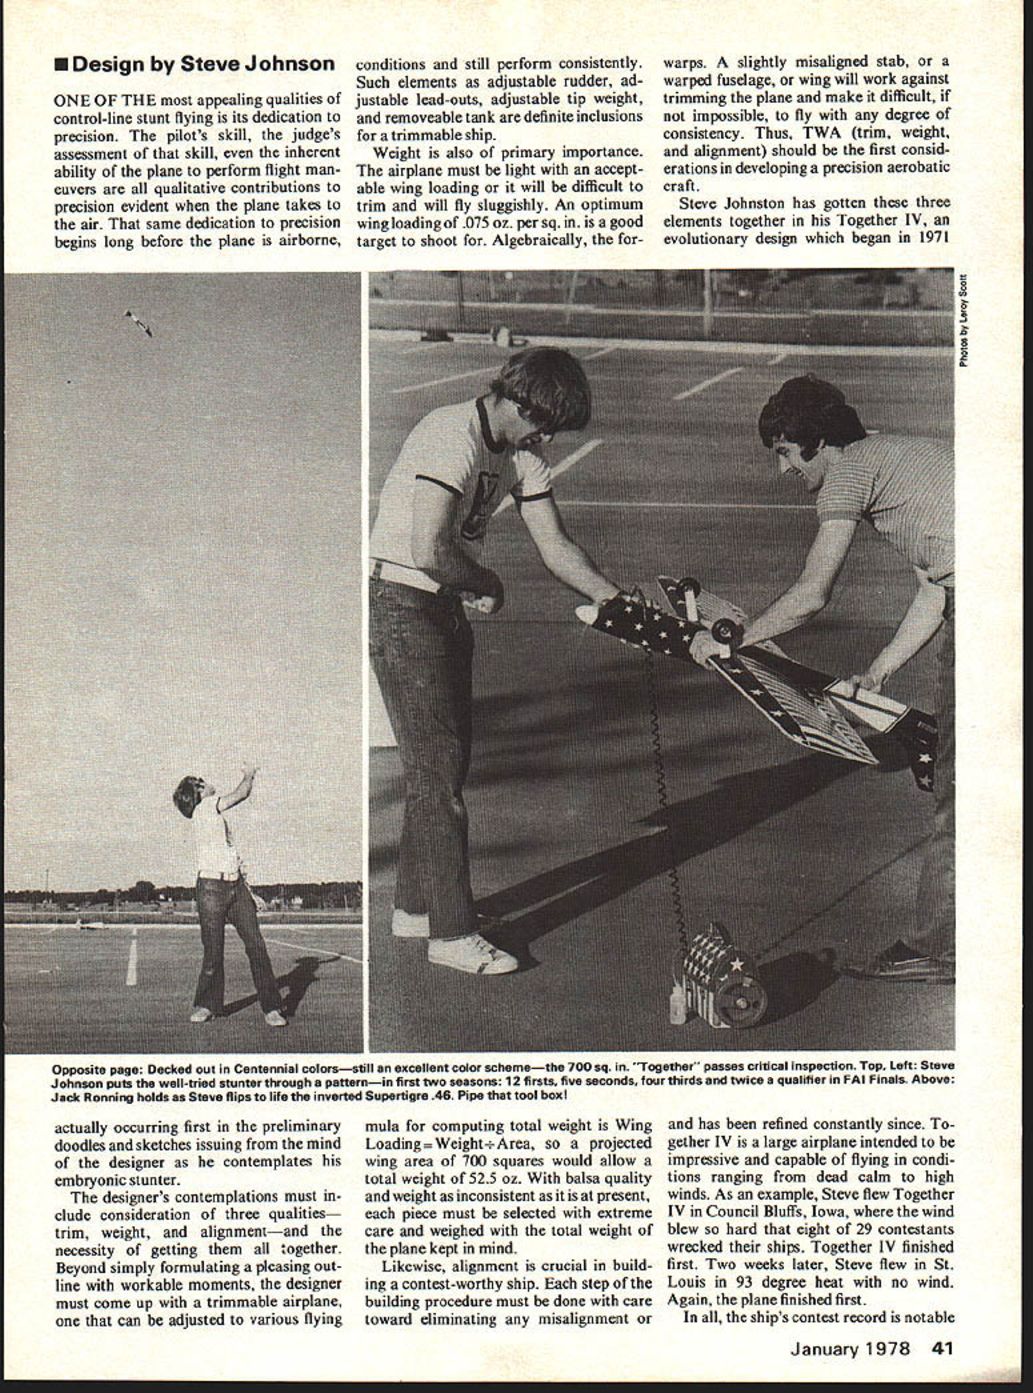
Design: Steve Johnston ONE OF THE most appealing qualities of control-line stunt flying is its dedication to precision. The pilot's skill, the judge's assessment of that skill, even the inherent ability of the plane to perform flight maneuvers are all qualitative contributions to precision evident when the plane takes to the air. That same dedication to precision begins long before the plane is airborne, actually occurring first in the preliminary doodles and sketches issuing from the mind of the designer as he contemplates his embryonic stunter.
The designer's contemplations must include consideration of three qualities—trim, weight, and alignment—and the necessity of getting them all together. Beyond simply formulating a pleasing outline with workable moments, the designer must come up with a trimmable airplane, one that can be adjusted to various flying conditions and still perform consistently. Such elements as adjustable rudder, adjustable lead-outs, adjustable tip weight, and removable tank are definite inclusions for a trimmable ship.
Weight is also of primary importance. The airplane must be light with an acceptable wing loading or it will be difficult to trim and will fly sluggishly. An optimum wing loading of .075 oz. per sq. in. is a good target to shoot for. Algebraically, the formula for computing total weight is Wing Loading = Weight ÷ Area, so a projected wing area of 700 sq. in. would allow a total weight of 52.5 oz. With balsa quality and weight as inconsistent as it is at present, each piece must be selected with extreme care and weighed with the total weight of the plane kept in mind.
Likewise, alignment is crucial in building a contest-worthy ship. Each step of the building procedure must be done with care toward eliminating any misalignment or warps. A slightly misaligned stab, or a warped fuselage, or wing will work against trimming the plane and make it difficult, if not impossible, to fly with any degree of consistency. Thus, TWA (trim, weight, and alignment) should be the first considerations in developing a precision aerobatic craft.
Steve Johnston has gotten these three elements together in his Together IV, an evolutionary design which began in 1971 and has been refined constantly since. Together IV is a large airplane intended to be impressive and capable of flying in conditions ranging from dead calm to high winds. As an example, Steve flew Together IV in Council Bluffs, Iowa, where the wind blew so hard that eight of 29 contestants wrecked their ships. Together IV finished first. Two weeks later, Steve flew in St. Louis in 93-degree heat with no wind. Again, the plane finished first.
In all, the ship's contest record is notable.
Construction:
Since total precision of alignment depends on fuselage construction, begin by drawing one fuselage side on a 1/8" x 4" x 48" sheet of balsa. Scribe a line down the center of the sheet with a 36-in. steel straightedge. This line will be the wing centerline and all other lines drawn will be drawn in reference to it. Stack this sheet onto another and, using an Exacto knife and straightedge, cut out both sides together. Cut the sides from within the sheet; don't use any edge of the sheet, since warps could be present. Once both sides are cut out, draw the wing centerline on the unmarked side. These centerlines will be used later when the wing is installed at 0° incidence.
Laminate the 1/16" plywood doublers on both sides and epoxy in the 3/8" x 1/2" maple motor mounts. Using a carpenter's square or right triangle, join the fuselage sides with the 1/8" ply firewall and 1/8" ply bulkhead in front of the wing mount. Draw a straight line on the workbench and place the fuselage squarely over it, pulling the rear of the fuselage together and making sure it is exactly straight. When the rear of the fuselage is dry, add the remainder of the bulkheads.
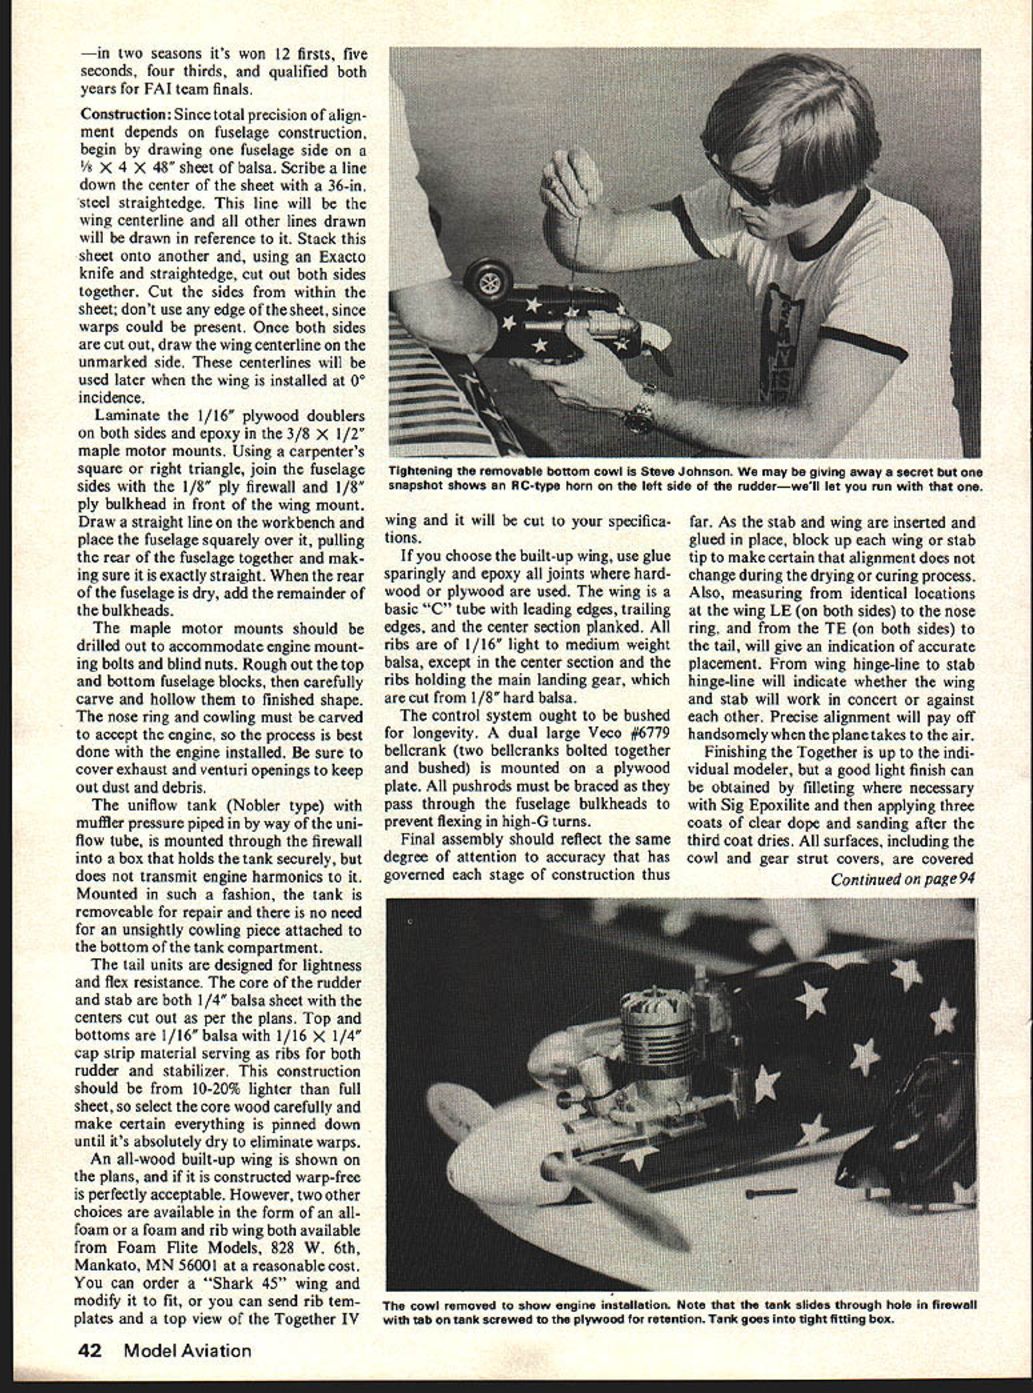
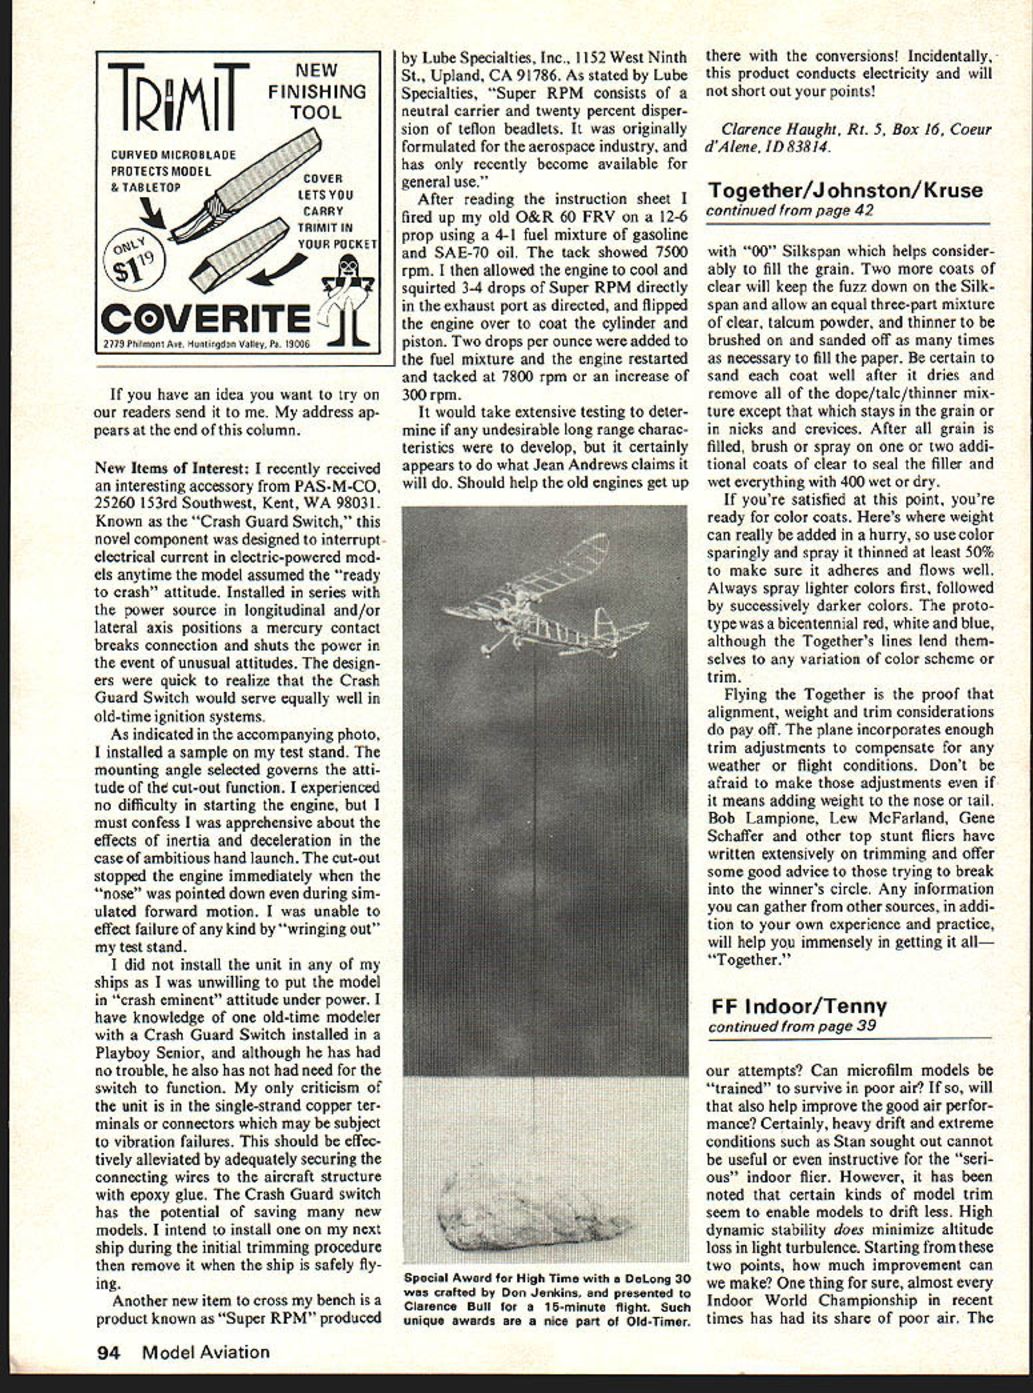
The maple motor mounts should be drilled out to accommodate engine mounting bolts and blind nuts. Rough out the top and bottom fuselage blocks, then carefully carve and hollow them to finished shape. The nose ring and cowling must be carved to accept the engine, so the process is best done with the engine installed. Be sure to cover exhaust and venturi openings to keep out dust and debris.
The uniflow tank (Nobler type) with muffler pressure piped in by way of the uniflow tube, is mounted through the firewall into a box that holds the tank securely, but does not transmit engine harmonics to it. Mounted in such a fashion, the tank is removable for repair and there is no need for an unsightly cowling piece attached to the bottom of the tank compartment.
The tail units are designed for lightness and flex resistance. The core of the rudder and stab are both 1/4" balsa sheet with the centers cut out as per the plans. Top and bottoms are 1/16" balsa with 1/16" x 1/4" cap strip material serving as ribs for both rudder and stabilizer. This construction should be from 10-20% lighter than full sheet, so select the core wood carefully and make certain everything is pinned down until it's absolutely dry to eliminate warps.
An all-wood built-up wing is shown on the plans, and if it is constructed warp-free it is perfectly acceptable. However, two other choices are available in the form of an all-foam or a foam-and-rib wing both available from Foam Flite Models, 828 W. 6th, Mankato, MN 56001 at a reasonable cost. You can order a "Shark 45" wing and modify it to fit, or you can send rib templates and a top view of the Together IV wing and it will be cut to your specifications.
If you choose the built-up wing, use glue sparingly and epoxy all joints where hardwood or plywood are used. The wing is a basic "C" tube with leading edges, trailing edges, and the center section planked. All ribs are of 1/16" light to medium weight balsa, except in the center section and the ribs holding the main landing gear, which are cut from 1/8" hard balsa.
The control system ought to be bushed for longevity. A dual large Veco #6779 bellcrank (two bellcranks bolted together and bushed) is mounted on a plywood plate. All pushrods must be braced as they pass through the fuselage bulkheads to prevent flexing in high-G turns.
Final assembly should reflect the same degree of attention to accuracy that has governed each stage of construction thus far. As the stab and wing are inserted and glued in place, block up each wing or stab tip to make certain that alignment does not change during the drying or curing process. Also, measuring from identical locations at the wing LE (on both sides) to the nose ring, and from the TE (on both sides) to the tail, will give an indication of accurate placement. From wing hinge-line to stab hinge-line will indicate whether the wing and stab will work in concert or against each other. Precise alignment will pay off handsomely when the plane takes to the air.
Finishing the Together is up to the individual modeler, but a good light finish can be obtained by filling where necessary with Sig Epoxilite and then applying three coats of clear dope and sanding after the third coat dries. All surfaces, including the cowl and gear strut covers, are covered with "00" Silkspan which helps considerably to fill the grain. Two more coats of clear will keep the fuzz down on the Silkspan and allow an equal three-part mixture of clear, talcum powder, and thinner to be brushed on and sanded off as many times as necessary to fill the paper. Be certain to sand each coat well after it dries and remove all of the dope/lac/thinner mixture except that which stays in the grain or in nicks and crevices. After all grain is filled, brush or spray on one or two additional coats of clear to seal the filler and wet everything with 400 wet or dry.
If you're satisfied at this point, you're ready for color coats. Here's where weight can really be added in a hurry, so use color sparingly and spray it thinned at least 50% to make sure it adheres and flows well. Always spray lighter colors first, followed by successively darker colors. The prototype was a bicentennial red, white and blue, although the Together's lines lend themselves to any variation of color scheme or trim.
Flying the Together is the proof that alignment, weight and trim considerations do pay off. The plane incorporates enough trim adjustments to compensate for any weather or flight conditions. Don't be afraid to make those adjustments even if it means adding weight to the nose or tail. Bob Lampione, Lew McFarland, Gene Schaffer and other top stunt fliers have written extensively on trimming and offer some good advice to those trying to break into the winner's circle. Any information you can gather from other sources, in addition to your own experience and practice, will help you immensely in getting it all—"Together."
Transcribed from original scans by AI. Minor OCR errors may remain.

