
TOP FUN
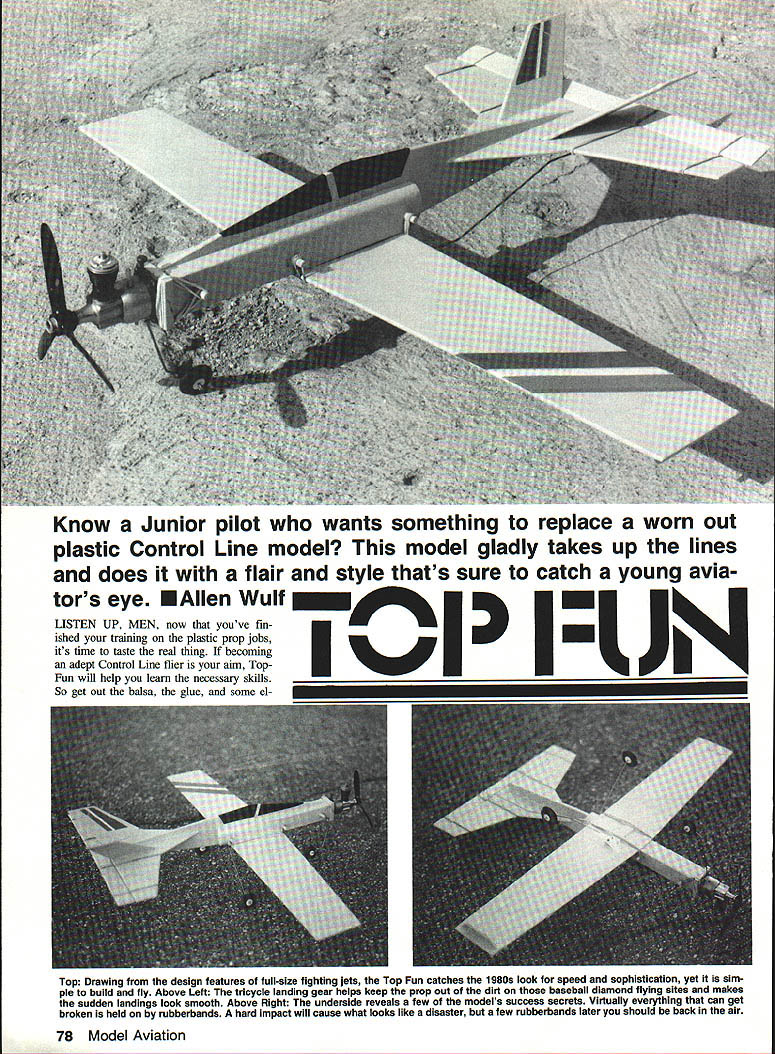
Know a junior pilot who needs something to replace a worn-out plastic control-line model? Top-Fun gladly takes up the lines and does it with a flair and style that will catch a young aviator's eye. If becoming an adept control-line flier is your aim, Top-Fun will help you learn the necessary skills. Get out the balsa, the glue, and some elbow grease.
This was intended as a first control-line model for a child, so it was designed to be rugged, simple, easy to build, and to look high-tech. Rubberbands are the main design element: they hold just about every component in place — engine, wing, elevator hinges — so the model will survive hard landings and give countless hours of fun flying.
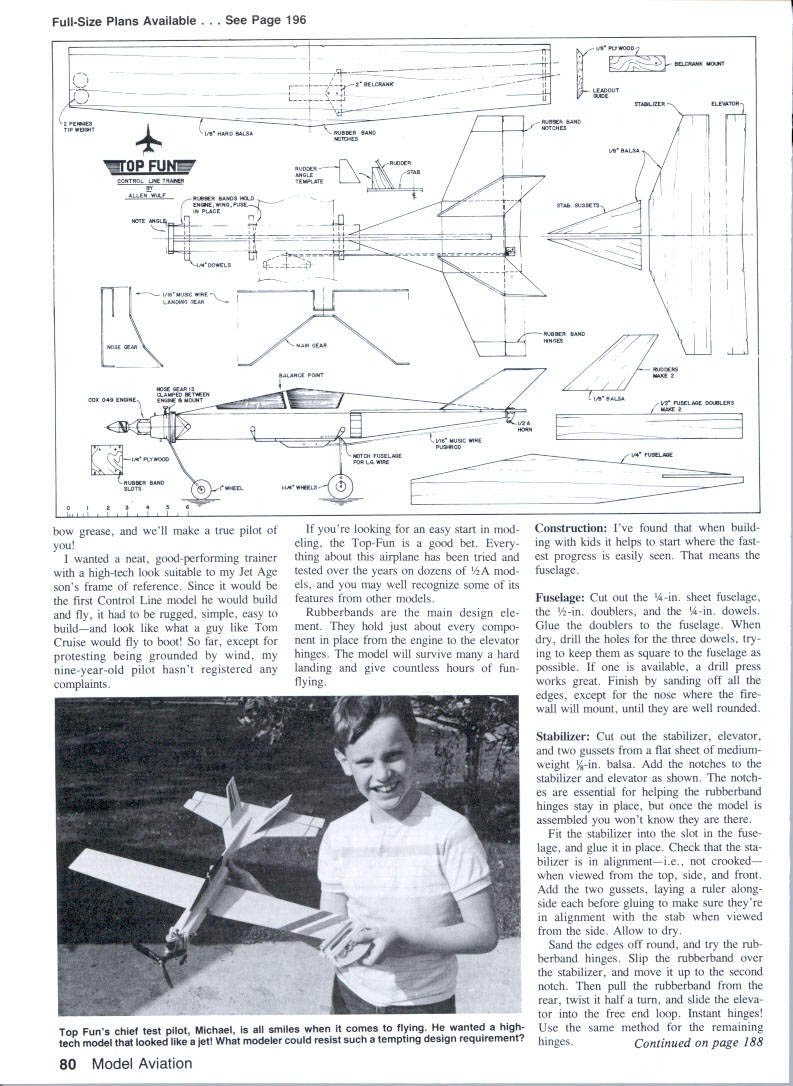
Full-size plans available. See Page 196.
Construction
Fuselage
Parts:
- 1/4-in. sheet fuselage
- 1/2-in. doublers
- 1/8-in. dowels
- Glue the doublers to the fuselage and let dry.
- Drill the holes for the three dowels, trying to keep them square to the fuselage. If available, use a drill press.
- Finish by sanding off all edges until well rounded, except for the nose/firewall area. Leave the firewall until the engine mount is installed, then round off the nose.
Stabilizer
- Cut the stabilizer, elevator, and two gussets from flat, medium-weight 1/8-in. balsa.
- Add the notches to the stabilizer and elevator. These notches are essential for helping the rubberband hinges stay in place once assembled.
- Fit the stabilizer into its slot in the fuselage and glue it in place. Check alignment from top, side, and front; make adjustments as needed.
- Add the two gussets. Lay a ruler alongside each before gluing to ensure side-view alignment. Allow to dry, then sand edges and round as needed.
Rubberband hinge method:
- Slip a rubberband over the stabilizer and move it up to the second notch.
- Pull the rubberband from the rear, twist it half a turn, and slide the elevator into the free end loop.
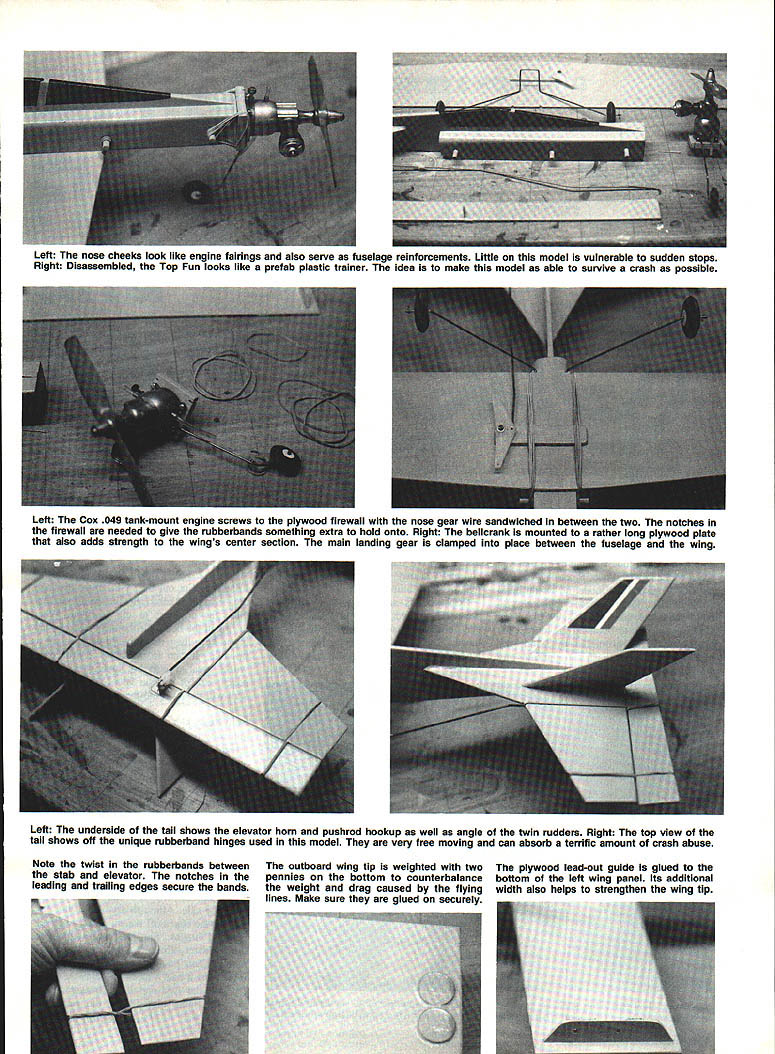
- Repeat for remaining hinges. Note the twist in the rubberbands between the stab and elevator; the notches in the leading and trailing edges secure the bands.
Rudders
The twin rudders add to the appearance, though a single rudder will do the job if preferred.
- Cut rudders from 1/8-in. sheet, round the front, top, and rear edges, and glue them in place on top of the stabilizer.
- Use an angle jig to keep the two rudders identical. Offset them slightly so the model will tend to turn right.
Wing
- Select a flat sheet of medium-weight 1/8-in. balsa and trim the leading edges to create the wing sweepback.
- Glue two pennies to the bottom of the outboard wing tip to counterbalance the weight and drag of the flying lines. Make sure they are glued securely.
- Glue a plywood lead-out guide to the bottom of the left wing panel; its additional width strengthens the wing tip.
- Notch the wing for the rubberbands as with the stabilizer. These notches keep the wing aligned on the fuselage.
Install the dowels in the fuselage and attach the wing using rubberbands.
Bellcrank, Pushrod, and Landing Gear
- Make the bellcrank mount and the lead-out guide from 1/8-in. plywood and glue them securely in place.
- Fit the 2-1/2-in. bellcrank to the mount using its bolt.
- Begin bending the pushrod: make a "Z" bend in one end and hook it to the bellcrank, then bend it back toward the stabilizer as shown in the plans.
- Mount a 1/4A control horn on the elevator and carefully bend the pushrod to the correct depth; adjust as needed until satisfied.
- Continue bending wire to make the nose strut and the main gear. The nose strut mounts between the firewall and the engine; the main gear will be held in place by the wing when mounted with rubberbands.
- Add wheels to the struts and hold them with spring keepers.
Firewall
Making the firewall is one of the more difficult tasks.
- Saw it out of 1/8-in. plywood and add the notches as shown in the plans. These notches are crucial because they help keep the engine from flying off.
- Drill the holes for the engine mount.
Finishing and Final Assembly
- Remove the rubberbands and give all wood parts a final sanding.
- Apply two coats of sanding sealer, sanding between coats.
- Paint your color scheme as desired—camouflage or a bright air-show scheme. Make sure all edges get a coat of paint to avoid bare spots after assembly.
- Band the stabilizer and elevator together; do the same with the wing and main landing gear.
- Mount the engine to the firewall with the nose gear between them, and fasten the firewall securely with rubberbands. With the wing secured, all firewalls and joints must be well secured so they won't come apart in flight.
- Add the propeller and check balance. Balance the model by holding it by the wing tips 3/4 in. from the leading edge. If the model balances tail-down, add nose weight (wrap solder wire to the nose strut) until the model balances a bit nose-down. If it's nose-heavy, that is acceptable.
Preflight and Flying
- Attach the lead-out lines to the bellcrank. Use the same nylon cord as your flying lines.
- Pack your flying box with lots of rubberbands, fuel, and ground-support items such as a starting battery.
- Unreel your flying lines (we used Sig's 1/2A Handle and Line kit). Make sure lines are hooked up correctly and check the controls: when the handle is near vertical, the elevator should be at neutral. Adjust line lengths to achieve this.
- Test-run the engine and check for vibration. If there is any suspicion the engine is loose, add more rubberbands.
- Fire up with a full tank of fuel and go fly.
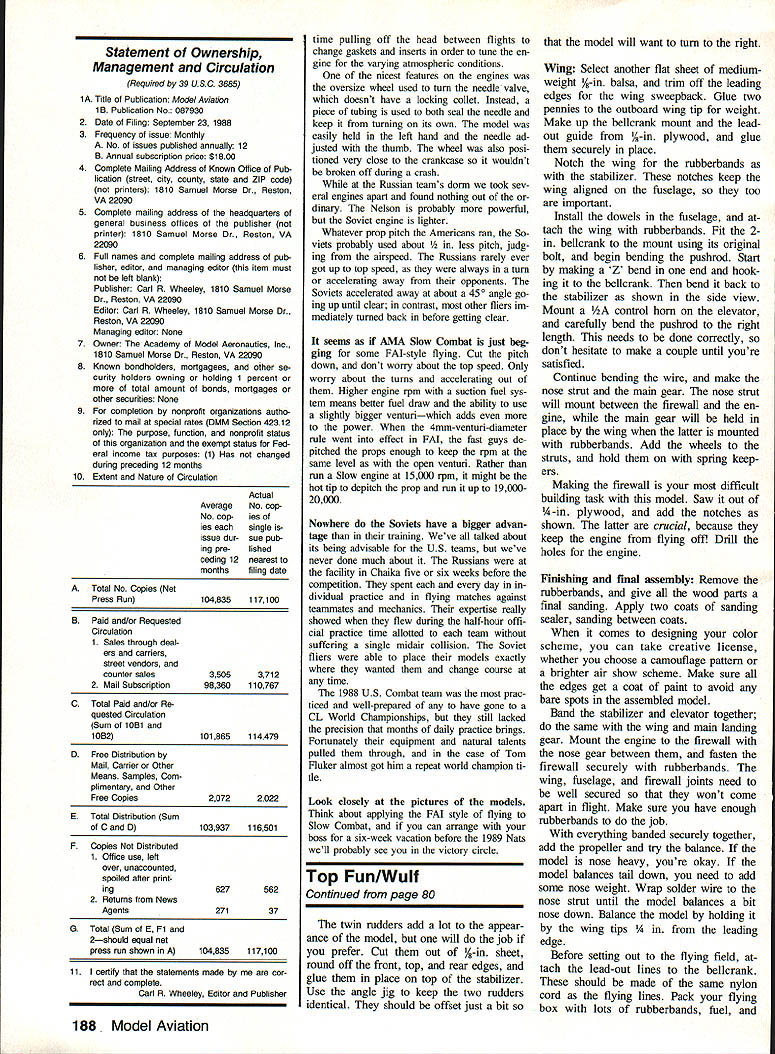
For my son and me, Top-Fun has certainly lived up to its name. We hope it does for you, too.
Transcribed from original scans by AI. Minor OCR errors may remain.

