
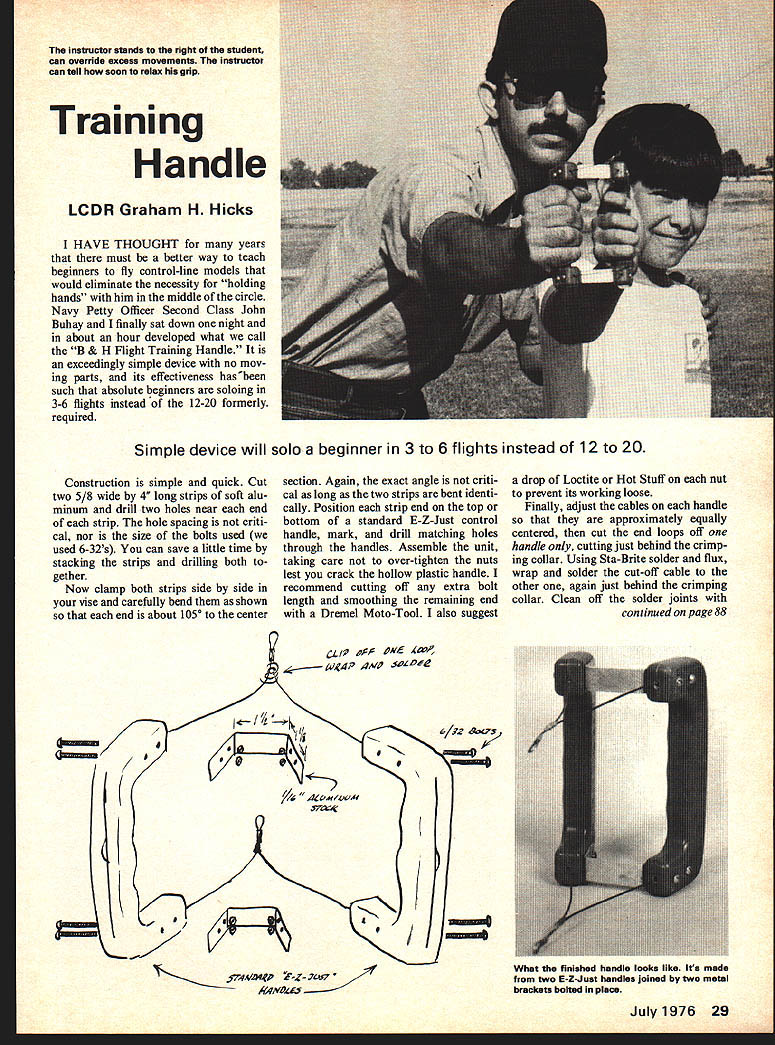
Training Handle
LCDR Graham H. Hicks
I HAVE THOUGHT for many years that there must be a better way to teach beginners to fly control-line models that would eliminate the necessity for "holding hands" with him in the middle of the circle. Navy Petty Officer Second Class John Buhay and I finally sat down one night and in about an hour developed what we call the "B & H Flight Training Handle." It is an exceedingly simple device with no moving parts, and its effectiveness has been such that absolute beginners are soloing in 3-6 flights instead of the 12-20 formerly required.
Simple device will solo a beginner in 3 to 6 flights instead of 12 to 20.
Construction is simple and quick. Cut two 5/8" wide by 4" long strips of soft aluminum and drill two holes near each end of each strip. The hole spacing is not critical, nor is the size of the bolts used (we used 6-32's). You can save a little time by stacking the strips and drilling both together.
Now clamp both strips side by side in your vise and carefully bend them as shown so that each end is about 105° to the center section. Again, the exact angle is not critical as long as the two strips are bent identically. Position each strip end on the top or bottom of a standard E-Z-Just control handle, mark, and drill matching holes through the handles. Assemble the unit, taking care not to over-tighten the nuts lest you crack the hollow plastic handle. I recommend cutting off any extra bolt length and smoothing the remaining end with a Dremel Moto-Tool. I also suggest a drop of Loctite or Hot Stuff on each nut to prevent its working loose.
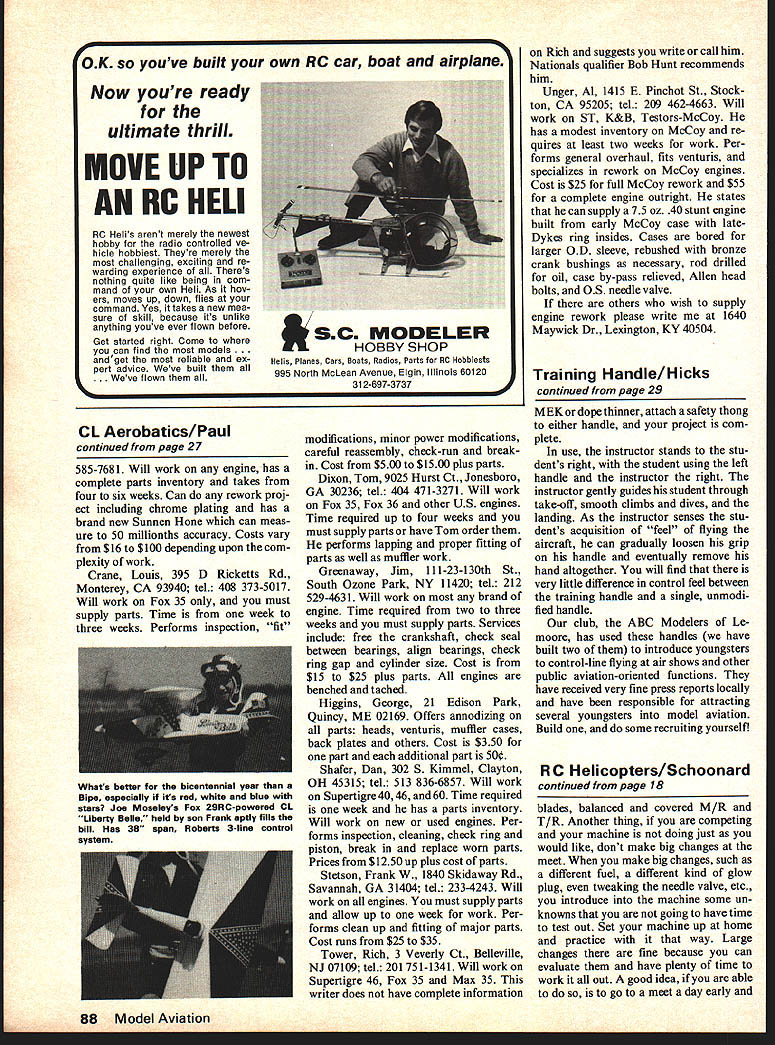
Finally, adjust the cables on each handle so that they are approximately equally centered, then cut the end loops off one handle only, cutting just behind the crimping collar. Using Sta-Brite solder and flux, wrap and solder the cut-off cable to the other one, again just behind the crimping collar. Clean off the solder joints.
Training Handle
MEK or dope thinner, attach a safety thong to either handle, and your project is complete.
In use, the instructor stands to the student's right, with the student using the left handle, and the instructor to the right. The instructor gently guides his student through take-off, smooth climbs and dives, and the landing. As the instructor senses the student's acquisition of "feel" of flying the aircraft, he can gradually loosen his grip on his handle and eventually remove his hand altogether. You will find that there is very little difference in control feel between the training handle and a single, unmodified handle.
Our club, the ABC Modelers of Lemoore, has used these handles (we have built two of them) to introduce youngsters to control-line flying at air shows and other public aviation-oriented functions. They have received very fine response and have been responsible for attracting several youngsters into model aviation. Build one, and do some recruiting yourself!
Transcribed from original scans by AI. Minor OCR errors may remain.

