
TWO PROFILES
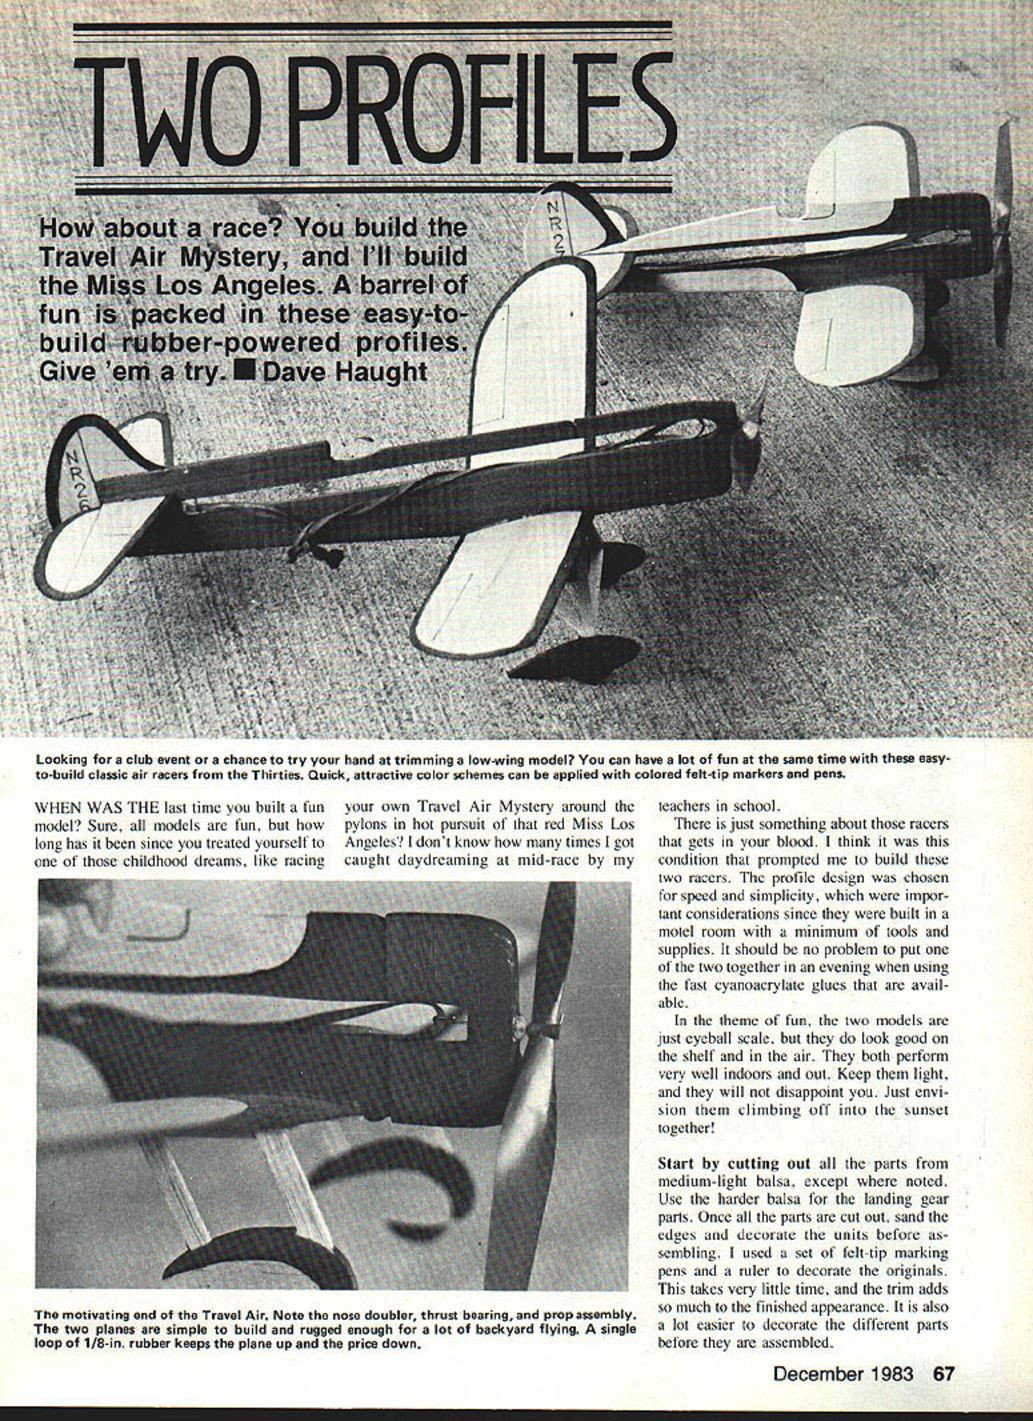
How about a race? You build the Travel Air Mystery, and I'll build the Miss Los Angeles. A barrel of fun is packed in these easy-to-build rubber-powered profiles. Give 'em a try. — Dave Haught
When was the last time you built a fun model? Sure, all models are fun, but how long has it been since you treated yourself to one of those childhood dreams, like racing your own Travel Air Mystery around the pylons in hot pursuit of that red Miss Los Angeles? I don't know how many times I got caught daydreaming at mid-race by my teachers in school.
There is just something about those racers that gets in your blood. I think it was this condition that prompted me to build these two racers. The profile design was chosen for speed and simplicity, which were important considerations since they were built in a model room with a minimum of tools and supplies. It should be no problem to put one or the two together in an evening when using the fast cyanoacrylate glues that are available.
In the theme of fun, the two models are just eyeball scale, but they do look good on the shelf and in the air. They both perform very well indoors and out. Keep them light, and they will not disappoint you. Just envision them climbing off into the sunset together!
Start by cutting out all the parts from medium-light balsa, except where noted. Use the harder balsa for the landing gear parts. Once all the parts are cut out, sand the edges and decorate the units before assembling. I used a set of felt-tip marking pens and a ruler to decorate the originals. This takes very little time, and the trim adds so much to the finished appearance. It is also a lot easier to decorate the different parts before they are assembled.
Since both models are quite similar in construction, I'll comment on the differences as they come up.
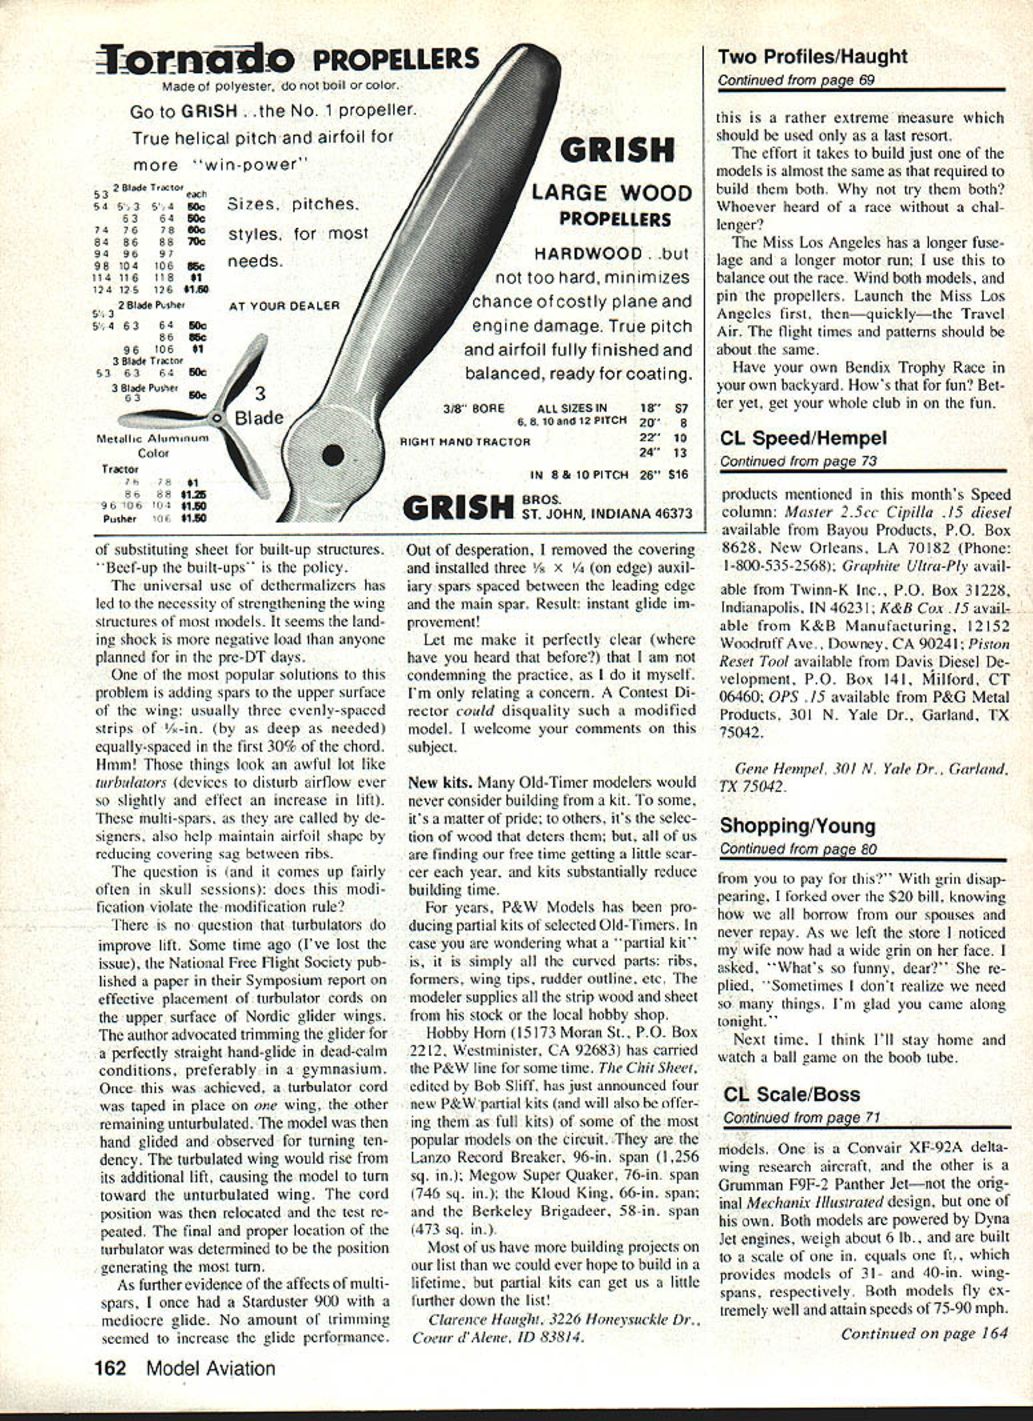
The wing assembly comes first, as the glue has to dry completely before the wing can be affixed to the fuselage. Glue the ribs to the underside of the wing panels, as shown on the plans. Make sure you build one right and one left wing panel. Use the dihedral guide to set the proper angle for the root ribs (and also the landing gear mounting ribs on the Travel Air). Let the panels dry completely before sanding the root ribs in preparation for joining the panels. Fit the two panels so there is no gap when they are joined with 1 in. of dihedral under each tip. Then glue them together and set aside to dry.
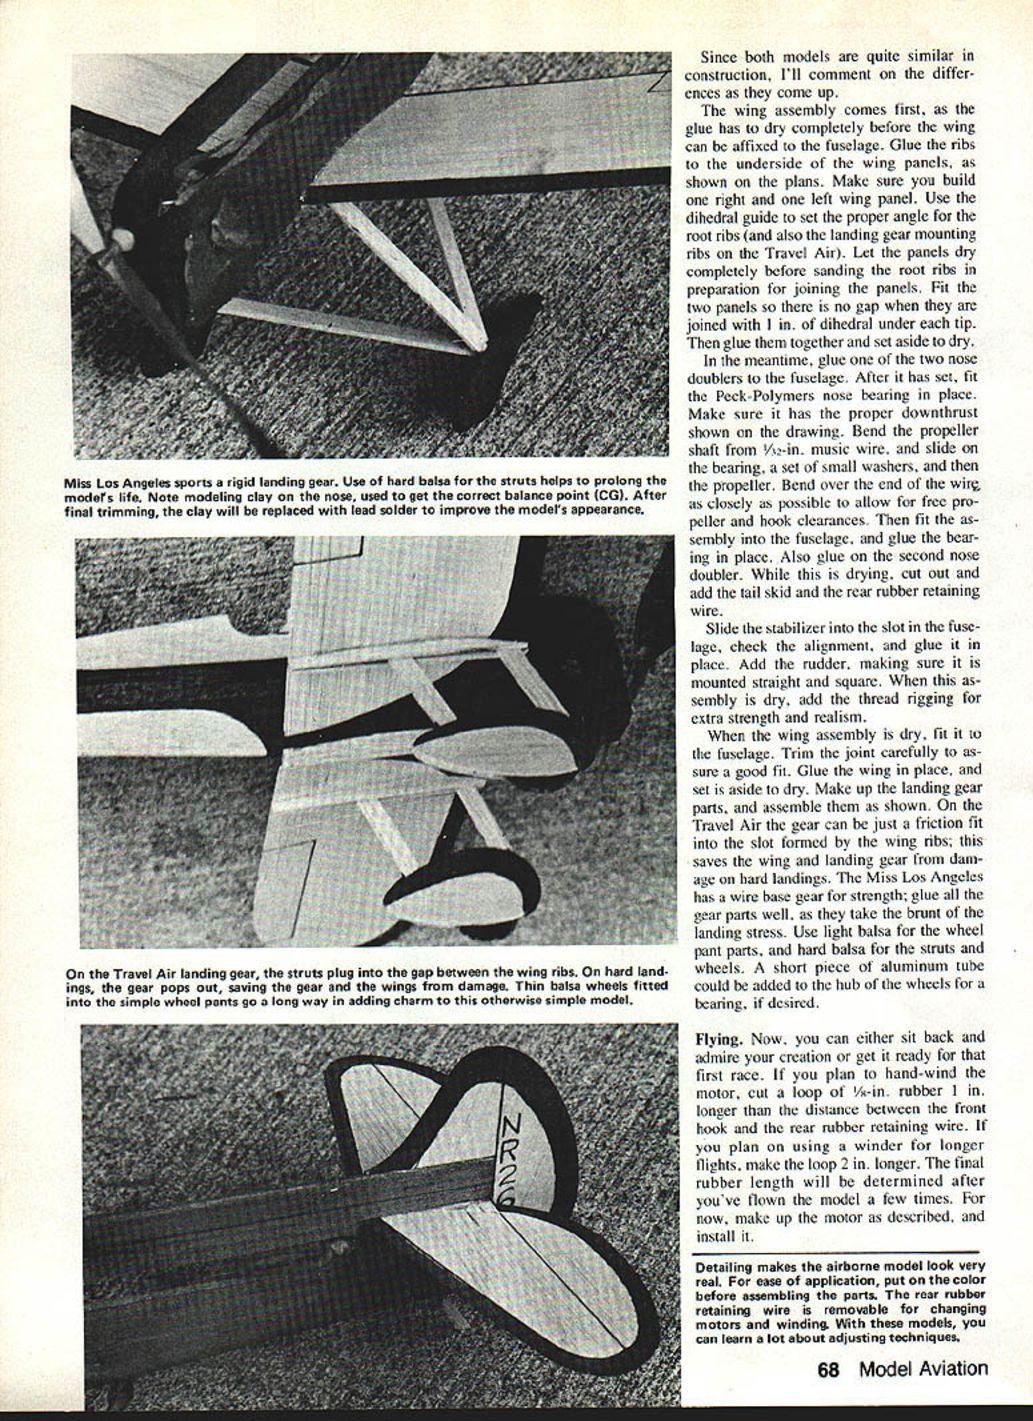
In the meantime, glue one of the two nose doublers to the fuselage. After it has set, fit the Peck-Polymers nose bearing in place. Make sure it has the proper downthrust shown on the drawing. Bend the propeller shaft from 1/32-in. music wire, and slide on the bearing, a set of small washers, and then the propeller. Bend over the end of the wire as closely as possible to allow for free propeller and hook clearances. Then fit the assembly into the fuselage, and glue the bearing in place. Also glue on the second nose doubler. While this is drying, cut out and add the tail skid and the rear rubber-retaining wire.
Slide the stabilizer into the slot in the fuselage, check the alignment, and glue it in place. Add the rudder, making sure it is mounted straight and square. When this assembly is dry, add the thread rigging for extra strength and realism.
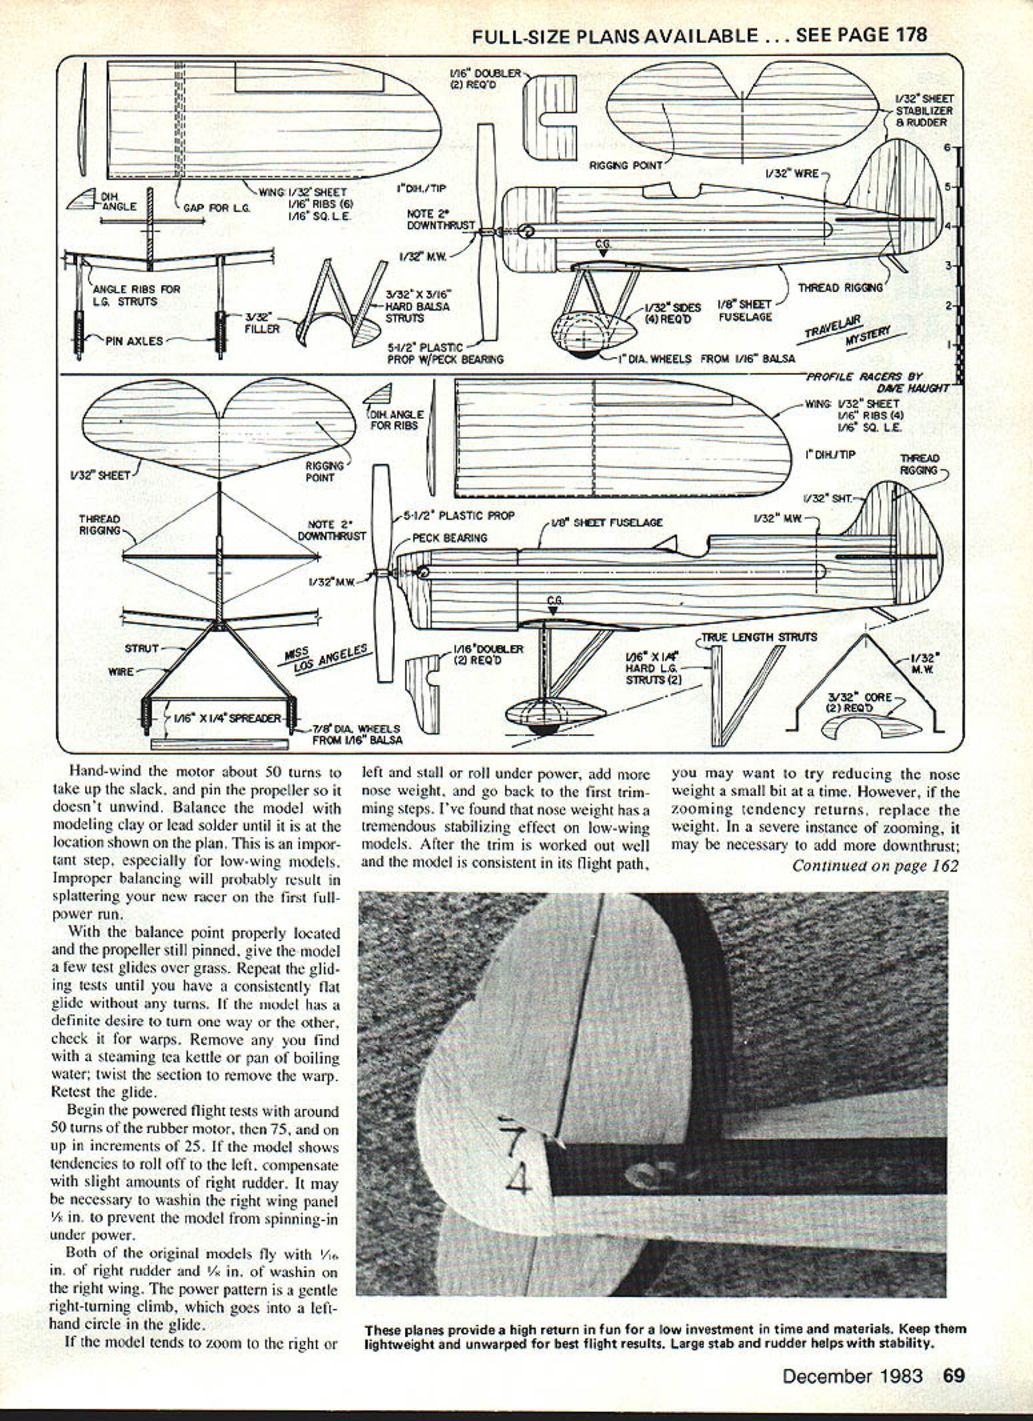
When the wing assembly is dry, fit it to the fuselage. Trim the joint carefully to assure a good fit. Glue the wing in place, and set aside to dry. Make up the landing gear parts, and assemble them as shown. On the Travel Air the gear can be just a friction fit into the slot formed by the wing ribs; this saves the wing and landing gear from damage on hard landings. The Miss Los Angeles has a wire-base gear for strength; glue all the gear parts well, as they take the brunt of the landing stress. Use light balsa for the wheel pant parts, and hard balsa for the struts and wheels. A short piece of aluminum tube could be added to the hub of the wheels for a bearing, if desired.
Flying
Now, you can either sit back and admire your creation or get it ready for that first race. If you plan to hand-wind the motor, cut a loop of 1/4-in. rubber 1 in. longer than the distance between the front hook and the rear rubber-retaining wire. If you plan on using a winder for longer flights, make the loop 2 in. longer. The final rubber length will be determined after you've flown the model a few times. For now, make up the motor as described, and install it.
Detailing makes the airborne model look very real. For ease of application, put on the color before assembling the parts. The rear rubber-retaining wire is removable for changing motors and winding. With these models, you can learn a lot about adjusting techniques.
Hand-wind the motor about 50 turns to take up the slack, and pin the propeller so it doesn't unwind. Balance the model with modeling clay or lead solder until it is at the location shown on the plan. This is an important step, especially for low-wing models. Improper balancing will probably result in splattering your new racer on the first full-power run.
With the balance point properly located and the propeller still pinned, give the model a few test glides over grass. Repeat the gliding tests until you have a consistently flat glide without any turns. If the model has a definite desire to turn one way or the other, check it for warps. Remove any you find with a steaming tea kettle or pan of boiling water; twist the section to remove the warp. Retest the glide.
Begin the powered flight tests with around 50 turns of the rubber motor, then 75, and on up in increments of 25. If the model shows tendencies to roll off to the left, compensate with slight amounts of right rudder. It may be necessary to wash in the right wing panel 1/8 in. to prevent the model from spinning in under power.
Both of the original models fly with 1/8 in. of right rudder and 1/8 in. of wash-in on the right wing. The power pattern is a gentle right-turning climb, which goes into a left-hand circle in the glide.
If the model tends to zoom to the right or left and stall or roll under power, add more nose weight, and go back to the first trimming steps. I've found that nose weight has a tremendous stabilizing effect on low-wing models. After the trim is worked out well and the model is consistent in its flight path, you may want to try reducing the nose weight a small bit at a time. However, if the zooming tendency returns, replace the weight. In a severe instance of zooming, it may be necessary to add more downthrust. This is a rather extreme measure which should be used only as a last resort.
The effort it takes to build just one of the models is almost the same as that required to build them both. Why not try them both? Whoever heard of a race without a challenger?
The Miss Los Angeles has a longer fuselage and a longer motor run; I use this to balance out the race. Wind both models, and pin the propellers. Launch the Miss Los Angeles first, then—quickly—the Travel Air. The flight times and patterns should be about the same.
Have your own Bendix Trophy Race in your own backyard. How's that for fun? Better yet, get your whole club in on the fun.
Two Profiles / Haught
Transcribed from original scans by AI. Minor OCR errors may remain.

