
The U-ltimate Field Box
The U-ltimate field box has to be—because "U" design and build it for yourself. There are many field boxes you can buy at the hobby shop: kits and molded fiberglass boxes for the discerning purchaser. But are they right for you?
Modelers have different ideas about the bits and pieces they'll need at the flying field. Some take everything from the workshop; others carry only the essentials. The field box should allow normal servicing away from the home workshop and permit field repairs when you "ding" your pride and joy. Generally there are three classes of dings:
- Serious washout: recover expensive bits and pieces for reuse.
- Intermediate damage: repairable structural damage — better repaired at home if extensive.
- Minor damage: a touch of 5-minute epoxy will do.
Analyzing how often and what type of repairs you make will help decide what to include in your field box.
Designing the Field Box
Assemble the tools and accessories you feel you'll need
Decide what you need, then lay out the items on your workbench and measure them in three dimensions. Typical items by type of flier:
- R/Cers: screwdrivers, wrenches, spare props, glue, starter, glow plugs, fuel, transmitter, glow-plug battery.
- U-Control fliers: lines instead of a transmitter; otherwise a comparable list.
- Free-fighters: fuses, wind-speed meter, extra rubber bands, stopwatch.
- Rubber-model pilots (Peanuts, Wakefield): winder, extra motors, motor lube, props, high-speed glue.
Estimate volume for small items (wrenches, plugs) and note those figures.
Planning and layout
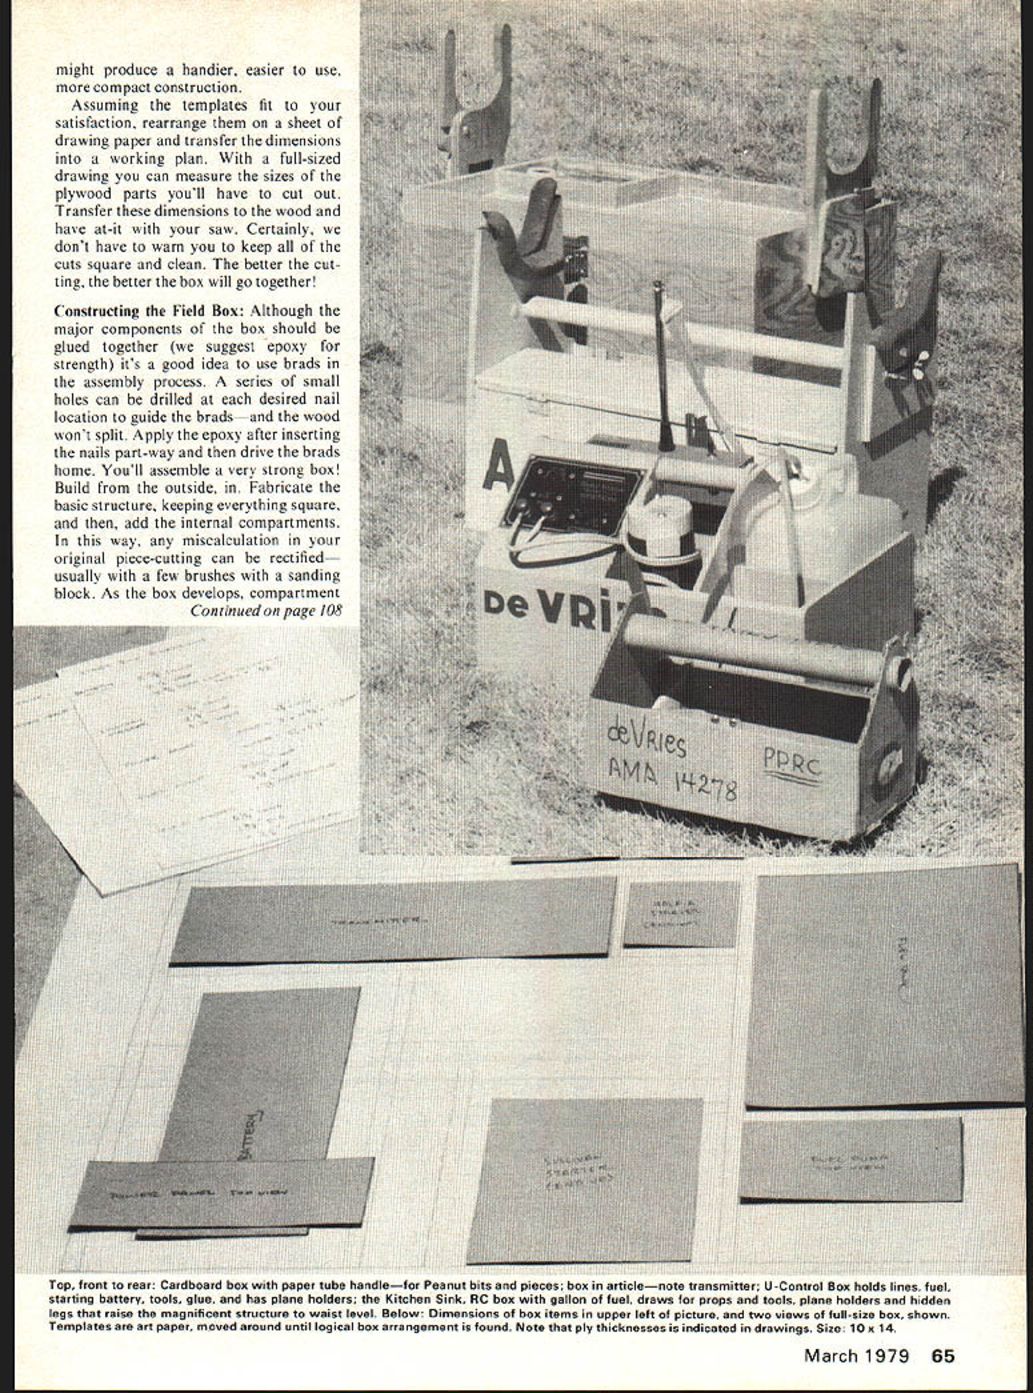
- Cut full-size templates from paper using the measured dimensions.
- Arrange and rearrange templates on the bench until you find a logical layout.
Considerations:
- Will the box balance when picked up, or will one end be heavier?
- How deep must compartments be to prevent spilling during transport?
- Would drawers be better for small items than open compartments?
- Should you carry everything in one box or build a separate start box for starter, battery, igniter, spare plugs and props?
- Do you need legs, an airplane holder, or just a compact carry box?
- How much fuel will you carry—a gallon or a smaller container?
Most boxes are built from 1/4" plywood. Allow for wood thickness when arranging templates and remember the box is three-dimensional. Building up (two- or three-tiered) is often handier than spreading out.
Example layout idea:
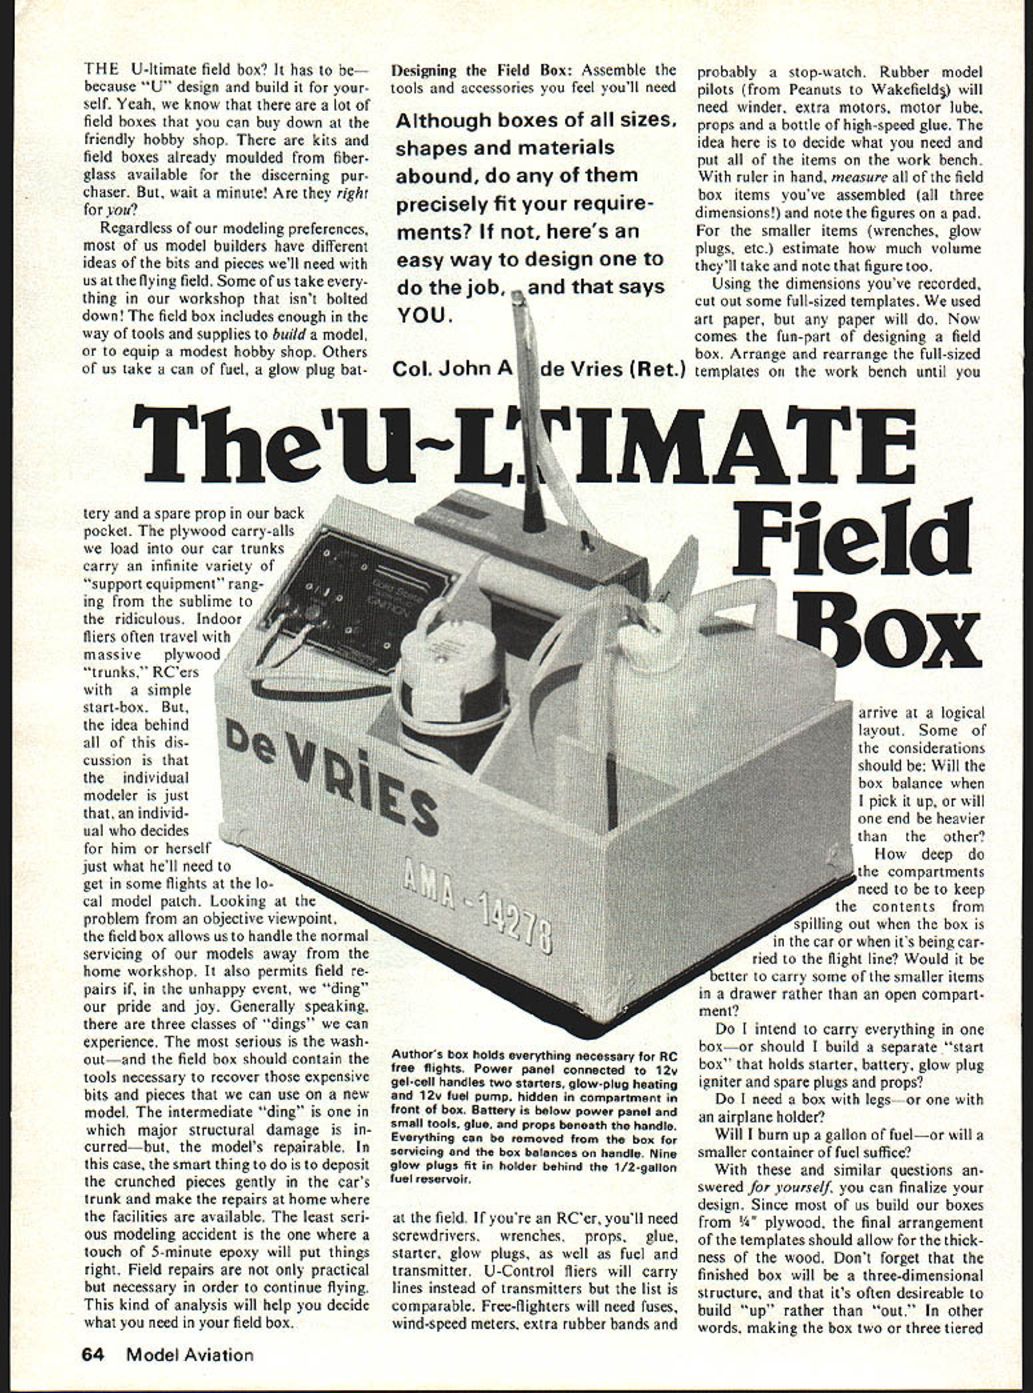
- Power panel connected to a 12V gel-cell to handle two starters, a glow-plug heater and a 12V fuel pump.
- Battery compartment hidden in front below the power panel.
- Small tools, glue and props beneath the handle.
- Removable components for servicing; the box should balance on the handle.
- A holder for nine glow plugs behind a small fuel reservoir.
When satisfied, transfer templates to a full-sized drawing, then to the wood, and cut carefully—square, clean cuts make assembly much easier.
Constructing the Field Box
Although major components should be glued (epoxy recommended for strength), use brads during assembly for alignment and temporary holding.
- Drill small pilot holes for brads to prevent splitting.
- Insert brads part way, apply epoxy, then drive them home.
- Build from the outside in: assemble the basic structure first, keeping it square, then add internal compartments.
- Compartment dividers: glue between divider and box base or sides; steady vertical joints with a single brad and a glue fillet.
- Drawers: ensure square openings and drawer boxes; design a method to keep them closed (latch or plywood face plate).
- Test-fit the actual items as the box is assembled so any measurement errors can be corrected while epoxy cures.
- Sand lightly and slightly round all plywood edges and corners to minimize edge-splitting.
Finishing the Box
A good finish protects the box from fuel and wear and makes it attractive and visible at the flight line.
- Countersink brad heads and fill holes with putty.
- Finish the interior if glow fuel may contact it—coat inside and out with resin or epoxy for fuel-proofing.
- Sand overall before applying paint; use coatings unaffected by nitro (clear urethane or bright colors as desired).
- Add hardware: brass corner protectors, drawer pulls, slide latches, foam tubing for airplane holders, nylon-bolt hinges for legs—all available at hardware and hobby stores.
- Make compartments visible or brightly colored to reduce trips over the box on the flight line.
A custom-built field box is a major project, but worth the effort. If all compartments are filled before you leave for the flying field, the box also acts as a physical checklist—if everything's in place, you haven't forgotten anything.
Transcribed from original scans by AI. Minor OCR errors may remain.

