
Upstart 4
Mark Drela
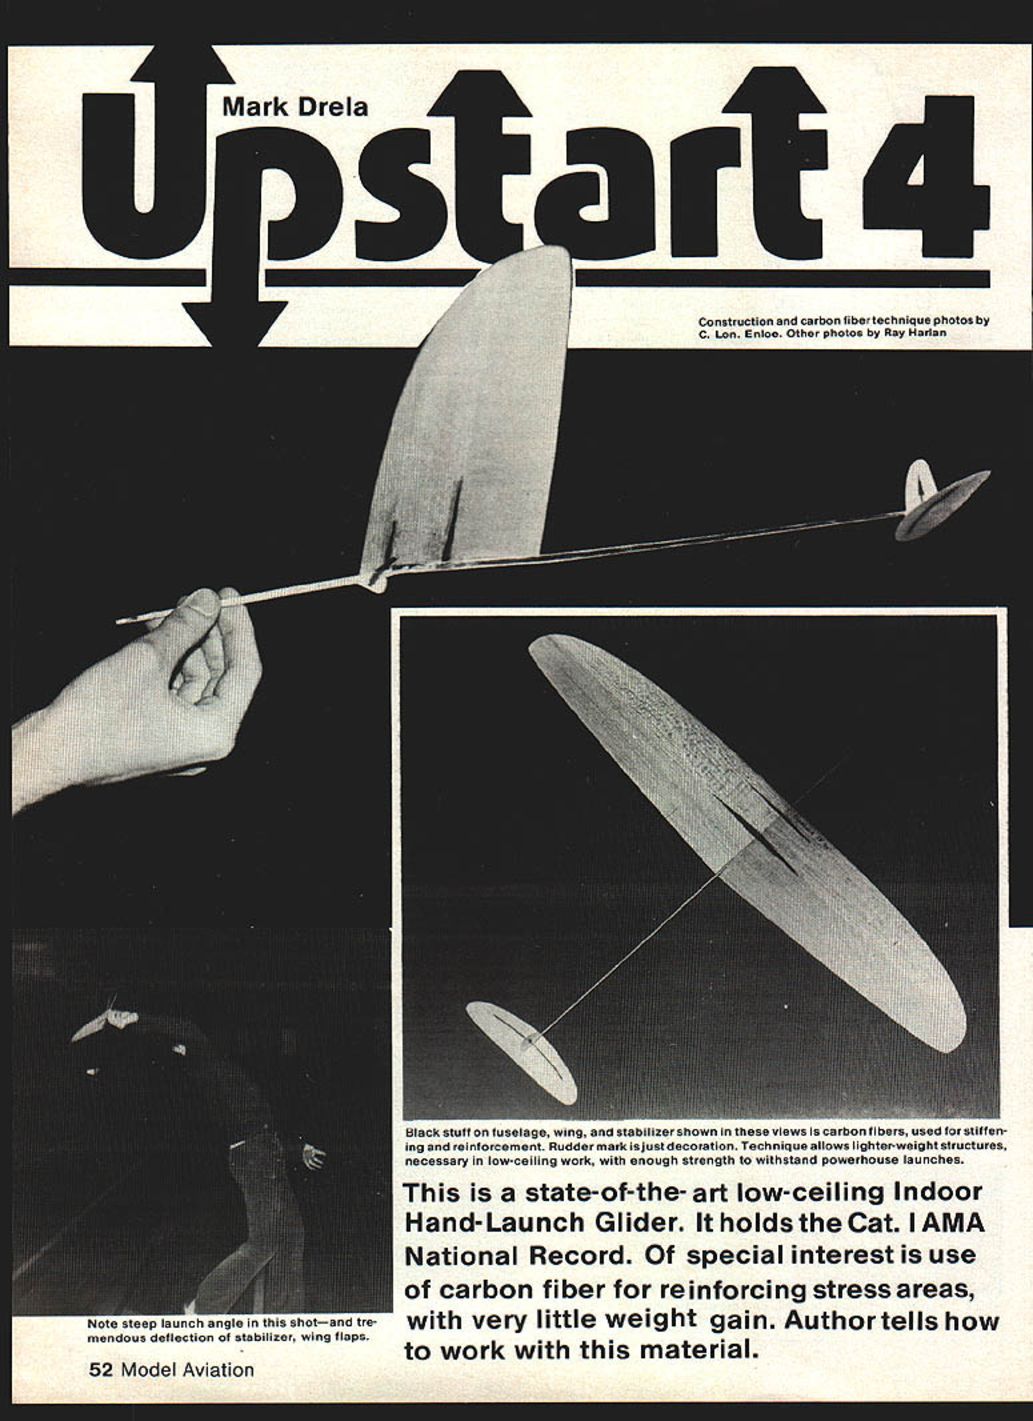
This is a state-of-the-art, low-ceiling Indoor Hand-Launch (HL) glider. It holds the Cat. I AMA national record. Of special interest is the use of carbon fiber for reinforcing stress areas with very little weight gain. The particular features that distinguish the Upstart 4 are carbon-fiber laminations on the wing, fuselage, and stabilizer; a two-piece wing spliced from different wood cuts; and very deep wing slots. The glider also has a relatively large overall size, a departure from the then-current trend toward smaller designs.
Design Philosophy
Upstart 4 is the latest in a series of four gliders built during the last few months of 1979. The guiding principle of the development process was "bigger is better." Naturally, this reasoning will quickly lead to structural problems if wing loading is kept constant. The wing slot especially creates a severe weak spot at the wing root.
Carbon fiber was first tried on Upstart 2 (40 sq. in., 14 in. span) to eliminate this weak spot. As an acid test, the slot was made very deep—over 50% of the root chord—and the wing proved extremely strong. Interestingly, the stabilizer folded on a particularly hard launch. The performance was encouraging: 43.0 seconds under a 35 ft ceiling.
Upstart 3 was a natural extension of Upstart 2. Wing area and span were increased to 52 sq. in. and 16 in., respectively, while wing loading was kept the same so the glider would roll out at just under 35 ft. As before, the wing was spliced from a C-grain balsa front piece and very light A-grain for the flaps, giving a rigid leading edge and flexible flaps. Carbon fiber was again applied to strengthen the wing root. Performance improved; the best time under 35 ft was 44.8 seconds.
Encouraged by these gains, Upstart 4 was built initially like the earlier ships, with carbon only on the wing. A few weeks later a new, lighter and longer fuselage stiffened with carbon fiber was fitted. Several effects followed: fuselage boom weight decreased, reducing needed ballast and dropping overall weight from 5.85 to 5.50 grams. This gave Upstart 4 the lowest wing loading of the series and a phenomenal sink rate of 0.70 ft/sec.
The lower weight was a mixed blessing: the glider became underweight and harder to reach 35 ft, although it tolerated steeper, nearly vertical launches. The lower pitch moment of inertia from the lighter fuselage produced a snappier roll-out and better damping of pitch oscillations. Ballasting to gain altitude proved ineffective because the faster glide offset extra height and decreased resistance to stalling-induced turbulence. Record flights of 47.4 and 46.3 seconds were achieved in Glastonbury, CT; Upstart 4 reached the peak of its trajectory with several feet to spare from the 34 ft 11 in ceiling.
Construction
If raw carbon fiber is not readily available, you can still build a competitive Upstart 4 that will not fall apart on launch. Substituting fiberglass strands pulled from heavy glass cloth for the carbon on the wing will eliminate the weak spot at the root. Do not apply glass to the fuselage, since fiberglass has only one-quarter the lengthwise stiffness of carbon fiber and is about 50% heavier. Kevlar is also unsuitable because it is poor in compression. For the fuselage it may be simpler to use plain balsa of higher density and larger cross-section.
Top-quality wood is essential for a glider of this size. Wing flaps especially should be free of defects or hard streaks, since uneven flap deflection can cause problems on launch. When cutting out the rear half of the wing, leave some excess material at the trailing edge, particularly at the tips. Note that the grain direction in the wing is swept; the splice line should be straight along the span when the wing pieces are cut out. After sanding, a narrow wedge cut out at the dihedral break will give the proper sweep.
Extreme care is required when splicing the front and rear pieces: the joint must be perfect. Any gaps will allow cement to shrink and warp the wing. Glue the wing splice with Ambroid, giving one coat to each piece. Do not apply pressure to the joint during drying, as this can create internal stresses and later warp the wing. An alternative is cyanoacrylate, which doesn't shrink but is harder to sand in soft balsa.
Because the airfoil has a very thin, sharp leading edge, a protective strip is essential for reasonable lifetime. Use 0.020-in model-railroad basswood or very hard balsa. Wet the strip and attach it with white glue (Titebond or Elmer's).
While the wing splice is drying, build the fuselage and tail surfaces so they can be weighed and a precise weight schedule established before the wing is sanded. This is necessary to achieve the correct wing loading every time. If you decide not to use carbon on the fuselage, a good target weight for the fuselage boom is 0.90 grams instead of 0.60 grams; an additional 0.20 grams of ballast will probably be required.
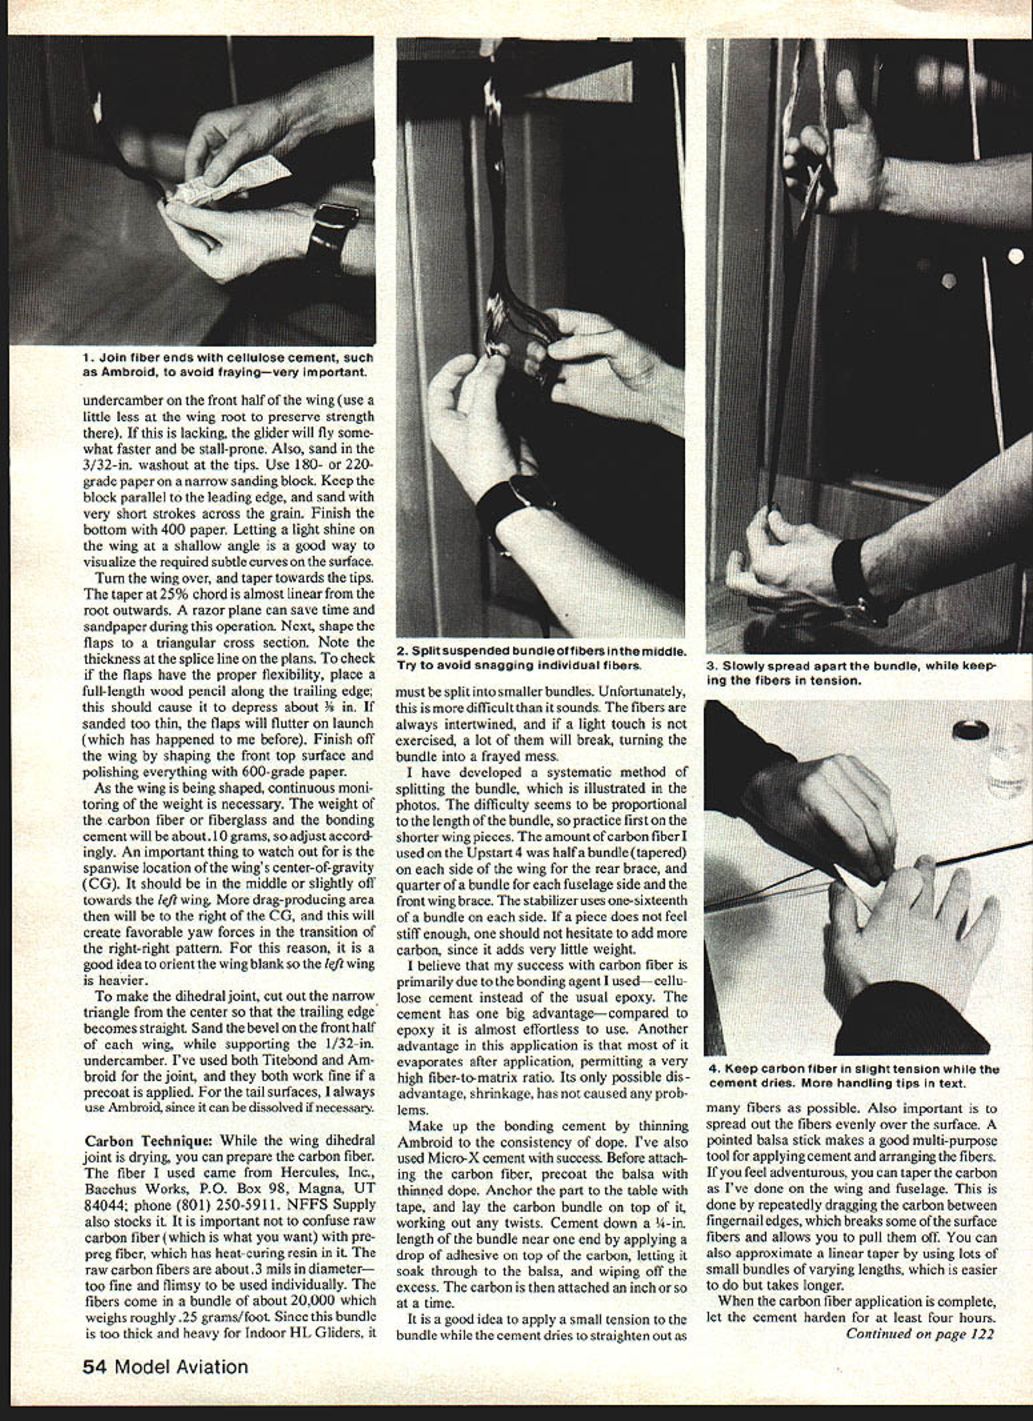
Start shaping the wing by sanding the 1/32-in undercamber on the front half (use a little less at the wing root to preserve strength there). If this undercamber is lacking, the glider will fly somewhat faster and be more stall-prone. Also sand in the 3/32-in washout at the tips. Use 180- or 220-grade paper on a narrow sanding block, keeping the block parallel to the leading edge and sanding with very short strokes across the grain. Finish the bottom with 400-grit paper. Letting a light shine on the wing at a shallow angle helps visualize the subtle curves required.
Turn the wing over and taper toward the tips. The taper at 25% chord is almost linear from the root outward. A razor plane can save time and sandpaper. Next, shape the flaps to a triangular cross section—note the thickness at the splice line on the plans. To check flap flexibility, place a full-length wood pencil along the trailing edge; it should depress about 3/32 in. If sanded too thin, the flaps will flutter on launch. Finish the front top surface and polish everything with 600-grit paper.
Continuously monitor weight while shaping. The carbon fiber (or fiberglass) and bonding cement will weigh about 0.10 grams, so adjust accordingly. Watch the spanwise location of the wing's center of gravity (CG): it should be in the middle or slightly off toward the left wing. More drag-producing area to the right of the CG will create favorable yaw forces in the transition of a right-right pattern. For this reason, orient the wing blank so the left wing is heavier.
To make the dihedral joint, cut out the narrow triangle from the center so the trailing edge becomes straight. Sand the bevel on the front half of each wing while supporting the 1/32-in undercamber. Both Titebond and Ambroid have been used for the joint; precoat should be applied. For tail surfaces, Ambroid is recommended because it can be dissolved if necessary.
Carbon Technique
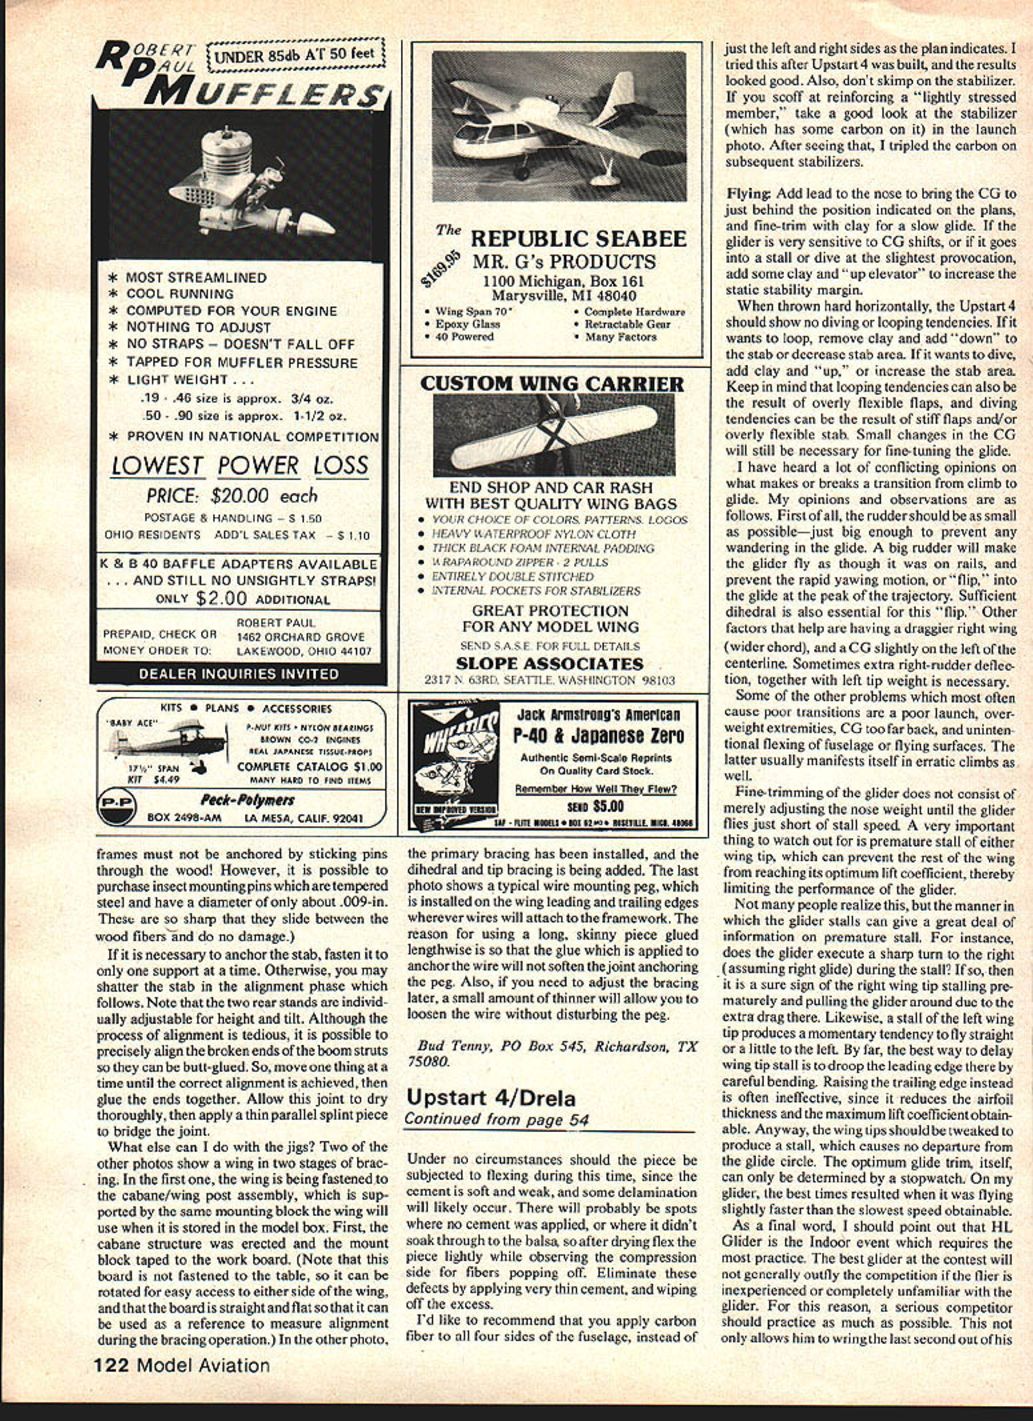
It is important not to confuse raw carbon fiber (what you want) with pre-preg fiber, which has heat-curing resin. Raw carbon fibers are about 0.3 mils in diameter—too fine to use individually. The fibers come in bundles of about 20,000 and weigh roughly 0.25 grams per foot. These bundles are too thick and heavy for indoor HL gliders and must be split into smaller bundles—a delicate, skillful process because the fibers are intertwined and easily fray.
The amount of carbon used on Upstart 4 was approximately:
- Rear wing brace: half a bundle (tapered) on each side
- Front wing brace: one-quarter bundle (each side)
- Fuselage: one-quarter bundle for each side
- Stabilizer: one-sixteenth of a bundle on each side
If a piece does not feel stiff enough, add more carbon—it adds very little weight.
The bonding agent used was cellulose cement rather than epoxy. Cellulose cement is almost effortless to use, and because much of it evaporates after application it permits a very high fiber-to-matrix ratio; shrinkage has not caused problems in this application. Make up the bonding cement by thinning Ambroid to the consistency of dope. Micro-X cement has also worked.
Before attaching the bundles, precoat the balsa with thinned dope. Anchor the part to the table with tape and lay the carbon bundle on top, working out twists. Cement down a 1/4-in length of the bundle near one end by applying a drop of Ambroid to the end of the carbon, letting it soak through to the balsa, and wiping off excess. Attach the carbon an inch or so at a time. Apply a small tension to the bundle while the cement dries to straighten fibers and spread them evenly. A pointed balsa stick is useful for applying cement and arranging fibers.
To taper the carbon, repeatedly drag the bundle between fingernails to break surface fibers and pull them off, or use many small bundles of varying lengths to approximate a linear taper. When the carbon application is complete, let the cement harden for at least four hours. Under no circumstances should the piece be flexed during this time, since the cement is soft and weak and delamination can occur. After drying, flex the piece lightly while observing the compression side for fibers popping off; eliminate defects by applying very thin cement and wiping off excess.
It is recommended to apply carbon fiber to all four sides of the fuselage rather than only left and right as the original plan indicates. Also, do not skimp on the stabilizer—subsequent builds used triple carbon on the stabilizer after seeing launch photos showing stress.
Flying
Add lead to the nose to bring the CG to just behind the position indicated on the plans, and fine-trim with clay for a slow glide. If the glider is very sensitive to CG shifts, or if it stalls or dives at the slightest provocation, add some clay and "up" elevator to increase the static stability margin.
When thrown hard horizontally, Upstart 4 should show no diving or looping tendencies. If it wants to loop, remove clay and add "down" to the stab or decrease stab area. If it wants to dive, add clay and "up," or increase stab area. Looping tendencies can also result from very flexible flaps; diving tendencies can result from stiff flaps and/or an overly flexible stab. Small CG changes will be necessary for fine-tuning.
On transitions from climb to glide, the following observations apply:
- The rudder should be as small as possible—just big enough to prevent wandering in the glide. A large rudder makes the glider fly "on rails" and prevents the rapid yawing "flip" into the glide at the peak.
- Sufficient dihedral is essential for that "flip."
- A dragger right wing (wider chord) and a CG slightly to the left of centerline help transitions.
- Sometimes extra right-rudder deflection together with left tip weight is necessary.
Common causes of poor transitions are poor launch, overweight extremities, CG too far back, and unintentional flexing of fuselage or flying surfaces (which often shows up as erratic climbs).
Fine-trimming is not merely adding nose weight until the glider flies near stall speed. Watch for premature stall of either wing tip, which prevents the wing from reaching its optimum lift coefficient and limits performance. The manner in which the glider stalls gives diagnostic information: a sharp turn to the right during stall (assuming a right glide) indicates the right tip stalled prematurely; a turn to the left or momentary straightening indicates left tip stall. The best way to delay wing tip stall is to droop the leading edge at the tips by careful bending. Raising the trailing edge is often ineffective because it reduces airfoil thickness and maximum lift coefficient. Tweak the wing tips to produce a stall that causes no departure from the glide circle. The optimum glide trim is determined by stopwatch; the best times on the author's glider occurred when it flew slightly faster than the slowest speed obtainable.
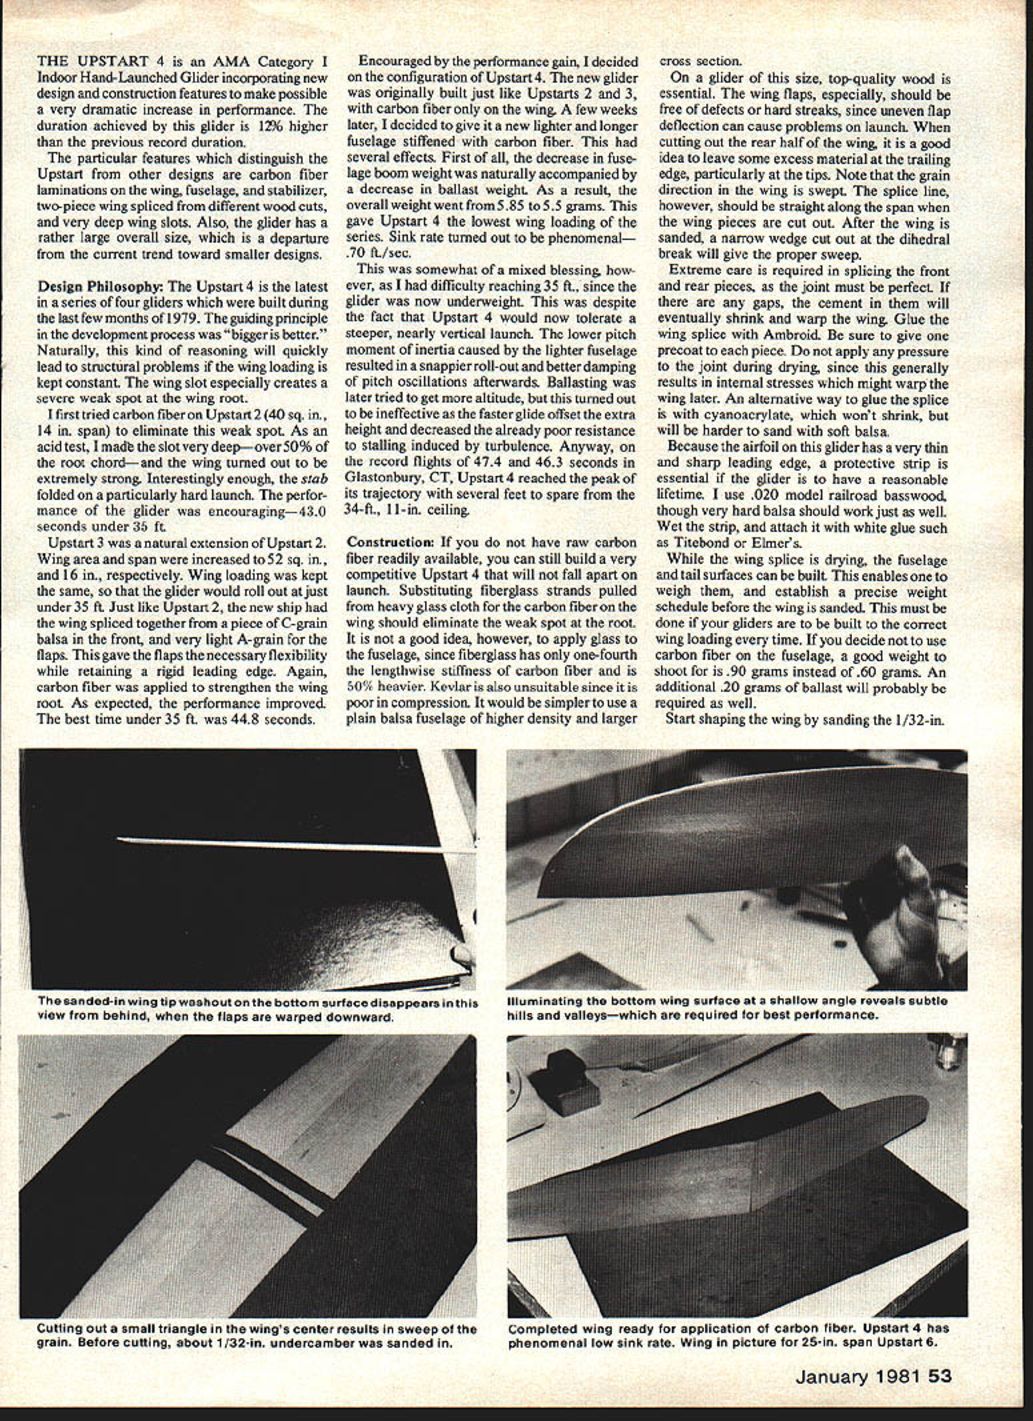
As a final word, indoor HL gliding requires a great deal of practice. The best glider will not necessarily outfly opponents if the flier is inexperienced or unfamiliar with the model. Practice not only tightens the throw but also reveals model behavior under many conditions. Top competitors use different launching styles—some snap the glider about 90 degrees out of the hand; others fling it like a spear—but the launch must be smooth and repeatable. The author finds a well-timed small wrist snap produces the best results for his style.
Mark Drela. Construction, carbon-fiber technique. Photos: C. Lon Enloe. Other photos: Ray Harlan.
Transcribed from original scans by AI. Minor OCR errors may remain.

