

Victory for AIR XX
Ken Johnson
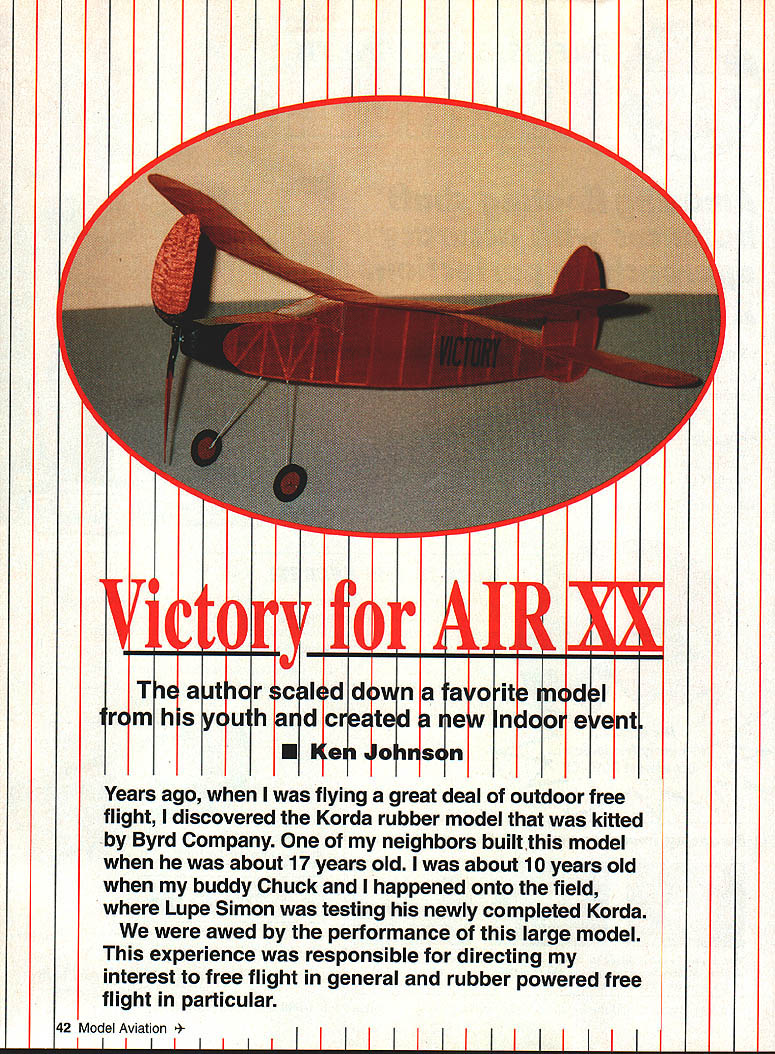
Years ago, when I was flying a great deal of outdoor free flight, I discovered the Korda rubber model that was kitted by Byrd Company. One of my neighbors built this model when he was about 17 years old. I was about 10 years old when my buddy Chuck and I happened onto the field, where Lupe Simon was testing his newly completed Korda.
We were awed by the performance of this large model. This experience was responsible for directing my interest to free flight in general and rubber-powered free flight in particular.
Years later I decided to build and fly this same Korda record holder. At the 1969 Nationals, I wound for a third flight with a larger rubber motor after making the first two maxes. A big mistake! The model did a torque roll to the left, spiraled into the tarmac, and destroyed itself. I could have placed in Old-Timer were it not for that mistake.
I found out later that a smaller version of the Korda rubber model had been kitted. The date on the plan was 1937. It featured a 32-inch wingspan. Using just the plan I built this model, called the Victory. It was lost in a thermal several weeks after completion. Since then, three more Victorys were built and lost out of sight.
Later in my modeling career while concentrating more on indoor free flight, I remembered my experiences with the Victory. We were looking for a new indoor event to fly at Paul Revere Gym in Santa Monica, California, so Mik Mikkelson and I conceived the AIR (Antique Indoor Rubber) XX (20-inch wingspan) event. We felt that a lot of old-timers who came up through outdoor free flight rubber would enjoy building and flying these planes again, but as 20-inch indoor versions.
We didn't realize that so many types of Old-Timers would emerge: we had in mind a class for cabin and one for stick models. Boy, were we surprised!
Bill Warner built Ed Lidgard's ornithopter and Bill Hannan entered the historic Penaud Planophore, which turned in a time of 56 seconds. Mike Mulligan built the Cloud Chaser stick model, which flew for 2:31. In all, 19 models were flown that day.
The rules were simple: 20-inch wingspan with a three-gram minimum weight without the rubber motor. Single-surface covering was acceptable. The categories were Cabin and Stick, with a catch-all for unusual entries (ornithopters and such).
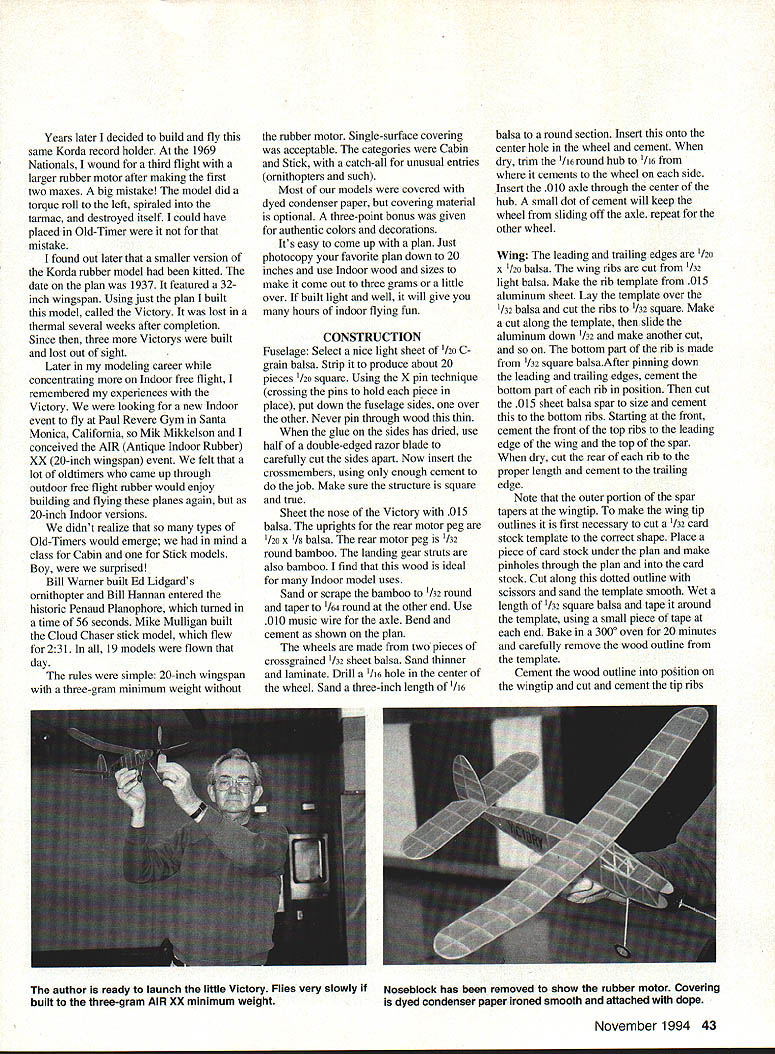
Most of our models were covered with dyed condenser paper, but covering material is optional. A three-point bonus was given for authentic colors and decorations.
It's easy to come up with a plan. Just photocopy your favorite plan down to 20 inches and use indoor wood sizes to make it come out to three grams or a little over. If built light and well, it will give you many hours of indoor flying fun.
Construction
Fuselage
- Select a nice light sheet of 1/20" C-grain balsa. Strip it to produce about 20 pieces 1/20" square.
- Using the X-pin technique (crossing the pins to hold each piece in place), put down the fuselage sides, one over the other. Never pin through the wood.
- When the glue on the sides has dried, use half of a double-edged razor blade to carefully cut the sides apart.
- Insert the crossmembers, using enough cement to do the job. Make sure the structure is square and true.
- Sheet the nose of the Victory with .015" C-grain balsa.
- The uprights for the rear motor peg are 1/32" x 1/8" balsa. The rear motor peg is 1/32" round bamboo. The landing gear struts are also bamboo — ideal for many indoor model uses.
- Sand or scrape the bamboo to 1/32" round and taper to 1/64" round at the other end. Use .010" music wire for the axle. Bend and cement as shown on the plan.
- The wheels are made from two pieces of cross-grained 1/32" sheet balsa. Sand thinner and laminate. Drill a 1/16" hole in the center of the wheel. Sand a three-inch length of 1/16" balsa to a round section. Insert this into the center hole in the wheel and cement. When dry, trim the 1/16" round hub to fit from the wheel on each side. Insert the .010" axle through the center hub. A small dot of cement will keep the wheel from sliding off the axle. Repeat for the other wheel.
Wing
- Leading and trailing edges: 1/20" x 1/8" balsa.
- Wing ribs: cut from 1/32" light balsa. Make the rib template from .015" aluminum sheet. Lay the template over 1/32" balsa and cut ribs to 1/32" square.
- After pinning down the leading and trailing edges, cement the bottom part rib in position.
- Cut the .015" sheet balsa spar to size and cement to the bottom ribs.
- Starting at the front, cement the front top ribs to the leading edge and the top of the spar. When dry, cut the rear of each rib to the proper length and cement to the trailing edge.
- Note that the outer portion of the spar tapers at the wingtip. To make the wingtip outline, first make a 1/32" card-stock template to the correct shape. Place a piece of card stock under the plan and make pinholes through the plan into the card stock. Cut along the dotted outline with scissors and sand the template smooth.
- Wet a length of 1/32" square balsa and tape it around the template using a small piece of tape at each end. Bake in a 300°F oven for 20 minutes and carefully remove the wood outline from the template. Cement the wood outline into position on the wingtip and cut and cement the tip ribs and spar into position. Use diagonal cuts on the tip outlines to get a longer glue joint.
- The center section of the wing is flat on the top of the fuselage. Cement in 1/4" dihedral at the center of each side of the wing, then add 3/4" dihedral at each wingtip. Add 1/32" gussets at the breaks and the wing is ready to cover.
Stab and Rudder
- Make the templates for the stabilizer and vertical fin in the same fashion as the wingtip template.
- The fin outline is two laminations of 1/32" x 1/20". Laminate the wood while wet with thinner and white glue, tape onto the template, and bake. Remove from the template, pin to the plan, and add the 1/32" x 1/20" crosspieces to the fin.
- The stabilizer paper is taped at the corners to a sheet of artist's illustration board. The coloring material is Dr. P. H. Martin's watercolor dye (available at artist supply stores). Thin the liquid about one-third with water and spray onto the condenser paper using an airbrush. Starting at the top left, spray across to the right, drop down, and repeat.
- Allow to dry thoroughly, remove from the illustration board, and carefully iron (warm setting).
- Attach the covering with thinned model aircraft dope and mist lightly with water. This will tighten the covering so that it's just snug; any tighter and it will warp the framework.
- Fashion the nose block from soft balsa. Drill an .030" hole through the block to accommodate the prop shaft.
- Make two 1/8" x 3/8" aluminum sheet pieces from .015" stock. Drill an .030" hole in the center of each piece. Bend the ends at a 90° angle and place these bearing plates over the front and rear holes in the nose block. Embed the ends into the block and cement in position.
- Bend the prop shaft from .035" music wire. Using small wire-bending pliers, fashion a complete circle at one end of the shaft. Center the circle hook on the shaft. The shaft should be about 1 1/4" long at this point. Pass the shaft through the nose block with the round hook at the rear. Slide a small glass bead over the shaft at the front of the nose block. A small Teflon washer is positioned just ahead of it.
Propeller
- Blades: cut from 1/32" medium-hard balsa. Pinhole through the blade to get a true outline shape for the blades. Soak them in hot water and tape to a three-inch diameter can at 15° off the vertical. Bake in a 300°F oven for about 20 minutes.
- Prop hub: 1/8" hard balsa. It measures 1 1/4" x 1/8" x 1/8". Measure in 3/8" from each end and cut a 45° notch from the prop hub (see plan for direction of the angles).
- Draw an ink line lengthwise along the back of each blade, 1/4" in from the back edge. Cement each blade onto the hub by positioning the leading edge side along the line drawn on the back of each prop blade. Check alignment visually for straightness.
- Cut a 1/8" x 1/2" piece of .015" aluminum sheet and drill an .035" hole in the center. Bend the ends up 90° and cement across the center of the prop hub. It should be across the back and up the sides of the hub.
- Drill an .035" hole through the center of the shaft and the aluminum rear facing plate. Pass the prop shaft through this hole and bend two 90° bends in the end of the shaft. Cement the shaft to the propeller hub and check for tracking alignment.
- Paint the prop orange and black. The front of the fuselage is also done in black per the plan. The wheel centers are orange and the tires are black.
- Assemble the wing and tail parts onto the fuselage. Cement a 1/4" block under the leading edge of the wing.
Flying the Victory
- I prefer to fly this type of model to the right. Warp in 1/8" right rudder and 1/8" wash-in at the right wingtip.
- If necessary, add a small amount of right thrust by cementing a 1/32" balsa strip behind the nose block.
- Make up a 1/4" x .040" rubber motor. Insert it into the fuselage and wind to 600 turns. Check to see if the model is climbing and turning. If the Victory seems to be underpowered, it may be necessary to go up in rubber cross-section by .005".
- Do not attempt to fly this plane outdoors. If built to the size and weight shown, it will be too fragile for even the calmest air outdoors.
Good luck and happy flying with your little indoor Victory.
AIR XX Victory (specifications)
- Type: FF Antique Indoor Rubber
- Wingspan: 20 inches (maximum)
- Motor: One loop 1/4" x .040" rubber
- Flying weight: Three grams (minimum)
- Construction: Built-up
- Covering/finish: Dyed condenser paper
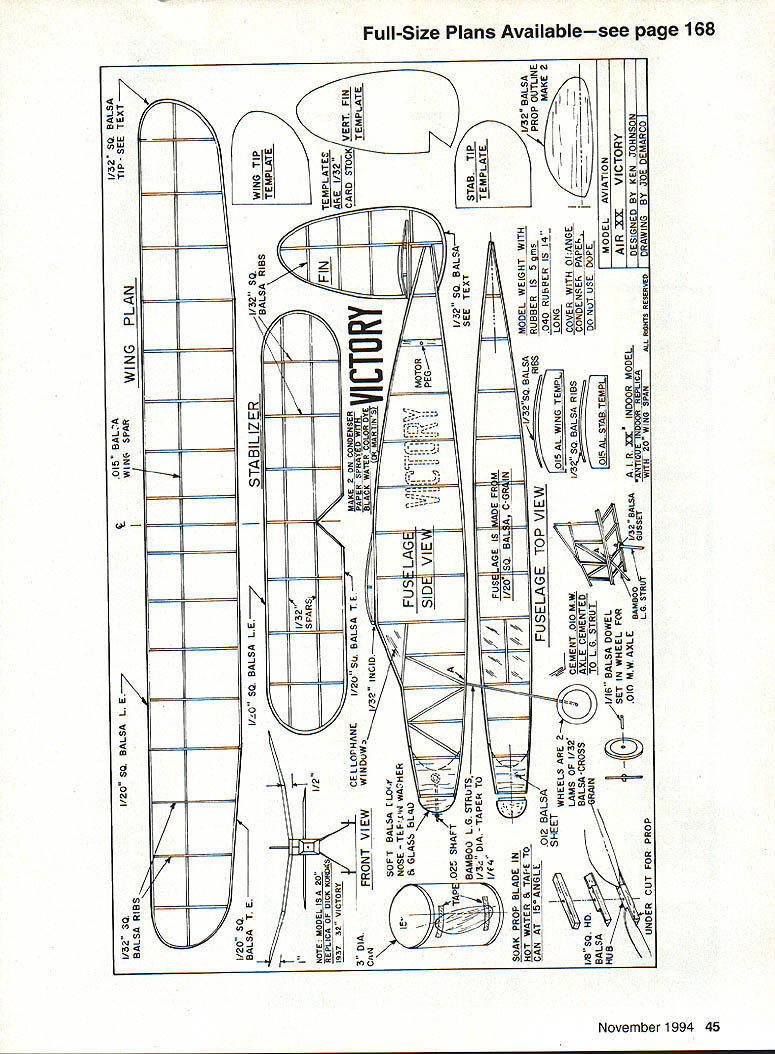
Wing Plan
- 1/20" sq. balsa L.E.
- 1/32" sq. balsa ribs
- 1/20" sq. balsa wing spar
- Wing tip template
- Tip — see text
Stabilizer
- 1/20" sq. balsa L.E.
- 1/32" sq. balsa spar
- Stab tip template
Fin
- Fin
- Template — vertical fin (card stock)
Wing Tip Template
- (make template from 1/32" card stock)
Fuselage Side View
- Victory (name printed on fuselage)
- Motor peg
- 1/32" sq. balsa uprights
- 1/20" sq. balsa longerons
- Celluloid window (windshield); make 2 from condenser paper
- Front nose block
Fuselage Top View
- Fuselage made from 1/20" sq. balsa longerons
- Axle location and wheel assembly shown
- Undercut for prop
Front View
- 1/32" music wire axle
- Wheels made from 1/32" sheet balsa with hub
- 1/16" hole center wheel
- Soak prop blade in wax
Note: Full-size plans available — see page 168.
Transcribed from original scans by AI. Minor OCR errors may remain.

