
VINTAGE 11
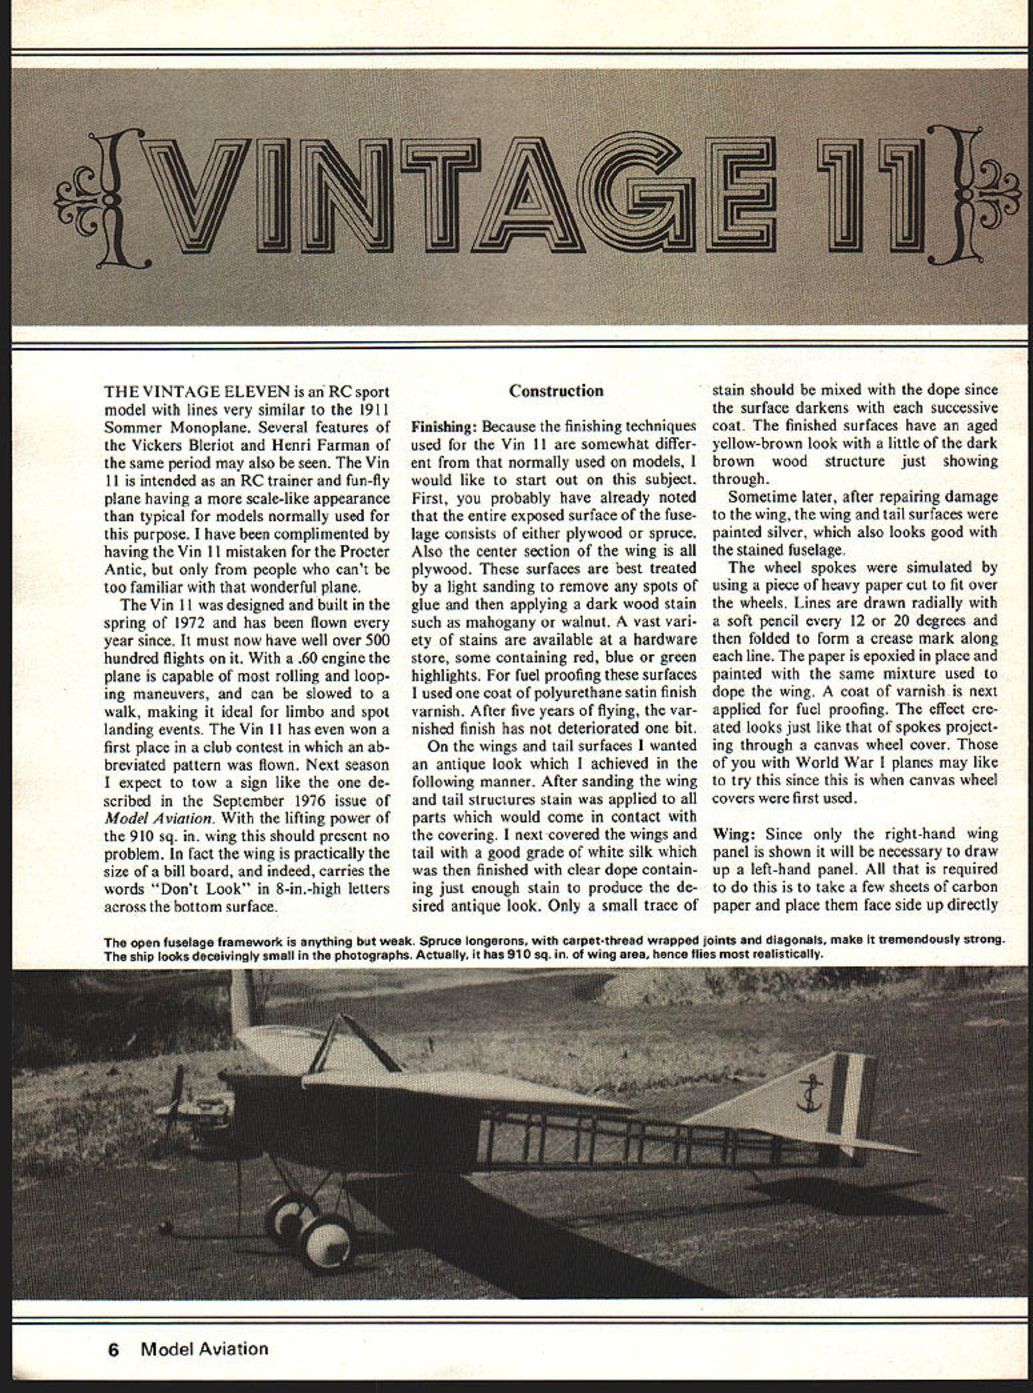
THE VINTAGE ELEVEN is an RC sport model with lines very similar to the 1911 Sommer Monoplane. Several features of the Vickers Bleriot and Henri Farman of the same period may also be seen. The Vin 11 is intended as an RC trainer and fun-fly plane having a more scale-like appearance than typical for models normally used for this purpose. I have been complimented by having the Vin 11 mistaken for the Procter Antic, but only from people who can't be too familiar with that wonderful plane.
The Vin 11 was designed and built in the spring of 1972 and has been flown every year since. It must now have well over 500 flights on it. With a .60 engine the plane is capable of most rolling and looping maneuvers, and can be slowed to a walk, making it ideal for limbo and spot landing events. The Vin 11 has even won a first place in a club contest in which an abbreviated pattern was flown. Next season I expect to tow a sign like the one described in the September 1976 issue of Model Aviation. With the lifting power of the 910 sq. in. wing this should present no problem. In fact the wing is practically the size of a billboard, and indeed, carries the words "Don't Look" in 8-in.-high letters across the bottom surface.
Construction
Finishing
Because the finishing techniques used for the Vin 11 are somewhat different from that normally used on models, I would like to start out on this subject. First, you probably have already noted that the entire exposed surface of the fuselage consists of either plywood or spruce. Also the center section of the wing is all plywood. These surfaces are best treated by a light sanding to remove any spots of glue and then applying a dark wood stain such as mahogany or walnut. A vast variety of stains are available at a hardware store, some containing red, blue or green highlights. For fuel proofing these surfaces I used one coat of polyurethane satin finish varnish. After five years of flying, the varnished finish has not deteriorated one bit.
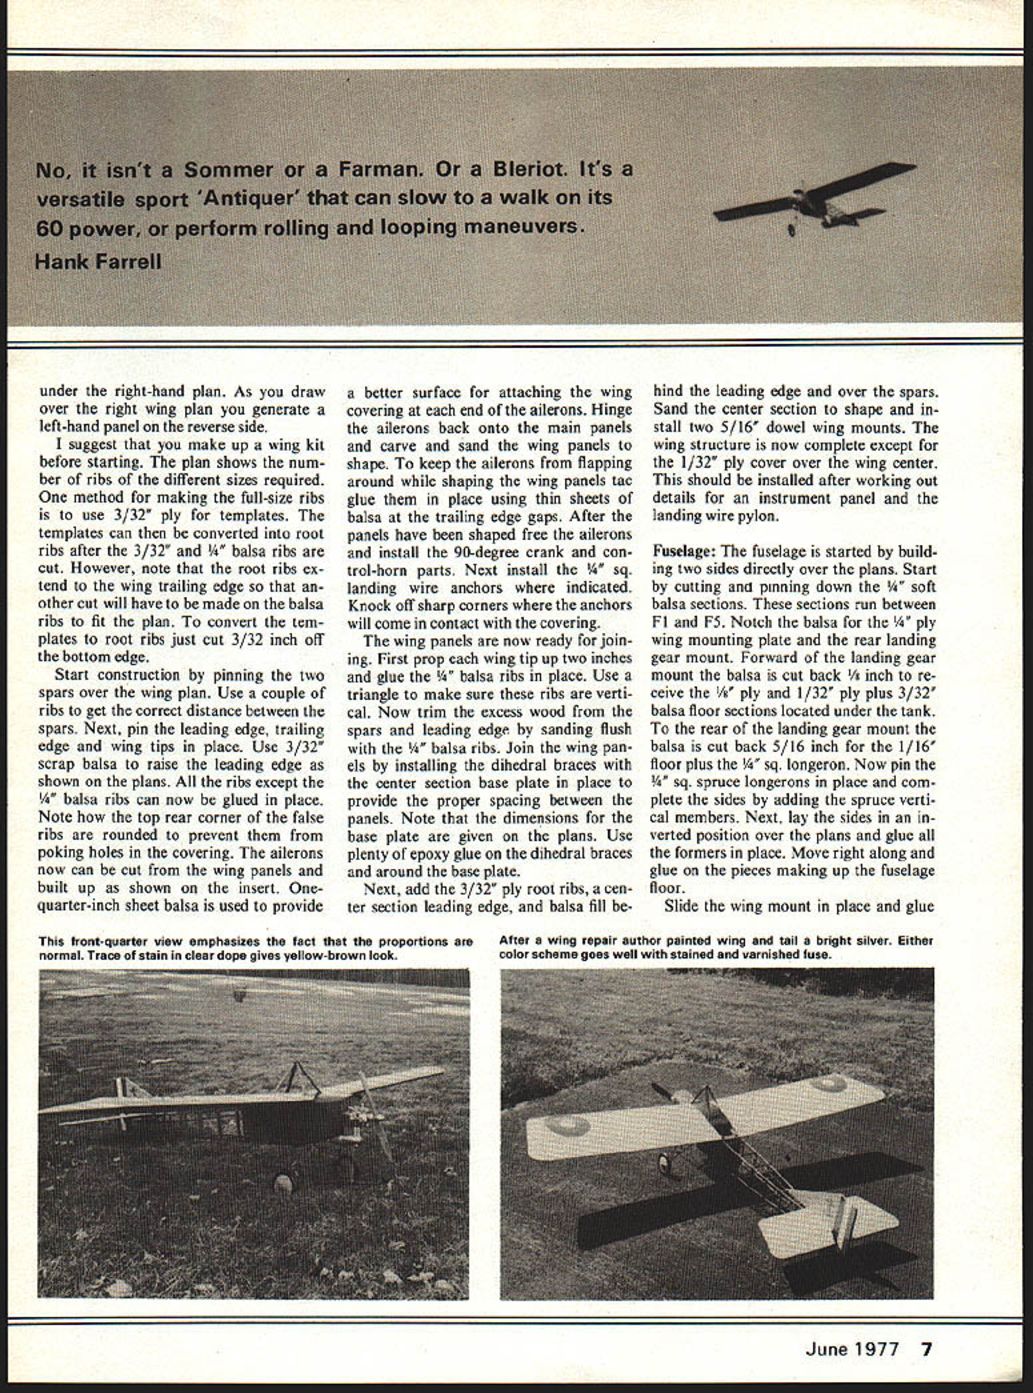
On the wings and tail surfaces I wanted an antique look which I achieved in the following manner. After sanding the wing and tail structures stain was applied to all parts which would come in contact with the covering. I next covered the wings and tail with a good grade of white silk which was then finished with clear dope containing just enough stain to produce the desired antique look. Only a small trace of stain should be mixed with the dope since the surface darkens with each successive coat. The finished surfaces have an aged yellow-brown look with a little of the dark brown wood structure just showing through.
Sometime later, after repairing damage to the wing, the wing and tail surfaces were painted silver, which also looks good with the stained fuselage.
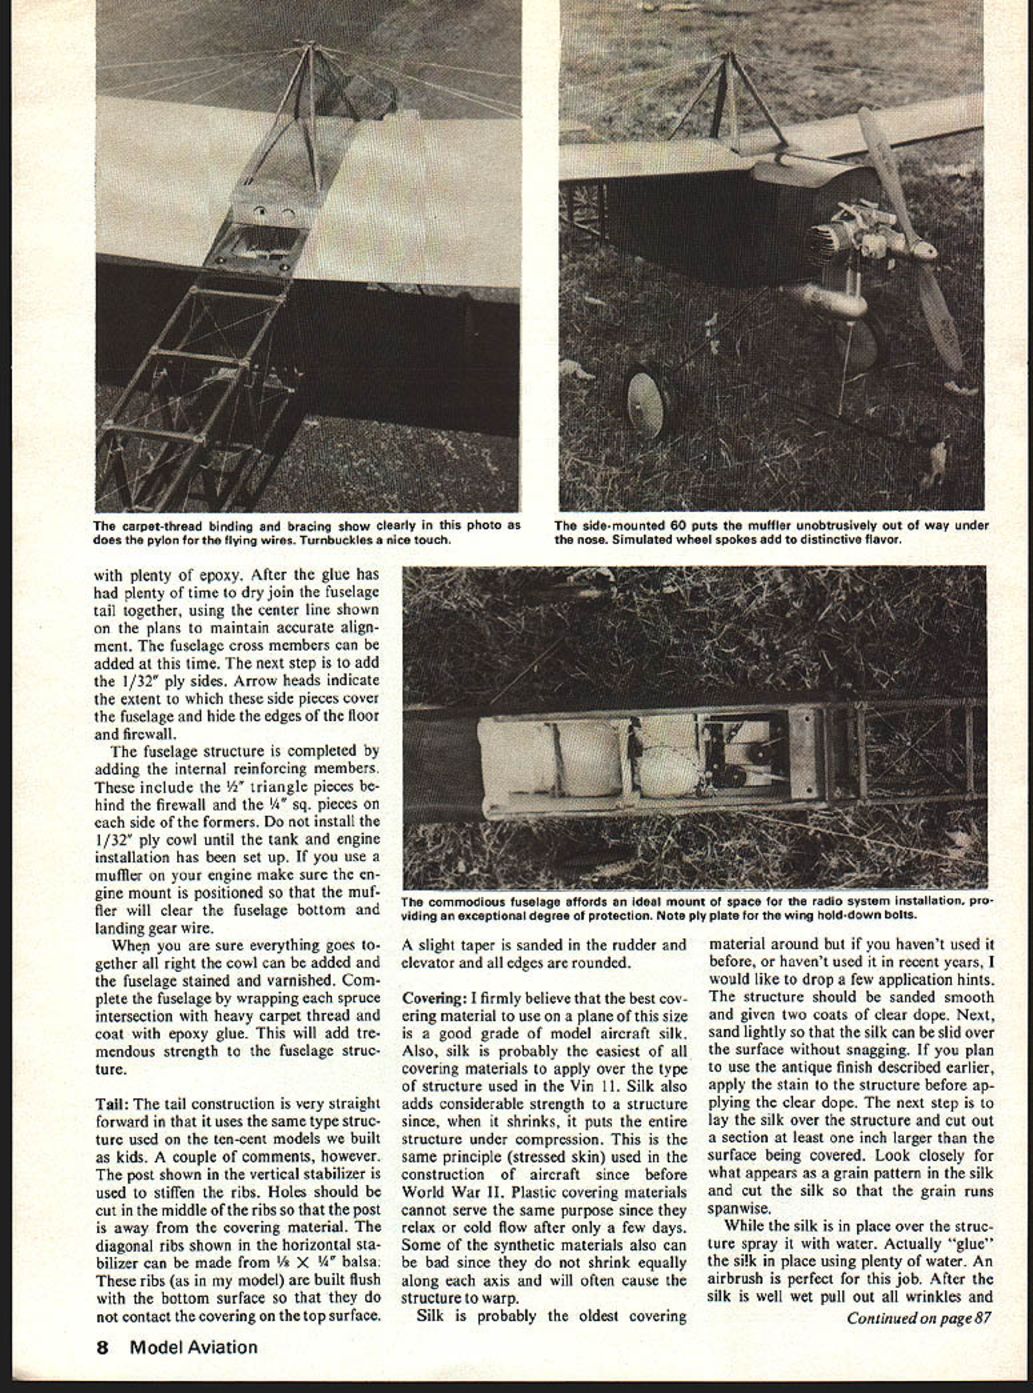
The wheel spokes were simulated by using a piece of heavy paper cut to fit over the wheels. Lines are drawn radially with a soft pencil every 12 or 20 degrees and then folded to form a crease mark along each line. The paper is epoxied in place and painted with the same mixture used to dope the wing. A coat of varnish is next applied for fuel proofing. The effect created looks just like that of spokes projecting through a canvas wheel cover. Those of you with World War I planes may like to try this since this is when canvas wheel covers were first used.
Wing
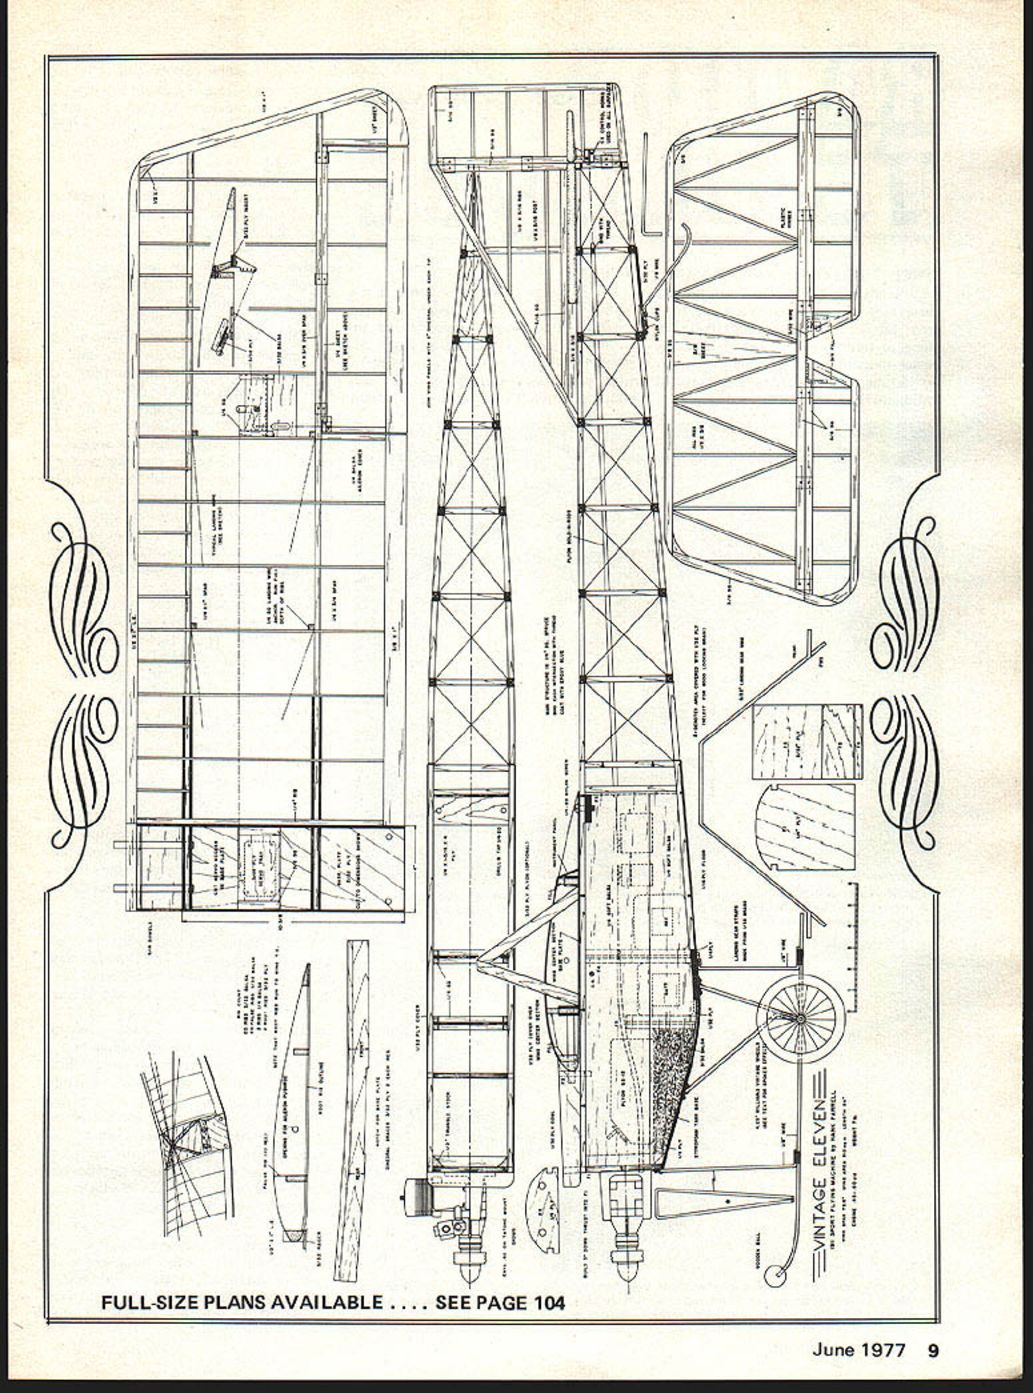
Since only the right-hand wing panel is shown it will be necessary to draw up a left-hand panel. All that is required to do this is to take a few sheets of carbon paper and place them face side up directly under the right-hand plan. As you draw over the right wing plan you generate a left-hand panel on the reverse side.
I suggest that you make up a wing kit before starting. The plan shows the number of ribs of the different sizes required. One method for making the full-size ribs is to use 3/32" ply for templates. The templates can then be converted into root ribs after the 3/32" and 1/4" balsa ribs are cut. However, note that the root ribs extend to the wing trailing edge so that another cut will have to be made on the balsa ribs to fit the plan. To convert the templates to root ribs just cut 3/32 inch off the bottom edge.
Start construction by pinning the two spars over the wing plan. Use a couple of ribs to get the correct distance between the spars. Next, pin the leading edge, trailing edge and wing tips in place. Use 3/32" scrap balsa to raise the leading edge as shown on the plans. All the ribs except the 1/4" balsa ribs can now be glued in place. Note how the top rear corner of the false ribs are rounded to prevent them from poking holes in the covering. The ailerons now can be cut from the wing panels and built up as shown on the insert. One-quarter-inch sheet balsa is used to provide a better surface for attaching the wing covering at each end of the ailerons. Hinge the ailerons back onto the main panels and carve and sand the wing panels to shape. To keep the ailerons from flapping around while shaping the wing panels, glue them in place using thin sheets of balsa at the trailing edge gaps. After the panels have been shaped free the ailerons and install the 90-degree crank and control-horn parts. Next install the 1/4" sq. landing wire anchors where indicated. Knock off sharp corners where the anchors will come in contact with the covering.
The wing panels are now ready for joining. First prop each wing tip up two inches and glue the 1/8" balsa ribs in place. Use a triangle to make sure these ribs are vertical. Now trim the excess wood from the spars and leading edge by sanding flush with the 1/4" balsa ribs. Join the wing panels by installing the dihedral braces with the center section base plate in place to provide the proper spacing between the panels. Note that the dimensions for the base plate are given on the plans. Use plenty of epoxy glue on the dihedral braces and around the base plate.
Next, add the 3/32" ply root ribs, a center section leading edge, and balsa fill behind the leading edge and over the spars. Sand the center section to shape and install two 5/16" dowel wing mounts. The wing structure is now complete except for the 1/32" ply cover over the wing center. This should be installed after working out details for an instrument panel and the landing wire pylon.
Fuselage
The fuselage is started by building two sides directly over the plans. Start by cutting and pinning down the 1/4" soft balsa sections. These sections run between F1 and F5. Notch the balsa for the 1/4" ply wing mounting plate and the rear landing gear mount. Forward of the landing gear mount the balsa is cut back 1/8" inch to receive the 1/8" ply and 1/32" ply plus 3/32" balsa floor sections located under the tank. To the rear of the landing gear mount the balsa is cut back 5/16 inch for the 1/16" floor plus the 1/4" sq. longeron. Now pin the 1/4" sq. spruce longerons in place and complete the sides by adding the spruce vertical members. Next, lay the sides in an inverted position over the plans and glue all the formers in place. Move right along and glue on the pieces making up the fuselage floor.
Slide the wing mount in place and glue with plenty of epoxy. After the glue has had plenty of time to dry join the fuselage tail together, using the center line shown on the plans to maintain accurate alignment. The fuselage cross members can be added at this time. The next step is to add the 1/32" ply sides. Arrow heads indicate the extent to which these side pieces cover the fuselage and hide the edges of the floor and firewall.
The fuselage structure is completed by adding the internal reinforcing members. These include the 1/2" triangle pieces behind the firewall and the 1/4" sq. pieces on each side of the formers. Do not install the 1/32" ply cowl until the tank and engine installation has been set up. If you use a muffler on your engine make sure the engine mount is positioned so that the muffler will clear the fuselage bottom and landing gear wire.
When you are sure everything goes together all right the cowl can be added and the fuselage stained and varnished. Complete the fuselage by wrapping each spruce intersection with heavy carpet thread and coat with epoxy glue. This will add tremendous strength to the fuselage structure.
Tail
The tail construction is very straight forward in that it uses the same type structure used on the ten-cent models we built as kids. A couple of comments, however. The post shown in the vertical stabilizer is used to stiffen the ribs. Holes should be cut in the middle of the ribs so that the post is away from the covering material. The diagonal ribs shown in the horizontal stabilizer can be made from 3/32" x 1/4" balsa. These ribs (as in my model) are built flush with the bottom surface so that they do not contact the covering on the top surface.
A slight taper is sanded in the rudder and elevator and all edges are rounded.
Covering
I firmly believe that the best covering material to use on a plane of this size is a good grade of model aircraft silk. Also, silk is probably the easiest of all covering materials to apply over the type of structure used in the Vin 11. Silk also adds considerable strength to a structure since, when it shrinks, it puts the entire structure under compression. This is the same principle (stressed skin) used in the construction of aircraft since before World War II. Plastic covering materials cannot serve the same purpose since they relax or cold flow after only a few days. Some of the synthetic materials also can be bad since they do not shrink equally along each axis and will often cause the structure to warp.
Silk is probably the oldest covering material around but if you haven't used it before, or haven't used it in recent years, I would like to drop a few application hints. The structure should be sanded smooth and given two coats of clear dope. Next, sand lightly so that the silk can be slid over the surface without snagging. If you plan to use the antique finish described earlier, apply the stain to the structure before applying the clear dope. The next step is to lay the silk over the structure and cut out a section at least one inch larger than the surface being covered. Look closely for what appears as a grain pattern in the silk and cut the silk so that the grain runs spanwise.
While the silk is in place over the structure spray it with water. Actually "glue" the silk in place using plenty of water. An airbrush is perfect for this job. After the silk is well wet pull out all wrinkles and FULL-SIZE PLANS AVAILABLE . . . . SEE PAGE 104
Vintage 11/Farrell
continued from page 8
creases. When you are satisfied that the silk is wet-glued perfectly in place brush clear dope around the periphery of the structure. The dope may turn white when applied to the wet surface but subsequent doping will cause the white areas to turn clear. Generally, I apply a second coat of dope around the periphery before the silk starts to dry and shrink. Since the second coat of dope may soften the first, make sure the silk stays wet until the second coat is dry. When covering a wing I cover the top first and wrap the silk around to the bottom surface. This keeps the overlaps and seams on the bottom.
Silk should be well sealed with clear dope before colored paint is applied. The first couple coats of clear are always critical since this is when heavy blotches of dope may appear and prevent a nice smooth finish from being obtained. My trick for preventing this is to keep the dope very thin for the first two or three coats until all the voids in the silk are filled. After this I use less thinner and apply about three additional coats. I always use some thinner, however, since this prevents brush marks from setting up. If you are using the antique finishing method described earlier then use even more clear dope since clear is not as fuel-proof as a pigmented paint.
If you plan to paint your wing and tail surfaces silver I have another trick to pass along. Have you noticed how dark and dull silver paint looks? It looks more like the dull chrome finish used on some engine castings for better cooling. Well, silver paint can be made considerably brighter and shinier by simply mixing it with clear dope. I have used up to 25 percent clear on some planes. Before mixing make sure your paints are compatible with each other. It is always best to stick with one brand whenever finishing a plane.
Flying: I have no special tricks to pass along concerning the flying of the Vin 11. The plane was designed to be an RC trainer only and its resemblance to the Sommer Monoplane is strictly a secondary feature. It could have been made to look like any number of different planes without altering its aerodynamic features. With a .60 engine installed takeoff will take place after only a 20-foot run. After gaining altitude the engine can be cut back to half throttle for the remainder of the flight. Many times, on a windless day, I have set the trim controls for a gradual turn and watched the plane continuously fly in circles without ever touching the stick. This degree of inherent stability, I believe, should be the single, most important feature of any trainer. If you decide to build the Vin 11 I hope you have as many enjoyable years of flying yours as I have had in flying mine.
Transcribed from original scans by AI. Minor OCR errors may remain.

