
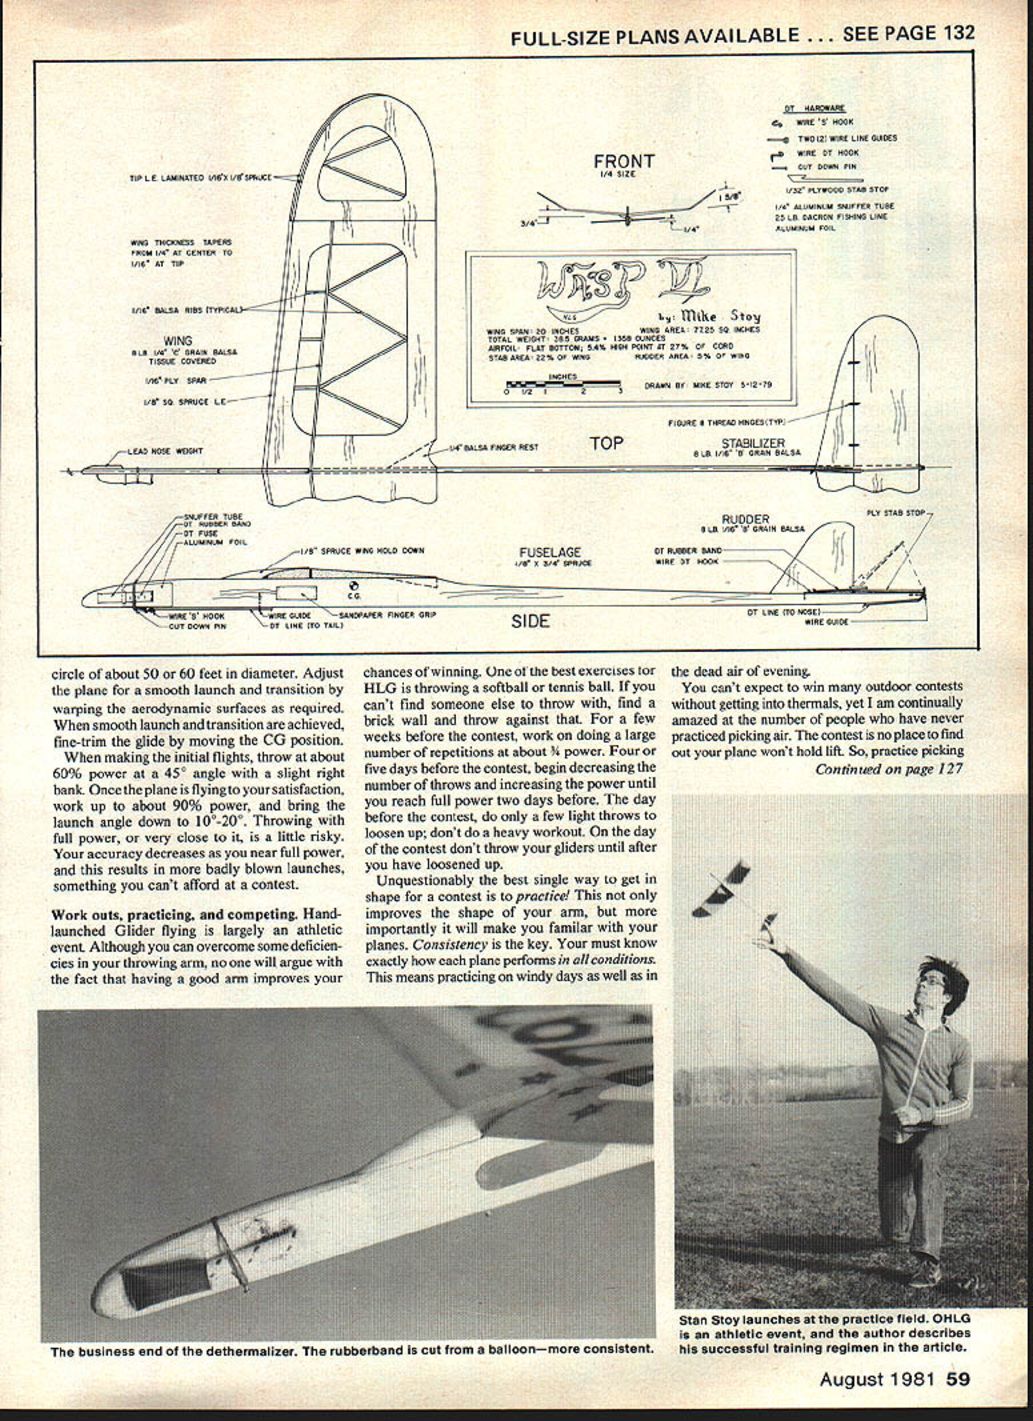
Wasp VI
High-time winner in outdoor hand-launched glider competition at last year's National Contest. This design can be built without specialized materials. The author includes a bushel of good advice about planning for, training for, and winning contests — he should know; he's won plenty. — Mike Stoy
In outdoor hand-launched glider (HLG) competition, consistency is the name of the game. The Wasp VI, due to its large size and careful design, offers superb consistency and thermalling ability that is nearly impossible to beat. The plane's contest performance is impressive in all kinds of weather — from light lift and calm winds to high winds and booming thermals.
A built-up hand-launched glider may seem like unnecessary complication for a sport model, but for a competition design it offers several advantages. The major difference is the wing loading achievable with a built-up structure. More important than making an ultra-light airplane is that you can build a light plane from less-than-ultra-light wood. Finding good C-grain wood in the 8–10 lb/ft³ range is much easier than locating similar quality in the 4–6 lb/ft³ range. Heavier wood is also less likely to have wind checks that weaken the structure. Using the right-weight wood and a built-up structure, you can produce a plane lighter than the same plane built from a single very light piece of wood, with no sacrifice in strength.
This design is not for beginners. Its construction complexity and large size make it suitable only for contest performance, and it requires a fairly good throwing arm to reach reasonable altitude. If you want a top-notch contest design, the Wasp VI will fill the bill.
Construction
Wood selection
- Wing: C-grain, preferably 8–10 lb/ft³ (lighter only for strictly dead-air designs).
- Stabilizer and rudder: 6–8 lb/ft³ B- or C-grain.
- Fuselage: springy, straight-grain spruce.
Splicing a wide wing blank
If you cannot obtain a wide enough piece of wood for the wing, splice two narrower pieces:
- True up the mating edges with a straightedge and a razor blade.
- Hold the edges together on the workboard. Tape several short strips of masking tape perpendicular to the joint, then run a 1-inch strip of masking tape the length of the joint on the same side.
- Flip the wood over and fold it open along the joint. Run white glue along the joint, lay the wood flat (masking-tape side down), weight it with bottles or weights, and wipe off squeezed-out glue.
- Let glue dry, remove the tape, and you will have a single wide blank.
Wing construction
- Splice the spruce leading edge after soaking it in hot water for a few minutes. Use masking tape or pins to hold it while bending; keep tension while bending to avoid breakage.
- Plane the wing to a rough airfoil with a sharp razor plane, then sand from 80 grit down to 400 grit to form the airfoil.
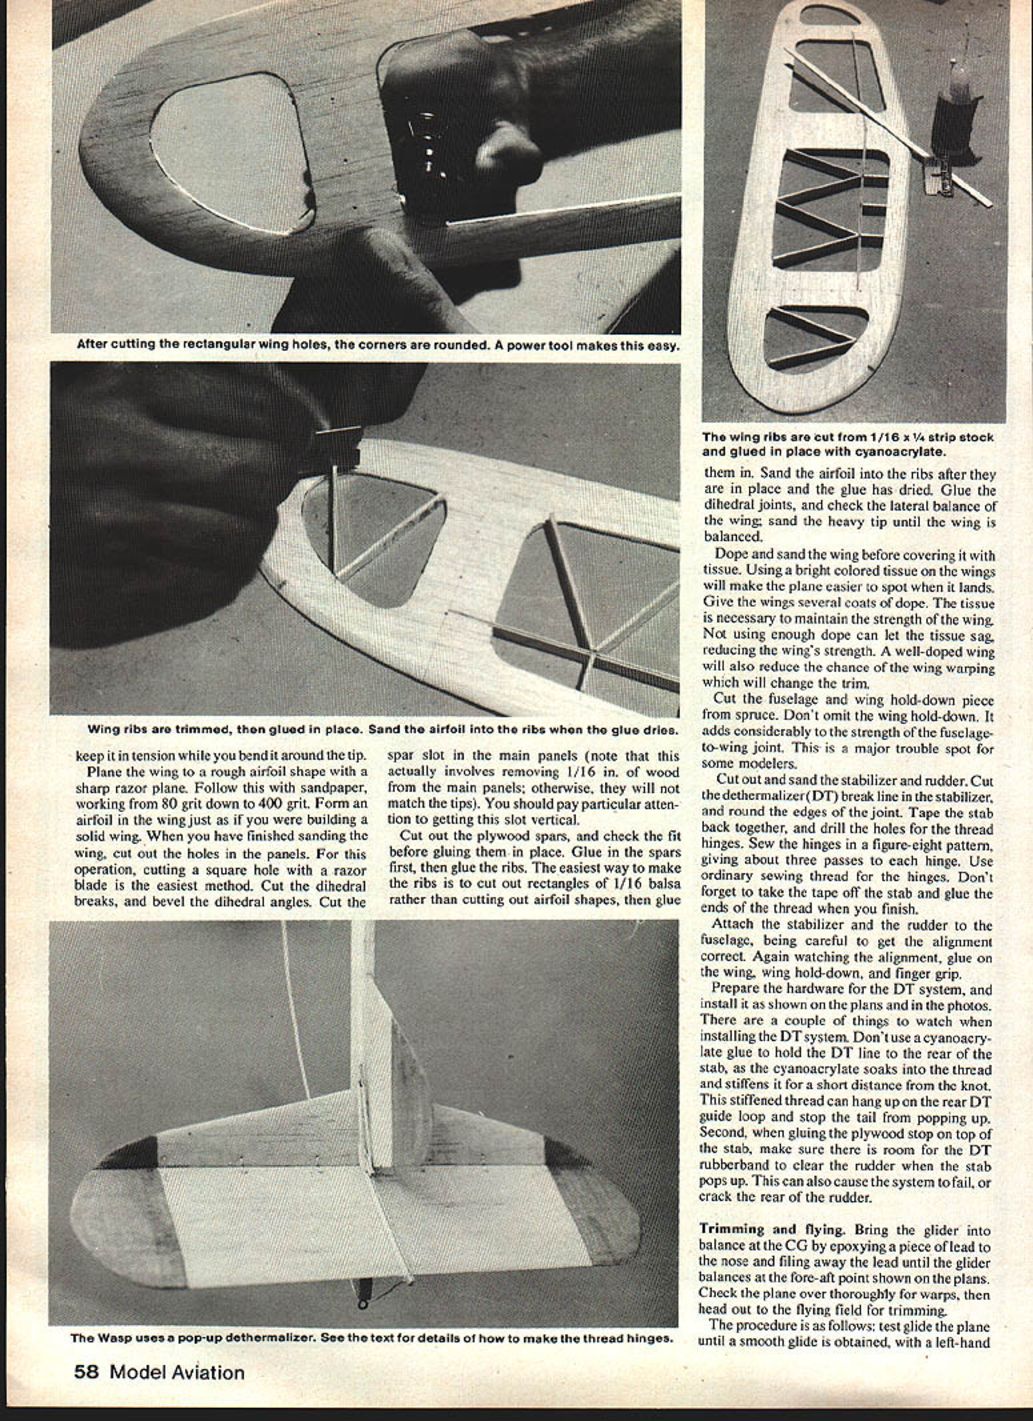
- If building a solid wing, finish and sand the wing before cutting out panel holes. Cutting a square hole with a razor blade is the easiest method.
- Cut dihedral breaks and bevel the dihedral angles.
- Cut the spar slot in the main panels — this requires removing 1/16" of wood in the main panels; otherwise the tips will not match. Pay particular attention to keeping the slot vertical.
- Cut out the plywood spars and check the fit before gluing.
- Glue spars first, then ribs. The easiest ribs are rectangles of 1/16" balsa glued in place; sand to airfoil shape after the glue dries.
- Glue dihedral joints and check lateral balance; sand a heavy tip until balanced.
Finish and covering
- Dope and sand the wing before covering with tissue.
- Use bright-colored tissue to make the plane easier to spot on landings.
- Apply several coats of dope. Insufficient dope lets the tissue sag and reduces wing strength; a well-doped wing also resists warping that can change trim.
Fuselage, tail, and DT system
- Cut the fuselage and the wing hold-down piece from spruce. Do not omit the wing hold-down — it adds considerable strength to the fuselage-to-wing joint.
- Cut out and sand the stabilizer and rudder.
- Cut the dethermalizer (DT) break line in the stabilizer and round the edges of the joint. Tape the stabilizer back together, drill hinge holes, and thread the hinges.
- Sew the hinges in a figure-eight pattern with about three passes to each hinge; use ordinary sewing thread. When finished, remove the tape and glue the thread ends.
- Attach stabilizer and rudder to the fuselage, checking alignment. Then glue on the wing, wing hold-down, and finger grip.
DT installation notes:
- Do not use cyanoacrylate glue to hold the DT line to the rear of the stabilizer; CA soaks into the thread and stiffens it, which can hang up on the rear DT guide loop and prevent the tail from popping up.
- When gluing the plywood stop on top of the stabilizer, make sure there is room for the DT rubber band to clear the rudder when the stab pops up. Lack of clearance can cause the system to fail or crack the rudder.
Trimming and flying
- Balance the glider at the center of gravity (CG) shown on the plans by epoxying a piece of lead to the nose and filing away lead until the glider balances fore-aft at the correct point.
- Inspect the plane thoroughly for warps before flying.
Initial trimming procedure:
- Test-glide the plane until you obtain a smooth glide in a left-hand circle about 50–60 ft in diameter.
- Adjust launch and transition by warping the aerodynamic surfaces as required to achieve a smooth launch and transition.
- Fine-trim the glide by moving the CG position.
Launch progression:
- Start initial flights by throwing at about 60% power, at a 45° angle, with a slight right bank.
- Once satisfied with flight, work up to about 90% power and reduce the launch angle to 10°–20°.
- Avoid throwing at full power during routine practice: accuracy decreases near full power, increasing the risk of badly blown launches — a liability in contests.
Workouts, practicing, and competing
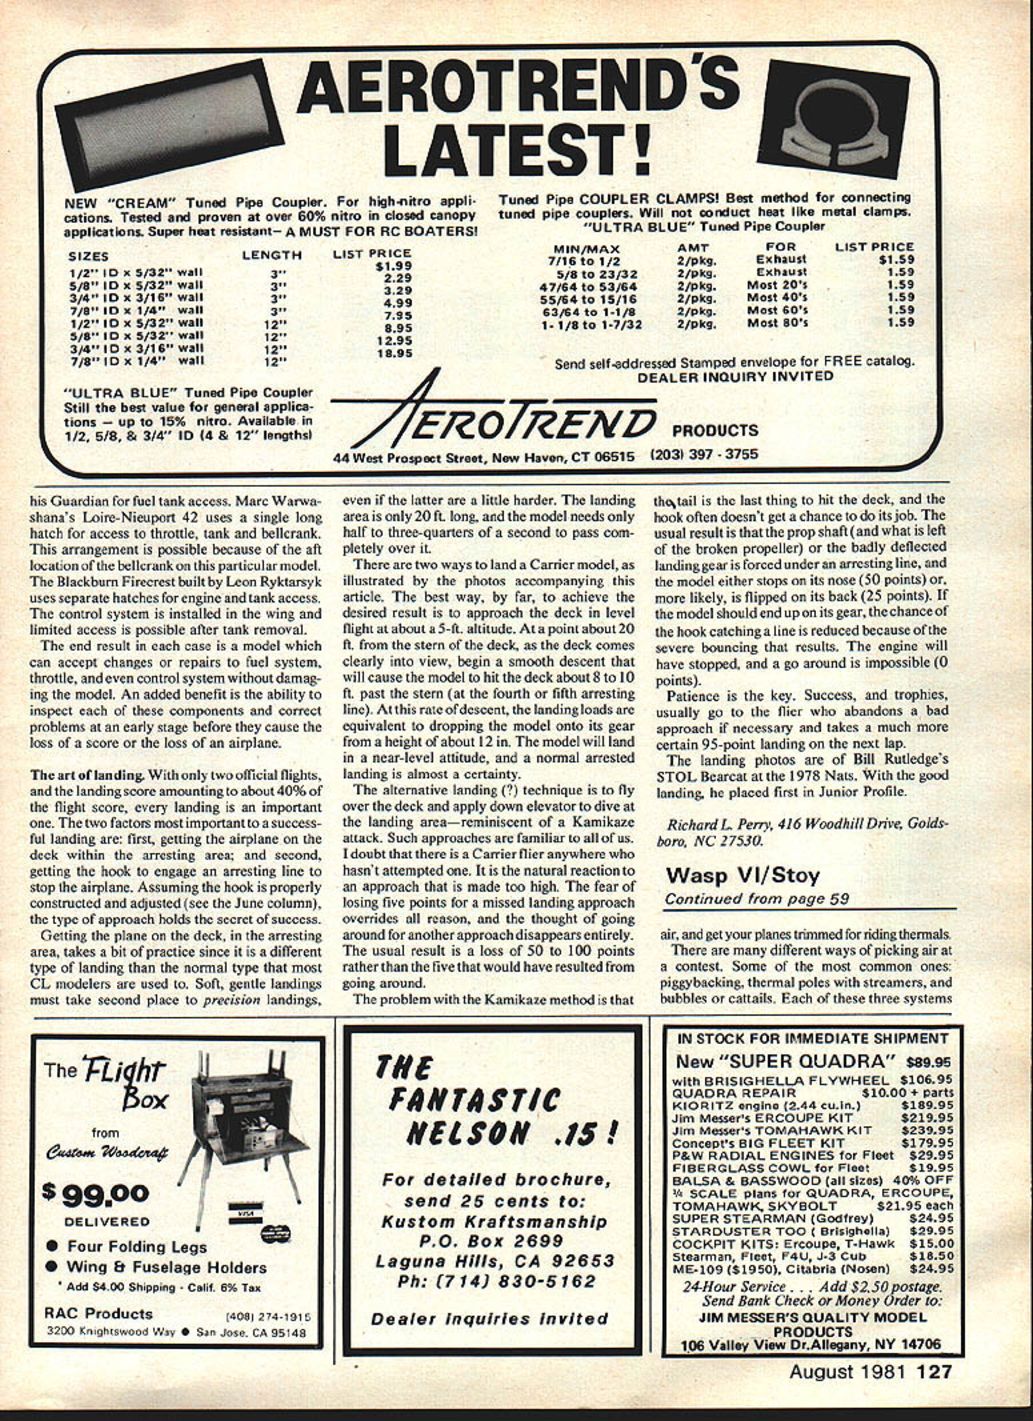
Hand-launched glider flying is largely an athletic event. A good throwing arm helps; practice conditions and familiarity with your planes are equally important.
Training recommendations:
- Throw a softball or tennis ball to develop arm strength and technique. If alone, throw against a brick wall.
- For several weeks before a contest, do a large number of repetitions at about 3/4 power.
- Four or five days before the contest, begin decreasing the number of throws and increasing the power.
- Reach full-power throws about two days before the contest.
- The day before the contest, do only a few light throws to loosen up; avoid a heavy workout.
- On contest day, do not throw gliders heavily until you are properly loosened up.
Practice advice:
- Practice regularly to get in contest shape and to learn exactly how each plane performs in all conditions — consistency is key.
- Practice in a variety of conditions: windy days and dead-air evenings.
- Practice finding and riding thermals; contests are not the place to discover your plane won't hold lift.
Thermal-finding methods:
- Piggybacking: one flier watches another's model; when the watcher sees lift, he signals and launches into the same area.
- Thermal pole with streamer: streamer indicates presence and direction of lift for launching.
- Natural indicators: bubbles, cattails, and other ground cues can show lift.
Retrieval methods for downed models in tall grass or weeds:
- Landing hook attached to the nose with a line to pull the model out.
- Send someone in with a long or collapsible retrieval pole.
- Use a long stick with a hook on the end.
If you are new to contest flying:
- Go watch contests and learn from experienced fliers. Ask questions, observe trimming procedures, and listen to commentary. Most fliers are glad to help and share tips.
- Above all, practice and be consistent with trimming and launching techniques.
Good luck and fly safe.
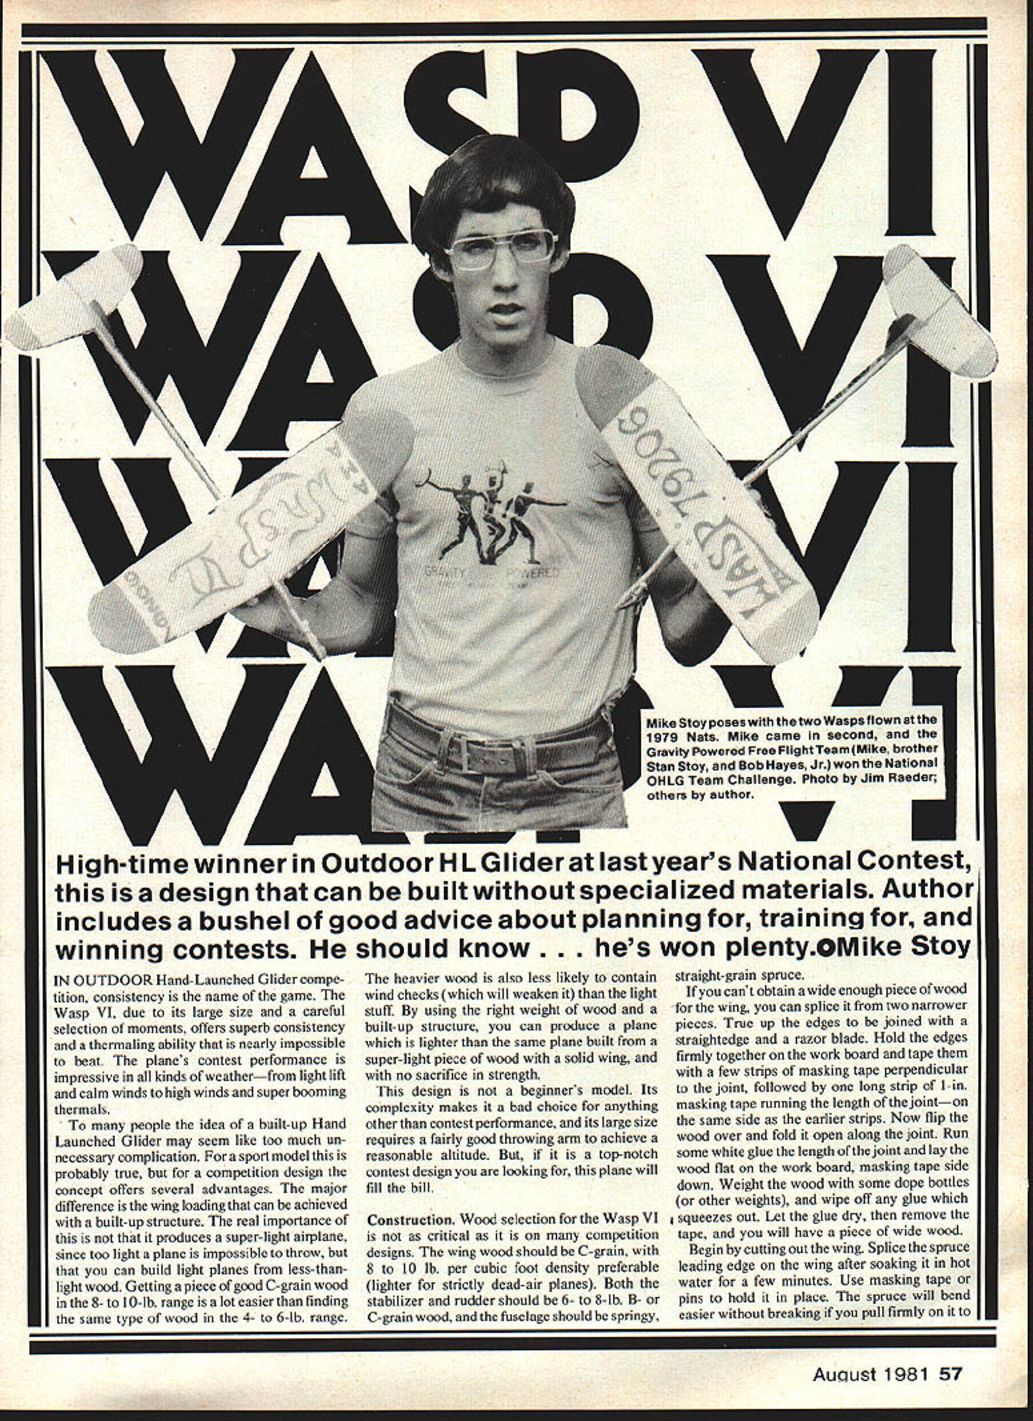
Mike Stoy poses two Wasps flown to Nats. Mike came second.
Transcribed from original scans by AI. Minor OCR errors may remain.

