
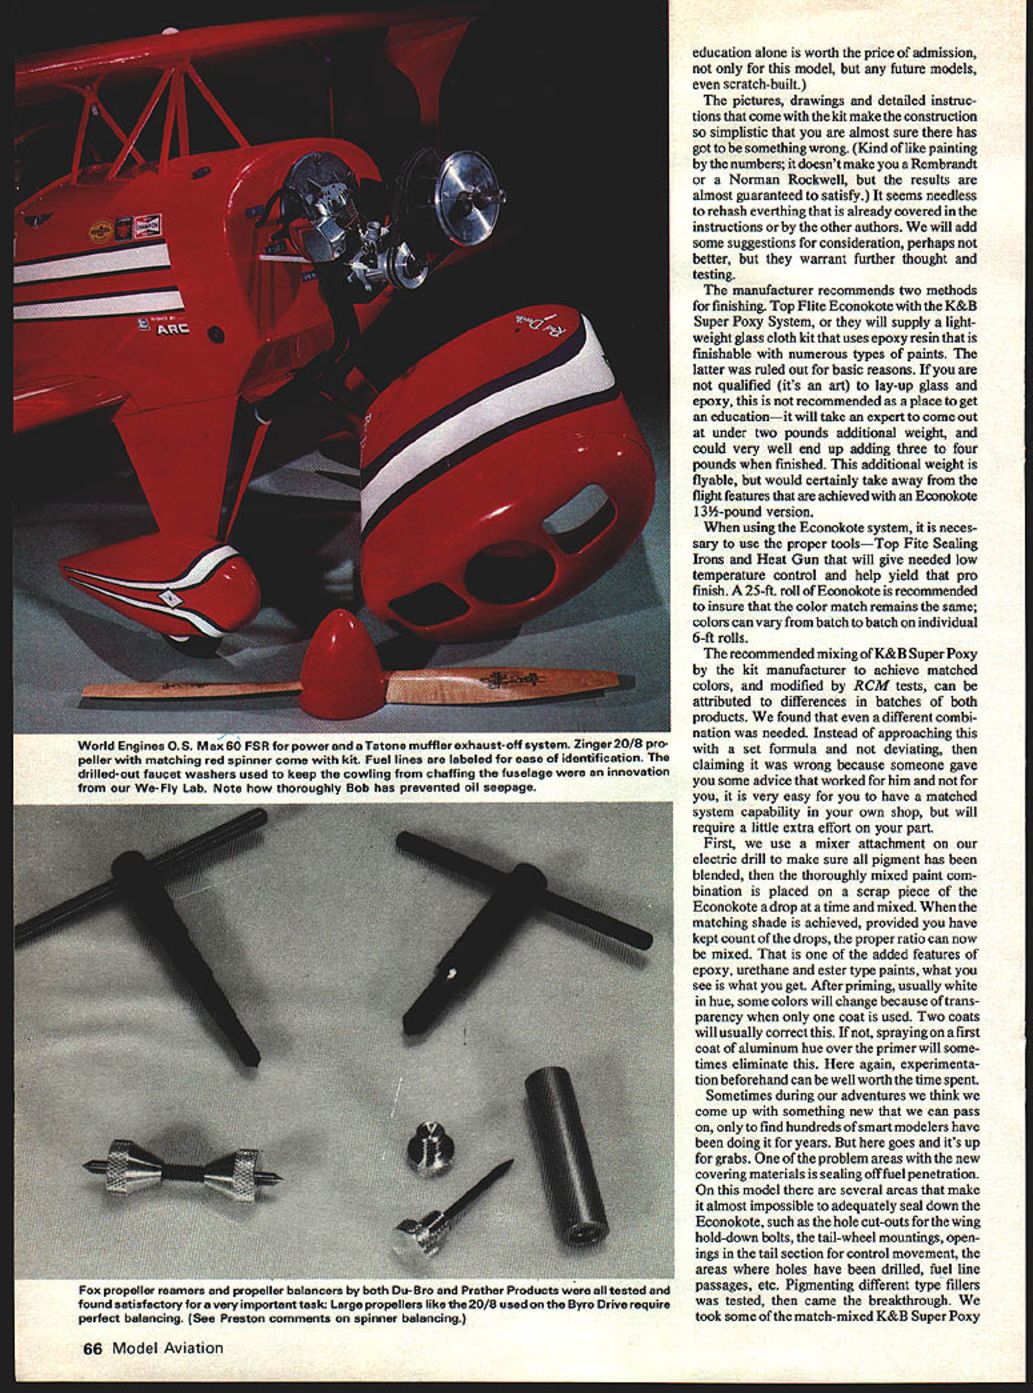
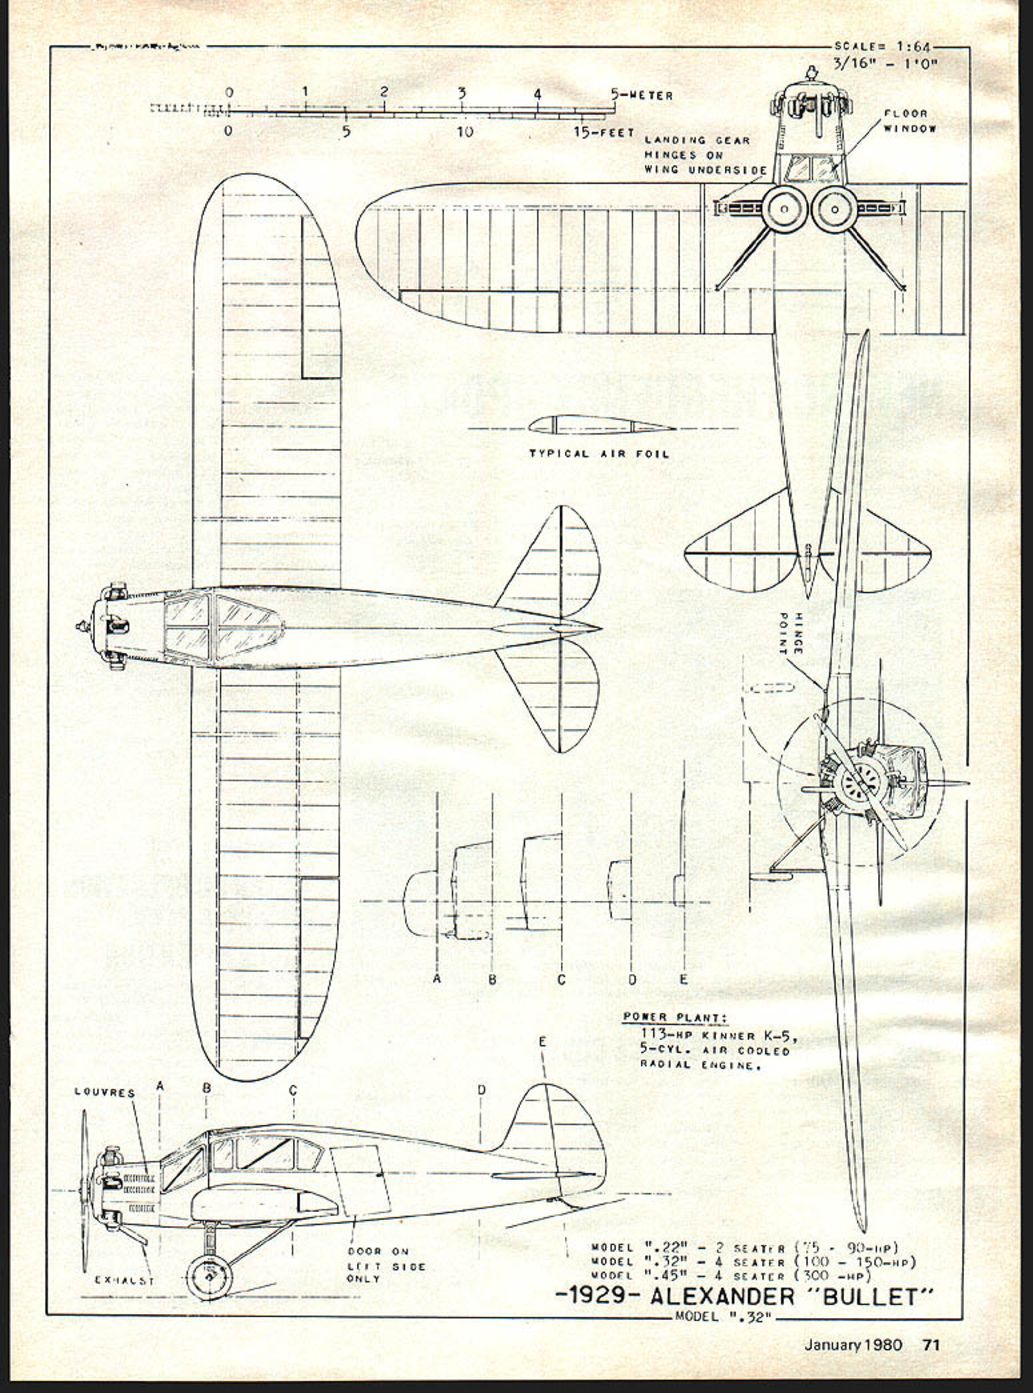
"From the We-Fly Lab:" The Byron Originals Pitts S-1A
Bob Harrah
Introduction
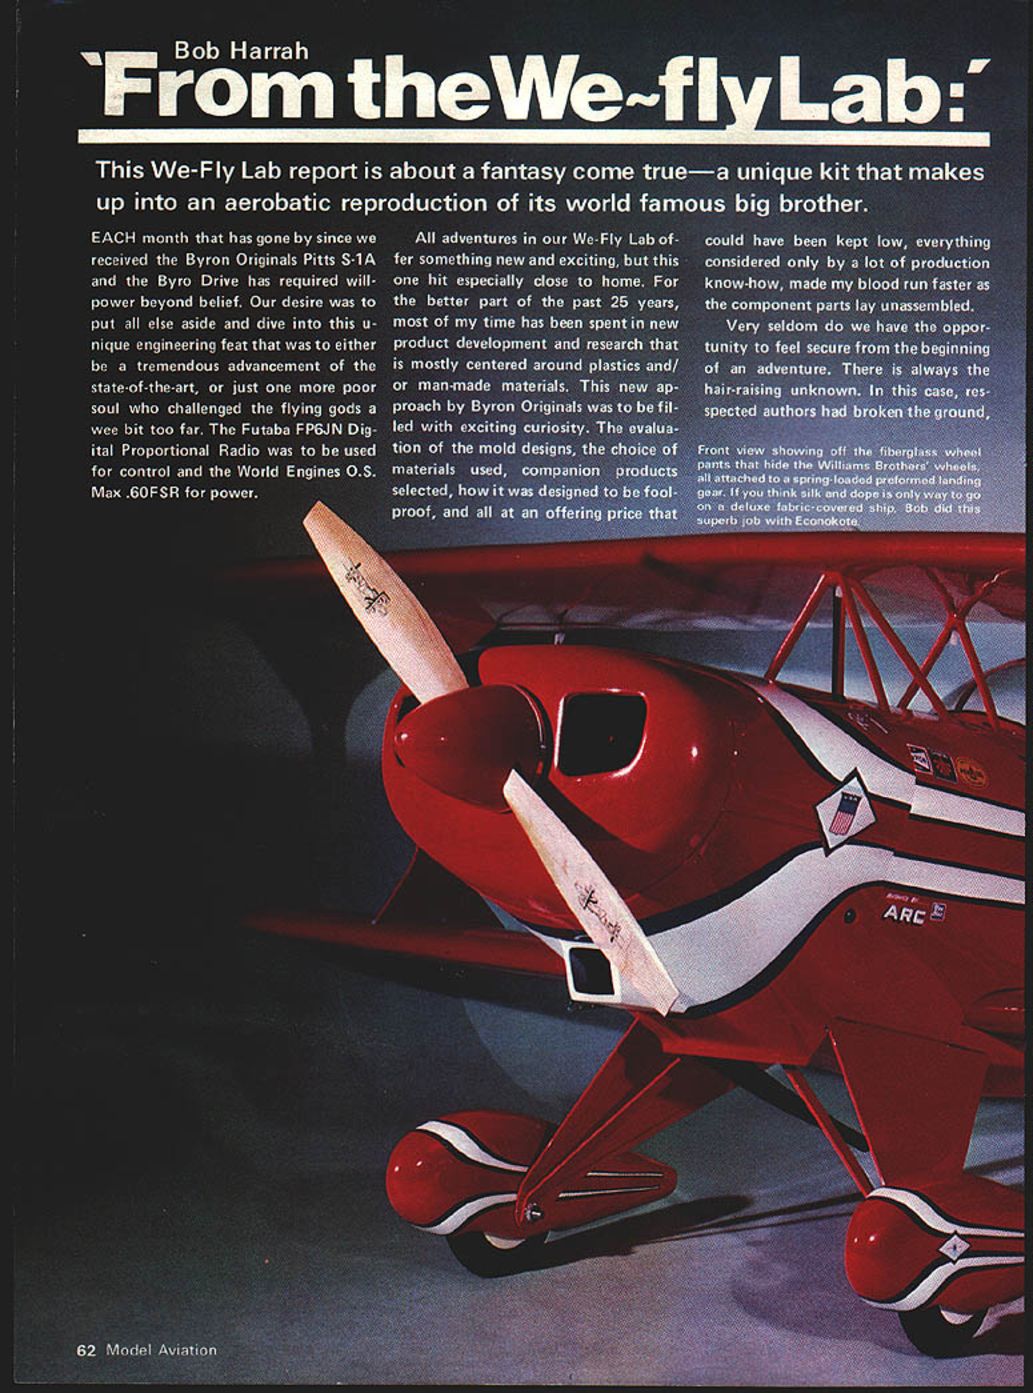
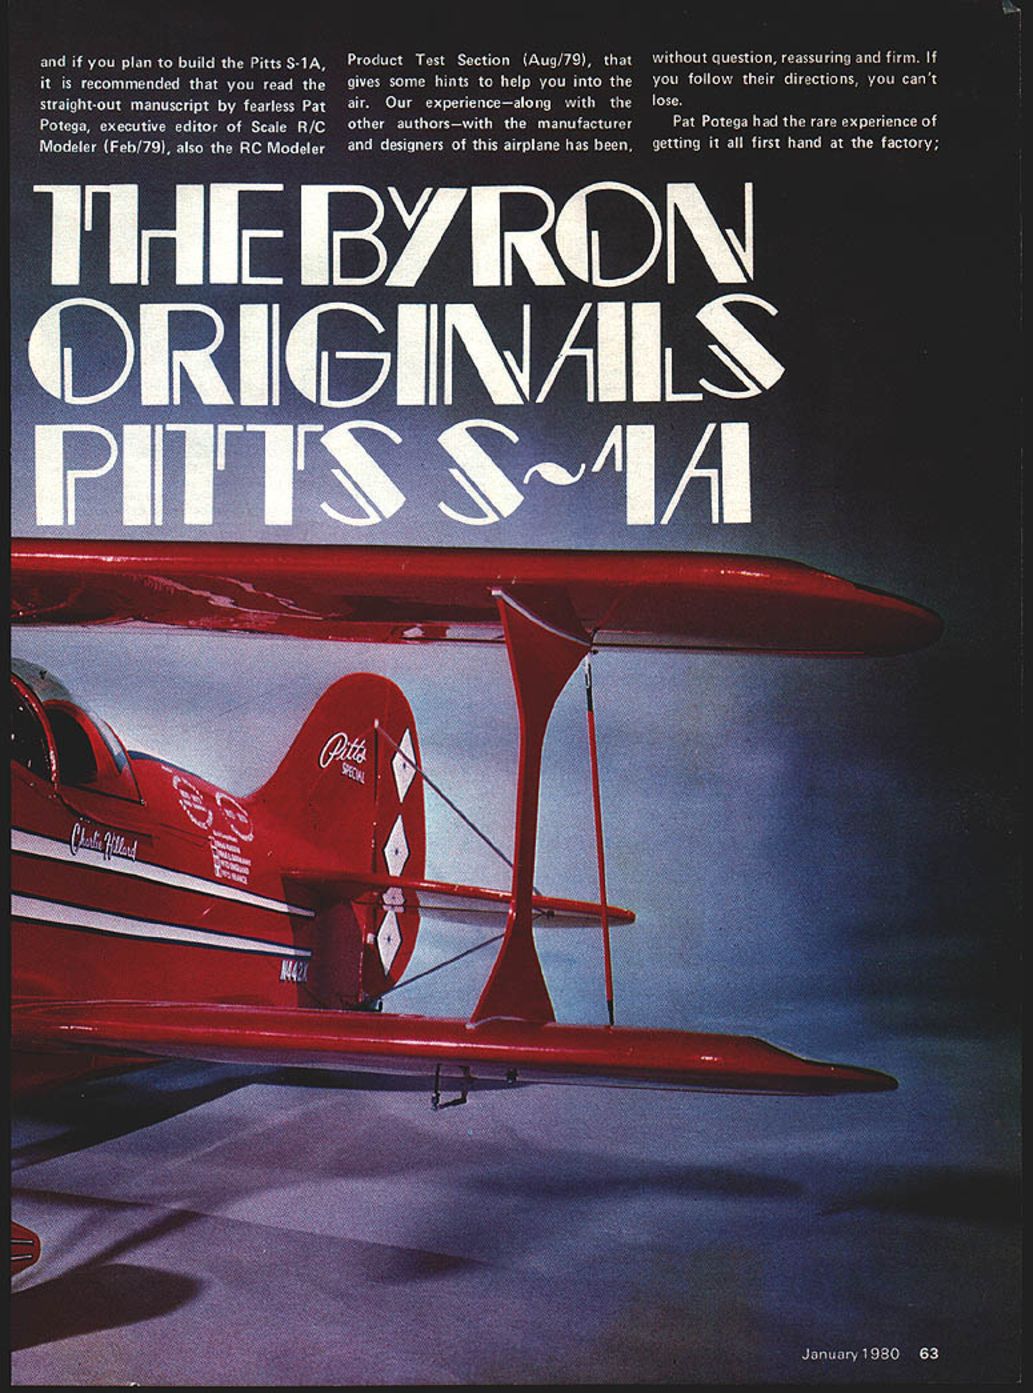
This We-Fly Lab report covers a fantasy-come-true kit: Byron Originals' Pitts S-1A, an aerobatic reproduction of the full-scale Pitts. The kit promised an advanced approach to foam/plastic model construction and an innovative Byro Drive system. Our evaluation included the Futaba FP6JN radio and a World Engines O.S. Max .60FSR for power.
First Impressions and Demonstration
Factory and show impressions
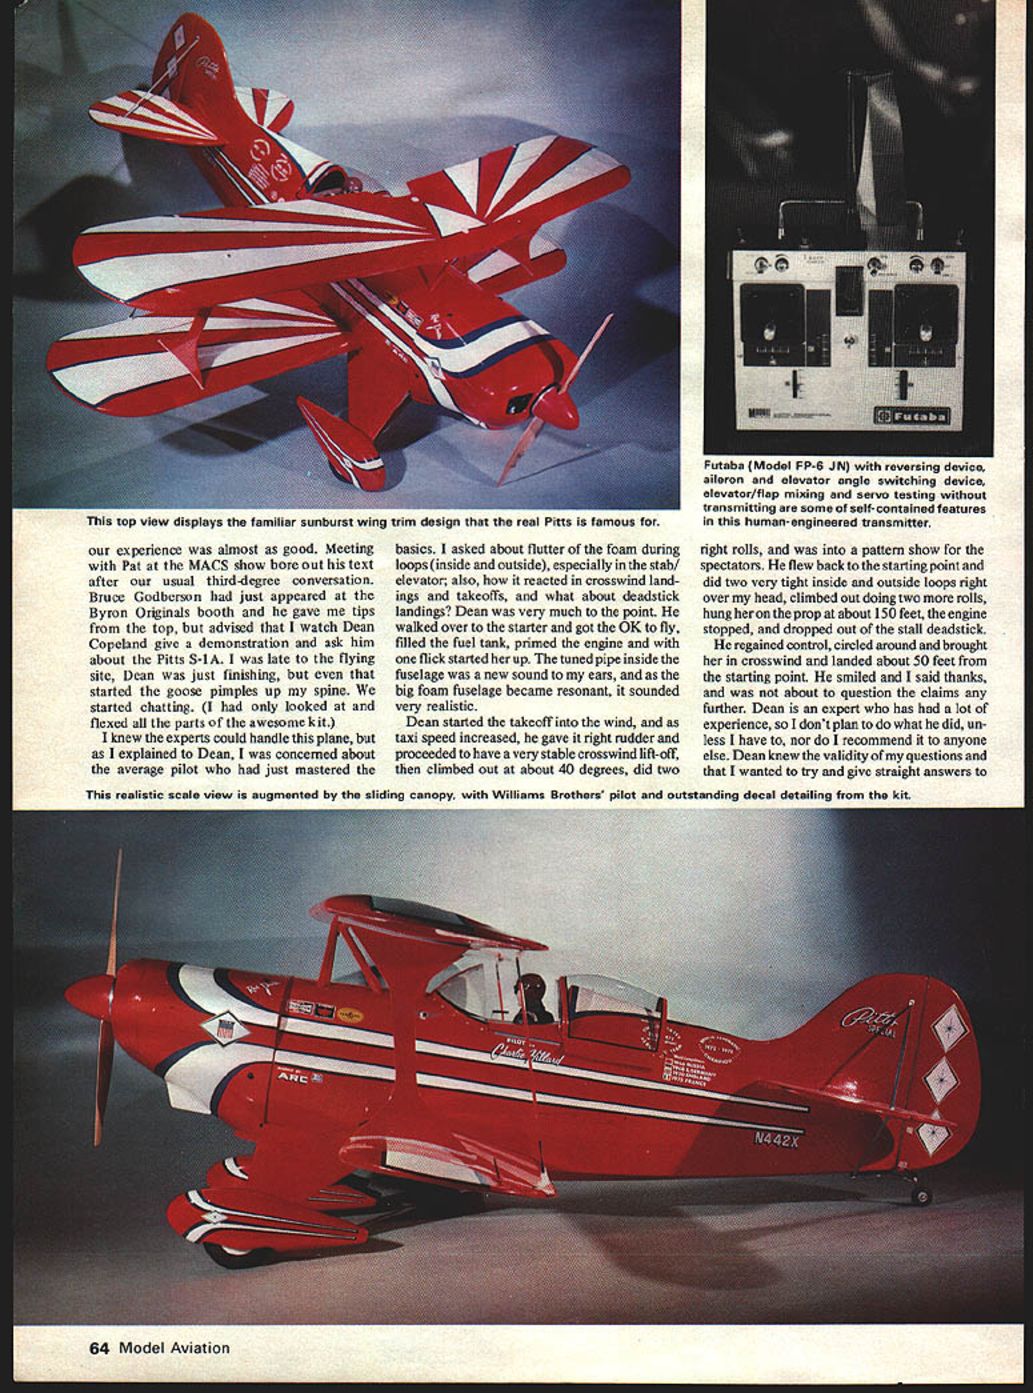
- Pat Potega (Scale R/C Modeler) and other respected authors had already written favorable accounts; their reports set expectations.
- At the MACS show, Byron Originals personnel (including Bruce Godberson) and demonstration pilot Dean Copeland confirmed the kit's performance and design integrity.
Dean Copeland demonstration
Dean filled the tank, primed the O.S. Max .60FSR, and flew the assembled Pitts S-1A. Highlights:
- Stable crosswind lift-off with right rudder input.
- Climbed at about 40 degrees, followed by rolls and tight inside/outside loops.
- Engine hung the prop at about 150 feet; when the engine quit, Dean recovered from a stall-deadstick and landed within about 50 feet of the start point.
The demonstration reassured us about foam flutter, crosswind handling, deadstick recovery, and the overall robustness of the design—when flown by an expert.
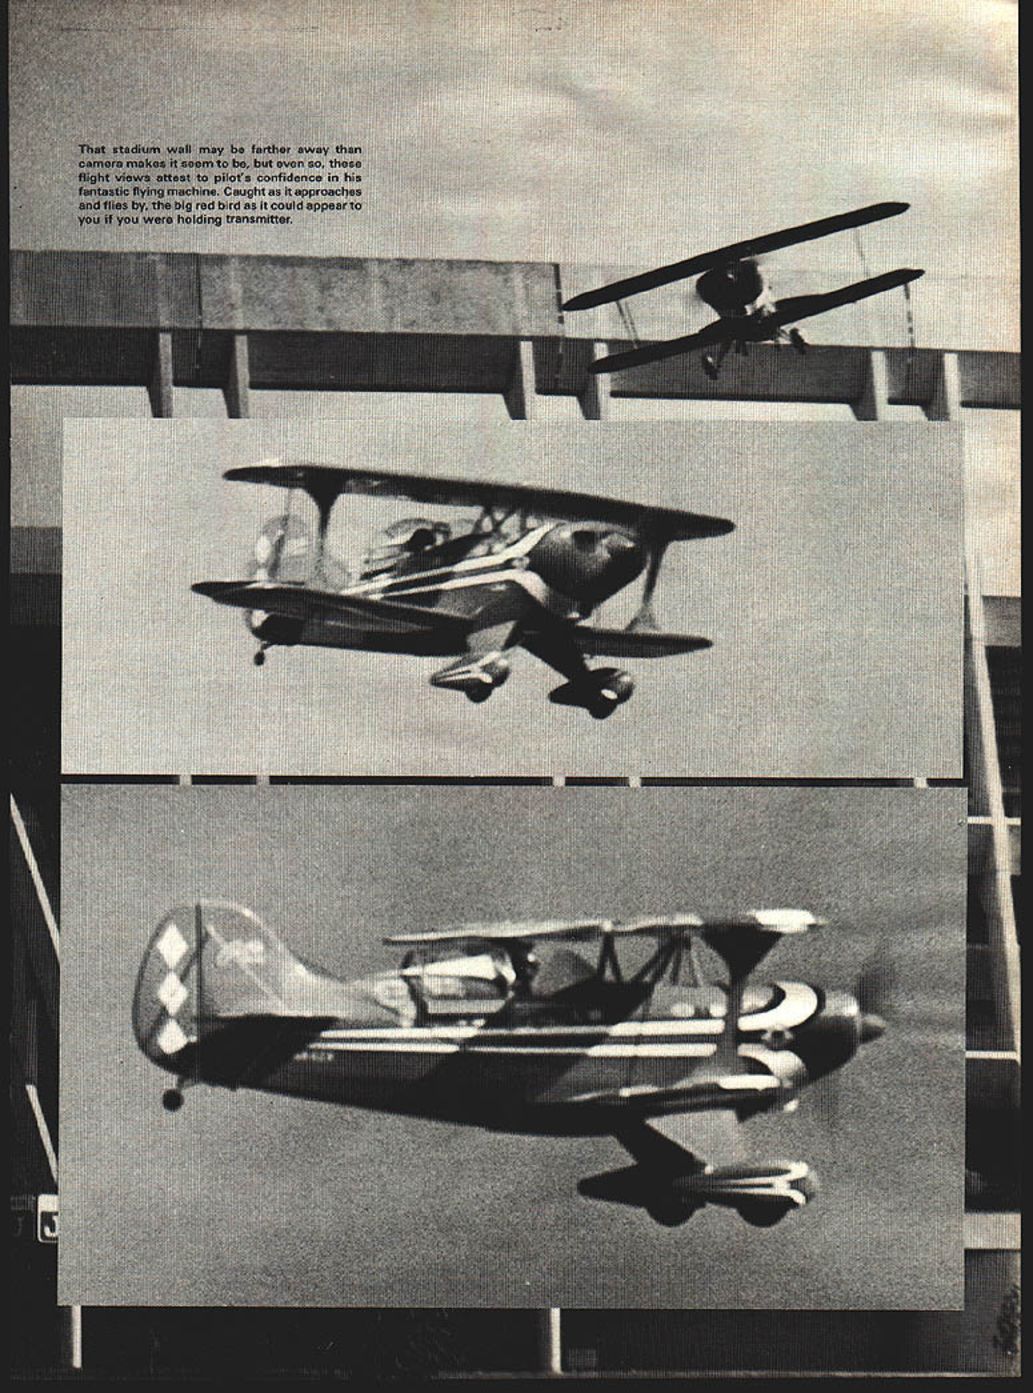
Kit Contents and Quality
Parts and packaging
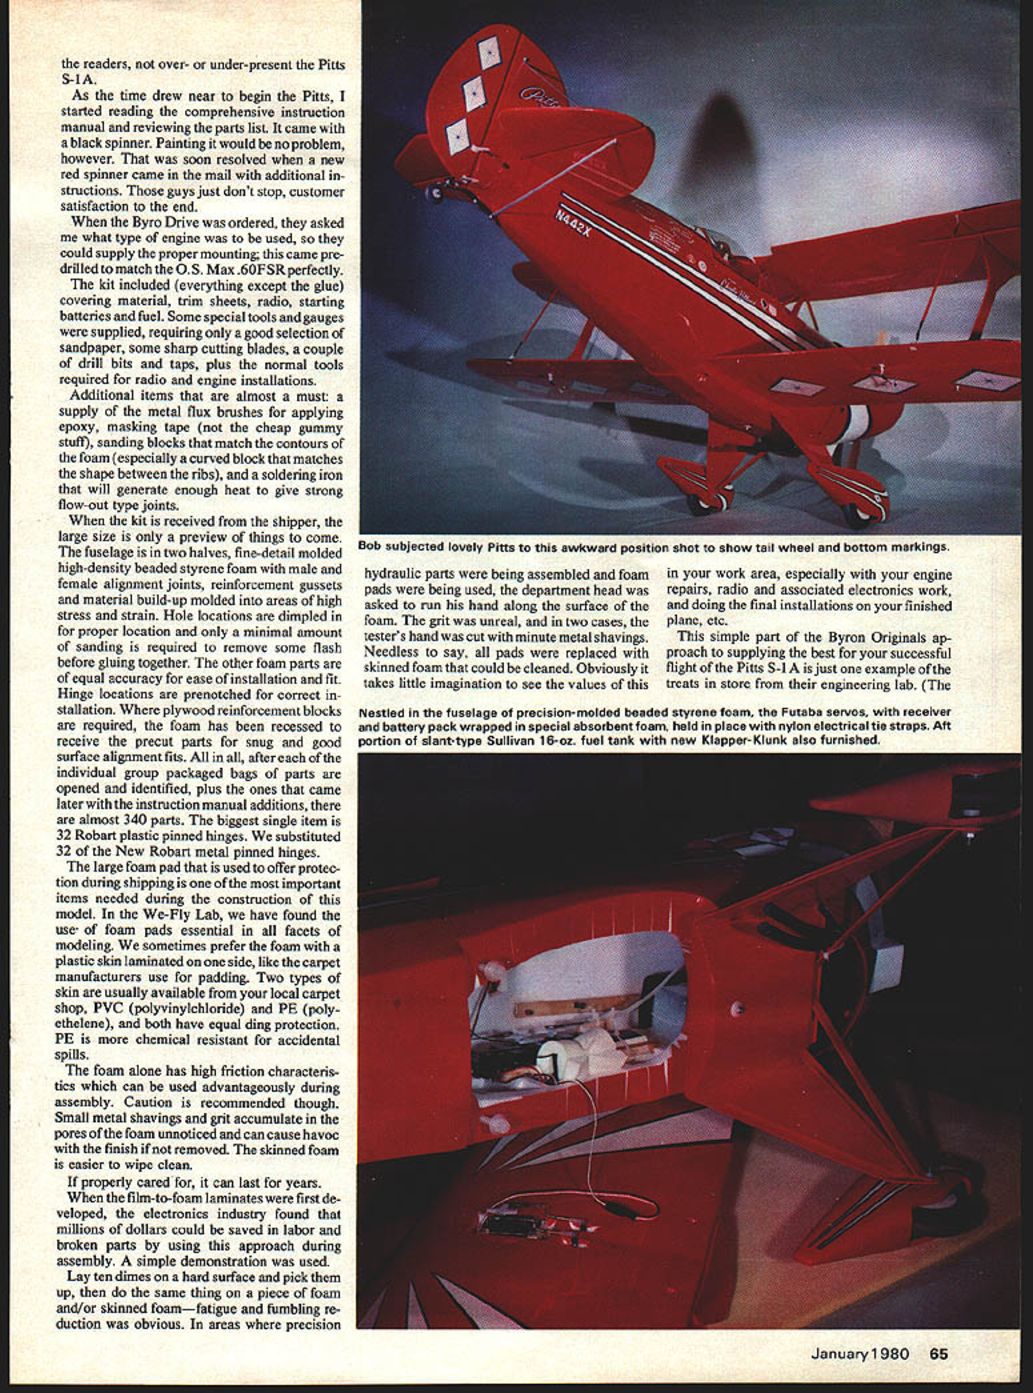
- Nearly 340 parts, including fuselage halves molded from high-density beaded styrene foam, pre-notched hinge locations, recessed seats for precut parts, and reinforcement gussets in stressed areas.
- Parts arrive bagged and identified; hole locations are dimpled; minimal flash removal is required.
- Supplied hinges are Robart plastic pinned (we substituted Robart metal pinned hinges).
- A large foam pad is included to protect parts in shipping.
What’s included / not included
Included: Byro Drive, pre-drilled engine mount (to match the O.S. Max .60FSR if specified), Sullivan 16-oz fuel tank system, Williams Bros. wheels, spinner (initially black; red spinner later shipped). Not included: glue, covering material, trim sheets, radio, starting batteries, and fuel.
Tools and Workshop Tips
Recommended tools and supplies
- Sandpaper (various grits), sharp cutting blades, drill bits and taps.
- Metal flux brushes for epoxy application.
- Masking tape (cheap gummy type), sanding blocks (including curved blocks for foam contours).
- Soldering iron (for heat-shrink/flow-out type joints).
- Top Flite sealing irons and a low-temperature heat gun for Econokote finishing.
Foam pad and workspace
- Use a skinned foam pad under parts to prevent dings and reduce fatigue while assembling small parts.
- Skinned foam (PVC or PE) is easier to clean; PE is chemical resistant.
- Small grit or metal shavings can lodge in plain foam—use skinned foam where possible to avoid contamination.
Assembly and Fit
Fit and gluing
- Parts fit very accurately; presanding before assembly saves time.
- Sand edges that will be glued only as needed; avoid removing glue-contact surfaces prematurely.
- Do not over-apply glue—excess provides no extra strength and creates cleanup work.
- If seams and coverings build up thickness in certain areas (e.g., belly pan), consider that when aligning parts to avoid protrusions.
Hinge and reinforcement details
- Hinge locations are pre-notched; add the specified plywood reinforcement blocks.
- Seat precut parts into recessed foam areas for good surface alignment.
Finishing Options and Techniques
Recommended coverings
- Byron recommends either Top Flite Econokote with K&B Super Poxy or a lightweight glass cloth kit using epoxy resin.
- We chose the Econokote/Epoxy approach to keep weight down—Byron quoted a 13½-pound version with Econokote; glass/epoxy layup risks adding 2–4 pounds if not done expertly.
Coloring and epoxy matching
- Use a full 25-ft roll of Econokote to maintain consistent color across panels (small rolls can vary by batch).
- For K&B Super Poxy color matching: mix pigments thoroughly (a drill mixer is handy), apply drops to scrap Econokote until matched, count drops to reproduce the batch ratio.
- Primer (usually white) can change perceived hue; two coats or an aluminum undercoat may be needed for consistent color.
Sealing problem areas
- Areas around bolt holes, tail-wheel mountings, control openings, fuel passages, and drilled holes can be hard to seal with covering film alone.
- We found that adding a small amount of matched K&B Super Poxy pigment to Devcon Five-Minute Epoxy yielded a good adhesive seal that adhered to foam without damaging it. Suggested starting ratio: 1–2 drops pigment per 10 drops epoxy. Test first—too much pigment may affect epoxy cure.
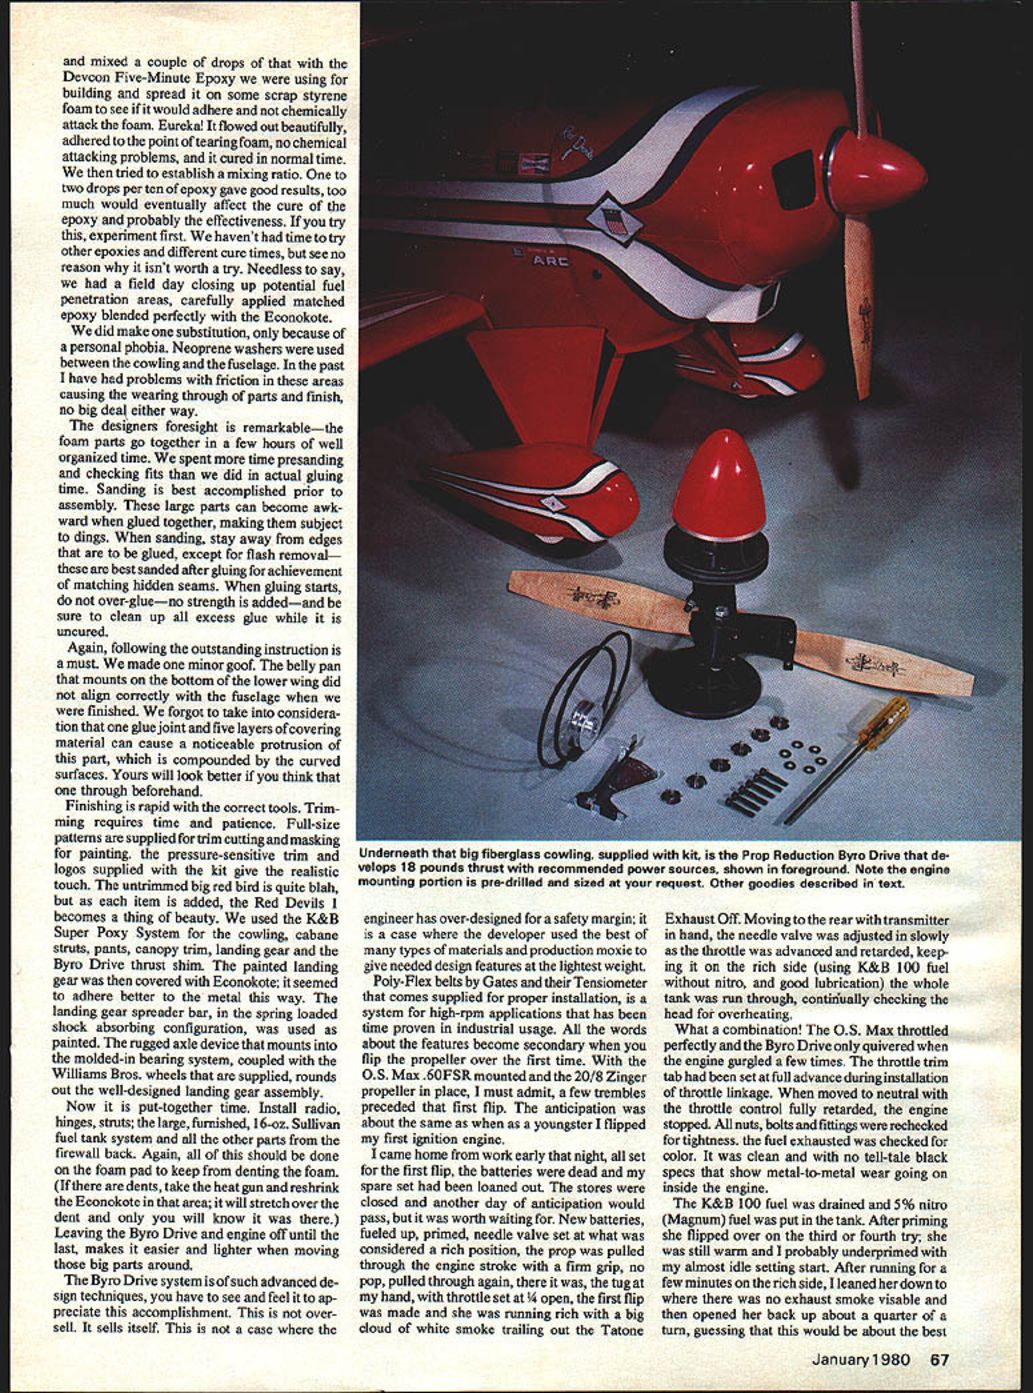
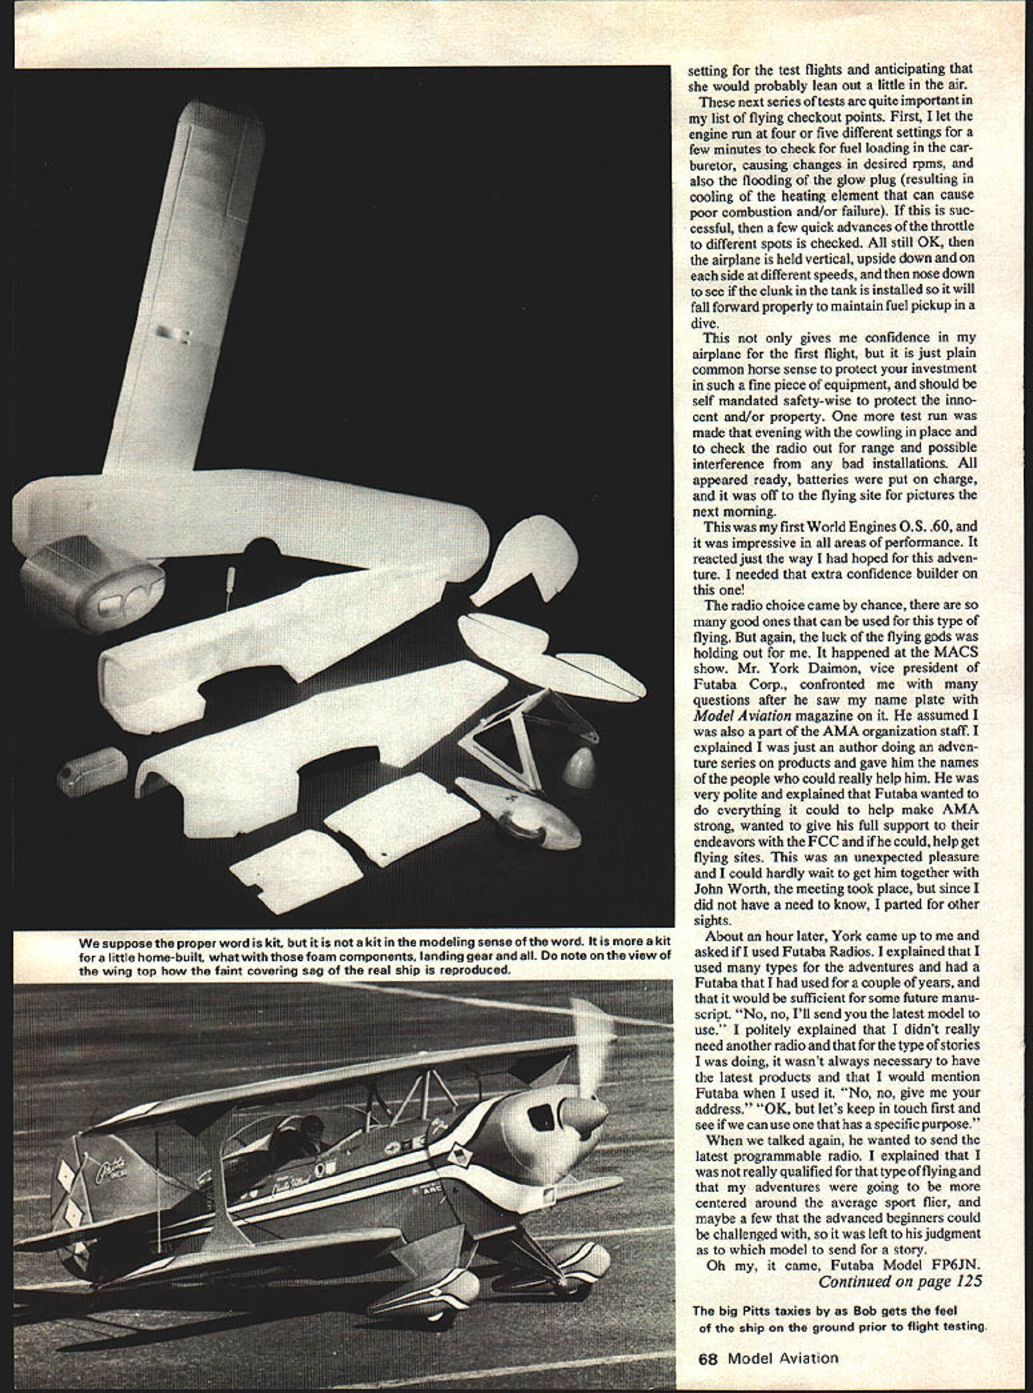
Byro Drive, Engine, and Ground Testing
Byro Drive highlights
- The Byro Drive uses Gates Poly-Flex belts and includes a tensometer for proper belt installation—industrial-grade components selected for light weight and reliability.
- The mount was pre-drilled to match the O.S. Max .60FSR.
Engine break-in and ground checks
- Initial run used K&B 100 (no nitro) for break-in and to check for overheating, smoothness, and any contamination in the fuel.
- After breaking in, we switched to 5% nitro (Magnum) and leaned to a setting with no visible exhaust smoke, then opened slightly (~1/4 turn) for cruise.
- Check for smooth throttle response, missing, or surging. Recheck all fasteners after engine runs.
Preflight bench tests
- Run the engine at several settings for a few minutes to confirm stable fuel flow and no flooding of the glow plug.
- Rapid throttle advances should be tested for carburetor response.
- Test the fuel clunk by holding the model in various attitudes (vertical, inverted, nose down) to ensure fuel pickup is maintained.
- Conduct a range check and check for radio interference with cowling in place.
Radio, Servos, and Controls
Radio choice
- Futaba FP6JN was used in our tests; Futaba provided the unit at the MACS show.
- Bench tests can be misleading—install and test in the airframe for final validation.
Servo selection and installation
- Use servos with high torque and good holding strength for ailerons, rudder, and elevator to prevent control flutter in flight.
- Futaba FP-S121 (ball-bearing output shaft) provided sufficient torque and holding strength in our installation.
- Proper linkages, centering, and no slop are essential. Avoid "sloppy" control feel—this plane performs best with smooth, precise inputs.
Flight Testing and Performance
Initial taxi and takeoff
- Taxi checks: re-check all screws and fittings, confirm trims, and perform low-speed taxi tests.
- The model had a left pull on takeoff that was corrected with a slight right thrust or trim input.
- We built the model slightly nose-heavy; with fuel and a couple of top-elevator trim clicks, hands-off level flight at half throttle was achievable.
In-flight handling
- Aileron response is positive and precise; in vertical banked turns the model held attitude well.
- No visible flutter at full power during our tests. The engine leaned slightly in the air but remained on the rich side.
- Landing technique: manufacturer and demonstration pilot recommend a three-point flare—this produced pleasant, predictable touchdown behavior in our trials.
Safety and skill notes
- Demonstrated advanced maneuvers by an expert (Dean Copeland) included aggressive aerobatics and a successful stall-deadstick recovery—these are not recommended for average pilots.
- This airplane requires smooth, accurate piloting and reliable hardware. Practice and checkout flights are essential.
Final Notes and Recommendations
- Byron Originals' engineering details—mold accuracy, reinforced foam parts, pre-drilled mounts, and the Byro Drive—make the Pitts S-1A an exceptional kit for modelers who want scale aerobatic performance without heavy composite layups.
- Take time for presanding, careful fitting, and proper finishing tools (sealing iron and heat gun) to achieve a professional result.
- Use robust servos and ensure all control linkages are tight and free of slop.
- Seal troublesome openings with the matched epoxy/epoxy-pigment technique after testing it on scrap material.
- Conduct thorough ground runs, throttle checks, tank-clunk tests, and range checks before the first flight.
- If you follow the kit instructions and the added tips here, the Pitts S-1A can deliver rewarding and realistic flight characteristics.
See you next time for another adventure from the We-Fly Lab.
Transcribed from original scans by AI. Minor OCR errors may remain.

