
From the We-Fly Lab: The Scamp
Bob Harrah
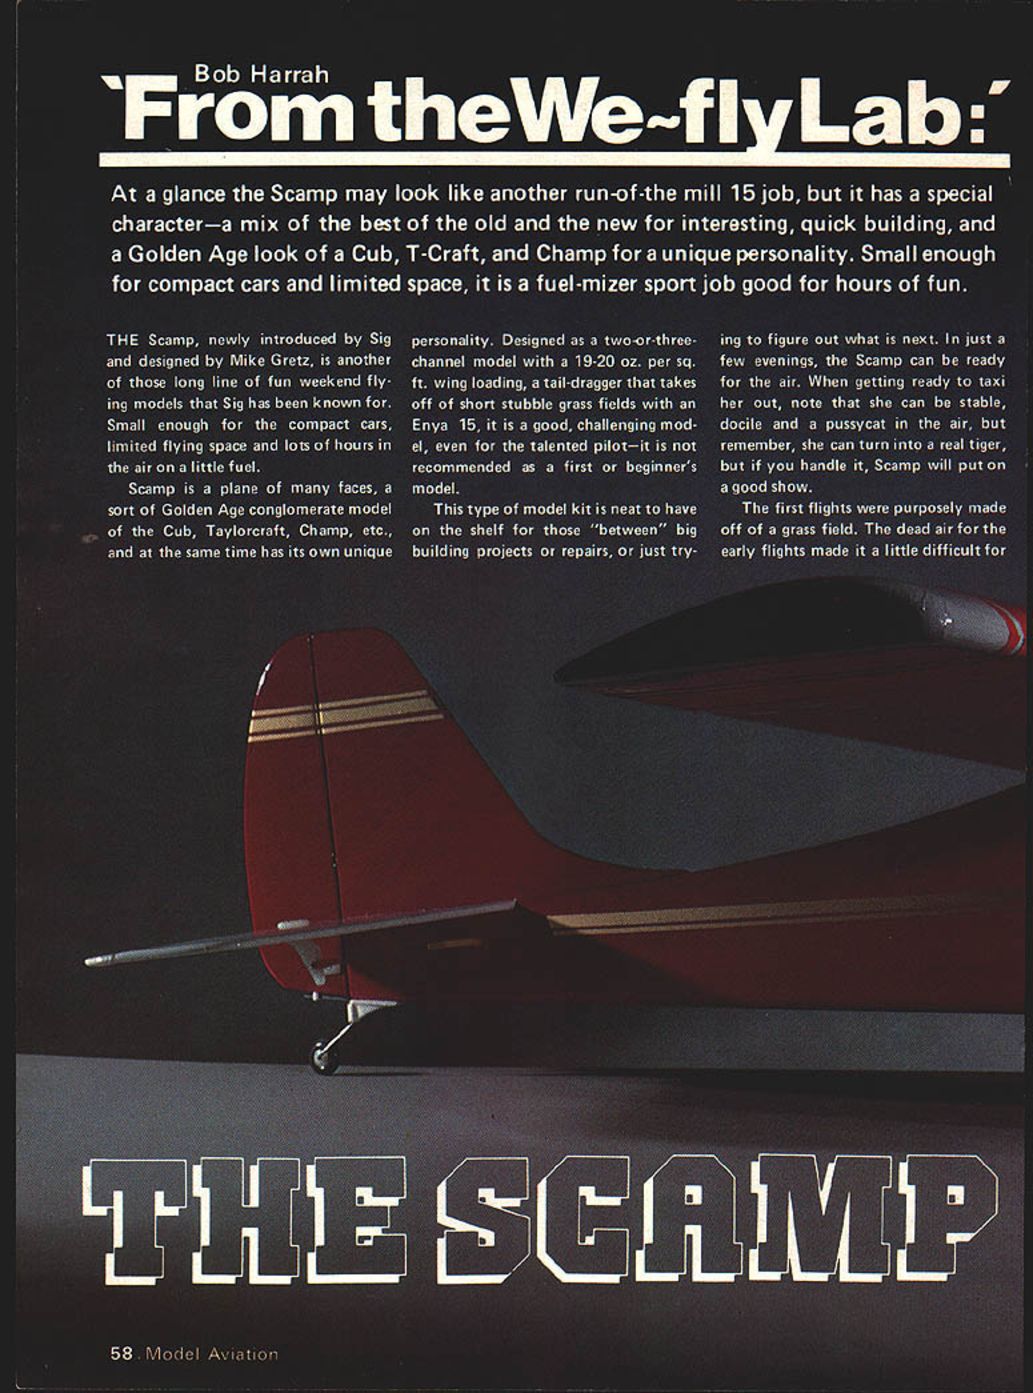
At a glance the Scamp may look like another run-of-the-mill .15 job, but it has a special character — a mix of the best of the old and the new for interesting, quick building, and a Golden Age look of a Cub, Taylorcraft and Champ for a unique personality. Small enough for compact cars and limited space, it is a fuel-mizer sport job good for hours of fun.
Overview
The Scamp, newly introduced by Sig and designed by Mike Gretz, is another in the long line of fun weekend flying models that Sig has been known for. Small enough for compact cars and limited flying space, it gives lots of flight time on a little fuel.
Scamp is a plane of many faces — a Golden Age conglomerate model of the Cub, Taylorcraft, Champ, etc. — and at the same time it has its own unique personality. Designed as a two- or three-channel model with about 19–20 oz per sq. ft. wing loading, it is a tail-dragger that can take off from short stubble grass fields with an Enya .15. It is a good, challenging model even for the talented pilot — it is not recommended as a first or beginner's model.
This type of kit is neat to have on the shelf for those "between" big building projects or repairs, or just trying to figure out what is next. In just a few evenings, the Scamp can be ready for the air. When getting ready to taxi her out, note that she can be stable, docile and a pussycat in the air, but remember she can turn into a real tiger. If you handle it, Scamp will put on a good show.
Flight impressions
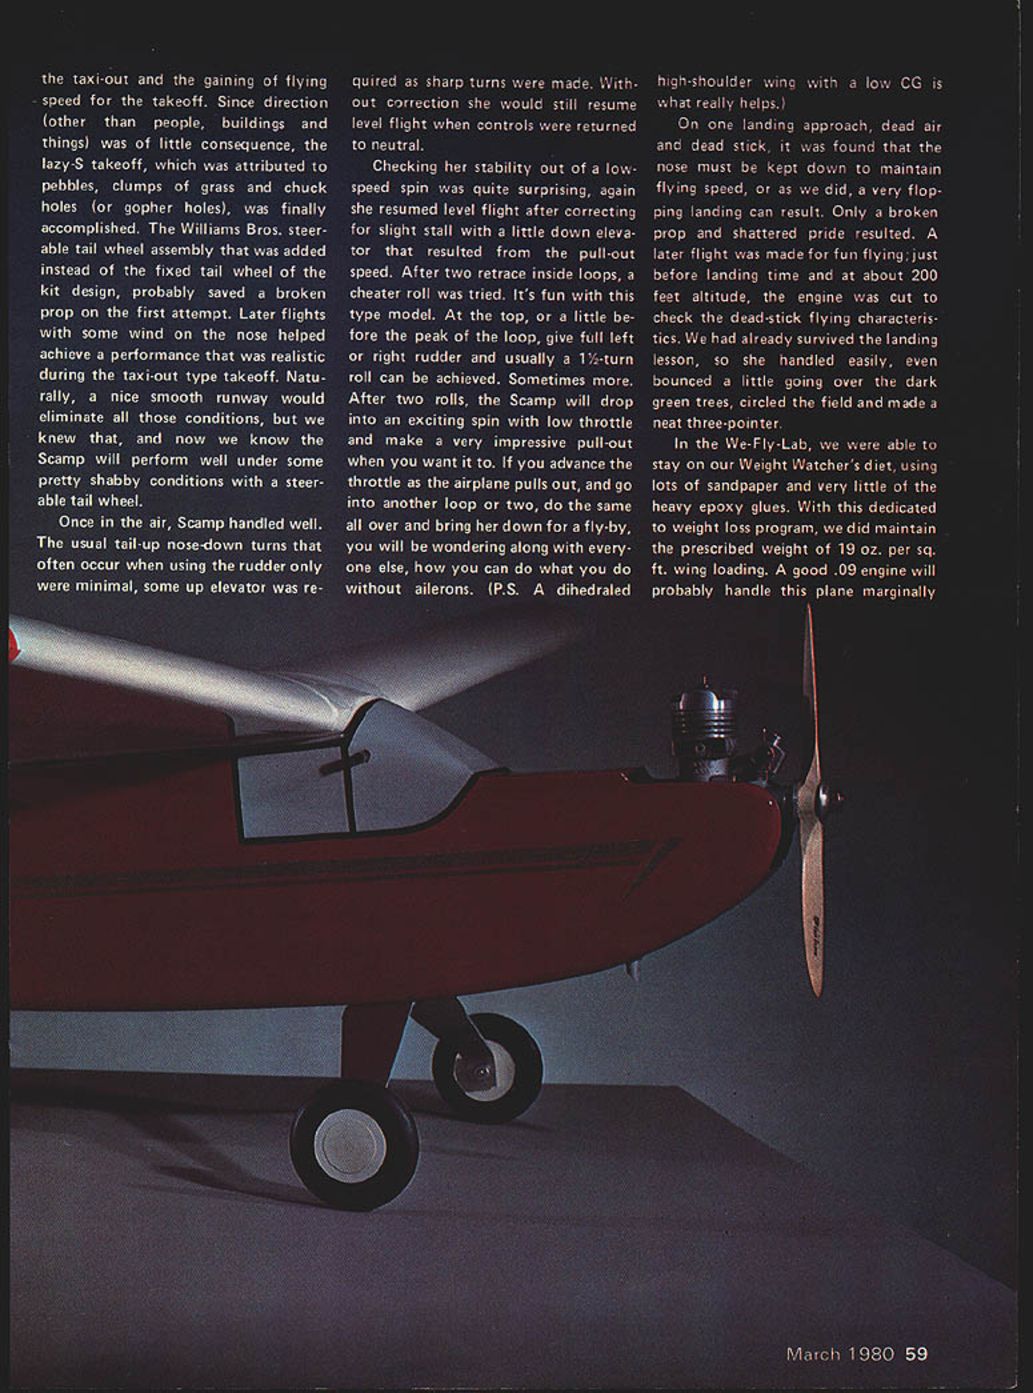
The first flights were purposely made off a grass field. The dead air for the early flights made taxi-out and gaining flying speed for takeoff a little difficult. Because direction was of little consequence on that field, the lazy-S takeoff — attributed to pebbles, clumps of grass and chuck holes (or gopher holes) — was finally accomplished. The Williams Bros. steerable tail-wheel assembly we added instead of the kit's fixed tail wheel probably saved a broken prop on the first attempt. Later flights with some wind on the nose helped achieve performance that was realistic during taxi-type takeoffs. Naturally, a nice smooth runway would eliminate those conditions, but we learned that the Scamp will perform well under some pretty shabby conditions with a steerable tail wheel.
Once in the air, Scamp handled well. The usual tail-up, nose-down turns that sometimes occur when using rudder only were minimal — some up elevator was required as sharp turns were made. Without correction she would still resume level flight when controls were returned to neutral.
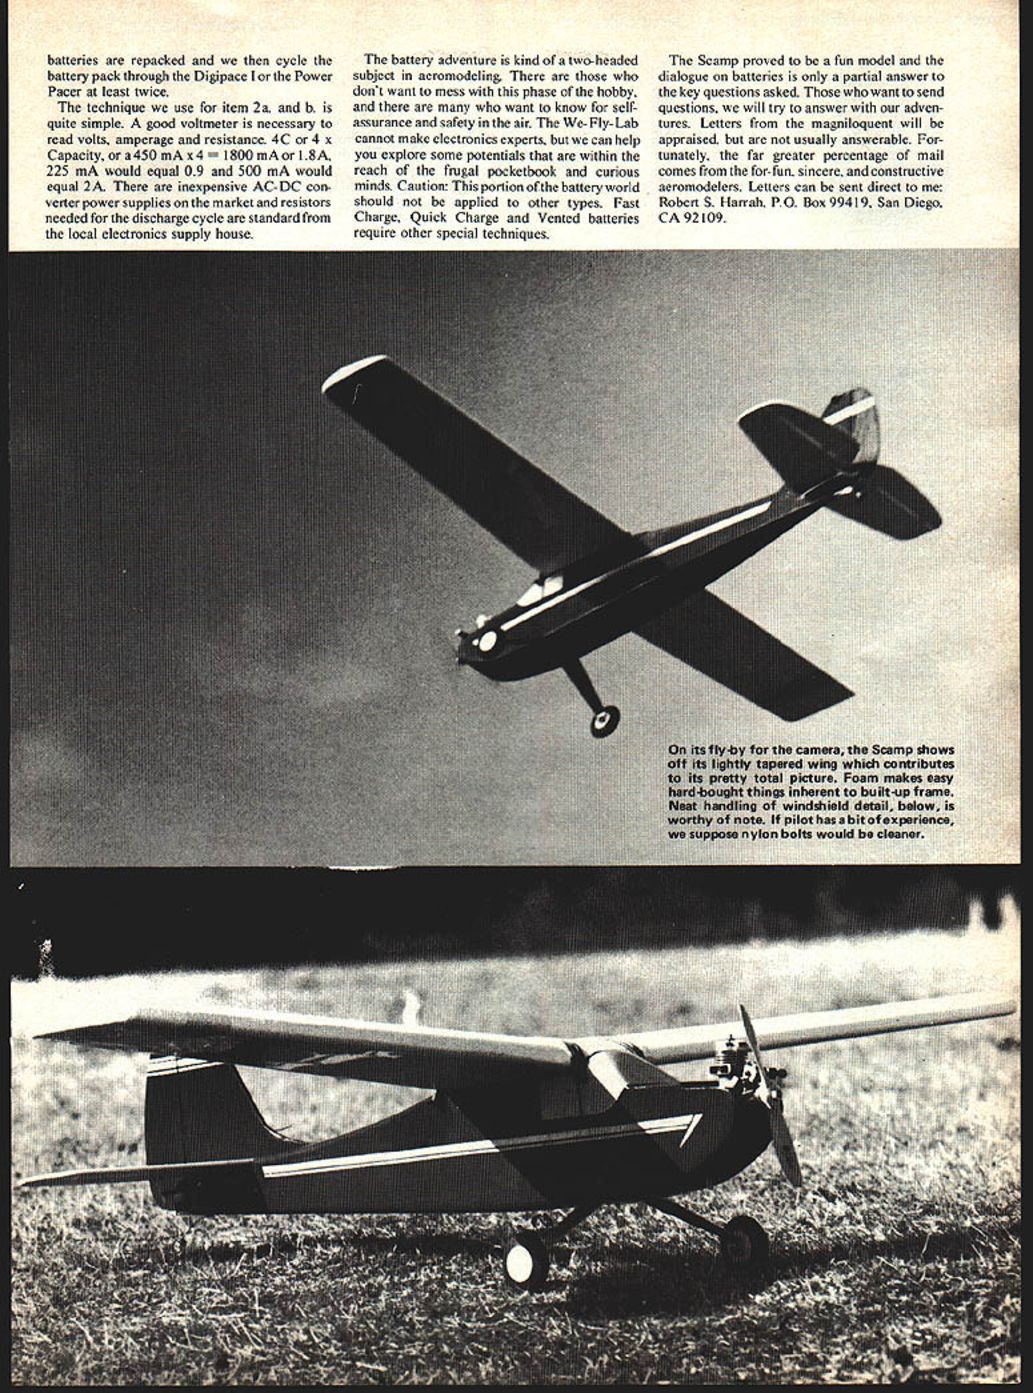
Checking stability out of a low-speed spin was quite surprising: she resumed level flight after correcting for a slight stall with a little down elevator resulting from the pull-out speed. After two inside loops, a cheater roll was tried. It's fun with this type of model. At the top, or a little before the peak of the loop, give full left or right rudder and usually a 1½-turn roll can be achieved — sometimes more. After two rolls, the Scamp will drop into an exciting spin with low throttle and make a very impressive pull-out when you want it to. If you advance the throttle as the airplane pulls out and go into another loop or two, then repeat and bring her down for a fly-by, you will be wondering along with everyone else how you can do what you do without ailerons. (P.S. A dihedraled high-shoulder wing with a low CG is what really helps.)
On one landing approach with dead air and dead stick, we found the nose must be kept down to maintain flying speed; otherwise a very flopping landing can result. Only a broken prop and shattered pride resulted. A later flight for fun flying just before landing time included a dead-stick check at about 200 feet altitude. Having already survived the earlier landing lesson, she handled easily, even bounced a little going over the dark green trees, circled the field and made a neat three-pointer.
Construction and finishing
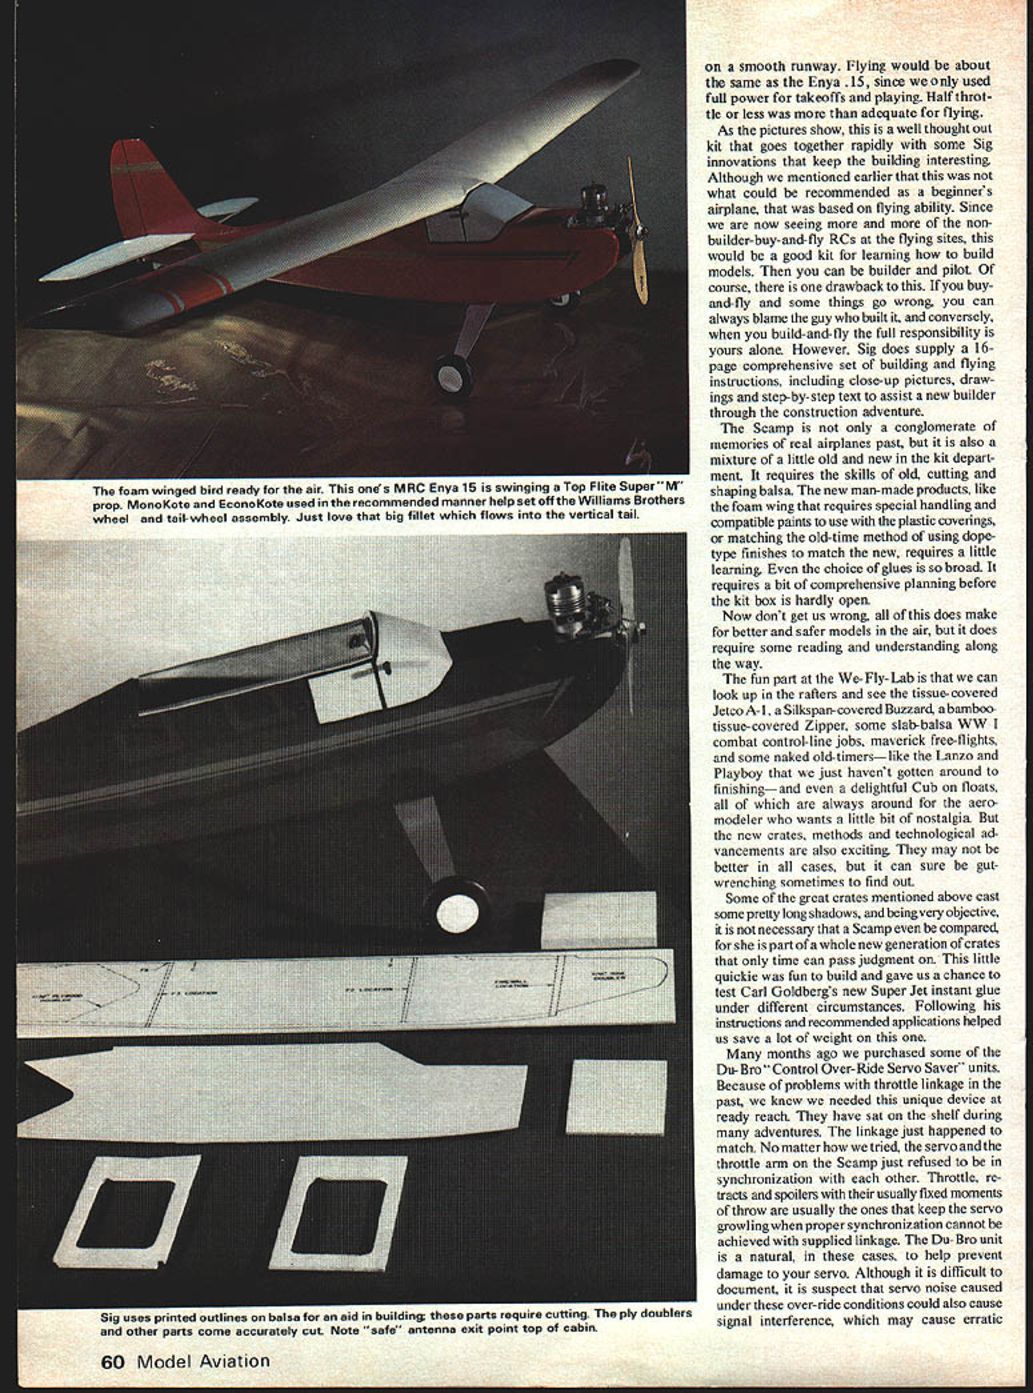
In the We-Fly-Lab we stayed on our Weight Watchers' diet, using lots of sandpaper and very little of heavy epoxy glues. With this dedication to weight loss, we maintained the prescribed wing loading of about 19 oz per sq. ft. A good .09 engine will probably handle this plane marginally on a smooth runway. Flying would be about the same as with the Enya .15, since full power was used only for takeoffs and playing; half throttle or less was more than adequate for normal flying.
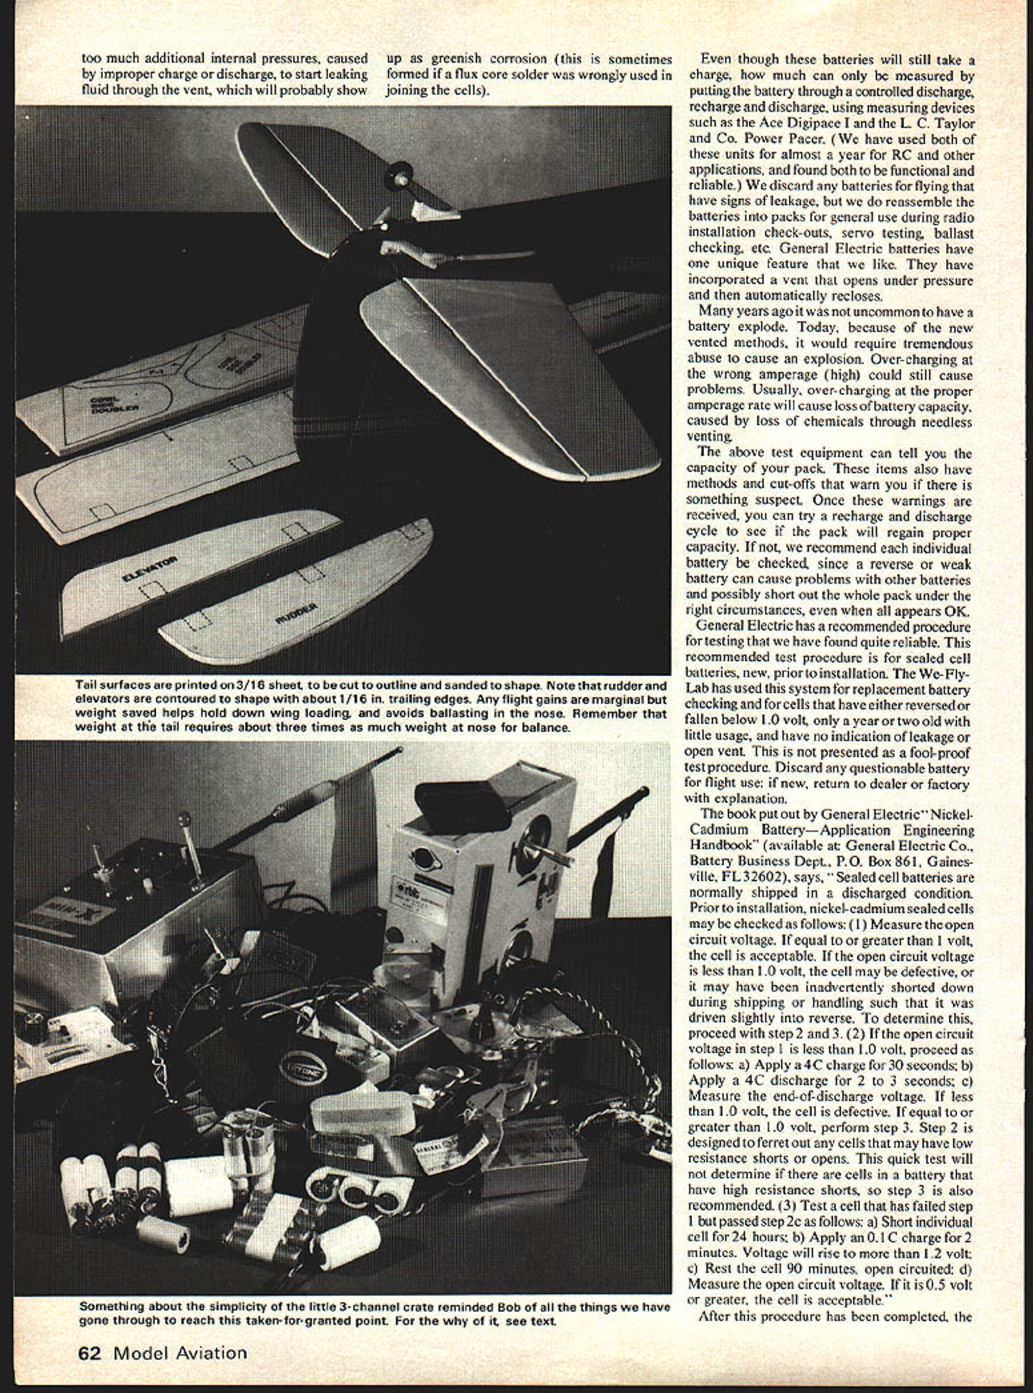
As the pictures show, this is a well-thought-out kit that goes together rapidly with some Sig innovations that keep the building interesting. Although this is not recommended as a beginner's airplane based on flying ability, we are now seeing more non-builder buy-and-fly RCs at flying sites. This would be a good kit for learning how to build models — then you can be builder and pilot. Of course, one drawback: if you buy-and-fly and something goes wrong, you can always blame the guy who built it; when you build-and-fly, the full responsibility is yours. Sig supplies a 16-page comprehensive set of building and flying instructions, including close-up pictures, drawings and step-by-step text to assist a new builder.
The Scamp is not only a conglomerate of memories of real airplanes past, but it is also a mixture of old and new in the kit department. It requires the skills of old — cutting and shaping balsa — and knowledge of new man-made products like the foam wing, which requires special handling and compatible paints under plastic coverings. Matching old-time dope-type finishes to new materials requires a little learning. Even the choice of glues is broad. It requires comprehensive planning before the kit box is hardly open.
All of this does make for better and safer models in the air, but it requires some reading and understanding along the way.
In the rafters of the We-Fly-Lab we keep tissue-covered Jetco A-1s, Silkspan-covered Buzzards, bamboo-tissue-covered Zippers, slab-balsa WW I combat control-line jobs, maverick free-flights and some naked old-timers like the Lanzo and Playboy that we haven't gotten around to finishing — and even a delightful Cub on floats. These are always around for the aeromodeler who wants a little nostalgia. The new crates, methods and technological advancements are also exciting. They may not be better in all cases, but it can be gut-wrenching to find out.
Some of the great crates mentioned above cast long shadows, and being objective, it is not necessary that a Scamp even be compared — she is part of a whole new generation of crates that only time can pass judgment on. This little quickie was fun to build and gave us a chance to test Carl Goldberg's Super Jet instant glue under different circumstances. Following his instructions and recommended applications helped save a lot of weight on this one.
Modifications and accessories
Many months ago we purchased Du-Bro "Control Over-Ride Servo Saver" units. Because of past throttle linkage problems, we knew we needed this device. They sat on the shelf until the Scamp's linkage just happened to match. No matter how we tried, the servo and throttle arm on the Scamp refused to synchronize. Throttle, retracts and spoilers with fixed throw moments are usually the ones that keep the servo growling when proper synchronization cannot be achieved with supplied linkage. The Du-Bro unit is a natural in these cases to help prevent servo damage. Although difficult to document, servo noise under overload conditions could also cause signal interference and erratic control. Being on the safe side and keeping all parts in harmony may save a lot of repairs. (Editor: servo overloads boost drain sky-high. It is a mistake to think in terms of pounds-pull to force things.)
If you plan to do some stunting, as we did, then the wing must be held down securely with fresh rubber bands. Our arrangement:
- Three bands across the wing on each side.
- Two diagonal bands in each direction across the wing (put on last to help hold the parallel bands).
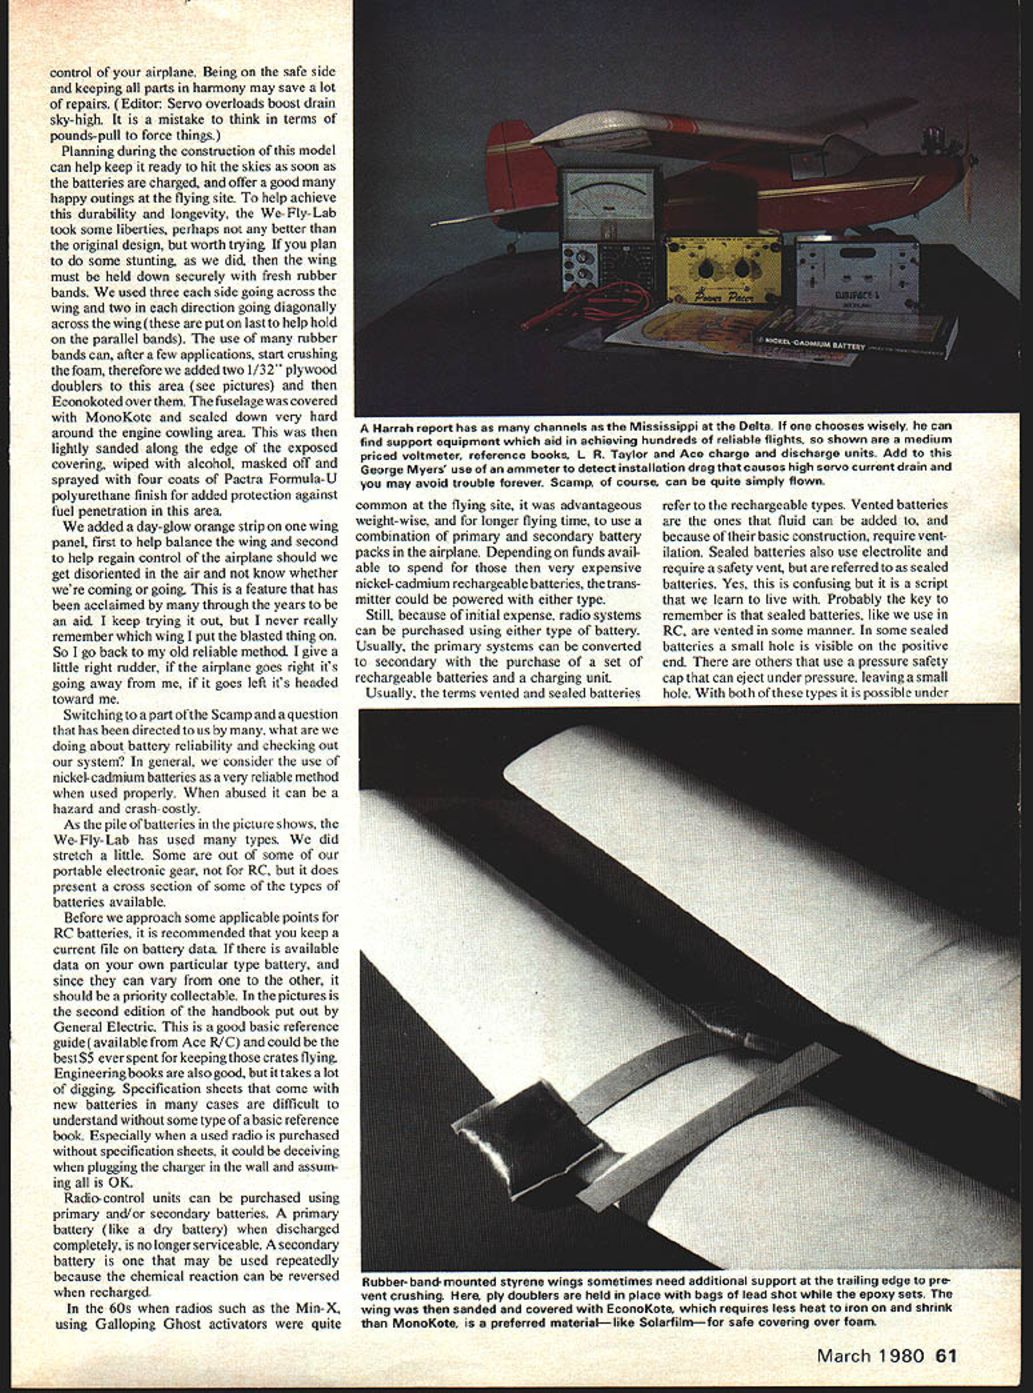
The use of many rubber bands can, after a few applications, start crushing the foam. Therefore we added two 1/32" plywood doublers to this area and then Econokoted over them. The fuselage was covered with MonoKote and sealed down very hard around the engine cowling area. This was lightly sanded along the edge of the exposed covering, wiped with alcohol, masked off and sprayed with four coats of Pactra Formula-U polyurethane finish for added protection against fuel penetration.
We added a day-glow orange strip on one wing panel: first, to help balance the wing; second, to help regain orientation if disoriented in the air. Many pilots have found this helpful. My personal orientation trick is: give a little right rudder — if the airplane goes right it's going away from me; if it goes left it's headed toward me.
Battery reliability and checking systems
Switching topics: many readers have asked what we do about battery reliability and system checkout. In general, we consider nickel-cadmium (Ni-Cd) batteries a very reliable method when used properly. When abused they can be hazardous and crash-costly.
As the pile of batteries in the pictures shows, the We-Fly-Lab has used many types. Some were stretched from portable electronic gear — not originally for RC — which gives a cross section of available types.
Before discussing RC battery points, keep a current file on battery data. If available, collect data on your particular battery type — they vary. A good basic reference is the General Electric handbook (we used the second edition). This is a worthwhile, inexpensive reference and is available from many hobby suppliers. Specification sheets that come with new batteries are sometimes difficult to understand without a basic reference. Especially when a used radio is purchased without specs, it could be deceiving when plugging the charger in and assuming all is OK.
Radio-control units can be purchased using primary and/or secondary batteries. A primary battery (like a dry battery) is not serviceable after complete discharge. A secondary battery is rechargeable because its chemical reaction can be reversed.
In earlier decades it was advantageous, weight-wise and for longer flying time, to use combinations of primary and secondary packs depending on cost. Today, systems sold for primary cells can usually be converted to secondary with the purchase of rechargeable cells and a charger.
Terms "vented" and "sealed" usually refer to rechargeable batteries. Vented batteries allow fluid addition and require ventilation. Sealed batteries also use electrolyte and have a safety vent, so the term "sealed" is somewhat misleading. In some sealed batteries a small hole is visible on the positive end; others use a pressure safety cap that can eject under pressure. Under certain charging or abuse conditions electrolyte can be expelled; keep connections clean and observe batteries for leakage or swelling. Even if these batteries still take a charge, how much capacity remains can only be measured by a controlled discharge/recharge/discharge cycle using measuring devices such as the Ace Digipac I and the L.C. Taylor & Co. Power Pacer. We have used both units for almost a year for RC and other applications and found them functional and reliable. We discard any batteries for flying that have signs of leakage, but reassemble questionable cells into packs for general use during radio installation checkouts, servo testing, ballast checking, etc. General Electric batteries have a vent that opens under pressure and then automatically re-closes.
Many years ago battery explosions were not uncommon. Today, thanks to vented methods, it would require tremendous abuse to cause an explosion. Overcharging at the wrong amperage can still cause problems; proper overcharging at excessive rates can cause loss of capacity by needless venting.
After testing, batteries are repacked and we cycle the battery pack through the Digipac I or the Power Pacer at least twice.
The technique we use for the GE quick test (items 2a and 2b below) is simple. A good voltmeter is necessary to read volts, amperage and resistance. Remember that 4C means 4 × capacity:
- Example: for a 450 mAh cell, 4C = 1.8 A; for 225 mAh, 4C = 0.9 A; for 500 mAh, 4C = 2.0 A.
There are inexpensive AC–DC converter power supplies on the market and resistors needed for the discharge cycle are standard from local electronics supply houses.
Caution: this portion of battery work should not be applied to other types. Fast charge, quick charge and vented batteries require special techniques.
General Electric recommended quick test procedure (sealed Ni-Cd cells)
The following is GE's recommended check for sealed cells prior to installation. Use this as a guideline; discard any questionable battery for flight use and, if new, return to dealer or factory with an explanation.
- Measure the open-circuit voltage (OCV).
- If OCV ≥ 1.0 V, the cell is acceptable.
- If OCV < 1.0 V, the cell may be defective or driven slightly into reverse. Proceed to step 2.
- If OCV < 1.0 V:
- a) Apply a 4C charge for 30 seconds.
- b) Apply a 4C discharge for 2–3 seconds.
- c) Measure the end-of-discharge voltage. If < 1.0 V, the cell is defective. If ≥ 1.0 V, proceed to step 3.
- For a cell that failed step 1 but passed step 2:
- a) Short the individual cell for 24 hours.
- b) Apply a 0.1C charge for 2 minutes (voltage will rise above 1.2 V).
- c) Rest the cell for 90 minutes, open-circuit.
- d) Measure the open-circuit voltage. If ≥ 0.5 V, the cell is acceptable.
These quick tests will not detect high-resistance shorts; for complete evaluation use full charge/discharge capacity tests with proper equipment.
If a pack shows warnings on test equipment, try a recharge and discharge cycle to see if capacity returns. If not, check each individual cell; a reversed or weak cell can cause problems with other cells and possibly short out a pack under the right circumstances.
Closing
The Scamp proved to be a fun model, and the battery dialogue here is only a partial answer to the many questions we receive. Those who want to send questions, we will try to answer from our adventures. Letters from the magniloquent will be appraised but are not usually answerable. Fortunately, the far greater percentage of mail comes from sincere, constructive aeromodellers.
Letters can be sent to: Robert S. Harrah P.O. Box 99419 San Diego, CA 92199
Transcribed from original scans by AI. Minor OCR errors may remain.

