


Where Are The Kids?
Fred L. Reese
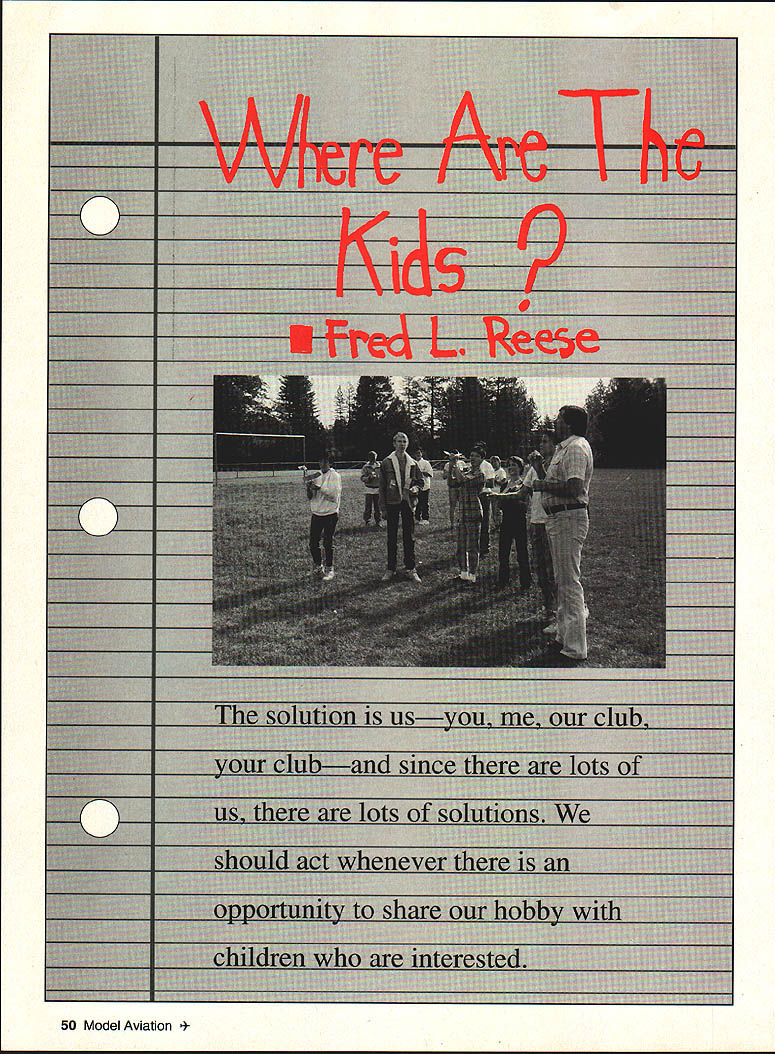
The solution is us — you, me, our club, your club — and since there are lots of us, there are lots of solutions. We should act whenever there is an opportunity to share our hobby with children who are interested.
Our club, the Sierra Foothills RC Flyers of Grass Valley, California, got involved when Gene King, a teacher at Lyman Gilmore Middle School, asked for help with a classroom RC airplane project. Gene has gone out of his way to make school more interesting by involving his students in educational programs that spark imaginations and encourage learning. Model aviation is one more way an inspired teacher can inspire our children.
Harry Stewart, president of the club, took on the project using his own easy-to-build, proven design, the #7 trainer. Hand-cut kits, made by the club, made the limited budget go farther. The club also donated used engines, RC gear, and other needed accessories. The remaining expenses were covered by the $20 fee collected from each student. Since the class was an elective, the fee was reasonable.
The boys were divided into four groups of five, and each group built a model during the semester. The students loved the class, word carried over to the next year, and by popular demand, the class was repeated.
By the third year, Harry Stewart, Dennis Carlson, Dennis Lupcho, and I decided to go back to the basics of rubber power and control line flying. We wanted students to build and fly their own models and to have more flying time. We decided to start with a simple rubber-powered model.
Sig's AMA Cub was considered first because of its simplicity and good flying characteristics. However, these boys ranged from fifth- to eighth-graders and were old enough to do more. We felt that more could be learned from the Peck ROG (Peck-Polymers kit PP-10). In my mind, the Peck ROG is the best first model for ten- to twelve-year-olds when experienced help is available. With less help available, or in general classroom situations, the AMA Cub is a better choice because it is easier to build and will fly well without adjustments.
In fact, Gene, Harry, and I successfully used the AMA Cub as a one-month science project in his regular class. The instructors just took over the class while Gene observed and videotaped the magic. The students were already excited and motivated; we just showed them how to succeed.
The project began slowly and deliberately as each step was explained in groups and then one-on-one. The people-helping-people theme that started with a teacher and a club carried through, with the students helping other students throughout the project.
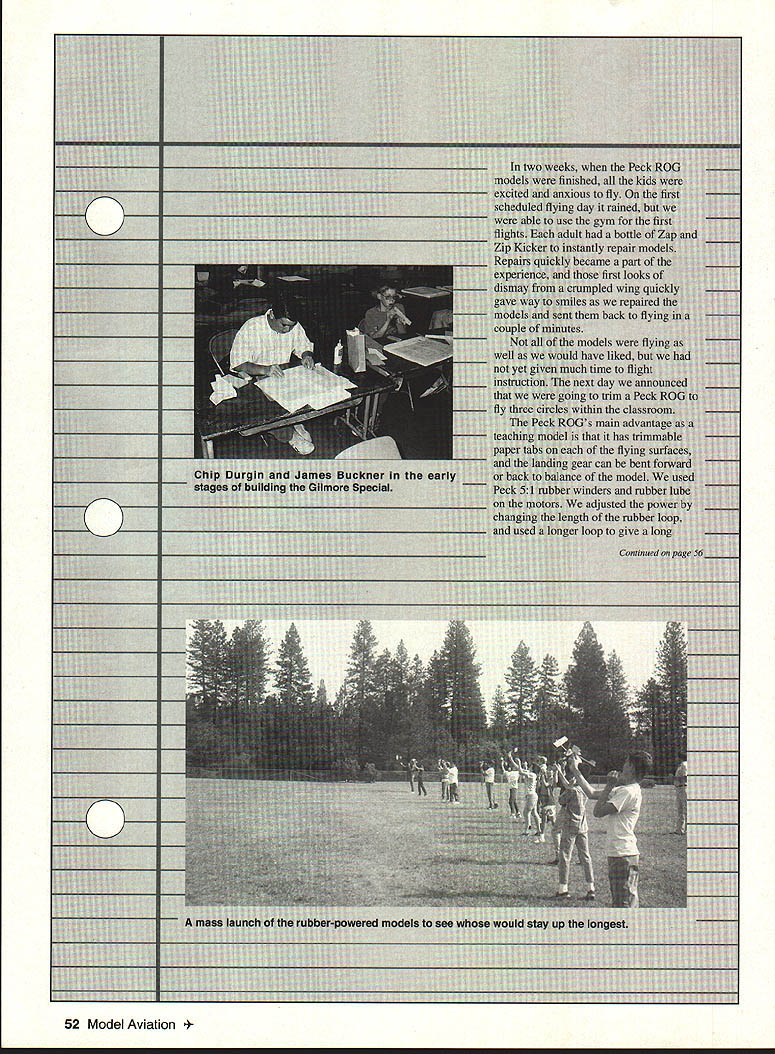
In two weeks, when the Peck ROG models were finished, all the kids were excited and anxious to fly. On the first scheduled flying day it rained, but we were able to use the gym for the first flights. Each adult had a bottle of Zap CA and Zip Kicker to instantly repair models. Repairs quickly became part of the experience, and those first looks of dismay at a crumpled wing quickly gave way to smiles as we repaired models and sent them back to flying in a couple of minutes.
Not all of the models were flying as well as we would have liked, but we had not yet given much time to flight instruction. The next day we announced that we were going to trim a Peck ROG to fly three circles within the classroom. The Peck ROG's main advantage as a teaching model is that it has trimmable paper tabs on each flying surface, and the landing gear can be bent forward or back to balance the model. We used Peck 5:1 rubber winders and rubber lube on the motors. We adjusted the power by changing the length of the rubber loop, using a longer loop to give a longer motor run and cruise power.
After flight we would make changes, trim and explain what we did, note mistakes and fix them. Pretty soon a model completed a full circle. As the rubber motor was adjusted and trims changed, the number of turns increased. Finally a model made three circles; someone reached out and caught it on the third pass, and the kids cheered. Mr. King captured the flight on a video camera so it could be shared with parents and others. The kids learned that although the desired adjustments took time and effort, they were worth it.
The kids flew the models outside the next day. Average flight times jumped by about twenty seconds, with several flights close to a minute. We were very busy winding and helping with adjustments. Initially we did the winding and smiled as the kids began winding each other's motors. Our main objective for the class was to give as much flying experience as possible.
However, it was winter, so we started the second rubber model, the Sierra, and flew the Peck ROGs whenever the weather was good. After building the Peck ROG, the Sierra only took a week to complete.
Sierra
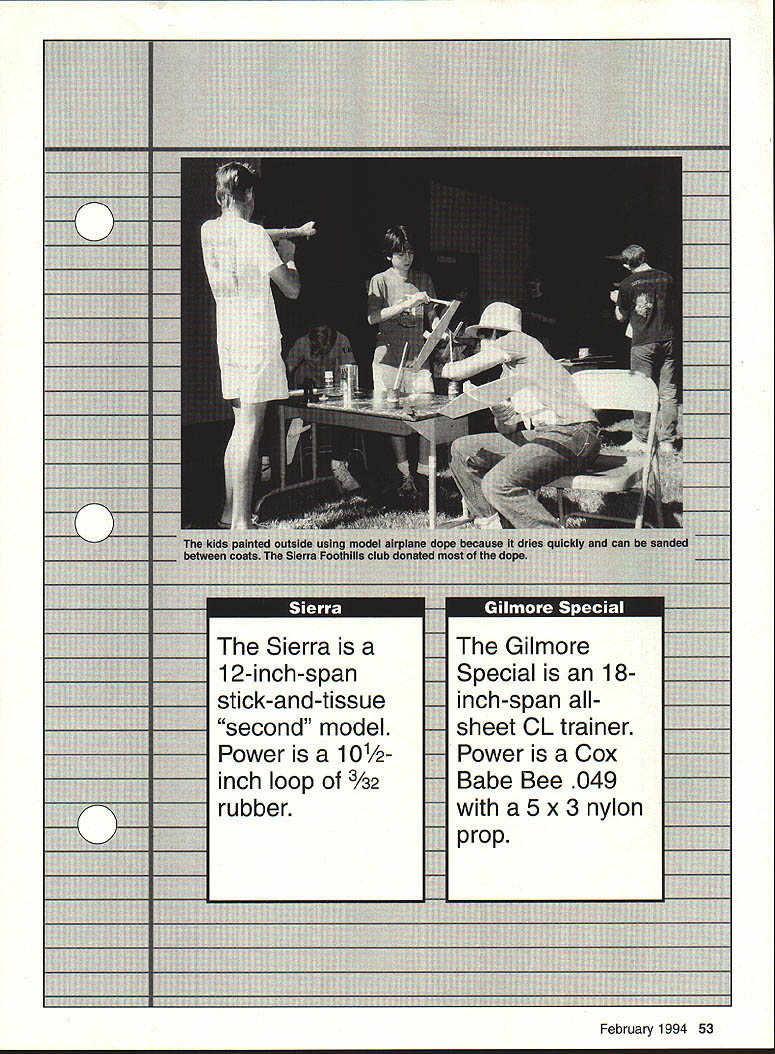
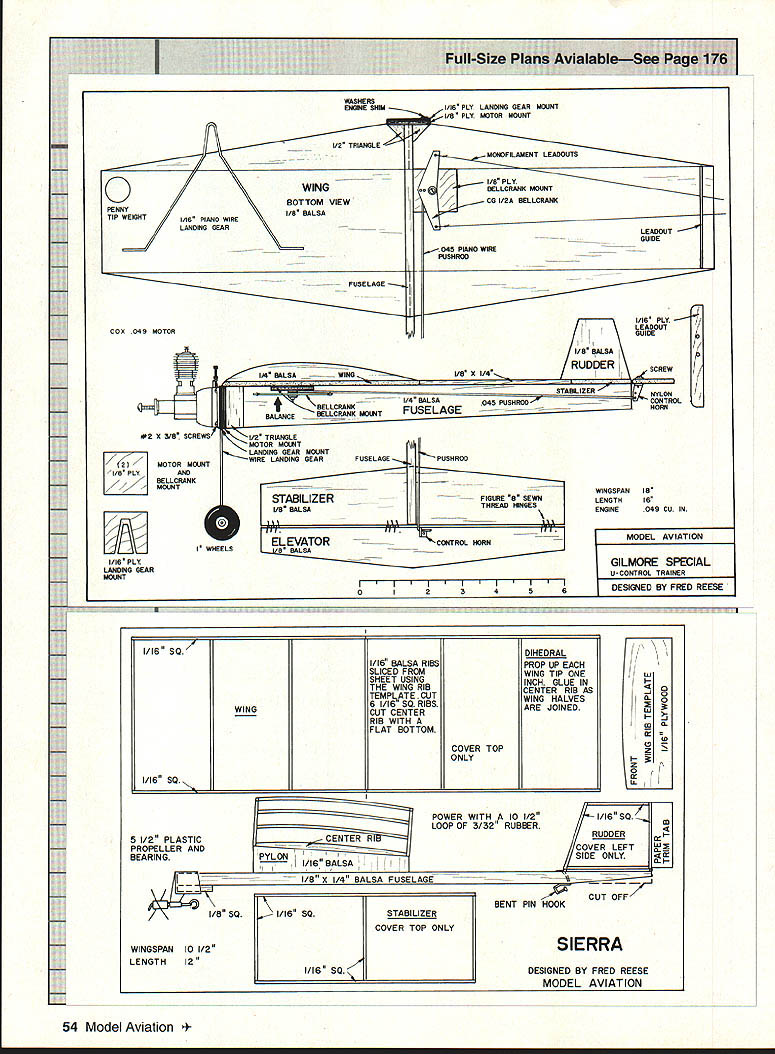
The Sierra is a 12-inch-span stick-and-tissue "second" model. Power is a 10½-inch loop of 3/32-inch rubber. Because it is larger and lighter and because it doesn't have landing gear, the Sierra can fly longer than the Peck ROG. The Sierra uses the same propeller assembly as the Peck ROG and the same size rubber for power. Since the Sierra only has an adjustable tab on the rudder, it was especially important to build a straight airplane. Initial flight trim is done by adding little darts of clay to the nose, tail, or wingtip, depending on what makes the model fly in a gentle, climbing left-hand circle.
The front of the Sierra's fuselage was purposely made a little long and was shortened if the model was nose heavy, dove, or just flew level. The longer fuselage allowed a longer rubber motor, which runs longer. Flight times of two minutes are possible with the Sierra. The simple curved airfoil improves performance and also teaches how to cut out parts and cover a curved surface.
To get maximum performance from any rubber-powered model, the motor should be stretch-wound and a rubber lubricant should be used. Rubber lube, mechanical winders, and extra motor rubber are available from Peck-Polymers, or your local hobby shop can order them.
Cut 18-inch lengths for the Peck ROG and 22-inch lengths for the Sierra from the 3/32-inch rubber motor material. To tie the ends of the rubber strip together, wet the ends and tie a square knot. Pull the knot tight while keeping it wet and clip off the excess rubber, leaving 1/4-inch ends. Apply rubber lube before each flying session by placing the motor in a sandwich bag with a few drops of rubber lube, then roll it around in the bag until it's completely coated.
To wind the motor: place the round end of the loop on the propeller hook and have a friend hold the model by the propeller and nose bearing. Hook the knotted end of the rubber on the winder hook, stretch the rubber out two to three times its original length, and begin winding. Gradually move the winder towards the propeller as the motor is wound. The motor is fully wound when the bumps will only move about one inch fore and aft when grasped in the middle. To remove the motor from the winder, grasp the rubber about 1/2 inch from the winder hook and slide it off the hook. The end will unwind, leaving an open loop that can then be slipped onto the model's rear hook. Note the bent-pin hook on the Sierra plan that should also be used on the Peck ROG; bend the pin with a pair of long-nose pliers.
Begin flying both rubber-powered models with about one hundred turns (twenty cranks on the winder). Use the Peck-Polymers flight trim chart (from the Peck ROG kit) to make flight-trim corrections. Increase the number of turns gradually, making the necessary trim changes until maximum turns are reached. As the students became more proficient, it was a real thrill to see the sky filled with these colorful little models.
Phase two of the class introduced the students to engine-powered control line, where the aircraft is controlled by the student. The control line project took four weeks to complete; an additional week could be used for more flying. There should be at least one adult with engine control-line experience for flight instruction.
Flight instruction begins with a whip trainer, which is nothing more than a Gilmore Special with no propeller and a non-powered line. It is whipped around in a circle. This gives the student a chance to feel the controls. The whip trainer flies nose-high if the student holds full up control. It is obvious when the student begins to feel the controls and the nose comes down to level flight. Continuing with the whip trainer, the student learns to climb and dive and then return to level flight.
Initial powered flights of the Gilmore Special were made in a trainer configuration. Control movement was minimized by installing the pushrod in the hole closest to the bellcrank and in the outer hole on the control horn. The landing gear was left in place to create more drag, and the propeller was installed backwards to give less thrust. These changes slowed the aircraft sufficiently so that all could fly it.
The instructor and student would stand in the center of the circle; the student would hold the control handle, but the instructor would have his hand around the student's. This way the student could fly the model but the instructor could override. Gradually the instructor gave the control to the student. It was really fun to see the excitement on the kids' faces as they completed their first flights.
Pretty soon the students were starting and adjusting their own engines, launching for each other, and helping students who needed more help. As each student got comfortable flying, we turned the propeller around, giving full thrust. Using this faster model, the students developed a new skill level. Finally, we took off the landing gear to reduce drag; the little trainer was a little faster, and the excitement level remained high.
As the students gained more skill, we increased elevator movement, which allowed the trainer to loop, do wingovers, and fly inverted. As the student was ready, the Gilmore Special took the student from training to stunting. In advanced configuration, the Gilmore is fast, agile, and fun to fly. It is also durable and easily repaired.
By using Zap CA Plus glue and Zip Kicker accelerator to set the glue, crashes were only a minor inconvenience. Badly broken models could be repaired and be ready to fly in a few minutes. Crashes did not hinder the training, but in fact became a part of it. The attitude was: if you fly it, you break it; no problem, you fix it.
Gilmore Special
The Gilmore Special is an 18-inch-span all-sheet control-line trainer. Power is a Cox Babe Bee .049 with a 5 x 3 nylon prop.
For safety we used the Cox #858 Double-Tuf 5 x 3 nylon props with rounded, blunt tips. We bought a gallon of Cool Power 25% fuel. Engines were all Cox .049 Babe Bee .049s. Cox Hobbies has an engine assistance program for schools; contact Don Hatcher at Cox Hobbies for details. The new engines were trouble-free, started easily, and had lots of power for these models.
Club members prepared the Gilmore Special kits by cutting out all of the wood parts and bending the wire landing gear and pushrods. We bought Carl Goldberg 1/2A bellcranks and Williams Brothers wheels to complete the package. Both Sig and Carl Goldberg sell good, inexpensive packaged control horns and line. If you would rather use a commercial kit instead of the Gilmore Special, you could use any of the Midwest 1/2A profiles, the Carl Goldberg Swordsman, or the Sig Deweybird or Skyray, and follow the same instruction procedure.
With the experience of building the rubber-powered models, our students built the Gilmore Special in just a few days and then spent another two days painting them. The club donated many bottles of paint for the class, so the models were every color. We moved tables covered with newspaper outside the classroom for the students to paint the models. The next day we brought in a drill and mounted all of the engines, bellcranks, and control horns, hinged the elevators, and they were ready to fly.
All of the students learned to fly control line with their first models, and by the end of the project the adults could mostly stand around, watch the students fly, and take care of themselves. It was very satisfying for us, and the kids not only had a great time, but learned a great deal as well.
Supplies and useful items:
- Peck 5:1 rubber winders, rubber lube, and extra motor rubber (Peck-Polymers)
- Zap CA Plus glue and Zip Kicker accelerator
- Cox .049 Babe Bee engines and Cool Power 25% fuel
- Cox #858 Double-Tuf 5 x 3 nylon props (rounded tips)
- Carl Goldberg 1/2A bellcranks, Williams Brothers wheels; Sig or Carl Goldberg control horns and line
Perhaps more teachers will initiate this type of project, with or without the aid of other modelers. Perhaps more clubs will approach schools or teachers and offer their help. We all felt that the kids benefited from seeing different adult role models. It is nice to think we are initiating a lifelong hobby, but realistically, only a few will actually pursue it after the class. However, the class does teach skills and attitudes that are important in life.
Following directions, reading plans, taking measurements, and gaining an appreciation for tools and their use will certainly be of benefit. The thrill of flight, consideration of others, and the value of one's own labor are all lessons to be learned. Times have changed, and there is a lot more competition for a child's free time than when I was a boy. Many children never learn skills that we take for granted. Too often kids ask me where I bought my airplane, never considering it could be hand made.
Modeling instills a pride in one's work, and that may be the most important lesson of all.
Transcribed from original scans by AI. Minor OCR errors may remain.

