
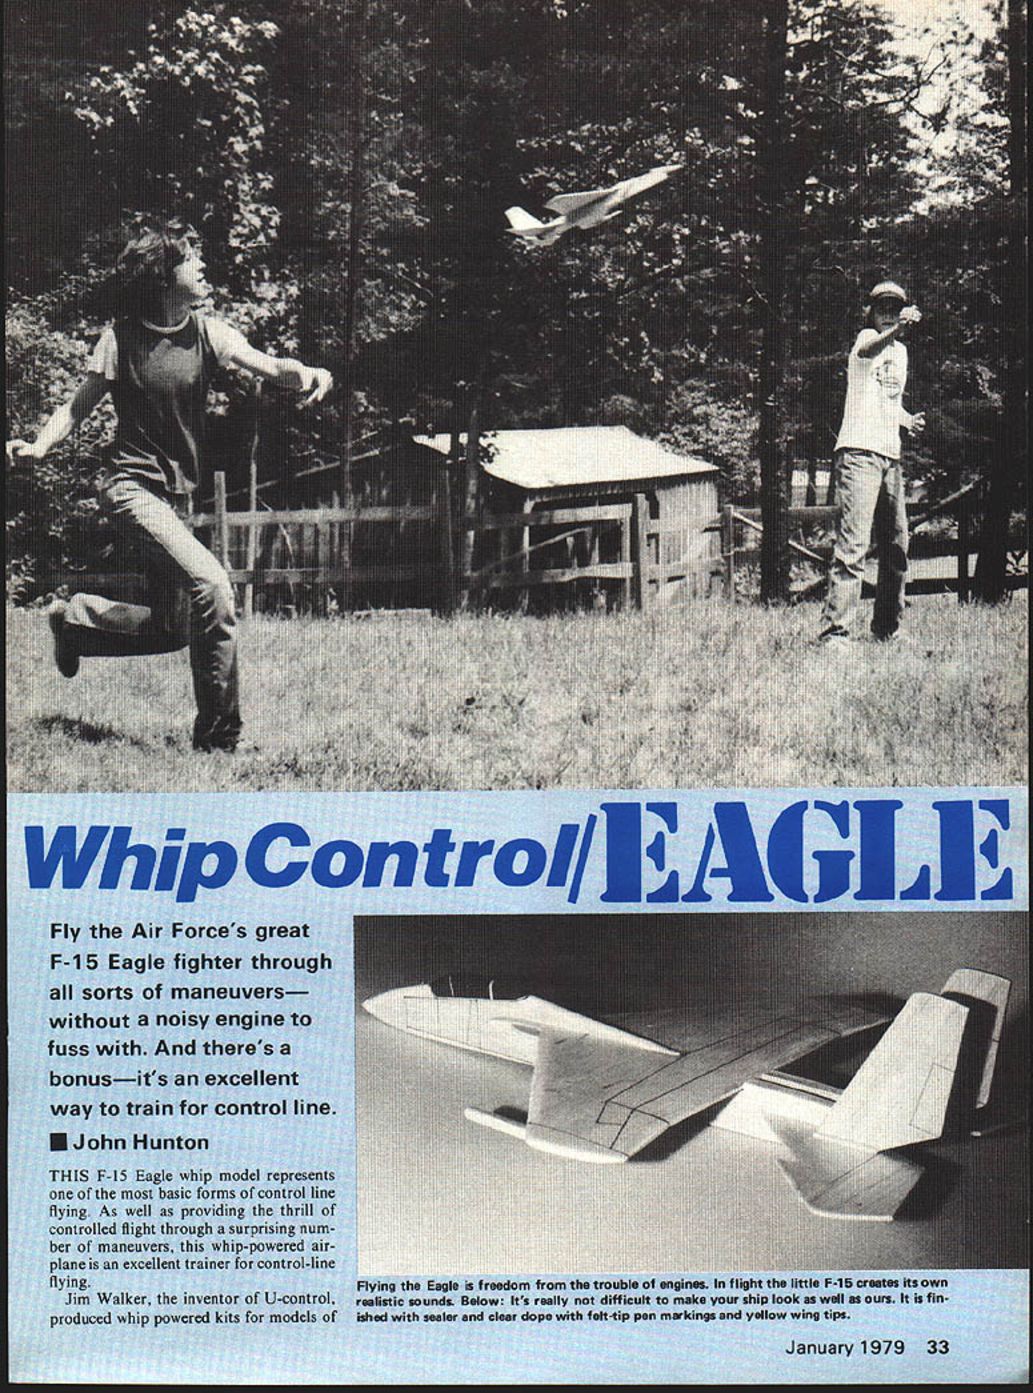
Whip Control/Eagle
By John Hunton
This F-15 Eagle whip model represents one of the most basic forms of control-line flying. As well as providing the thrill of controlled flight through a surprising number of maneuvers, this whip-powered airplane is an excellent trainer for control-line flying.
Jim Walker, the inventor of U-Control, produced whip-powered kits for models of the Airacobra and Mustang in the 1940s, so this concept is not new. With the whip model there is no engine to start, throw oil, burn fuel, or make noise, so perhaps this is the time to look at the whip model again.
With the lack of suitable, economical jet engines on the market there has been a lack of interest in flying models of the jets. The jet provides an ideal subject for a whip model.
The subject chosen here is the F-15A by McDonnell-Douglas. The F-15 Eagle was conceived to outperform any fighter in existence or on the drawing board. The Eagle is now in operation and has been called the best, most maneuverable fighter ever built.
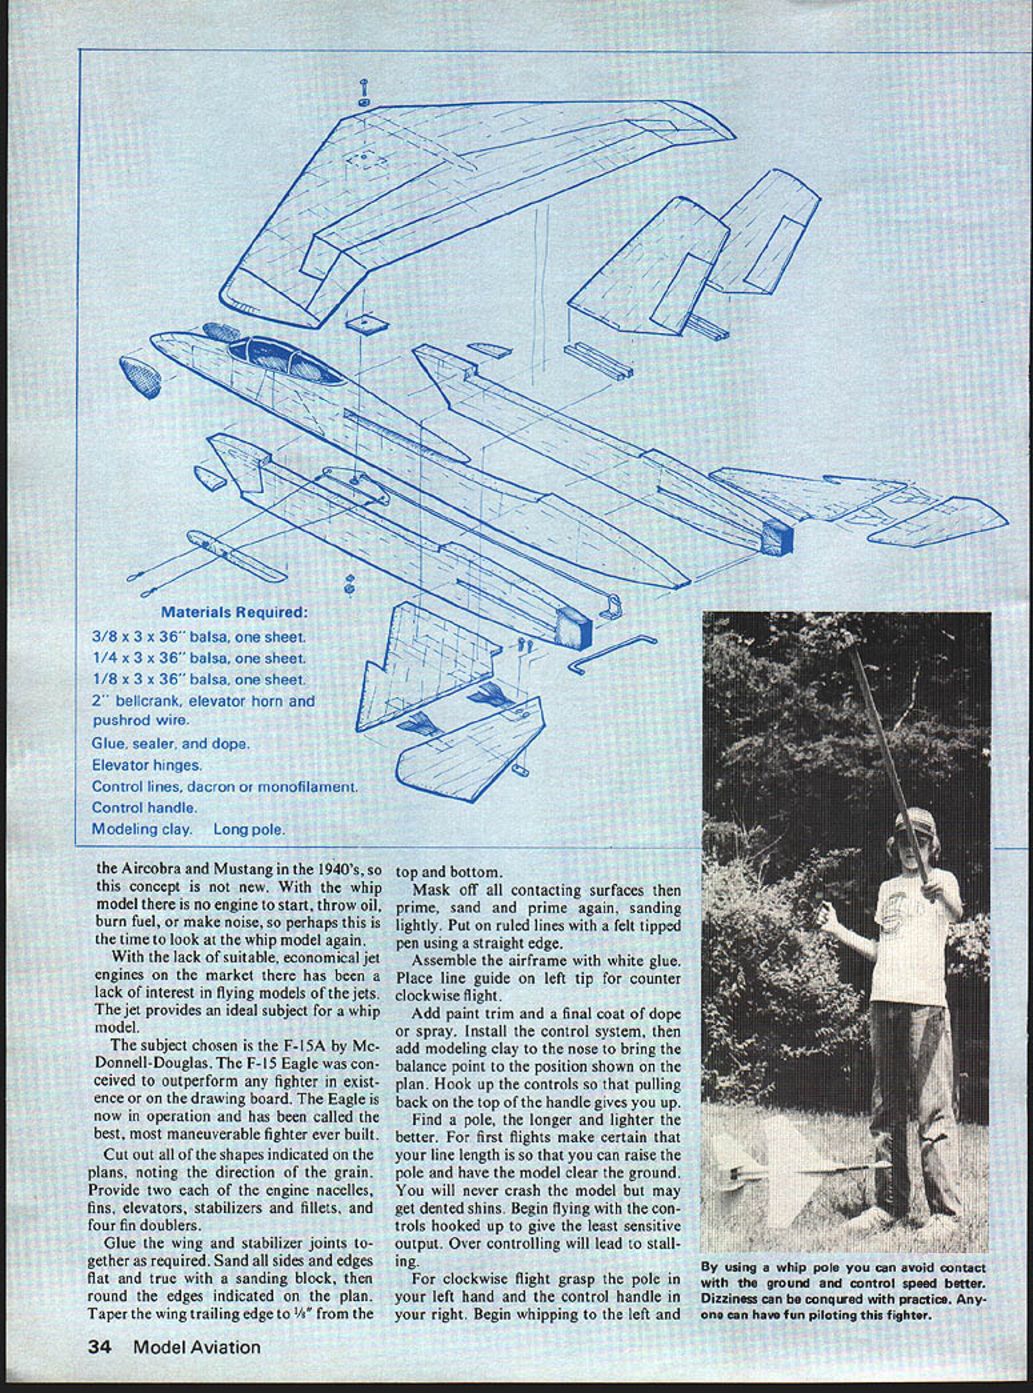
Materials Required
- 3/8 x 3 x 36" balsa, one sheet
- 1/4 x 3 x 36" balsa, one sheet
- 1/8 x 3 x 36" balsa, one sheet
- 2" bellcrank, elevator horn and pushrod wire
- Glue, sealer, and dope
- Elevator hinges
- Control lines, Dacron or monofilament
- Control handle
- Modeling clay
- Long pole
Construction
- Cut out all of the shapes indicated on the plans, noting the direction of the grain. Provide two each of the engine nacelles, fins, elevators, stabilizers and fillets, and four fin doublers.
- Glue the wing and stabilizer joints together as required.
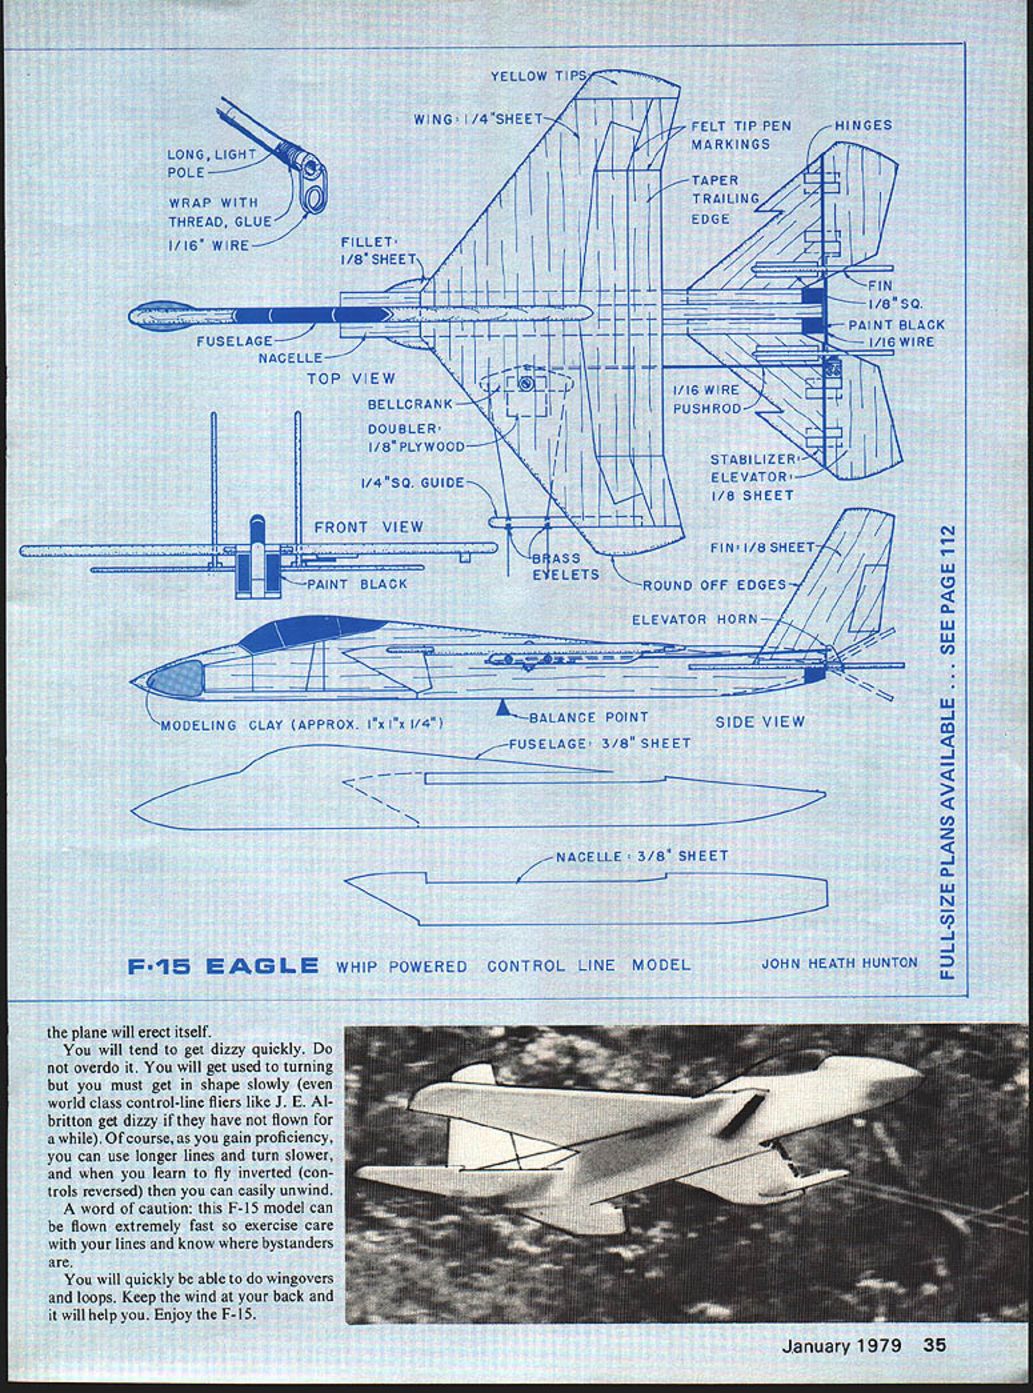
- Sand all sides and edges flat and true with a sanding block, then round the edges indicated on the plan. Taper the wing trailing edge to 1/8" from the top and bottom.
- Mask off all contacting surfaces, then prime, sand and prime again, sanding lightly between coats.
- Put on ruled lines with a felt-tipped pen using a straight edge.
- Assemble the airframe with white glue. Place the line guide on the left tip for counterclockwise flight.
Finishing and Marking
- Add paint trim and a final coat of dope or spray.
- Install the control system.
- Add modeling clay to the nose to bring the balance point to the position shown on the plan.
- Hook up the controls so that pulling back on the top of the handle gives up.
Flying
- Find a pole—the longer and lighter the better. For first flights, make certain that your line length is such that you can raise the pole and have the model clear the ground.
- Begin flying with the controls hooked up to give the least sensitive output. Over-controlling will lead to stalling.
- For clockwise flight, grasp the pole in your left hand and the control handle in your right. Begin whipping to the left and the plane will erect itself.
You will tend to get dizzy quickly. Do not overdo it. You will get used to turning but you must build up slowly (even world-class control-line fliers like J. E. Albritton get dizzy if they have not flown for a while). As you gain proficiency, you can use longer lines and turn slower, and when you learn to fly inverted (controls reversed) you can easily unwind.
Tips and Warnings
- A word of caution: this F-15 model can be flown extremely fast, so exercise care with your lines and know where bystanders are.
- You will never crash the model in the conventional sense, but you may get dented shins—so be careful when whipping.
Performance
You will quickly be able to do wingovers and loops. Keep the wind at your back and it will help you. Enjoy the F-15.
Transcribed from original scans by AI. Minor OCR errors may remain.

