
Bob Beckman
Why Be Ugly
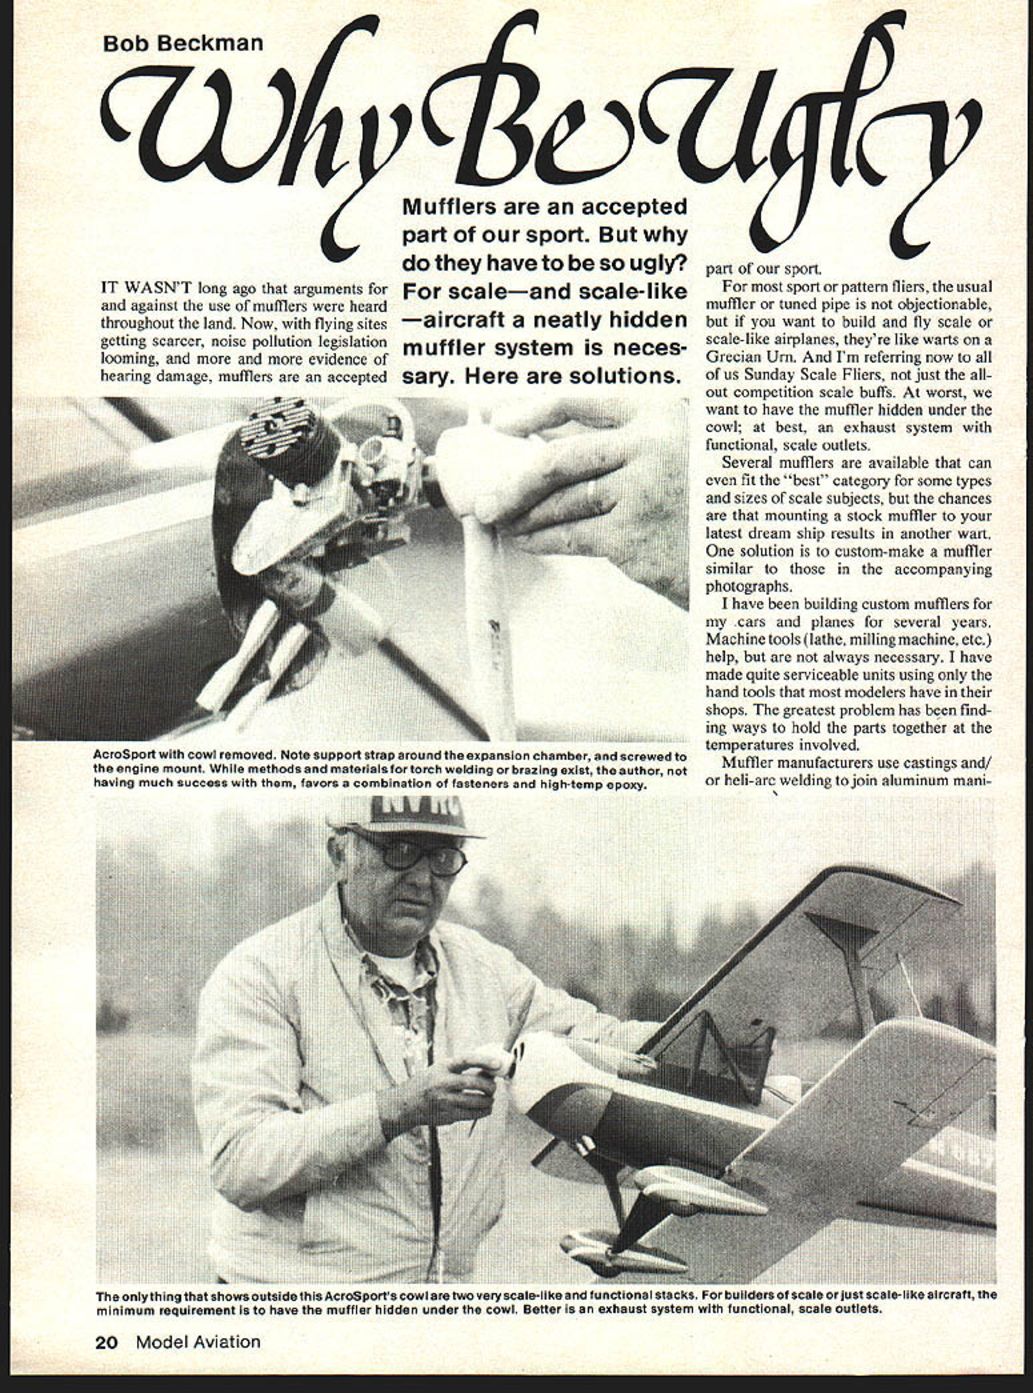
Mufflers are an accepted part of our sport. But why do they have to be so ugly? For scale—and scale-like—aircraft a neatly hidden muffler system is necessary. Here are solutions.
It wasn't long ago that arguments for and against the use of mufflers were heard everywhere. Now, with flying sites getting scarcer, noise pollution legislation looming, and mounting evidence of hearing damage, mufflers are an accepted part of our sport.
For most sport or pattern fliers, the usual muffler or tuned pipe is not objectionable, but if you want to build and fly scale or scale-like airplanes, they're like warts on a Grecian urn. I'm referring to the casual scale flier as well as the competition scale buff. At worst, we want to have the muffler hidden under the cowl; at best, an exhaust system with functional, scale outlets.
Several mufflers are available that can fit the "best" category for some types and sizes of scale subjects, but mounting a stock muffler to your latest dream ship often results in another wart. One solution is to custom-make a muffler similar to the examples described here.
I have been building custom mufflers for my cars and planes for several years. Machine tools (lathe, milling machine, etc.) help, but are not always necessary. I have made quite serviceable units using only the hand tools most modelers have in their shops. The greatest problem has been finding ways to hold the parts together at the temperatures involved.
Muffler manufacturers use castings and/or heli-arc welding to join aluminum manifolds. Torch welding or brazing methods and materials exist, but I've had limited success with them. The solution I favor is a combination of mechanical fasteners and high-temperature epoxy.
My approach to muffler design is far from scientific, but it is successful.
Design approach
- Based on available aluminum tubing (either round or square), determine the size and location of the largest expansion chamber that will fit in the available space.
- Design the manifold to connect the engine exhaust stacks to the expansion chamber. The manifold should:
- a. Be easily attached to and removed from the engine.
- b. Be permanently attached to the expansion chamber using small screws and epoxy.
- c. Have an exhaust path with a minimum cross-sectional area as great as or greater than the total area of the engine's exhaust ports.
- Add exhaust outlets to the expansion chamber:
- a. Be scale-size in appearance at the cowl exit.
- b. Be permanently attached to the expansion chamber with screws and epoxy.
- c. Have the total outlet area of the expansion chamber equal to, or slightly less than, the total area of the engine's exhaust ports.
- Add mechanical support between the expansion chamber, engine mount, and firewall to minimize strain at the manifold–chamber joint.
Drawings and variations
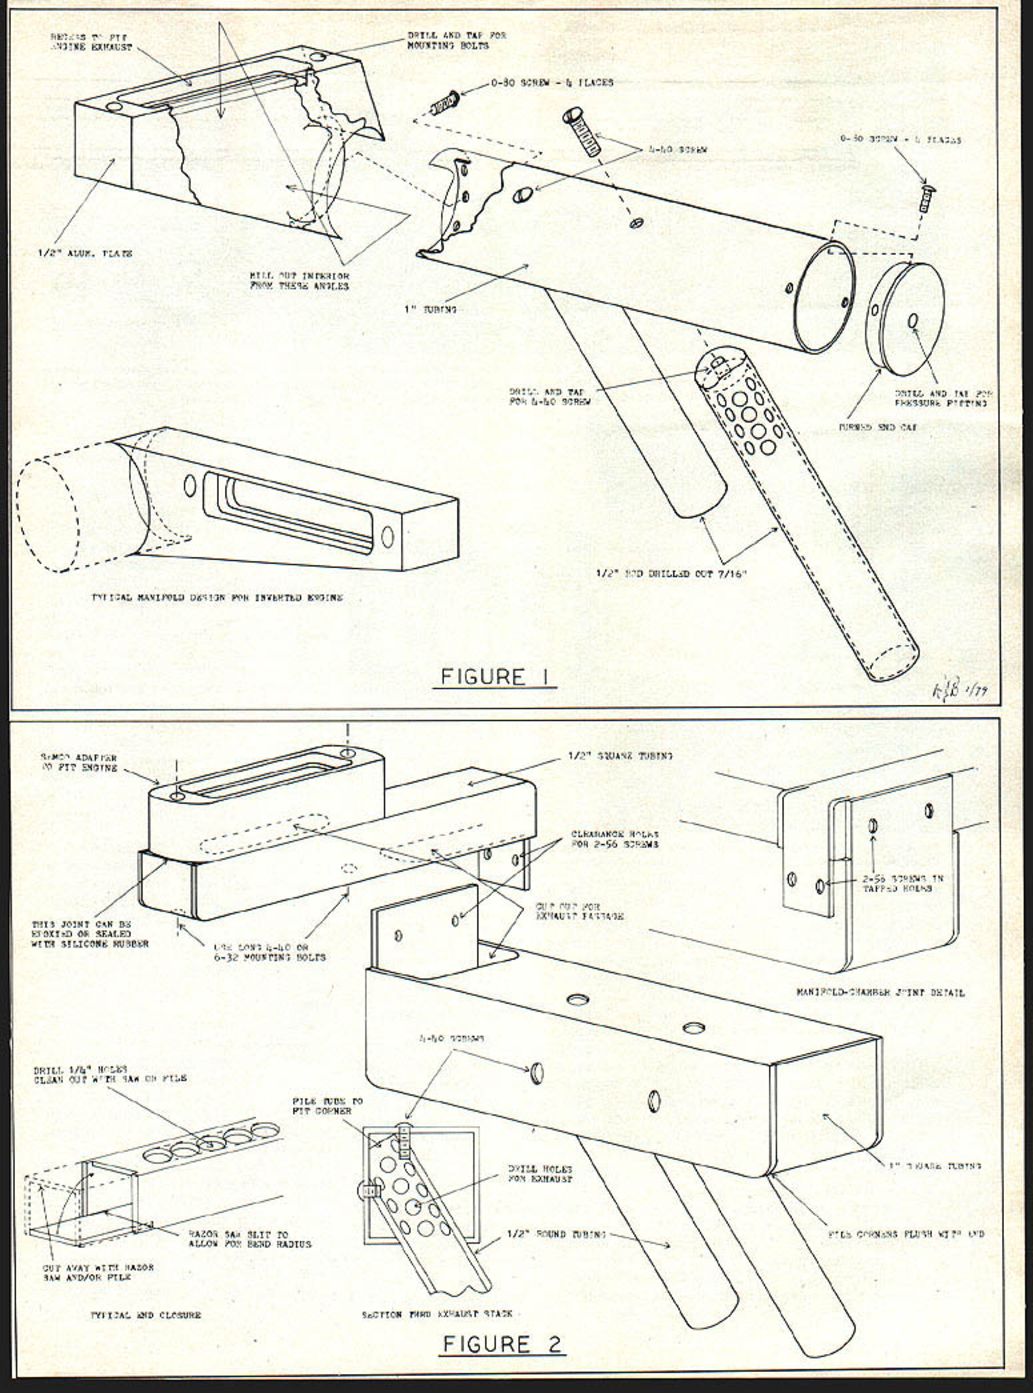
- Fig. 1 shows an exploded view of a muffler designed for a horizontally mounted engine (as used on the AcroSport). A lathe and milling machine are needed to make this unit.
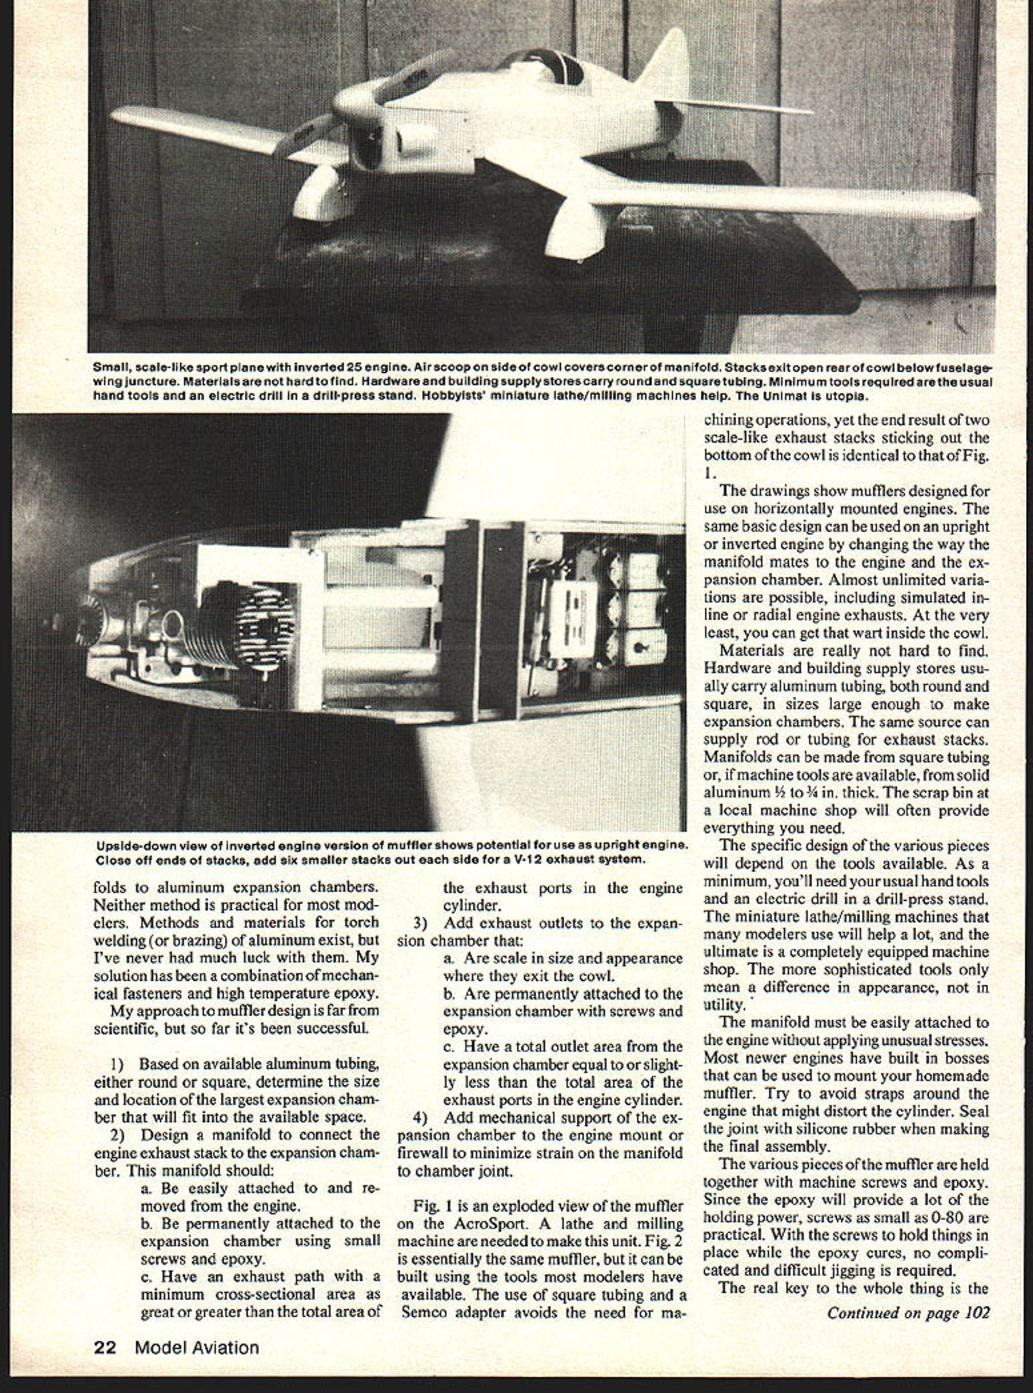
- Fig. 2 is essentially the same muffler and can be built using the tools most modelers have available. Using square tubing and a Semco adapter avoids machining operations but still yields two very scale-like exhaust stacks protruding from the bottom cowl.
- The same basic design can be adapted for upright or inverted engines by changing the way the manifold mates the engine and expansion chamber. Almost unlimited variations are possible, including simulated inline or radial engine exhausts. At the very least, you can get the wart inside the cowl.
Note: On the AcroSport example the cowl is removed to show the expansion chamber and a support strap around the chamber screwed to the engine mount.
Materials and tools
- Aluminum tubing (round or square) for expansion chambers and exhaust stacks—commonly available at hardware and building supply stores.
- Manifolds made from square tubing or from solid aluminum 1/8" to 3/4" thick if machine tools are available.
- Rod or tubing for exhaust stacks; scrap from a local machine shop can be a good source.
- Fasteners: small machine screws (0-80 and similar sizes work because the epoxy supplies much of the holding power).
- Tools: as a minimum, usual hand tools and an electric drill in a drill-press stand. A miniature lathe/mill helps; the ultimate is a fully equipped machine shop. The sophistication of tools affects appearance more than utility.
Manifold attachment and sealing
- The manifold must be attached to the engine without applying unusual stresses. Most newer engines have built-in bosses that can be used to mount your muffler—avoid straps that might distort the cylinder.
- Seal the joint with silicone rubber when making the final assembly.
Assembly and fastening
- Hold the various muffler pieces together with machine screws and high-temperature epoxy. Screws are primarily to hold parts in position while the epoxy cures, so small screws are practical and no elaborate jigging is required.
- Apply a thin, even coat of epoxy on all contacting surfaces and on the screws before installation. Run a bead of epoxy along all seams and joints. The epoxy is thixotropic, which helps it stay where applied, but it can thin and run if applied too thickly.
Epoxy and cure schedule
- I use Tra-Bond 2248, made by Tra-Can, Inc. They supply it in "BIPAX": premeasured resin and hardener in a single plastic bag separated by a clip. Remove the clip, mix the two parts, cut off a corner, and squeeze out the epoxy. Pot life is about three hours.
- Cure schedule: after assembly, let the muffler sit at room temperature (70°–75°F) for 12 hours. Then heat in an oven for:
- 2 hours at 65°C (149°F)
- 2 hours at 90°C (194°F)
- 4 hours at 125°C (257°F)
- These temperatures are at the lower end of a kitchen oven's range. They aren't super critical, but do the entire schedule in one continuous period—pick a time when you can tie up the oven for about eight hours.
The end result will be a muffler that holds together at the normal operating temperatures of your engine—and the warts will be out of sight.
Transcribed from original scans by AI. Minor OCR errors may remain.

