

Wing Thing
by John R. Walker
Introduction
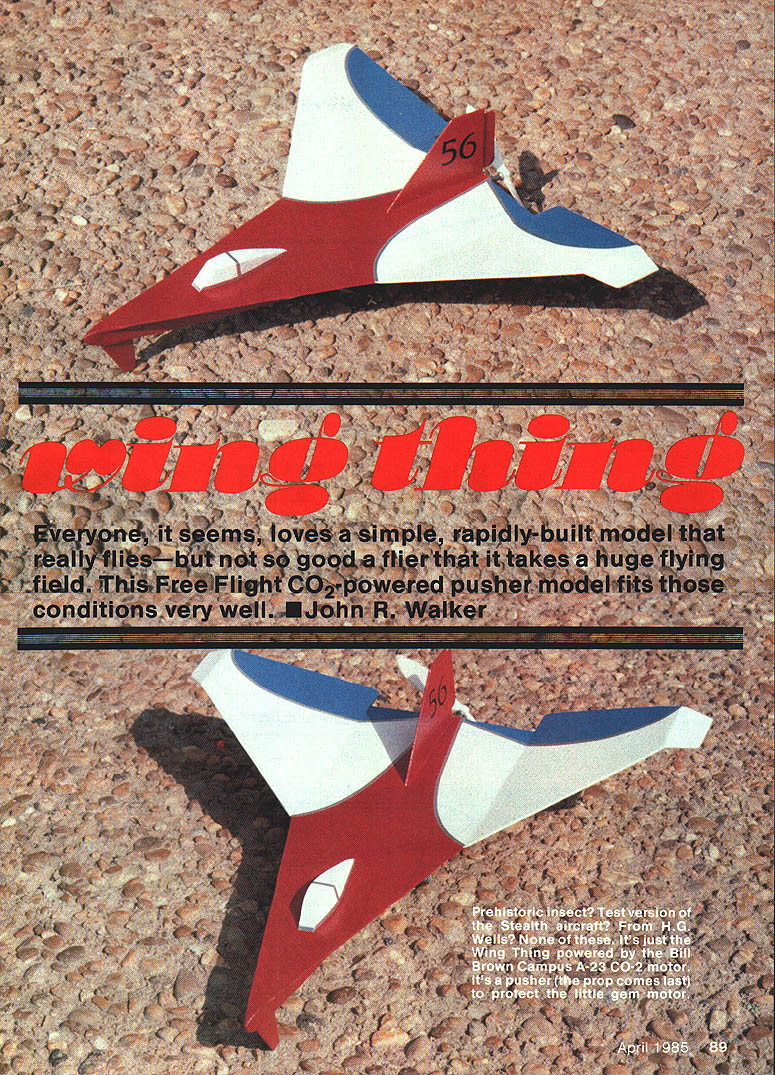
Everyone seems to love a simple, rapidly built model that really flies — but not so well that it needs a huge flying field. This Free Flight CO2-powered pusher model fits those conditions very well.
This is one model to confabulate (or disconfabulate?). The editor notes that the old word couldn't be found in the dictionary; its present-day meaning is roughly equivalent to a Catch-22 situation. The idea was to design a model different enough to be interesting: you'll want to fly it, but not so well that you have to chase it a long way. The dream is a model that can be launched from the rear deck, circle the house, and land back on the deck — preferably on the picnic table to avoid bending down to pick it up.
What happens
Trim it out, add a charge from a half-used CO2 capsule, and launch. The plane may dive toward the ground — just grab it. It then levels out, picks up speed, and climbs away at about a 45° angle. At its highest it may snag a rain gutter on the edge of a roof; if it's too high, a ladder won't help.
Construction
Overview
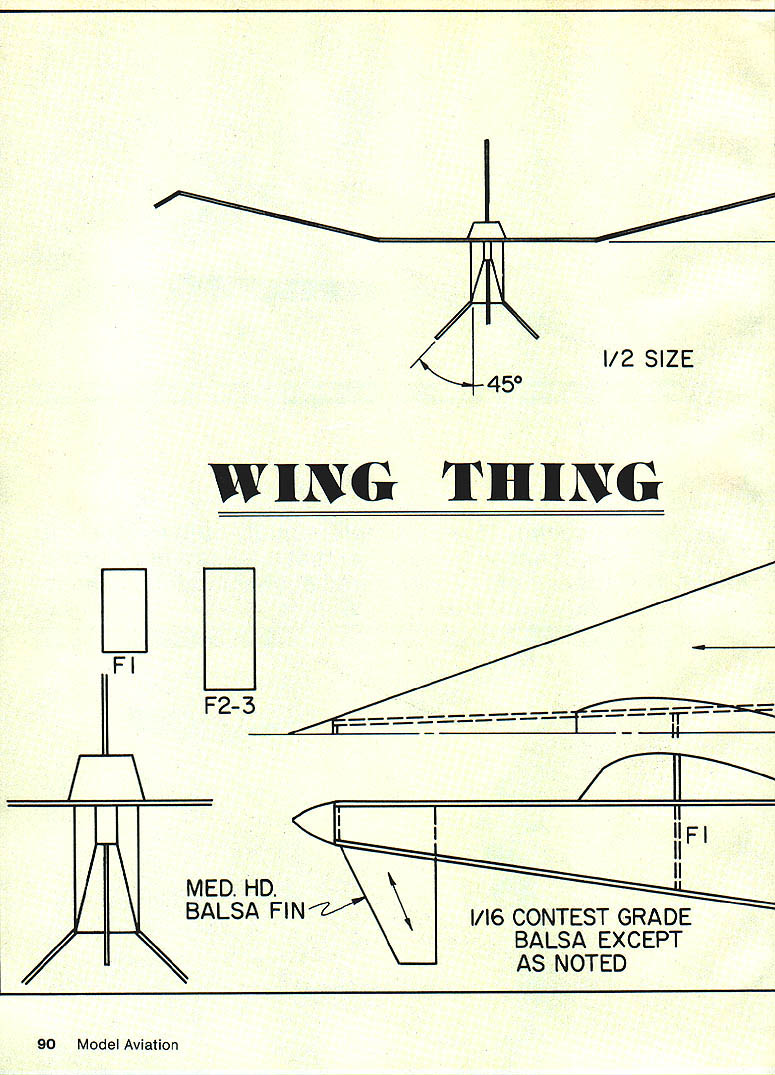
The model is simple and can be built in an evening. It doesn't need to be doped or painted, so there is no danger of smelling up the house. Carefully study the plans — only half the wing is shown, but it's a simple matter to work around.
Select clear, straight-grained, contest-grade balsa. The lighter you build the model, the better it will fly.
Materials and tools
- Contest-grade balsa sheets and strips (very light where indicated)
- 1/16" sheet for fuselage sides to save weight
- 1/16 x 1/8 hard balsa strips
- 1/16 x 1/4 hard balsa strips (note plan callouts)
- Small strips of soft aluminum (from a soft-drink can or sardine-can lid) for hinges
- Cyanoacrylate (CyA) adhesive
- Fine sandpaper
- Saran Wrap or similar (to protect work surface from adhesive)
- CO2 motor and tank (e.g., Campus A-23 CO2 engine)
- Lead BB or printer's weight (about 3 grams) for nose ballast
- Nitrate dope or Sig Lite Coat (thin coat for dew protection)
- Magic Markers, colored tissue, Floquil paint, dope, or trim tape for decoration
Wing
- Cut wing components to size. Note grain direction to avoid splitting.
- Round leading and trailing edges with fine sandpaper.
- Assemble the wing using CyA adhesive.
- Add tip plates before cementing wing panels to the center section.
- Install 1/16 x 1/4 hard balsa strips at the ends of the center section.
- When cementing wing parts, work over a piece of Saran Wrap or similar to prevent glue sticking to the work surface.
Controls (rudder and elevons)
- Attach rudder and elevons after wing assembly.
- Use small strips of soft aluminum for hinges.
- An aluminum rudder tab was tried but didn't work well; the elevons provided directional control.
Fuselage and motor installation
- Cut fuselage sides to the outline shape. Use 1/16" sheet to save weight.
- Locate and cement formers in place.
- Attach fuselage sides and mount the wing.
- Mount the CO2 motor and tank as shown on the plans. Follow the motor manufacturer's instructions (e.g., Bill Brown) for proper mounting to improve operation and longevity.
- Place the front skid and add the nose block.
- Before attaching the fuselage bottom, cement a lead BB or printer's weight at the very front of the fuselage. About 3 grams was ideal for the author's model, but wood density varies — additional nose weight may be necessary.
- Shape and cement the canopy into place.
Finishing and protection
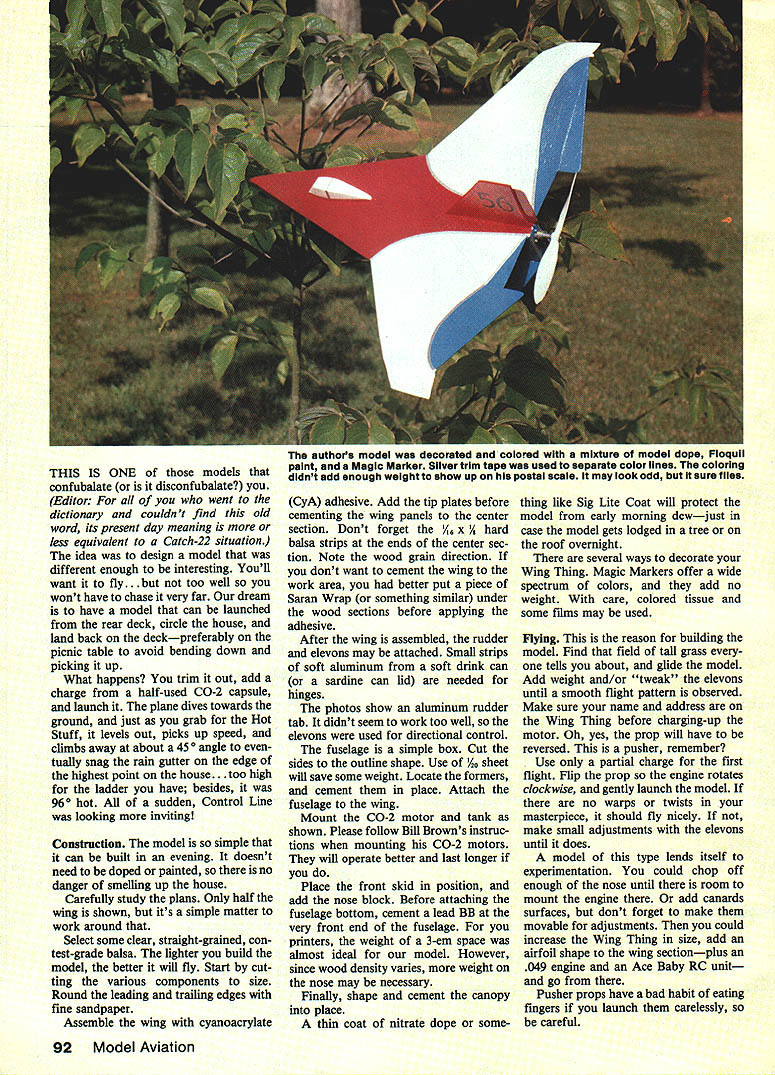
- Apply a thin coat of nitrate dope or Sig Lite Coat to protect the model from early morning dew — useful if the model stays overnight on a roof or in a tree.
- Decoration options include Magic Markers (no added weight), colored tissue (with care), dope mixed with Floquil paint, and silver trim tape to separate color lines. The author's coloring added negligible weight.
Flying
Preflight
- Make sure your name and address are on the model before charging the motor.
- Use only a partial CO2 charge for the first flight.
- Reverse the prop for pusher operation (engine should rotate clockwise when viewed from behind).
- Flip the prop so the engine rotates clockwise and gently launch the model.
Trim and tuning
- Fly from a field with tall grass to assess glide.
- Add nose weight and/or tweak the elevons until the model exhibits a smooth flight pattern.
- If the model has warps or twists, correct them before confident flying.
- Make small elevon adjustments as needed.
Experimentation and modifications
- The design lends itself to experimentation:
- Shorten the nose to mount a .049 engine.
- Add movable canards for trim adjustments.
- Increase the size and use an airfoil-shaped wing, add an .049 engine and an Ace Baby RC unit.
- Pusher props can injure fingers during careless launches — be careful.
Plans and notes
- Arrows indicate direction of grain.
- 30° dihedral each wing panel (as shown on plans).
- All surfaces shown full size on the plan.
- Materials called out on the plan include:
- 1/16 x 1/8 hard balsa (various locations)
- 1/16 hard balsa firewall
- Very light balsa for specified areas
- Soft aluminum hinges (2 per wing)
- Campus A-23 CO2 engine (example)
- Formers labeled F2, F3 on the plan
Be careful, build light, and enjoy flying Wing Thing.
Transcribed from original scans by AI. Minor OCR errors may remain.

