

Yellow Peril
Richard L. Perry
Overview
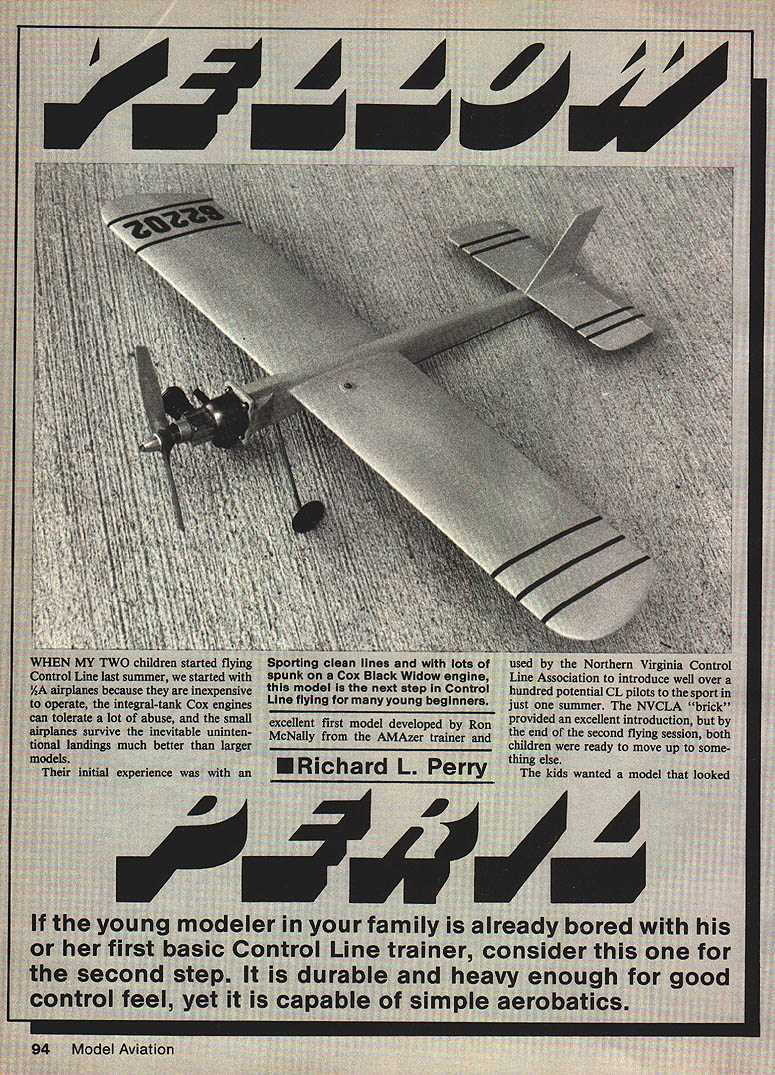
When my two children started flying Control Line last summer, we began with 1/2A airplanes because they are inexpensive to operate, the integral-tank Cox engines tolerate a lot of abuse, and the small airplanes survive the inevitable unintentional landings much better than larger models.
Their initial experience was with an excellent first model developed by Ron McNally from the AMAZer trainer and used by the Northern Virginia Control Line Association to introduce well over a hundred potential CL pilots to the sport in just one summer. The NVCLA "brick" provided an excellent introduction, but by the end of the second flying session both children were ready to move up to something else.
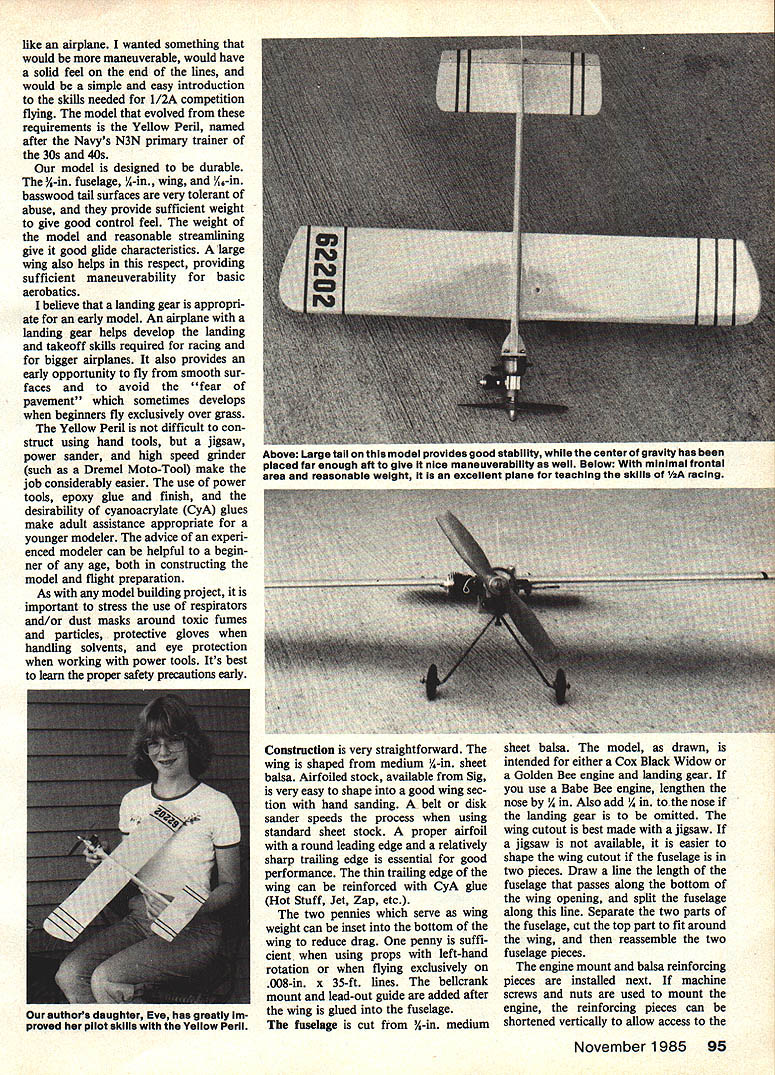
The Yellow Peril is the next step for many young beginners: sporting clean lines, durable construction, and plenty of spunk when powered with a Cox Black Widow. It is heavy enough for good control feel, yet capable of simple aerobatics. A landing gear is appropriate for an early model: it helps develop takeoff and landing skills, allows flying from smooth surfaces, and can prevent the "fear of pavement" that sometimes develops when beginners fly exclusively over grass.
Tools and Safety
Construction is straightforward with hand tools, but a jigsaw, power sander, and high-speed grinder (such as a Dremel Moto-Tool) make the job considerably easier. Because the project uses power tools, epoxy glues and finishes, and cyanoacrylate (CyA) glues, adult assistance is appropriate for younger modelers. The advice of an experienced modeler can also be helpful during construction and flight preparation.
Recommended safety precautions:
- Use respirators and/or dust masks when around toxic fumes and particles.
- Wear protective gloves when handling solvents.
- Use eye protection when working with power tools.
- Learn proper safety procedures early.
Construction
Wing
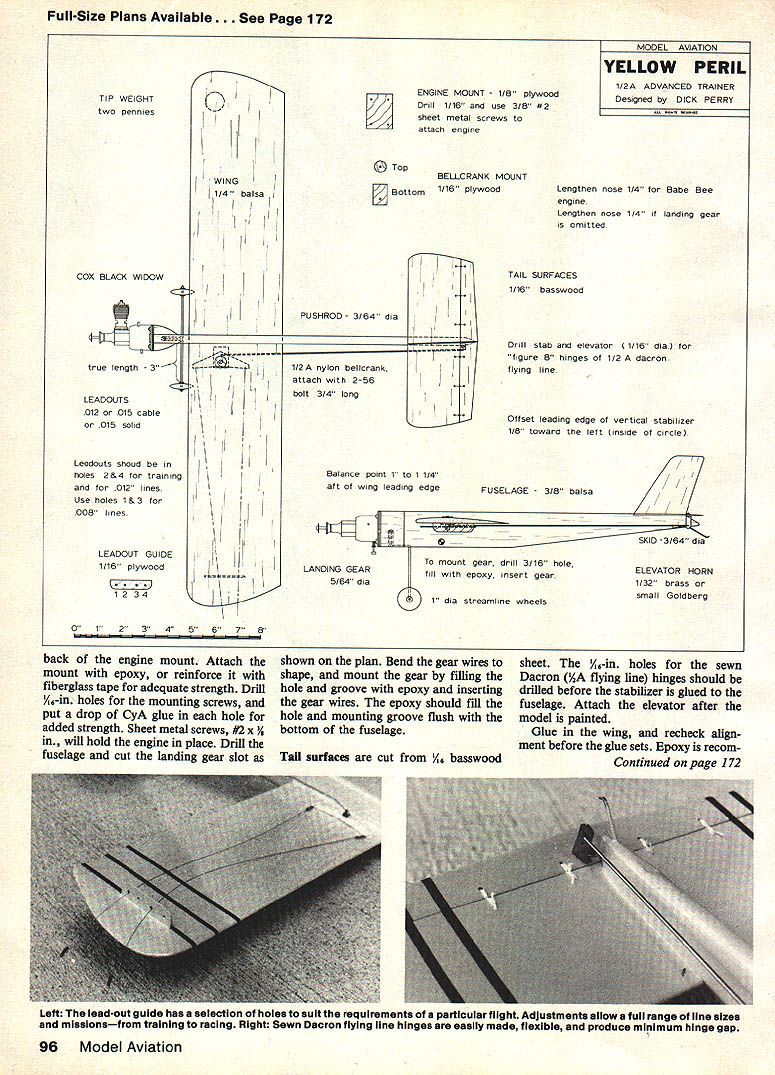
- The wing is shaped from medium 1/4-in. sheet balsa.
- Airfoiled stock (available from Sig) is easy to shape into a good wing section with hand sanding. A belt or disk sander speeds the process when using standard sheet stock.
- A proper airfoil with a round leading edge and a relatively sharp trailing edge is essential for good performance.
- Reinforce the thin trailing edge with CyA glue (Hot Stuff, Jet, Zap, etc.) if desired.
Ballast:
- Two pennies serve as wing weight and can be inset into the bottom of the wing to reduce drag.
- One penny is sufficient when using props with left-hand rotation or when flying exclusively on .008-in. x 35-ft. lines.
The bellcrank mount and lead-out guide are added after the wing is glued into the fuselage.
Fuselage
- The fuselage is cut from 3/8-in. medium sheet balsa.
- The plan is intended for either a Cox Black Widow or a Golden Bee engine with landing gear.
- If you use a Babe Bee engine, lengthen the nose by 1/4 in. Also add 1/4 in. to the nose if the landing gear is to be omitted.
- The wing cutout is best made with a jigsaw. If a jigsaw is not available, split the fuselage along a line drawn the length of the fuselage that passes along the bottom of the wing opening. Separate the two parts, cut the top part to fit around the wing, then reassemble.
Engine Mount and Landing Gear
- Install engine mount and balsa reinforcing pieces next.
- If using machine screws and nuts to mount the engine, the reinforcing pieces can be shortened vertically to allow access to the back of the engine mount.
- Attach the mount with epoxy, or reinforce it with fiberglass tape for added strength.
- Drill 1/4-in. holes for mounting screws, and put a drop of CyA glue in each hole for added strength.
- Sheet metal screws (#2 x 1/8 in.) will hold the engine in place.
- Drill the fuselage and cut the landing gear slot as shown on the plan. Bend the gear wires to shape.
- Mount the gear by filling the hole and groove with epoxy and inserting the gear wires. The epoxy should fill the hole and mounting groove flush with the bottom of the fuselage.
Tail Surfaces
- Cut tail surfaces from 1/16-in. basswood sheet.
- Drill the 1/16-in. holes for the sewn Dacron (1/2A flying line) hinges before the stabilizer is glued to the fuselage.
- Glue the stabilizer in place, then attach the elevator after the model is painted.
Assembly and Finishing
- Glue in the wing and recheck alignment before the glue sets. Epoxy is recommended for the wing joint.
- Use a sanding block to ensure the stabilizer mount is parallel to the wing, then glue on the tail surfaces.
- An epoxy finish will last as long as the airplane; the Yellow Peril can carry the weight of a color finish.
Hinges and control:
- Mount the elevator using "figure 8" hinges of 1/2A Dacron flying line with drops of glue to hold the knots.
- Do not use thin CyA glue for these hinges; thin CyA will wick along the thread and cause the hinge to be stiff. If using CyA, use the thick type.
- Mount the control system and form the lead-outs using .012-in. to .015-in. cable or .015-in. solid wire.
- Add 1-in. diameter streamlined wheels and ensure they turn freely.
Power and Propellers
- The Yellow Peril flies best with the extra power available from a Cox Black Widow engine, although a Babe Bee is acceptable.
- Recommended props:
- Black Widow: Cox Gray 5 x 3 or Tornado 5 x 3.
- Babe Bee: Tornado 5 x 3 or Top Flite 5 x 4.
- For racing: Tornado 5 x 4 is excellent.
Lines and Lead-Outs
- Yellow Peril flies well on .008-in. or .012-in. x 35-ft. lines, or on .008-in. x 42-ft. lines.
- For training: use the second and fourth holes in the lead-out guide.
- For racing: use the first and third holes for a little higher speed; these can be used with .008-in. lines.
Conclusion
If you build your own Yellow Peril, I hope you enjoy it as much as we have.
Transcribed from original scans by AI. Minor OCR errors may remain.

