
You Broke It!
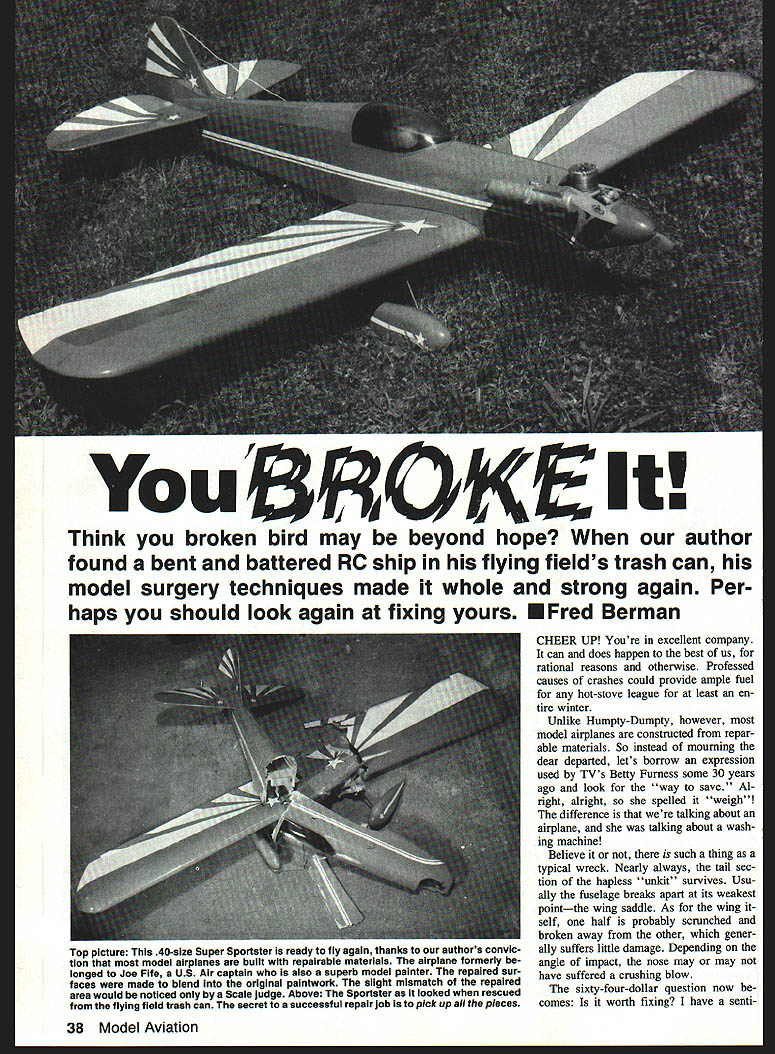
Think your broken bird may be beyond hope? When our author found a bent and battered RC ship in his flying field's trash can, his model surgery techniques made it whole and strong again. Perhaps you should look again at fixing yours. — Fred Berman
Cheer up — it happens to the best of us
It can — and does — happen to the best of us, for rational reasons and otherwise. Professed causes of crashes could provide ample fuel for a hot‑stove league all winter. Unlike Humpty‑Dumpty, however, most model airplanes are constructed of repairable materials. So instead of mourning the dear departed, look for a way to save it.
A typical wreck
- The tail section usually survives.
- The fuselage most often breaks at the wing saddle — its weakest point.
- One wing half is often scrunched while the other is relatively undamaged.
- The nose may or may not be crushed depending on the angle of impact.
Is it worth fixing?
Ask yourself whether the model has sentimental value and whether repair materials and time justify salvaging it. Many modelers hate seeing balsa babies permanently dispatched. There is pure joy in watching a miniature marvel rise from the splinters and fly again.
Repair basics
Pick up the pieces
Treat the wreck like a jigsaw puzzle:
- Closely examine the break.
- Remove loose splinters and extraneous material that will obstruct rejoining.
- Slide the segments tightly together and make certain the reassembled surface is flat and properly aligned.
- Apply thin CYA (cyanoacrylate) glue. In many cases the glued piece will be nearly as strong as the original.
Both cross‑grain and parallel‑grain fractures may be treated this way.
Tip: Expect accidents. Use iron‑on film covering rather than paint. It comes off much more easily and clears the reconstruction zone of extraneous materials.
Alignment and temporary holding
- Get the fuselage as straight as possible; a taut string makes a good alignment tool.
- If necessary, glue temporary external stringers to hold pieces together until major repairs are completed.
- Avoid adding unnecessary weight during repair.
Strengthening joints
Butt joints are weaker than lap joints. Simple, lightweight reinforcement techniques:
- Saw slits across the reglued butt joint (length depends on the fracture — from about 1/8" to 1" depending on size).
- Push properly sized splints into these slits:
- Carbon‑fiber strips work exceptionally well for tensile strength; set with CYA and trim flush.
- Carved balsa keys can also be used for lighter repairs.
- Trim any protruding material flush with a knife or chisel.
Internal overlays for additional strength:
- Lap with carbon fiber, thin plywood (1/4‑ply, 1/8‑ply), or hard balsa.
- Orient grain or fibers to bridge the fracture — tensile strength is greatest along the grain/fiber direction.
Glass cloth and epoxy can be used for heavy repairs and external bandaging.
Filling holes, gaps, and depressions
Two primary methods:
- The insert
- Cut out the damaged area in a regular shape (triangle, rectangle, etc.).
- Fabricate a matching piece from new wood, install, and set with CYA.
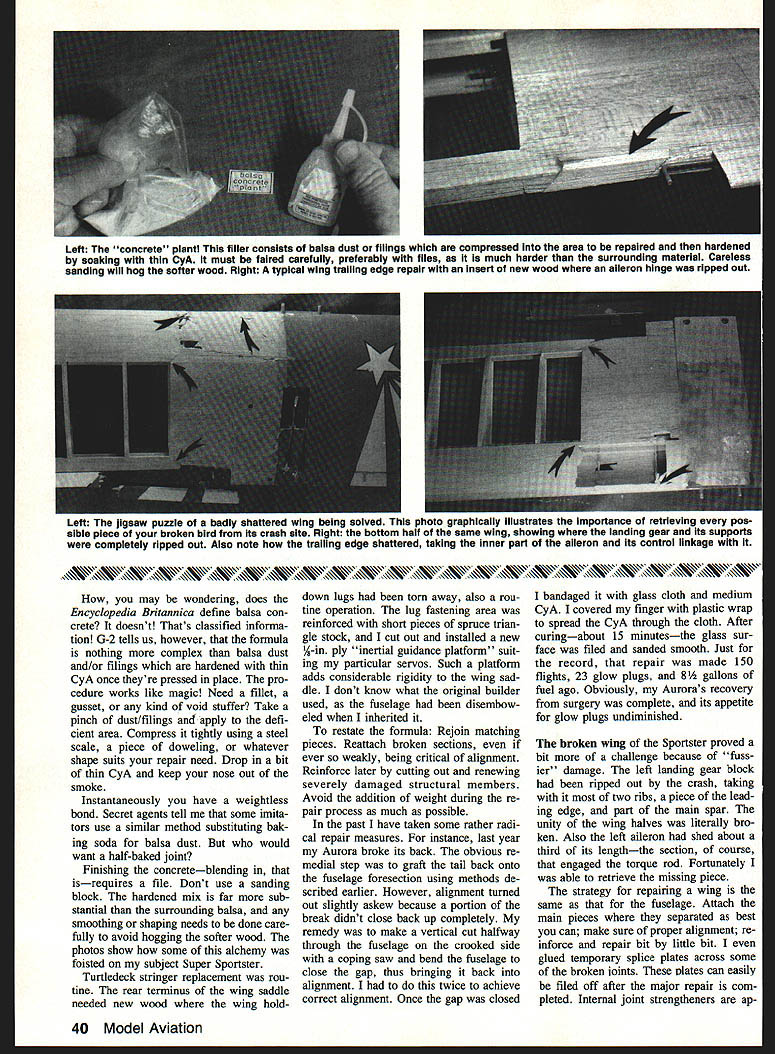
- Balsa‑cored "concrete"
- Make a paste of balsa dust/filings and compress into the void.
- Apply a drop of thin CYA; the mix hardens instantly into a lightweight filler.
- Some modelers use baking soda as a substitute, but balsa dust is preferred.
- Finish by filing the hardened mix; avoid a sanding block because the filler is harder than the surrounding balsa.
Case study: my bashed 40‑size Super Sportster
Damage assessment:
- Fuselage broken into five pieces.
- Wing saddle cracked in half.
- Turtledeck stringers broken.
- Wing mounting lugs and bulkhead separated.
- Nose/fuel tank compartment mangled.
- Tail section intact.
Steps taken:
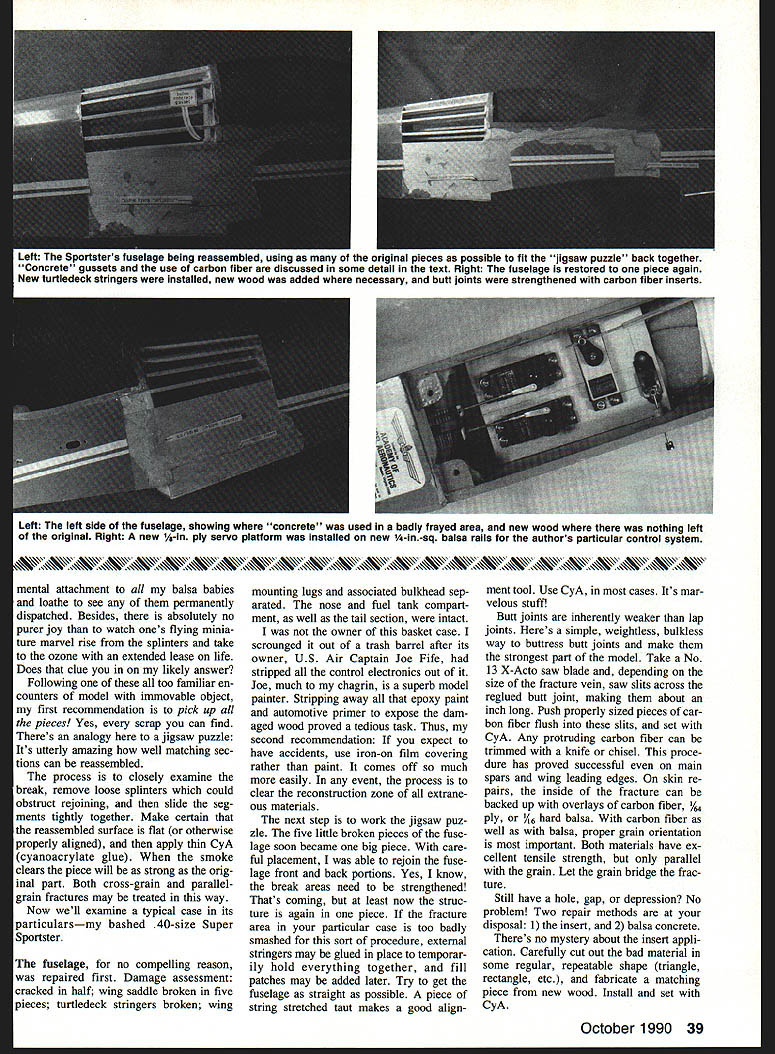
Fuselage reconstruction
- Reassembled the five pieces as a single unit, paying close attention to alignment.
- Where internal repair was insufficient, glued external stringers temporarily and added fill patches later.
- Reinforced the wing hold‑down area with short pieces of spruce triangle stock and installed a 5/16‑in. plywood "inertial guidance platform" for added rigidity at the wing saddle.
- For one severe misalignment (Aurora example), a vertical coping‑saw cut and controlled bending closed the gap, then the joint was bandaged with glass cloth and medium CYA. Plastic wrap was used to help spread the CYA through the cloth before curing.
Wing repair
- Main problems: landing gear block ripped out (taking ribs and spar edges), main spar damaged, trailing edge and aileron damage.
- Reattach the separated main wing pieces and ensure proper alignment.
- Use temporary splice plates across broken joints; these are easily filed off later.
- Internal joint strengtheners: lap with carbon fiber, thin ply, or balsa.
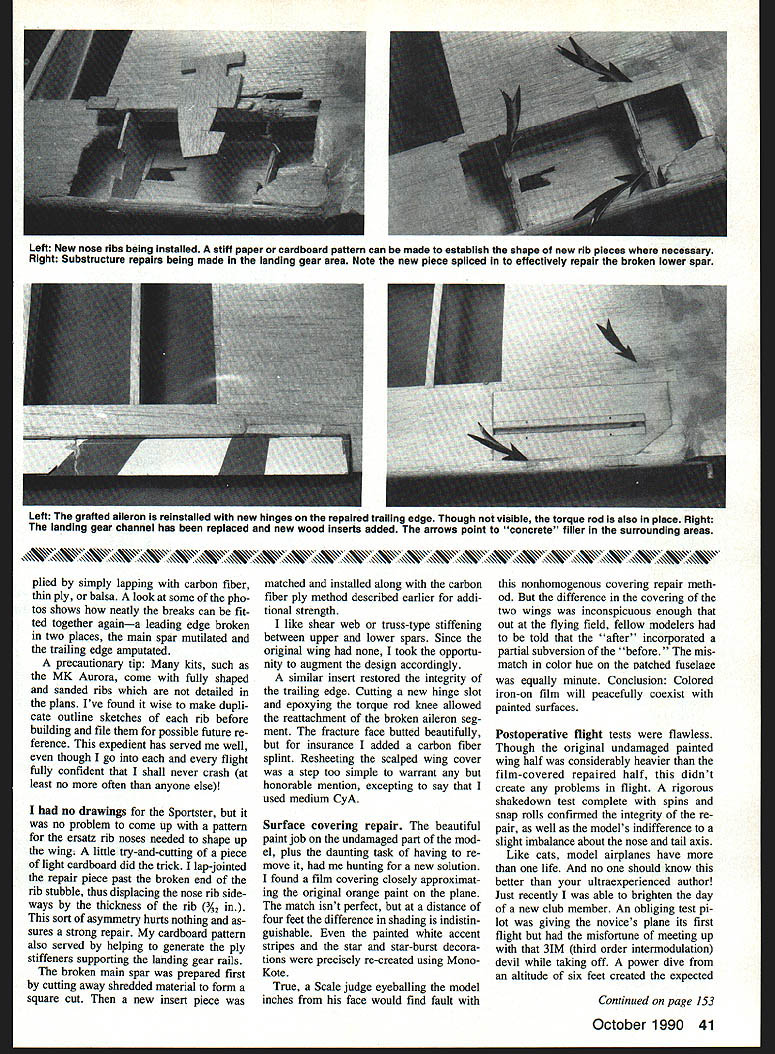
- For the broken main spar: cut away shredded material to form a square cut, then install a matched insert and reinforce with carbon fiber or ply.
- Added shear‑web or truss‑type stiffening between upper and lower spars where advantageous.
- Restored trailing edge with a similar insert, cut new hinge slot, and epoxy the torque‑rod knee to reattach an aileron section. Added a carbon‑fiber splint for extra insurance.
- Resheathing the wing covering was done with medium CYA.
Ribs and patterns
- Many kits include fully shaped ribs not detailed on plans. Make duplicate outline sketches of each rib before building for future reference.
- If no drawings exist, create a cardboard pattern and refine by trial and cut to produce replacement rib noses and ply stiffeners.
Surface covering and finishing
- I removed paint in repair zones where necessary; iron‑on film covering makes repairs easier.
- I found a film matching the original orange closely enough that, from a few feet away, the difference was indistinguishable.
- Accents and markings (white stripes, star‑and‑bar) were reproduced with MonoKote.
- A scale judge up close might note the nonhomogeneous repair, but at the field the mismatch was inconspicuous.
- Colored iron‑on film will peacefully coexist with painted surfaces if matched carefully.
Flight testing and results
- Postoperative flight tests included shakedown maneuvers, spins, and snap rolls.
- The repaired model flew flawlessly; a slight weight imbalance between painted and film covered halves did not create problems.
- The repaired structures proved robust over many subsequent flights.
Final thoughts
- Rejoin matching pieces, align carefully, and reinforce damaged structural members.
- Avoid unnecessary added weight.
- Use CYA, carbon fiber, thin ply, and balsa techniques as appropriate.
- Like cats, model airplanes often have more than one life — with patience and the right methods, many wrecks can be brought back to flying condition.
Transcribed from original scans by AI. Minor OCR errors may remain.

