
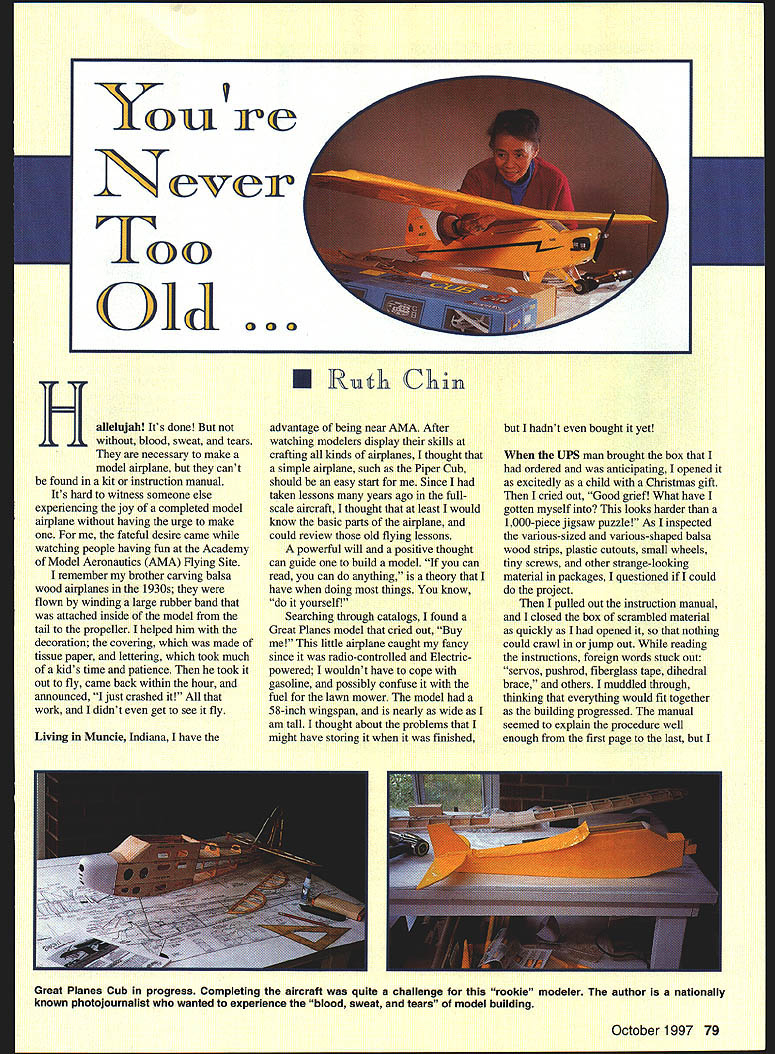
You're Never Too Old
Ruth Chin
Hallelujah! It's done! But not without blood, sweat, and tears. They are necessary to make a model airplane, but they can't be found in a kit or instruction manual.
It's hard to witness someone else experiencing the joy of a completed model airplane without having the urge to make one. For me, the fateful desire came while watching people having fun at the Academy of Model Aeronautics (AMA) Flying Site.
I remember my brother carving balsa wood airplanes in the 1930s; they were flown by winding a large rubber band that was attached inside the model from the tail to the propeller. I helped him with the decoration: the tissue-paper covering and the lettering, which took much of a kid's time and patience. Then he took it out to fly, came back within the hour, and announced, "I just crashed it!" All that work, and I didn't even get to see it fly.
Living in Muncie, Indiana, I have the advantage of being near AMA. After watching modelers display their skills at crafting all kinds of airplanes, I thought that a simple airplane, such as the Piper Cub, should be an easy start for me. Since I had taken lessons years ago in full-scale aircraft, I thought that at least I would know the basic parts of the airplane and could review those old flying lessons.
A powerful will and a positive thought can guide one to build a model. "If you can read, you can do anything" is a motto I have when doing most things. You know: do it yourself.
Searching through catalogs, I found a Great Planes model that cried out, "Buy me!" This little airplane caught my fancy since it was radio-controlled and electric-powered; I wouldn't have to cope with gasoline, and possibly confuse it with the fuel for the lawn mower. The model had a 58-inch wingspan and is nearly as wide as I am tall. I thought about the problems I might have storing it when it was finished, but I hadn't even bought it yet!
When the UPS man brought the box I had ordered and was anticipating, I opened it as excitedly as a child with a Christmas gift. Then I cried out, "Good grief! What have I gotten myself into? This looks harder than a 1,000-piece jigsaw puzzle!" As I inspected the various-sized and various-shaped balsa wood strips, plastic cutouts, small wheels, tiny screws, and other strange-looking material in packages, I questioned if I could do the project.
I pulled out the instruction manual and closed the box of scrambled material as quickly as I had opened it, so that nothing could crawl in or jump out. While reading the instructions, foreign words stuck out: servos, pushrod, fiberglass tape, dihedral brace, and others. I muddled through, thinking that everything would fit together as the building progressed. The manual seemed to explain the procedure well enough from the first page to the last, but I still wondered what I had gotten myself into.
The instructions began: lay out the construction plan on a flat table or surface and identify the various pieces; punch or cut the forms out of the balsa wood. That part was fun. Once the parts were laid out, I could almost see the finished airplane. I surmised that it would take a couple of weeks to make; however, I began the project a year ago and have just now finished it.
The plans covered the dining room table, and we had a new place to eat meals. I moved the TV table to make the project more convenient; my workspace was in the corner of the den. Eventually I had to build a worktable in the sun porch to continue the project.
Lessons Learned
- Lesson #1: Use waxed paper, not cling wrap. The instructions said to lay waxed paper over the plans. I didn't have any, so I used cling wrap. It's clear, so I could see the instructions better through it, but parts stuck to the cling wrap and it was very hard to get them off. Waxed paper works much better.
- Lesson #2: Keep fingernail polish remover or acetone handy. I managed to get glue on my fingers and have them stuck together. Driving to the drugstore with no hands on the wheel (elbows steering the car), I bought polish remover and learned to have acetone on hand when using glue.
- Lesson #3: Buy good glue — clear, not yellow. Back at the drawing board, the gluing sessions went on for nights and days until I ran out of glue. I found a local shop that sold balsa, a limited inventory of model airplane parts, and glue. It made me feel secure to know there was such a place. "Get glue that's clear — not yellow; it's fresher," the clerk informed me.
- Lesson #4: It pays to have a "third hand." The airplane took shape once I started gluing the right pieces together. Use wood blocks, clothespins, or clamps to hold pieces while glue dries. A fuselage piece once stuck to a block and tore when I was getting it off, but I had scrap material to make a new one. It also pays to have a sharp razor blade.
- Lesson #5: Mark off each step and sand thoroughly. I marked each completed step in the instruction book as the months went by. The fuselage and wing were finished, but not before sanding and sanding. Sanding lessens weight and makes the covering smooth. Haste makes waste.
- Lesson #6: Read covering instructions carefully — and use the right tools. With the skeleton finished, it was time for the MonoKote covering. First I used a hair dryer and a clothes iron; that didn't work, so I ordered a heat gun and a sealing iron. The wait seemed like eons. When they came, I took to the task at once, but the yellow covering kept bubbling. I went back and read the MonoKote instructions, which said to "peel the backing off!" Yikes! I had to remove the covering and start again. Read instructions repeatedly.
- Lesson #7: Think before you leap when installing the "guts." The real struggle came when attaching the servos to the pushrods. By analyzing their functions, it became simple. I struggled to get the pushrods through the fuselage to attach to the elevator and rudder until I realized I was doing it backward. By this point, my confidence had increased enough that I dared to deviate from the plans in small, practical ways — for example, putting the radio switch next to the motor switch on the outside and cutting out the front window to put in a picture of a pilot (me).
Attaching the batteries seemed simple enough; most of us are used to using them. I wasn't sure how long to charge the motor battery, but the minimum 15 minutes was ample. The propeller motor hummed, and the elevator and rudder moved in the right directions with the radio control.
"Contact! Switch on! Clear!" was what we used to say long ago when starting up the full-scale Piper Cub. Now, will my finished model fly?
Ruth Chin 1007 N. Tillotson Ave. Muncie, IN 47304
Transcribed from original scans by AI. Minor OCR errors may remain.

